WPF QuickStart系列之样式和模板(Style and Template)
在WPF桌面程序中,当我们想构建一个统一的UI表现时(在不同操作系统下,显示效果一致),此时我们就需要使用到WPF中的样式和模板技术。简单来说,如果我们需要简单的给一个Button设置宽,高,Margin等,可以使用Style来指定这一系列的属性。可以把Style理解为一个属性的集合。如果需要完全改变控件的样子,就需要使用到Template技术,相当于给控件换一层皮,不过Button还是Button,它原有的行为(Click事件)还存在。而且我们仅需要在XAML中遍可以完成对样式和模板的定义和重写。非常简洁方便。
首先通过一个例子了解Style。
<Window.Resources> <Style x:Key="numericStyle" TargetType="{x:Type Button}"> <Setter Property="FontSize" Value="20" /> <Setter Property="Margin" Value="4" /> <Setter Property="Padding" Value="6" /> <Setter Property="Effect"> <Setter.Value> <DropShadowEffect Color="Blue"/> </Setter.Value> </Setter> </Style> <Style TargetType="Button" x:Key="operatorStyle" BasedOn="{StaticResource numericStyle}"> <Setter Property="FontWeight" Value="ExtraBold" /> <Setter Property="Effect"> <Setter.Value> <DropShadowEffect Color="Red" /> </Setter.Value> </Setter> </Style> </Window.Resources> <Grid> <Grid.RowDefinitions> <RowDefinition Height="Auto"/> <RowDefinition Height="Auto"/> <RowDefinition Height="Auto"/> <RowDefinition Height="Auto"/> <RowDefinition Height="Auto"/> </Grid.RowDefinitions> <Grid.ColumnDefinitions> <ColumnDefinition Width="Auto"/> <ColumnDefinition Width="Auto"/> <ColumnDefinition Width="Auto"/> <ColumnDefinition Width="Auto"/> </Grid.ColumnDefinitions> <TextBox Background="Cyan" IsReadOnly="True" Grid.ColumnSpan="4" FontSize="20"/> <Button Content="7" Style="{StaticResource numericStyle}" Grid.Row="1"/> <Button Content="8" Style="{StaticResource numericStyle}" Grid.Row="1" Grid.Column="1"/> <Button Content="9" Style="{StaticResource numericStyle}" Grid.Row="1" Grid.Column="2"/> <Button Content="4" Style="{StaticResource numericStyle}" Grid.Row="2"/> <Button Content="5" Style="{StaticResource numericStyle}" Grid.Row="2" Grid.Column="1"/> <Button Content="6" Style="{StaticResource numericStyle}" Grid.Row="2" Grid.Column="2"/> <Button Content="1" Style="{StaticResource numericStyle}" Grid.Row="3"/> <Button Content="2" Style="{StaticResource numericStyle}" Grid.Row="3" Grid.Column="1"/> <Button Content="3" Style="{StaticResource numericStyle}" Grid.Row="3" Grid.Column="2"/> <Button Content="0" Style="{StaticResource numericStyle}" Grid.Row="4"/> <Button Content="=" Style="{StaticResource operatorStyle}" Grid.Row="4" Grid.Column="1" Grid.ColumnSpan="2"> <Button.Effect> <DropShadowEffect Color="Green"/> </Button.Effect> </Button> <Button Content="+" Style="{StaticResource operatorStyle}" Grid.Row="4" Grid.Column="3"/> <Button Content="-" Style="{StaticResource operatorStyle}" Grid.Row="3" Grid.Column="3"/> <Button Content="X" Style="{StaticResource operatorStyle}" Grid.Row="2" Grid.Column="3"/> <Button Content="/" Style="{StaticResource operatorStyle}" Grid.Row="1" Grid.Column="3"/> </Grid>
运行效果:
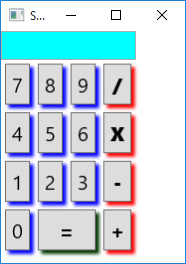
通过上面的示例可以看到,
1. Style中包含了很多Setter,每个Setter都会对应着不同属性的设置。正如博客开头讲到的一样。Style是一组属性的集合;
2. 在Style中可以设置TargetType,指示这个Style是给哪一个控件使用的;
3. Style可以继承,例如操作按钮的Style继承了数字按钮的Style,使用BaseOn,然后引用到Style的资源即可;
4. Style的优先级,=按钮,在Style中设置了Button的DropShadowEffect为红色,然后在Button内部我们设置DropShadowEffect为蓝色,最后显示的效果可以看出来,=按钮最终颜色为蓝色。可以理解为后来者居上。
Style中不仅可以包含一系列的Setter,还可以包含Trigger。WPF中有三种Trigger,Property Trigger,Event Trigger,Data Trigger。下面我们介绍Property Trigger,沿用上面的示例,在鼠标点击按钮时,设置Transform效果。
<Style TargetType="Button" x:Key="operatorStyle" BasedOn="{StaticResource numericStyle}"> <Setter Property="FontWeight" Value="ExtraBold" /> <Setter Property="Effect"> <Setter.Value> <DropShadowEffect Color="Red" /> </Setter.Value> </Setter> <Style.Triggers> <Trigger Property="IsPressed" Value="True"> <Setter Property="RenderTransform"> <Setter.Value> <TranslateTransform X="4" Y="4" /> </Setter.Value> </Setter> </Trigger> </Style.Triggers> </Style>
运行效果如下:
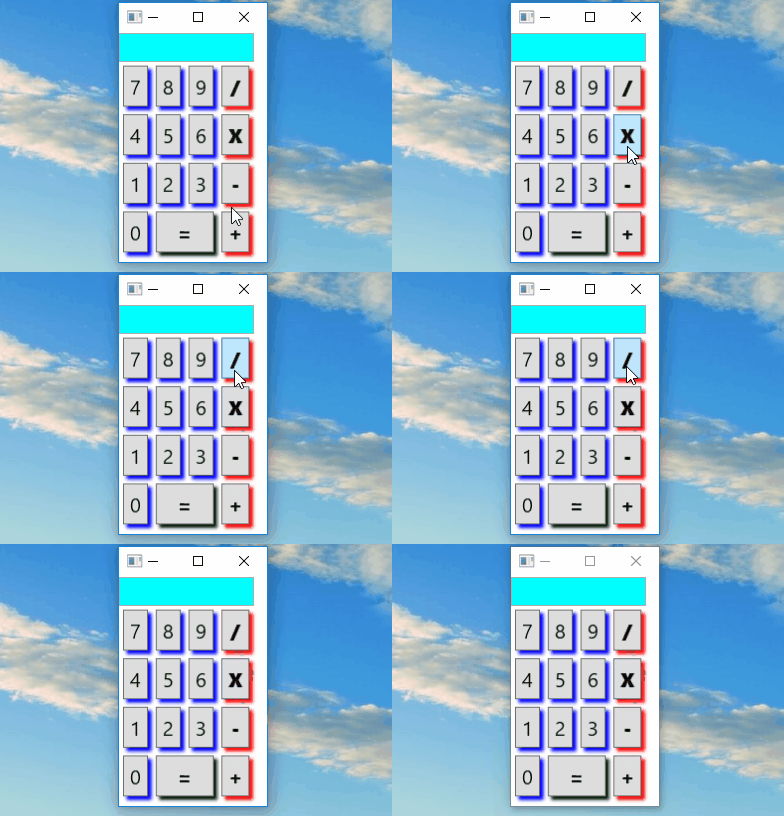
Trigger表示当满足某个/某些条件时触发。上面的例子中,当IsPressed为True时,触发了Transform的改变,当IsPressed为False时,自动恢复到初始状态,不需要额外的代码来恢复初始状态。
不仅可以在Style中使用Trigger,还可以在DataTemplate,ControlTemplate中使用。
Property Trigger针对的是依赖属性,那普通属性改变时,如何触发UI的改变呢?所以下面介绍另一种Trigger,Data Trigger。请看示例:
XAML:
<ListBox HorizontalAlignment="Center" ItemsSource="{Binding .}"> <ListBox.ItemTemplate> <DataTemplate> <Grid> <Border Margin="2" BorderBrush="Blue" BorderThickness="1" Padding="2" x:Name="_border"> <Grid> <Grid.RowDefinitions> <RowDefinition Height="Auto" /> <RowDefinition Height="Auto" /> </Grid.RowDefinitions> <TextBlock Text="{Binding Name}" FontSize="20" FontWeight="Bold" /> <TextBlock Grid.Row="1" Text="{Binding AuthorName}" FontSize="16" Foreground="Blue" /> <TextBlock Opacity=".5" FontWeight="Bold" FontStyle="Italic" Foreground="Red" TextAlignment="Right" Grid.RowSpan="2" VerticalAlignment="Center" Visibility="Hidden" x:Name="_free" Text="Free!" Margin="4" FontSize="25"/> </Grid> </Border> </Grid> <DataTemplate.Triggers> <DataTrigger Binding="{Binding IsFree}" Value="True"> <Setter Property="Background" TargetName="_border" Value="Yellow" /> <Setter Property="Visibility" Value="Visible" TargetName="_free" /> </DataTrigger> </DataTemplate.Triggers> </DataTemplate> </ListBox.ItemTemplate> </ListBox>
C#:
public partial class MainWindow : Window { public MainWindow() { InitializeComponent(); DataContext = new List<Book> { new Book { Name = "Windows Internals", AuthorName = "Mark Russinovich", IsFree = false }, new Book { Name = "AJAX Introduction", AuthorName = "Bhanwar Gupta", IsFree = true }, new Book { Name = "Essential COM", AuthorName = "Don Box", IsFree = false }, new Book { Name = "Blueprint for a Successful Presentation", AuthorName = "Biswajit Tripathy", IsFree = true } }; } } public class Book { public string Name { get; set; } public bool IsFree { get; set; } public string AuthorName { get; set; } }
运行效果:
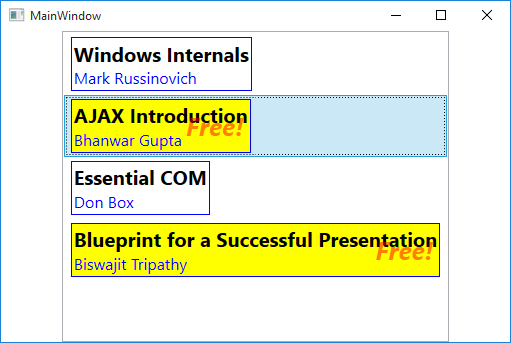
DataTrigger根据Binding查找特定属性,当满足条件时触发。
下面简单介绍下Event Trigger,请看示例代码:
<Grid> <Grid.Triggers> <EventTrigger RoutedEvent="Loaded"> <BeginStoryboard> <Storyboard> <DoubleAnimation From="0" To="1" Duration="0:0:5" Storyboard.TargetProperty="Opacity" /> </Storyboard> </BeginStoryboard> </EventTrigger> </Grid.Triggers> <TextBlock Text="Event Trigger Demo" FontSize="24"/> </Grid>
运行效果,Grid的透明度从0到1。
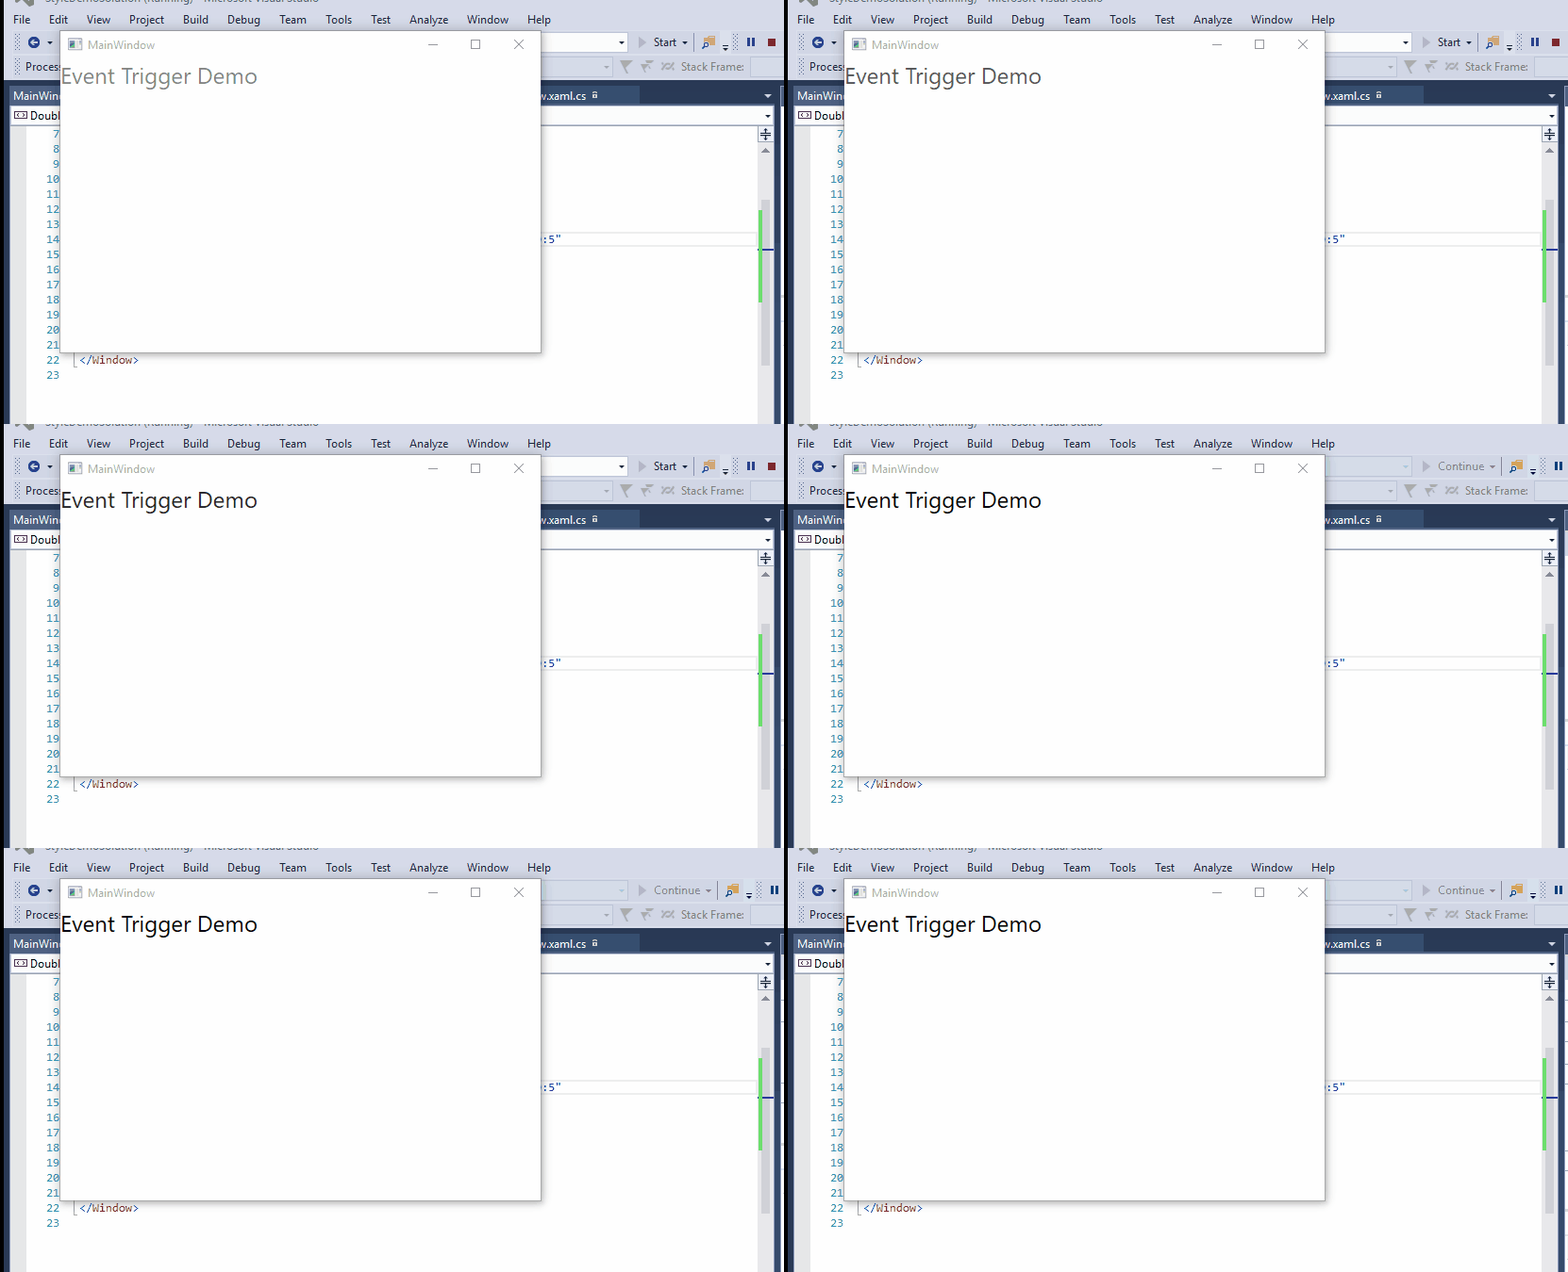
注意:Event Trigger只可以用于路由事件。
上面我们介绍了三种Trigger,但是它们都是使用与满足某一个条件然后触发。如果要满足一些条件才触发,我们可以使用MultiTrigger,请看示例:
<Window.Resources> <Style x:Key="HoverButtonStyle" TargetType="{x:Type Button}"> <Style.Triggers> <MultiTrigger> <MultiTrigger.Conditions> <Condition Property="IsMouseOver" Value="True" /> <Condition Property="IsDefault" Value="True" /> </MultiTrigger.Conditions> <Setter Property="Background" Value="Cyan" /> <Setter Property="Effect"> <Setter.Value> <DropShadowEffect /> </Setter.Value> </Setter> </MultiTrigger> </Style.Triggers> </Style> </Window.Resources> <StackPanel Orientation="Vertical"> <Button Content="Move mouse over me" FontSize="20" HorizontalAlignment="Center" Margin="20" Padding="6" x:Name="theButton" Style="{StaticResource HoverButtonStyle}"/> <CheckBox Content="Default button" Margin="10" IsChecked="{Binding IsDefault, ElementName=theButton, Mode=TwoWay}" FontSize="15"/> </StackPanel>
运行效果:

注意:只有两种MultiTrigger,除了上面这种,还有MultiDataTrigger。用于当多个数据属性满足某一条件时触发。
下面通过一个示例来介绍ControlTemplate的使用,
例如有两个"原生态"的的RadioButton,
<StackPanel Orientation="Horizontal"> <RadioButton Content="作业练习" IsChecked="True" Margin="10,5,10,0"/> <RadioButton Content="考试测验" Margin="0,5,10,0"/> </StackPanel>
在Win 10 和Win 7中的显示效果如下:
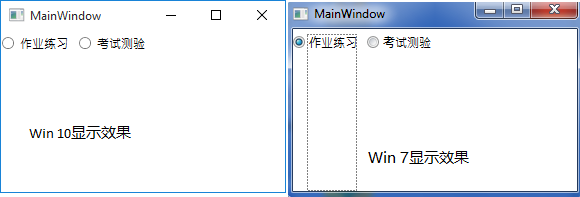
同样的控件在Win10与Win7下显示效果不一致,下面我们对RadioButton进行"整容",
<Window.Resources> <Style x:Key="RadioButtonStyle01" TargetType="RadioButton"> <Setter Property="SnapsToDevicePixels" Value="True" /> <Setter Property="OverridesDefaultStyle" Value="True" /> <Setter Property="Foreground" Value="#565656"/> <Setter Property="Background" Value="#EDEEEF"/> <Setter Property="FontSize" Value="12"/> <Setter Property="FontWeight" Value="Bold"/> <Setter Property="Width" Value="100"/> <Setter Property="Height" Value="45"/> <Setter Property="Template"> <Setter.Value> <ControlTemplate TargetType="RadioButton"> <Border x:Name="MainBorder" BorderThickness="1" BorderBrush="#8B99BC" CornerRadius="1" Background="#F0F2F2"> <Grid> <Image x:Name="imgChecked" Visibility="Collapsed" Source="/ControlTemplatingDemo;component/Resources/Images/Completed_02.png" Width="20" Height="20" HorizontalAlignment="Right" VerticalAlignment="Top" Margin="0,-8,-10,0"/> <ContentPresenter RecognizesAccessKey="True" Content="{TemplateBinding ContentControl.Content}" ContentTemplate="{TemplateBinding ContentControl.ContentTemplate}" ContentStringFormat="{TemplateBinding ContentControl.ContentStringFormat}" Margin="5" HorizontalAlignment="Center" VerticalAlignment="Center" SnapsToDevicePixels="{TemplateBinding UIElement.SnapsToDevicePixels}" /> </Grid> </Border> <ControlTemplate.Triggers> <Trigger Property="IsChecked" Value="True"> <Setter TargetName="MainBorder" Property="Background" Value="#239FFF"/> <Setter TargetName="imgChecked" Property="Visibility" Value="Visible"/> <Setter Property="Foreground" Value="White"/> <Setter TargetName="MainBorder" Property="BorderBrush" Value="#239FFF"/> </Trigger> </ControlTemplate.Triggers> </ControlTemplate> </Setter.Value> </Setter> </Style> </Window.Resources> <StackPanel Orientation="Horizontal"> <RadioButton Content="作业练习" Style="{StaticResource RadioButtonStyle01}" IsChecked="True" Margin="10,5,10,0"/> <RadioButton Content="考试测验" Style="{StaticResource RadioButtonStyle01}" Margin="0,5,10,0"/> </StackPanel> 经过ControlTemplate样式重写后的RadioButton:

现在RadioButton在不同操作系统下外貌一致了。
为了在不同OS下获得相同的显示效果,我们需要对WPF的控件进行样式的重写。对控件样式的重写,可以理解为对它的表现进行重组。我们可以通过Blend来查看控件的内部构造,然后根据项目需求对控件进行重写。
感谢您的阅读。代码点击 这里 下载。


![[HBLOG]公众号](https://www.liuhaihua.cn/img/qrcode_gzh.jpg)

