一个java程序员自学IOS开发之路(九)
2015/11/16
Day 38
今天开始做一个综合之前UI知识的项目,根据网易彩票的样子做出页面,还是用之前说的app的主流框架
这次用的自定义的tabBar 和navigationBar

导航栏的样式是在导航控制器的 initialize方法里设置的,因为这个方法会在系统第一次使用这个类的时候调用
代码如下
+ (void)initialize { //设置导航栏 UINavigationBar *navBar = [UINavigationBar appearance]; NSString *bgName = @"NavBar64"; [navBar setBackgroundImage:[UIImage imageNamed:bgName] forBarMetrics:UIBarMetricsDefault]; //设置标题字体 NSMutableDictionary *attrs = [NSMutableDictionary dictionary]; attrs[NSFontAttributeName] = [UIFont systemFontOfSize:18]; attrs[NSForegroundColorAttributeName] = [UIColor whiteColor]; [navBar setTitleTextAttributes:attrs]; // 2.设置BarButtonItem的主题 UIBarButtonItem *item = [UIBarButtonItem appearance]; // 设置文字颜色 NSMutableDictionary *itemAttrs = [NSMutableDictionary dictionary]; itemAttrs[NSForegroundColorAttributeName] = [UIColor whiteColor]; itemAttrs[NSFontAttributeName] = [UIFont systemFontOfSize:16]; [item setTitleTextAttributes:itemAttrs forState:UIControlStateNormal]; } 2015/11/22
Day 39
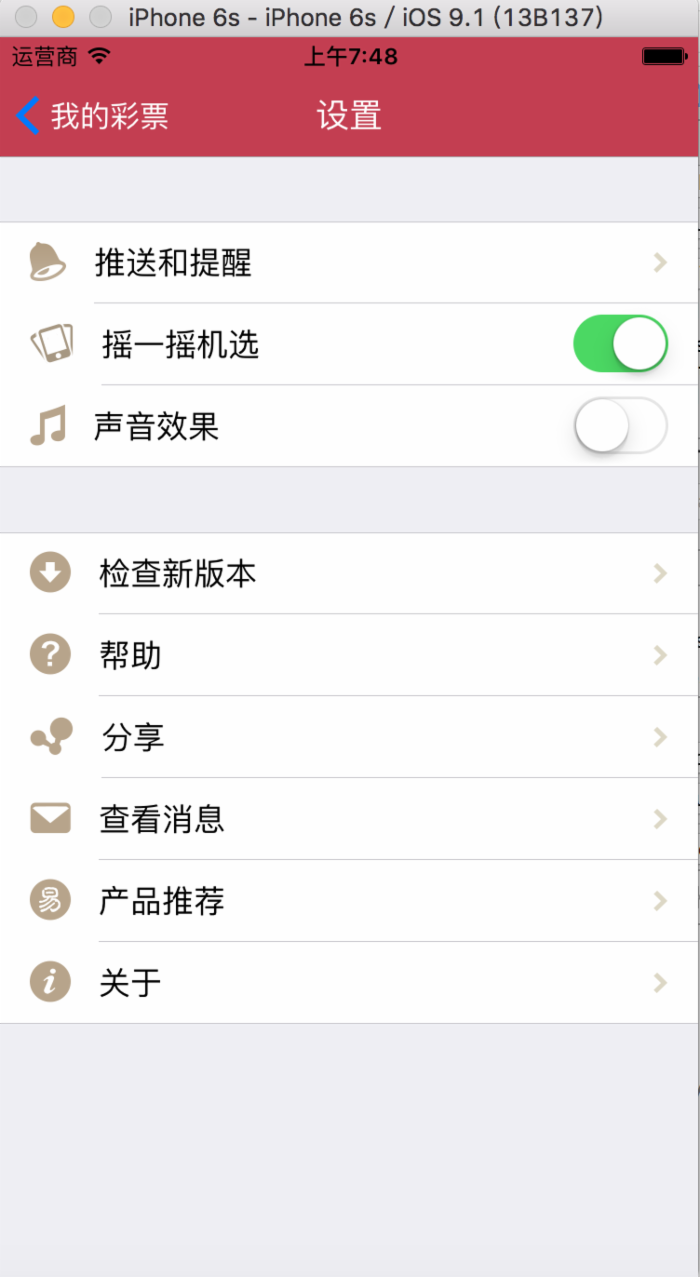
最近接到个新项目,很急,预计12月17号就要上线,开始频繁加班= =!终于周末了,昨天休息了一天,今天继续彩票的页面,把设置那块的页面做了
由于设置的页面里面跳转的页面特别多,而且很多都是tableView,这种情况肯定不能用storyboard,不然就sb了
由于每个tableViewCell里都可能有图片,文字等属性,还有被点击的事件,最好先把这些封装成一个模型
如下:点击事件我用一个block表示,另外声明两个类方法方便实例化
typedef void(^YUSettingItemOption)(); @interface YUSettingItem : NSObject @property (nonatomic, copy) NSString *icon; @property (nonatomic, copy) NSString *title; @property (nonatomic, copy) YUSettingItemOption option; @property (nonatomic, copy) NSString *subtitle; + (instancetype)itemWithIcon:(NSString *)icon title:(NSString *)title; + (instancetype)itemWithTitle:(NSString *)title; @end
接着自定义 cell。在 .h文件里定义自己的数据模型类,以及快速初始化的方法
@interface YUSettingCell : UITableViewCell @property (nonatomic, strong) YUSettingItem *item; + (instancetype)cellWithTableView:(UITableView *)tableView; @end
在 .m文件里
@implementation YUSettingCell + (instancetype)cellWithTableView:(UITableView *)tableView { static NSString *yu3 = @"yu3"; YUSettingCell *result = [tableView dequeueReusableCellWithIdentifier:yu3]; if (result == nil) { result = [[self alloc] initWithStyle:UITableViewCellStyleValue1 reuseIdentifier:yu3]; } return result; } - (void)setItem:(YUSettingItem *)item { _item = item; [self setupData]; } - (void)setupData { if (self.item.icon) { self.imageView.image = [UIImage imageNamed:self.item.icon]; } self.textLabel.text = self.item.title; self.detailTextLabel.text = self.item.subtitle; } @end 但是问题来了,这样是不能控制 cell的右边显示什么的,因为 cell功能不同右边显示就会不同,箭头表示点击可以跳转的,但是也有不能跳转的,右边可能是文字或者一个开关
之前的模型不够用了,要想展示更多个性化内容,再建模型类继承之前的模型类就是咯,再根据自身需要加数据
YUSettingSwitchItem 表示右边是开关,YUSettingArrowItem 表示右边是箭头,YUSettingLabelItem 表示右边是文字
YUSettingArrowItem 中新加了一个属性表示点击cell 后要跳转到的控制器
@interface YUSettingArrowItem : YUSettingItem @property (nonatomic, assign) Class destVcClass; + (instancetype)itemWithTitle:(NSString *)title destVcClass:(Class)destVcClass; + (instancetype)itemWithIcon:(NSString *)icon title:(NSString *)title destVcClass:(Class)destVcClass; @end
然后在自定义 cell中加入私有属性
@interface YUSettingCell() /** * 箭头 */ @property (nonatomic, strong) UIImageView *arrowView; /** * 开关 */ @property (nonatomic, strong) UISwitch *switchView; /** * 标签 */ @property (nonatomic, strong) UILabel *labelView; @end
注意:这里的控件用的 strong,因为这不是连线来的而且 cell要拥有他们
然后加上设置右边内容的方法,根据 item的类型判断
- (void)setupRightContent { if ([self.item isKindOfClass:[YUSettingArrowItem class]]) { self.accessoryView = self.arrowView; } else if ([self.item isKindOfClass:[YUSettingSwitchItem class]]) { self.accessoryView = self.switchView; self.selectionStyle = UITableViewCellSelectionStyleNone; NSUserDefaults *defaults = [NSUserDefaults standardUserDefaults]; self.switchView.on = [defaults boolForKey:self.item.title]; [self.switchView addTarget:self action:@selector(saveSwitch:) forControlEvents:UIControlEventValueChanged]; } else if ([self.item isKindOfClass:[YUSettingLabelItem class]]) { self.accessoryView = self.labelView; } else { self.accessoryView = nil; } } 模型和 cell都完成了那控制器就很好写了,由于设置里面的 view大多是 UITableView,然后各自的区别就是 cell的个数不同,这样可以把共同点抽离出来做父类
@interface YUSettingBaseViewController : UITableViewController @property (nonatomic, strong) NSMutableArray *data; @end
data 里面存放一个二维数组,为什么是二维呢,因为tableView 是group 类型的,每个tableView 有若干个group ,每个group 里有若干个cell
这样就很有必要把每个 group要显示的数据封装成模型
@interface YUSettingGroup : NSObject /** * 头部标题 */ @property (nonatomic, copy) NSString *header; /** * 尾部标题 */ @property (nonatomic, copy) NSString *footer; /** * 存放着这组所有行的模型数据(这个数组中都是YUSettingItem对象) */ @property (nonatomic, copy) NSArray *items; @end
然后控制器就是实现初始化方法和数据源方法就行了
1 @implementation YUSettingBaseViewController 2 3 - (id)init 4 { 5 return [super initWithStyle:UITableViewStyleGrouped]; 6 } 7 8 - (id)initWithStyle:(UITableViewStyle)style 9 { 10 return [super initWithStyle:UITableViewStyleGrouped]; 11 } 12 13 - (NSArray *)data 14 { 15 if (_data == nil) { 16 _data = [NSMutableArray array]; 17 } 18 return _data; 19 } 20 21 - (void)viewDidLoad { 22 [super viewDidLoad]; 23 24 } 25 26 27 #pragma mark - Table view data source 28 29 - (NSInteger)numberOfSectionsInTableView:(UITableView *)tableView { 30 return self.data.count; 31 } 32 33 - (NSInteger)tableView:(UITableView *)tableView numberOfRowsInSection:(NSInteger)section { 34 YUSettingGroup *group = self.data[section]; 35 return group.items.count; 36 } 37 38 - (UITableViewCell *)tableView:(UITableView *)tableView cellForRowAtIndexPath:(NSIndexPath *)indexPath { 39 YUSettingCell *cell = [YUSettingCell cellWithTableView:tableView]; 40 YUSettingGroup *group = self.data[indexPath.section]; 41 cell.item = group.items[indexPath.row]; 42 return cell; 43 } 44 45 - (NSString *)tableView:(UITableView *)tableView titleForHeaderInSection:(NSInteger)section 46 { 47 YUSettingGroup *group = self.data[section]; 48 return group.header; 49 } 50 51 - (NSString *)tableView:(UITableView *)tableView titleForFooterInSection:(NSInteger)section 52 { 53 YUSettingGroup *group = self.data[section]; 54 return group.footer; 55 } 56 57 - (void)tableView:(UITableView *)tableView didSelectRowAtIndexPath:(NSIndexPath *)indexPath { 58 [tableView deselectRowAtIndexPath:indexPath animated:YES]; 59 YUSettingGroup *group = self.data[indexPath.section]; 60 YUSettingItem *item = group.items[indexPath.row]; 61 if (item.option) { 62 item.option(); 63 } else if ([item isKindOfClass:[YUSettingArrowItem class]]) { 64 YUSettingArrowItem *aItem = (YUSettingArrowItem *)item; 65 if (aItem.destVcClass == nil) return; 66 UIViewController *vc = [[aItem.destVcClass alloc] init]; 67 vc.title = aItem.title; 68 [self.navigationController showViewController:vc sender:nil]; 69 } 70 71 } 72 @end 前面封装了这么多,虽然很累啊,但是后面的页面就很简单了后面的控制器继承这个 base控制器,就只要设置数据就行了
@interface YUSettingViewController : YUSettingBaseViewController @end
在viewDidLoad 方法中设置数据
YUSettingItem *pushNotice = [YUSettingArrowItem itemWithIcon:@"MorePush" title:@"推送和提醒" destVcClass:[YUPushNotic eViewController class]]; YUSettingItem *handShake = [YUSettingSwitchItem itemWithIcon:@"handShake" title:@"摇一摇机选"]; YUSettingItem *soundEffect = [YUSettingSwitchItem itemWithIcon:@"sound_Effect" title:@"声音效果"]; YUSettingGroup *group = [[YUSettingGroup alloc] init]; group.items = @[pushNotice, handShake, soundEffect]; [self.data addObject:group];
后面要跳转的控制器也是一样,继承YUSettingBaseViewController ,然后设置数据就可以了

2015/11/23
Day 40
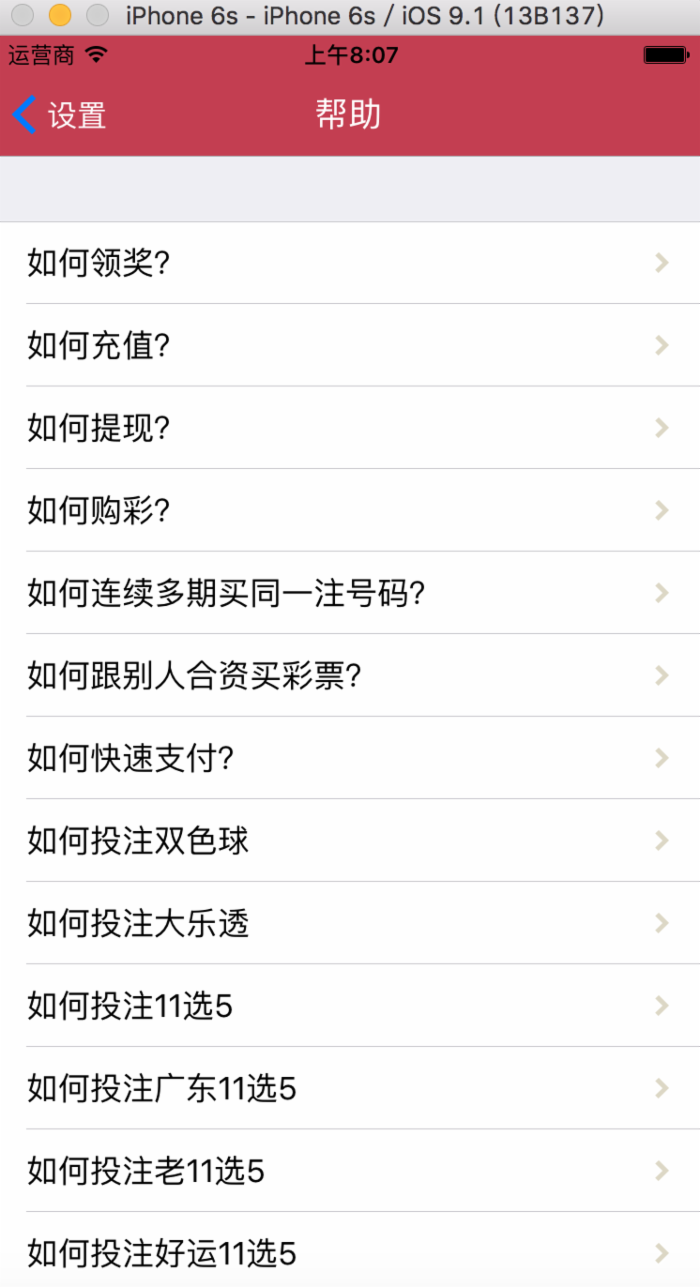
帮助页面
今天继续设置里的帮助页面,主页面还是跟之前一样设置数据就好

帮助页面的数据是存在 json里面的,使用方法跟 plist差不多,如下
NSString *path = [[NSBundle mainBundle] pathForResource:@"help.json" ofType:nil]; NSData *data = [NSData dataWithContentsOfFile:path]; NSArray *dicArray = [NSJSONSerialization JSONObjectWithData:data options:NSJSONReadingMutableContainers error:nil];
注意:如果数据的键值和类的属性名不匹配,一定不能用 kvc,会导致程序崩溃
帮助页面跳转的页面是网页数据, html格式的,要用 UIWebView来显示
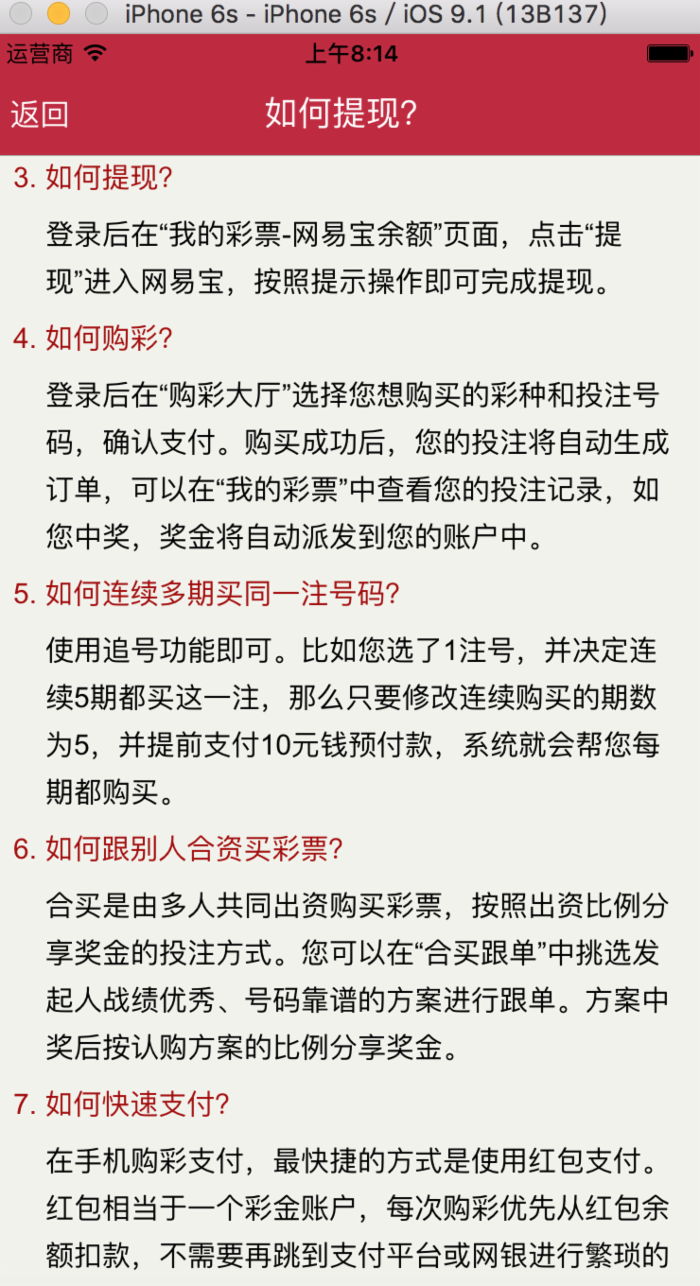
网页用 modal形式显示出来,但是如果直接 modal就无法返回了,最好先包装一个导航控制器,设置左上角的 BarButtonItem,点击它 dismiss当前页面即可。另外由于某些 cell跳转的时同一个页面,只是他们的标签位置不同而已,需要运行 javascript代码让页面跳到对应的标签也
/** 网页加载完毕的时候调用 */ - (void)webViewDidFinishLoad:(UIWebView *)webView { // 跳到id对应的网页标签 // 1.拼接Javacript代码 NSString *js = [NSString stringWithFormat:@"window.location.href = '#%@';", self.html.ID]; // 2.执行JavaScript代码 [webView stringByEvaluatingJavaScriptFromString:js]; } 下图为点击如何提现时跳转的页面

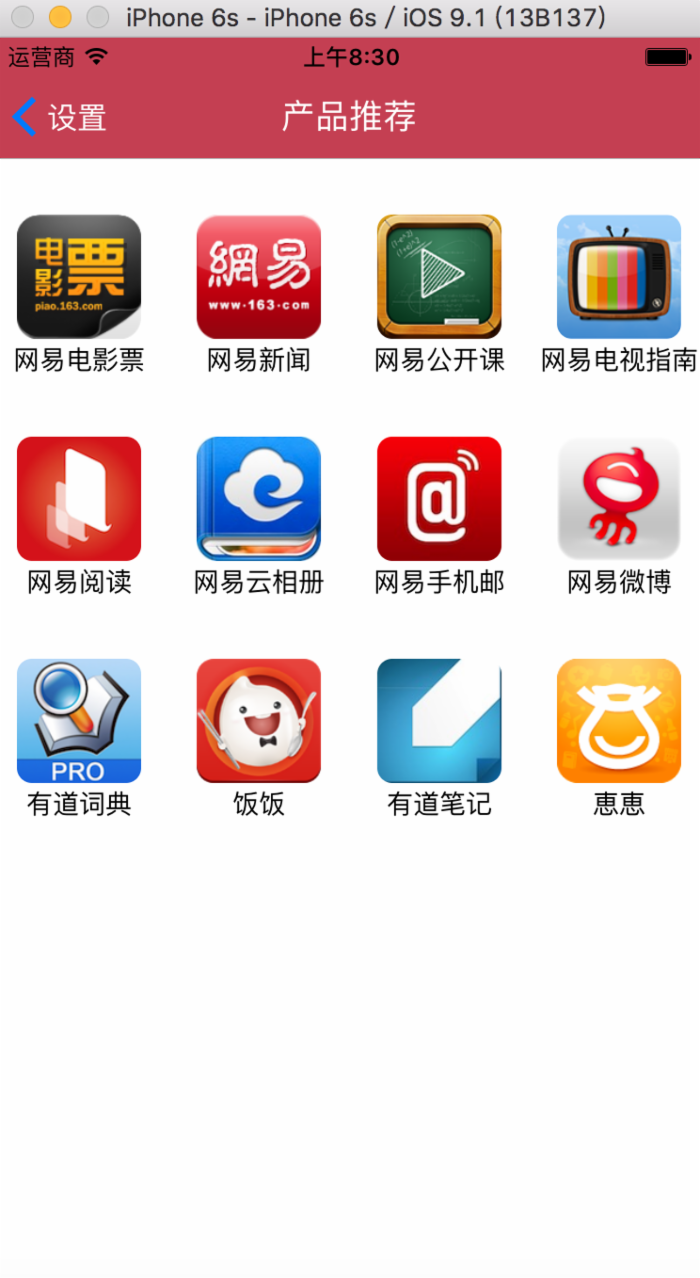
最后做了产品推荐的页面,利用UICollectionViewController,用法也跟tableView差不多,实现数据源方法就能显示数据 //此方法可以不写,默认返回1 - (NSInteger)numberOfSectionsInCollectionView:(UICollectionView *)collectionView { return 1; } - (NSInteger)collectionView:(UICollectionView *)collectionView numberOfItemsInSection:(NSInteger)section { return self.products.count; } - (UICollectionViewCell *)collectionView:(UICollectionView *)collectionView cellForItemAtIndexPath:(NSIndexPath *)indexPath { YUProductCell *cell = [collectionView dequeueReusableCellWithReuseIdentifier:reuseIdentifier forIndexPath:indexPath]; cell.product = self.products[indexPath.item]; return cell; } cell 利用xib 实现

注意UICollectionViewController 的reuseIdentifier 是定义在方法外的
static NSString * const reuseIdentifier = @"product";
另外UICollectionViewController 在创建时必须有个布局参数
- (instancetype)initWithCollectionViewLayout:(UICollectionViewLayout *)layout
最好重写 init方法方便别的类调用
- (instancetype)init { UICollectionViewFlowLayout *layout = [[UICollectionViewFlowLayout alloc] init]; layout.itemSize = CGSizeMake(88, 88); layout.minimumInteritemSpacing = 0; layout.minimumLineSpacing = 30; layout.sectionInset = UIEdgeInsetsMake(layout.minimumLineSpacing, 0, 0, 0); return [super initWithCollectionViewLayout:layout]; } 


![[HBLOG]公众号](https://www.liuhaihua.cn/img/qrcode_gzh.jpg)

