Android Studio for Experts(Android Dev Summit2015)
原文链接: http://my.oschina.net/u/437912/blog/537094
目录[-]
-
Editor Tricks
-
1. code completion.
-
2. Selection.
-
3. Intention.
-
4. LiveTemplates.
-
5. filterSearch.
-
6. Replace Structurally.
-
7. Search Structurally.
-
8. Desingtime Attributes.
-
9. Private Resources.
-
10. Resource Shrinking.
按照规矩,先贴参考来源:
来自简书的iamwent的Android Studio for Experts:Edit (很多帮助,多谢!)
Android Studio Tips and Tricks
Android Studio Tips & Tricks: Moving Around (这篇文章算是很久远了,但是绝对是干货, 中文翻译在这 )
废话少说,直入正题。首先声明一下,以下的操作全部都是在 mac 上面,所以windows的各位还需要自己摸索一下,也不会很麻烦的。这篇博客是翻译自google2015的开发者峰会的 Android Studio for Experts ,主要讲解AS的一些非常nasty的技巧,嗯......talk is cheap,show me the code。
-
Editor Tricks
1. code completion.
当我们按下Ctrl+Alt+Space调出代码提示功能的时候:

按下Enter键,然后就出现了烦人的:

还需要将后面的代码删除,但现在我们需要做的就是,直接 按下 tab键 ,然后就是这样:

code completion2.这次演示的是也是自动补齐, control+space 和 control+shift+space 的区别(连续2次点击space会有惊喜发生):

2. Selection.
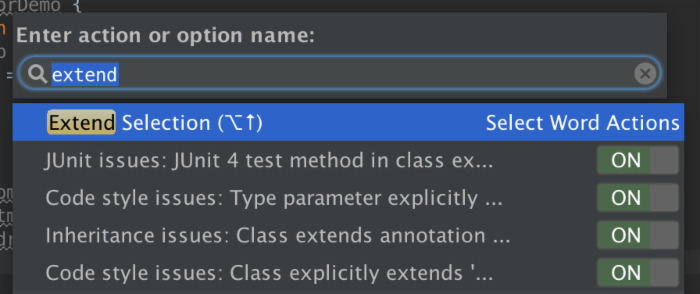
补充一个快捷键: shift+command+A 调出快捷键搜索窗口,输入 Extend Selection, 显示快捷方式为 alt+↑/↓
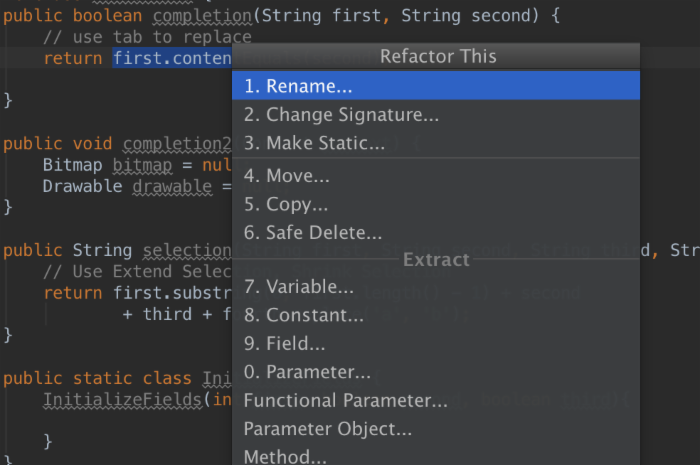
各种区块的选中,非常便捷。选中后我们可以进行下一步的操作。使用Extra快捷键重构为变量或者方法, control+T :
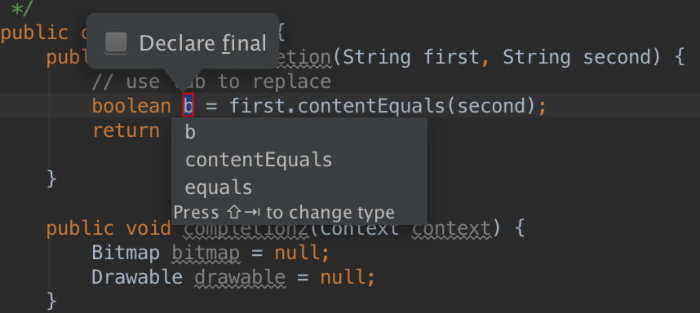
选择Varialble我们将看到如下所示:
3. Intention.
意图操作了,感觉这是最酷的一部分了,alt+enter,你绝对不会想错过这个的,it's really dope!

选择Bind constructor parameters to fields,你将会看到:

再来一个alt+enter的例子:

after:

4. LiveTemplates.
这个已经被讨论了很多次了,直接去到AS的Setting->Editor->Code Style->Live Templates,第一次进去感觉跟发现了新大陆一样。
初级的:fori,foreach
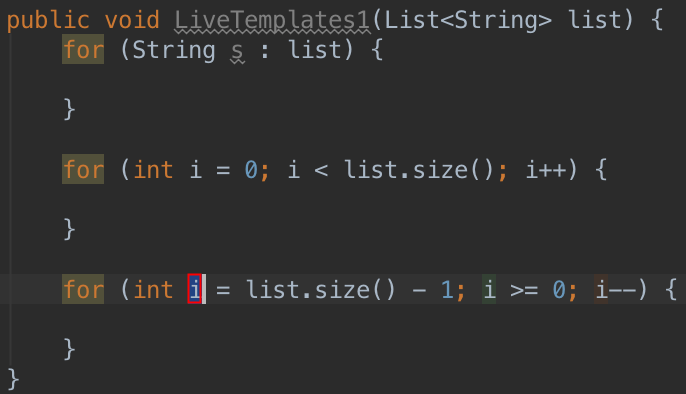
进阶一点:数据集和变量后面输入.for(eg. list.for),按下enter键:

3种选择对应如下,foreach语句,正序for语句,逆序for语句:
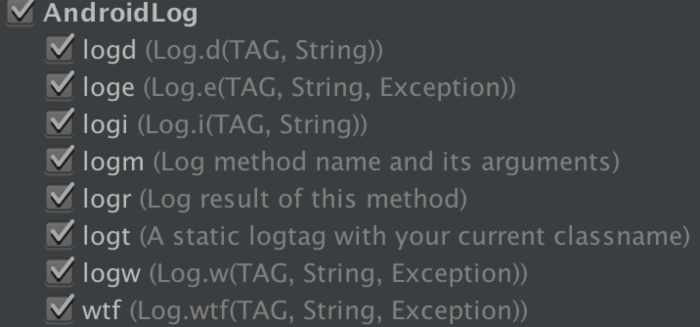
高级的log,不说多,试过了就知道:
5. filterSearch.
对于弹出框,都可以直接输入关键字进行搜索,如下:
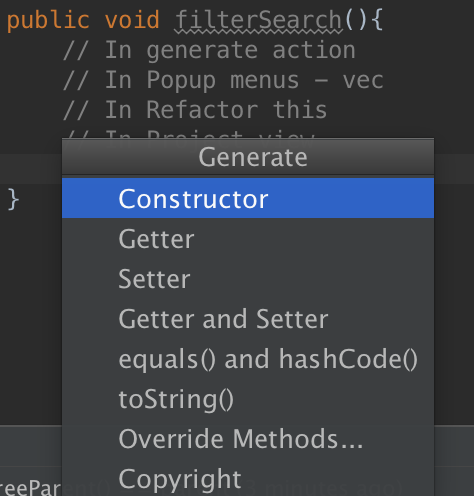
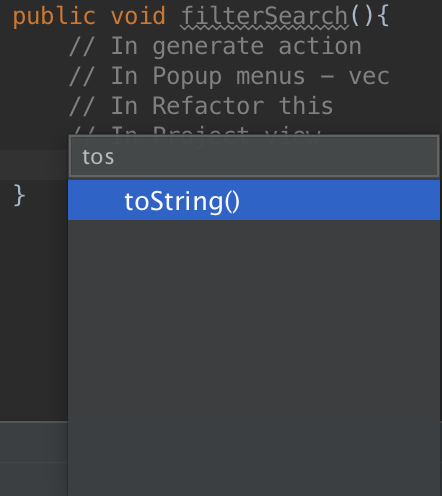
注:区别快捷键 control+enter(插入操作) , alt+enter(意图操作) , control+T(refactor)
6. Replace Structurally.
举个例子,你想去掉String.xml中的所有translation_description如下,

以前的做法可能是find&replace,现在更便捷的方法:shift+command+A调出搜索action的窗口,输入replace:

然后编辑模版:

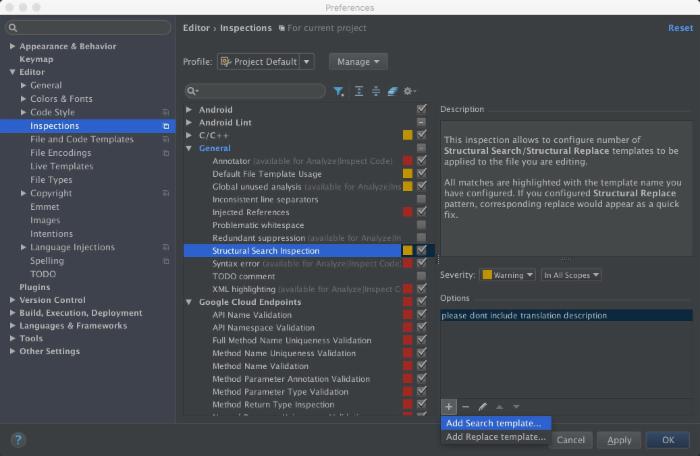
轻松替换掉了,另外也剋直接把这个模版加入到设置组中,as就会自动进行检查,alt_enter可直接进行替换的,就是这么方便:
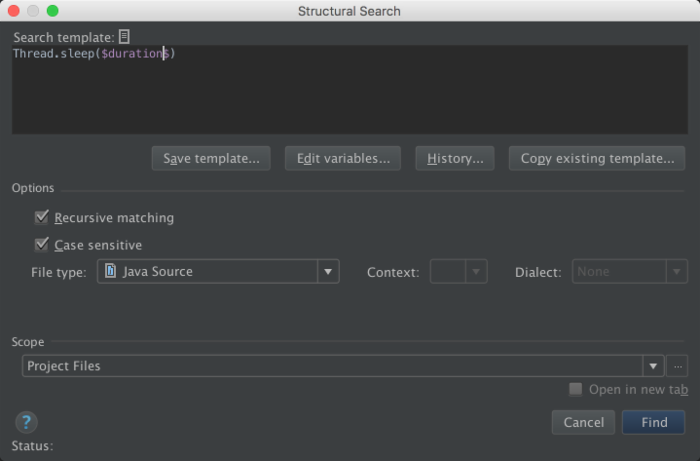
7. Search Structurally.
搜索的快捷方式,其实和Replace Structurally比较类似,高级搜索功能,非常赞:

8. Desingtime Attributes.
这一快速偶的重点都是tools这个无敌的工具,先看看官方的说明:
Android has a dedicated XML namespace intended for tools to be able to record information in XML files, andhave that information stripped when the application is packaged such that there is no runtime or download size penalty. The namespace URI is http://schemas.android.com/tools and is usually bound to the tools: prefix
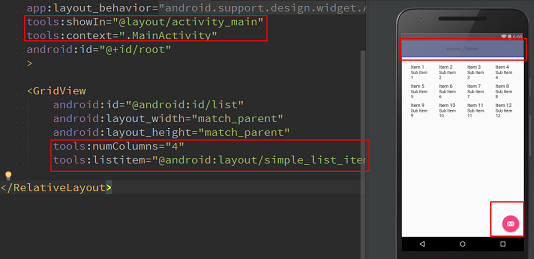
显然我们可以同时查看控件的预览效果同时不需要担心多余的资源会被编译到apk中去,只需要用到tools:prefix,一切都搞定!
关注两个属性,更多属性可以访问官网: Android Tools Project Site
tools:showIn // 声明在最顶层的 layout,值是 include 了本布局的一个父布局,它使得预览本布局时同时会渲染该父布局 tools:listItem // 它可以直接让我们 preview GridView的效果!
9. Private Resources.
首先列出官方文档: Public and Private Resources
依照官方文档,android studio默认所有library resource都是public,在code completion suggestions和resource references中都会出现,关键的一点, If you declare any library resources as public, Android Studio assumes all the other library resources are private . 如果想保护某些资源不被外部访问,最好的做法就是声明另外一些library resource为public就行了,like this:
<resources> <public name="mylib_app_name" type="string"/> </resources>
批量操作的话,可以直接在 res/values/目录下面直接new file "public.xml",就是这样。
10. Resource Shrinking.
减少未使用的文件资源的技巧。按照惯例,先贴出官方文档: Resource Shrinking
貌似这个用处不是很大,对于很多模糊匹配的资源系统是不会随便删除,当然我们也能使用tools:strictMode来进行相应的操作设置。
第一部分到此结束,第二部分是一个黑人小哥讲解debug技巧的,感觉也是干货满满,有时间再更新出来分享给大家!敬请期待!


![[HBLOG]公众号](https://www.liuhaihua.cn/img/qrcode_gzh.jpg)

