摆脱第三方库系列(三)- 自己写顶部滚动标签栏
前言
好久没写博客了,最近自己参考了一些源码写了一个标签页,并把他传到了CocoaPods上。大家可以集成到项目中进行使用,也可以看看源码自己写一个更好的,也希望如果有什么意见可以告诉我,我会进行完善。
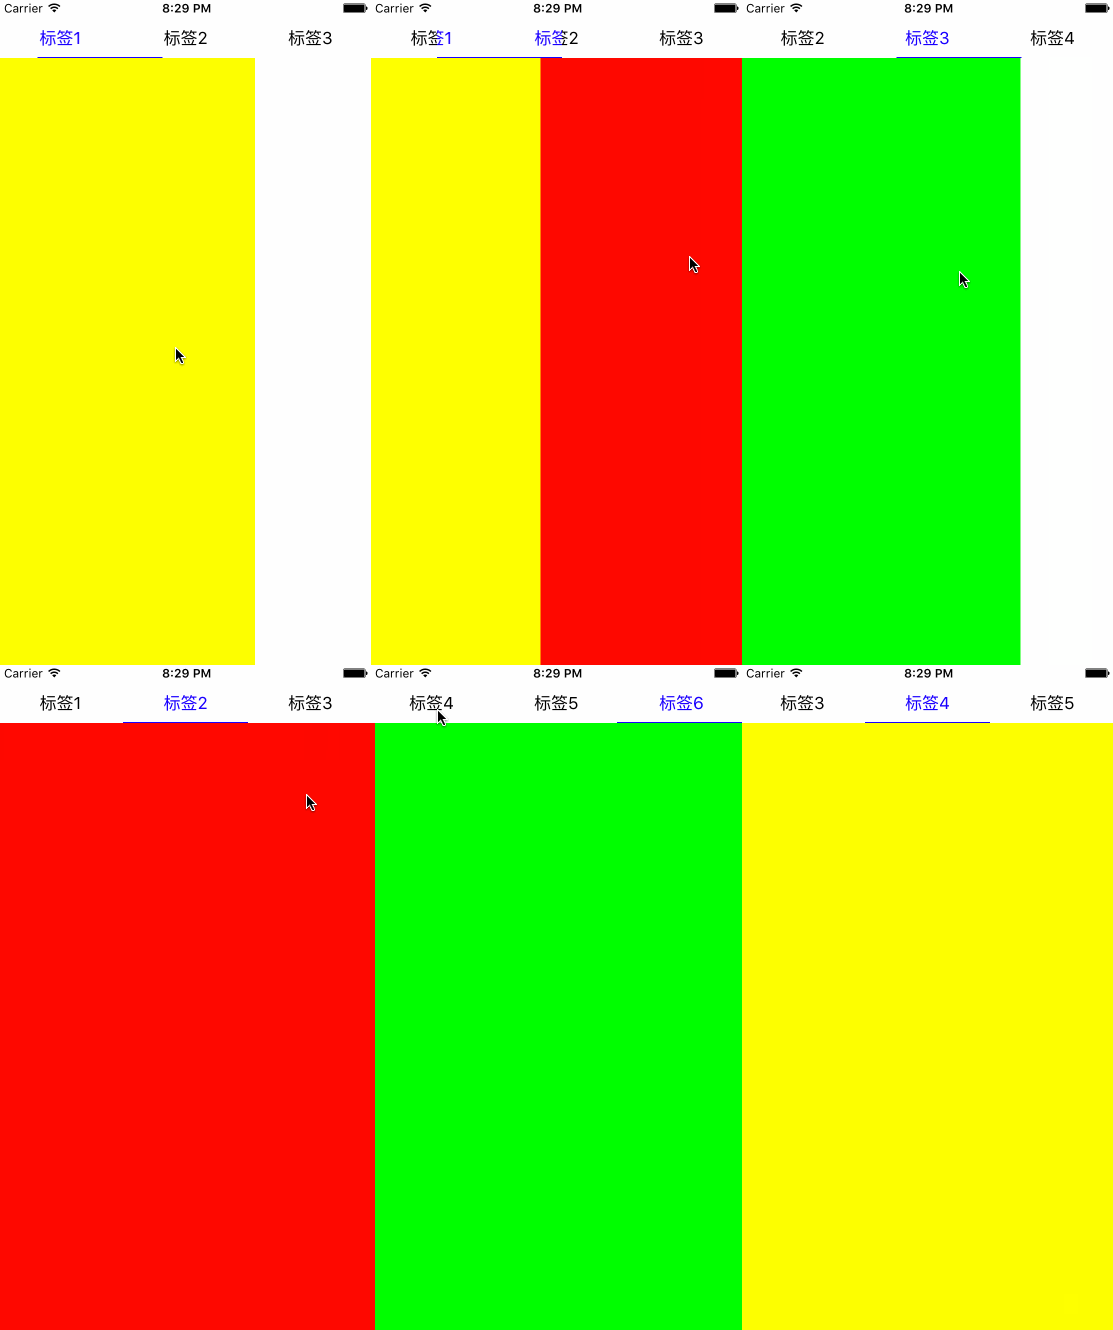
成果
自己写了两种形式的Demo,一种类似网易云音乐的固定的标签栏,一种是类似爱奇艺、今日头条的可滚动的标签栏。一开始只是草草的写,后来经过师傅提醒考虑了下优化,只有移动到那个页面才会对ViewController进行加载,这样即使是很复杂的页面很多网络请求数据加载应该也不会有卡顿的现象。


如果有想加入项目中使用的同学可以利用CocoaPods,具体使用我放在 github 上了,欢迎使用。也可以把github上的zip直接下载下来看使用方法。接下来简单介绍下实现原理。
实现原理
简单的说,顶部的标签栏是UIScrollView,底下也是一个UIScrollView,将多个 ViewController.view 初始化加入到下面ScrollView中的合适位置,并且与顶部的标签栏相关联,并且给上面的标签栏增加点击事件控制下部分的ScrollView可以移动到合适的位置就行了!
部分源码解析
感觉其实没什么难点,比较需要动脑筋的实现应该就是顶部标签栏随下面ScrollView的滑动,包括字体颜色,下划线移动。我就对这一部分进行介绍,对其他地方感兴趣的同学可以自己把源码下载下来看看。
这里先上代码,先上顶部标签栏的初始化方法。这一部分比较繁琐,肯定可以简化代码,时间有点紧就没做了。
- (void)addScrollHeader:(NSArray *)titleArray { self.headerView.frame = CGRectMake(0, 0, self.width, self.buttonHeight); self.headerView.contentSize = CGSizeMake(self.buttonWidth*titleArray.count, self.buttonHeight); [self addSubview:self.headerView]; for (NSInteger index = 0; index < titleArray.count; index++) { _titleLabel = [[UILabel alloc] initWithFrame:CGRectMake(self.buttonWidth*index, 0, self.buttonWidth, self.buttonHeight)]; _titleLabel.textColor = [UIColor blackColor]; _titleLabel.text = titleArray[index]; _titleLabel.textAlignment = NSTextAlignmentCenter; _titleLabel.adjustsFontSizeToFitWidth = YES; [self.headerView addSubview:_titleLabel]; _segmentBtn = [[UIButton alloc] initWithFrame:CGRectMake(self.buttonWidth*index, 0, self.buttonWidth, self.buttonHeight)]; _segmentBtn.tag = index; [_segmentBtn setBackgroundColor:[UIColor clearColor]]; [_segmentBtn addTarget:self action:@selector(btnClick:) forControlEvents:UIControlEventTouchUpInside]; [self.headerView addSubview:_segmentBtn]; } self.headerSelectedSuperView = [[UIView alloc] initWithFrame:CGRectMake(0, 0, self.buttonWidth, self.buttonHeight)]; [self.headerView addSubview:self.headerSelectedSuperView]; self.headerSelectedView.frame =CGRectMake(0, 0, self.buttonWidth, self.buttonHeight); self.headerSelectedView.contentSize = CGSizeMake(self.buttonWidth*titleArray.count, self.buttonHeight); [self.headerSelectedSuperView addSubview:self.headerSelectedView]; for (NSInteger index = 0; index < titleArray.count; index++) { _titleLabel = [[UILabel alloc] initWithFrame:CGRectMake(self.buttonWidth*index, 0, self.buttonWidth, self.buttonHeight)]; _titleLabel.textColor = [UIColor blueColor]; _titleLabel.text = titleArray[index]; _titleLabel.textAlignment = NSTextAlignmentCenter; _titleLabel.adjustsFontSizeToFitWidth = YES; [self.headerSelectedView addSubview:_titleLabel]; } UIImageView *bottomLine = [[UIImageView alloc] initWithFrame:CGRectMake(0, self.headerSelectedView.contentSize.height - self.lineHeight, self.headerSelectedView.contentSize.width, self.lineHeight)]; bottomLine.backgroundColor = [UIColor blueColor]; [self.headerSelectedView addSubview:bottomLine]; } 这里的实现主要分成三个步骤,一开始在顶部加上一个 self.headerView ,这是一个UIScrollView,他是标签栏视图的最底层,所以需要最先add上去。在 self.headerView 我们会加上若干个UILabel,这几个UILabel就是没选中时的标签样子,就是上文gif中黑色的标签。然后再加上若干个透明的Button方便添加点击事件,当然也可以用手势这里随意。
第二步就是加一个UIView的“父视图” self.headerSelectedSuperView ,这个父视图的作用稍后说。
第三步就是再加上一个UIScrollView self.headerSelectedView ,这是当前选中标签应该展现的外观的ScrollView,我们在这个ScrollView里加入若干个UILabel,不同的是颜色要设置成选中标签后的颜色,这里我设置的是蓝色。为了美观,还加了一个蓝色的下划线。第三步有个关健就是将 _headerSelectedView.clipsToBounds = YES; 这个代码我在headerSelectedView的get方法里面写了。这个属性是说子视图如果比父视图大,则将超出的部分去掉,默认是NO的。不是很理解的最好取谷歌下,这个属性是实现上图效果的关健。
然后看UIScrollView的代理方法。
- (void)scrollViewDidScroll:(UIScrollView *)scrollView { if (scrollView == _backView) { self.headerSelectedSuperView.frame = CGRectMake(scrollView.contentOffset.x * (self.buttonWidth/self.width), self.headerSelectedSuperView.frame.origin.y, self.headerSelectedSuperView.frame.size.width, self.headerSelectedSuperView.frame.size.height); self.headerSelectedView.contentOffset = CGPointMake(scrollView.contentOffset.x * (self.buttonWidth/self.width), 0); } } backView就是下面ViewController存放的ScrollView,当backView滚动时,我们需要改变标签栏headerSelectedSuperView的frame和headerSelectedView的contentOffset,这样的结果就是headerSelectedSuperView能移动到合适的位置,并且展示出headerSelectedSuperView子视图也就是headerSelectedView合适的部分。这样就能有gif中标签栏的那种滚动效果了。这里就和 _headerSelectedView.clipsToBounds = YES; 息息相关了。代码很简单。
至于其他部分我就不一一解析了,还是推荐大家看看源码,也希望有什么意见可以告诉我,互相提高互相进步。


![[HBLOG]公众号](https://www.liuhaihua.cn/img/qrcode_gzh.jpg)

