android 实现【夜晚模式】的另外一种思路
源码地址
在一切开始之前,我只想用正当的方式,跪求各位的一个star

https://github.com/geminiwen/skin-sprite
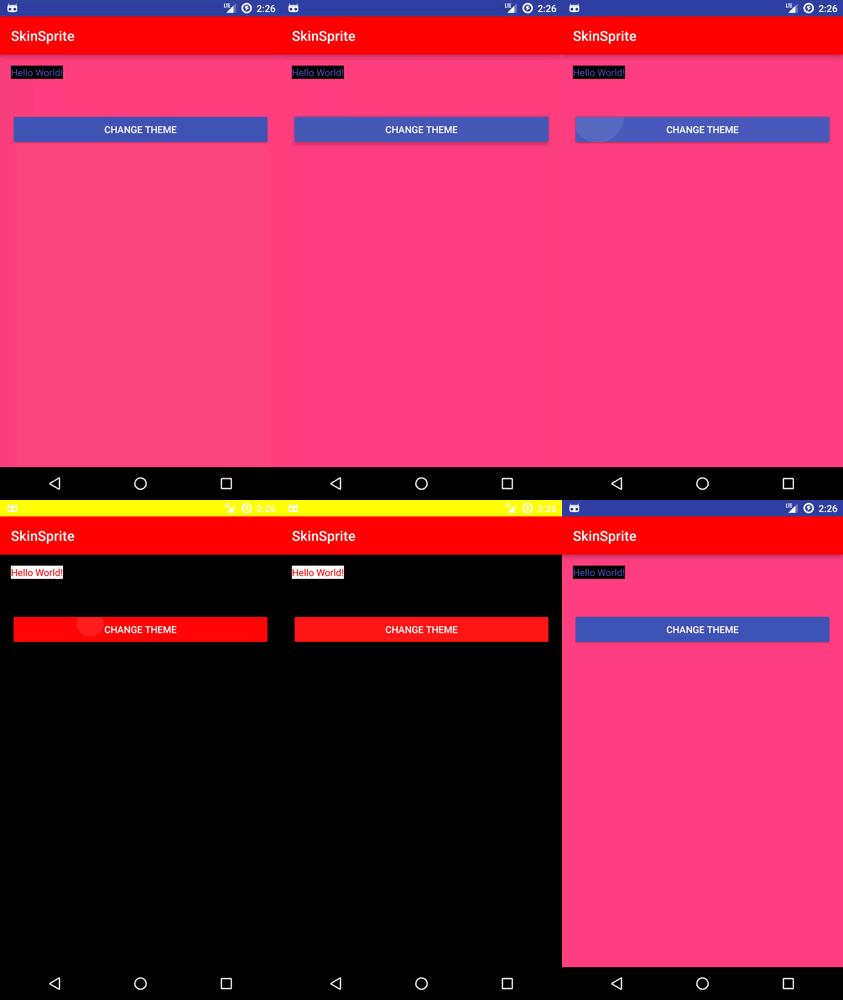
预览

序
在写 SegmentFault for Android 4.0 的过程中,因为原先采用的夜间模式,代码着实不好看,于是我又开始挖坑了。
在几个月前更新的 Android Support Library 23.2 中,让我们认识到了 DayNight Theme 。一看源码,原来以前在 API 8 的时候就已经有了 night 相关的资源可以设置,只是之前一直不知道怎么使用,后来发现原来还是利用了 AssetManager 相关的API —— Android在指定条件下加载指定文件夹中的资源。 这正是我想要的! 这样我们只用指定好引用的资源,(比如 @color/colorPrimary ) 那么我就可以在白天加载 values/color.xml 中的资源,晚上加载 values-night/color.xml 中的资源。

v7 已经帮我们完成了这里的功能,放置夜晚资源的问题也已经解决了,可是每次切换 DayNight 模式的时候,需要重启下 Activity ,这件事情很让人讨厌,原因就是因为重启后,我们的 Context 就会重新创建, View 也会重新创建,根据当前系统(应用)配置的不同,加载不同的资源。 那我们有没有可能做到不重启 Activity 来实现夜间模式呢? 其实实现方案很简单:我们只用记录好系统渲染xml的时候,当时给 View 的资源id,在特定时刻,重新加载这些资源,然后设置给View即可。接下去我们碰到两个问题:
-
在引入这个库的情况下,让开发者少改已有的xml文件,把所有的布局都换为我们指定的布局。
-
API要尽量简单,清楚,明白。
上面两个条件说起来很容易,其实想实现并不是很容易的,还好 AppCompat 给了我一些思路。
来自AppCompat的启发
当我们引入 appcompat-v7 ,有了 AppCompatActivity 的时候,我们发现我们渲染的 TextView / Button 等组件分别变成了 AppCompatTextView 和 AppCompatButton , 这些组件都是包含在 v7 包中的,很早以前觉得很神奇,当看了 AppCompatActivity 和 AppCompatDelegate 的源码,知道了 LayoutInflator.Factory 这些东西的工作原理之后,这一切也就不神奇了 —— 它只是在 inflate 的过程中,注入了自己的代码进去,比如把 TextView 解析成 AppCompatTextView 类,达到对解析结果拦截的目的。
OK,借助这个方法,我们可以在 Activity.onCreate 中,注入我们自己的 LayoutInflatorFactory :

像这样,有兴趣的同学可以看看 AppCompatDelegateImplV7 这个类的 installViewFactory 方法的实现。
接下去我们的目的是把 TextView 、 Button 等类换成我们自己的实现—— SkinnableTextView 和 SkinnableButton 。
可以翻到 AppCompatViewInflater 这个类的源码,其实很清晰了:
public final View createView(View parent, final String name, @NonNull Context context, @NonNull AttributeSet attrs, boolean inheritContext, boolean readAndroidTheme, boolean readAppTheme, boolean wrapContext) { final Context originalContext = context; // We can emulate Lollipop's android:theme attribute propagating down the view hierarchy // by using the parent's context if (inheritContext && parent != null) { context = parent.getContext(); } if (readAndroidTheme || readAppTheme) { // We then apply the theme on the context, if specified context = themifyContext(context, attrs, readAndroidTheme, readAppTheme); } if (wrapContext) { context = TintContextWrapper.wrap(context); } View view = null; // We need to 'inject' our tint aware Views in place of the standard framework versions switch (name) { case "TextView": view = new AppCompatTextView(context, attrs); break; case "ImageView": view = new AppCompatImageView(context, attrs); break; case "Button": view = new AppCompatButton(context, attrs); break; case "EditText": view = new AppCompatEditText(context, attrs); break; case "Spinner": view = new AppCompatSpinner(context, attrs); break; case "ImageButton": view = new AppCompatImageButton(context, attrs); break; case "CheckBox": view = new AppCompatCheckBox(context, attrs); break; case "RadioButton": view = new AppCompatRadioButton(context, attrs); break; case "CheckedTextView": view = new AppCompatCheckedTextView(context, attrs); break; case "AutoCompleteTextView": view = new AppCompatAutoCompleteTextView(context, attrs); break; case "MultiAutoCompleteTextView": view = new AppCompatMultiAutoCompleteTextView(context, attrs); break; case "RatingBar": view = new AppCompatRatingBar(context, attrs); break; case "SeekBar": view = new AppCompatSeekBar(context, attrs); break; } if (view == null && originalContext != context) { // If the original context does not equal our themed context, then we need to manually // inflate it using the name so that android:theme takes effect. view = createViewFromTag(context, name, attrs); } if (view != null) { // If we have created a view, check it's android:onClick checkOnClickListener(view, attrs); } return view; } 这里完成的工作就是把 XML 中的一些Tag解析为java的类实例,我们可以依样画葫芦,只不过把其中的 AppCompatTextView 换成 SkinnableTextView
//省略代码 switch (name) { case "TextView": view = new SkinnableTextView(context, attrs); break; } //省略代码好了,如果有需要,我们在库中把所有的类都替换成自己的实现,就能达到目的了,使得那些使用原始控件的开发者,不修改一丝一毫的代码,渲染出我们定制的控件。
应用DayNightMode
上一节我们解决了自定义 View 替换原始 View 的问题,那么接下去怎么办呢?这里我们同样也参考 AppCompat 关于 BackgroundTint 的一些设计方式。首先我们可以看到 AppComatTextView 的声明:
public class AppCompatTextView extends TextView implements TintableBackgroundView { //... } 实现了一个 TintableBackgroundView 的接口,而我们使用 ViewCompat.setSupportBackgroundTint 的时候,可以找到这么一条:
static void setBackgroundTintList(View view, ColorStateList tintList) { if (view instanceof TintableBackgroundView) { ((TintableBackgroundView) view).setSupportBackgroundTintList(tintList); } } 利用OO的特性,很轻松的判断这个View是否支持我们想要的特性,这时候我也声明了一个接口 Skinnable
public class SkinnableTextView extends AppCompatTextView implements Skinnable { //... }这样等于给我的类打了一个标记,外部调用的时候,就可以判断这个View是否实现了我们的接口,如果实现了接口,就可以调用相关的函数。
我们在 Activity 的基类中,可以如此调用
private void applyDayNightForView(View view) { if (view instanceof Skinnable) { Skinnable skinnable = (Skinnable) view; if (skinnable.isSkinnable()) { skinnable.applyDayNight(); } } if (view instanceof ViewGroup) { ViewGroup parent = (ViewGroup)view; int childCount = parent.getChildCount(); for (int i = 0; i < childCount; i++) { applyDayNightForView(parent.getChildAt(i)); } } } 利用递归的方式,把所有实现 Skinnable 接口的 View 全部应用了 applyDayNight 方法。 因此开发者使用的时候,只用把 Activity 的继承改为 SkinnableActivity ,然后在恰当的时机调用 setDayNightMode 即可。
Skinnable在View中具体实现
这节讲的是如何解决我们的痛点 —— 不重启 Activity 应用 DayNight mode 。
那我们的 View 实现 Skinnable 接口中的方法,到底是如何工作的呢,以 SkinnableTextView 为例子。
一般我们对 TextView 应用的样式有 background 和 textColor ,额外的情况下带一个 backgroundTint 都是OK的。
首先我们的大前提是,这些资源在 xml 中是用引用的方式传进来的,什么意思呢,看下面的表格
| 对 | 错 |
|---|---|
| android:textColor="@color/primaryColor" | android:textColor="#fff" |
| android:textColor="?attr/colorPrimary" | android:textColor="#000" |
总结起来一句话,就是不应该是绝对值,如果是绝对值的话,我们去改它的值也不符合逻辑。
那么如果是资源引用的方式的话,我们使用 TypedArray 这个对象,是可以获取到我们引用的资源的id的,也就是 R.color.primaryColor 的具体数值。 我们把这个值保存下来,然后在恰当的时候,利用这个值再去变化后的 Context 中获取一遍指定的颜色
ContextCompat.getColor(context, R.color.primaryColor);
这时候我们获取到的实际值, context 就会根据系统的配置去正确的文件夹下找我们想要的资源了。
我们利用 TypedArray 能获取到资源的id,使用 TypedArray.getResourceId 方法即可,传入属性的索引值就行。
public void storeAttributeResource(TypedArray a, int[] styleable) { int size = a.getIndexCount(); for (int index = 0; index < size; index ++) { int resourceId = a.getResourceId(index, -1); int key = styleable[index]; if (resourceId != -1) { mResourceMap.put(key, resourceId); } } } 最后,在切换夜间模式的时候,我们调用了 applyDayNight 方法,具体代码如下:
@Override public void applyDayNight() { Context context = getContext(); int key; key = R.styleable.SkinnableView[R.styleable.SkinnableView_android_background]; Integer backgroundResource = mAttrsHelper.getAttributeResource(key); if (backgroundResource != null) { Drawable background = ContextCompat.getDrawable(context, backgroundResource); //这时候获取到的background是符合上下文的 setBackgroundDrawable(background); } //省略代码 }总结以及缺陷
经过以上几点的开发,我们使用日/夜模式切换就变得非常容易了,比如我们如果只处理颜色的修改的话,只用在 values/colors.xml 和 values-night/colors.xml 配置好指定颜色在不同模式下的表现形式,再调用 setDayNightMode 方法,就可以完成一键切换,不需要在 xml 中添加任何复杂凌乱的东西。
因为在配置上节省了许多代码,那我们的约定就变得比较冗长了,如果想进行自定义View的换肤的话,就需要手动去实现 Skinnable 接口,实现 applyDayNight 方法,开发者这时候就需要去做一些缓存资源id的操作。
同时因为它依赖于 AppCompat DayNight Mode ,它只能作用于日/夜间模式的切换,要想实现 换肤 功能,是做不到的。
这两点是缺陷,同时也是和市面上其他换肤库最不同的地方。但是我们把肮脏的代码隐藏在顶部实现里,就是为了业务逻辑层代码的干净和整洁。
希望各位会喜欢,然后有问题可以留言或者在 github 上给我提PR,非常感谢。
Github Repo 地址: https://github.com/geminiwen/skin-sprite


![[HBLOG]公众号](https://www.liuhaihua.cn/img/qrcode_gzh.jpg)

