Harbor 企业级 Docker Registry HTTPS配置
默认的 OpenSSL 生成的签名请求只适用于生成时填写的域名,即 Common Name 填的是哪个域名,证书就只能应用于哪个域名,但是一般内网都是以 IP 方式部署,所以需要添加 SAN(Subject Alternative Name) 扩展信息,以支持多域名和IP
# 首先 cp 一份 openssl 配置
cp /etc/ssl/openssl.cnf .
# 主要修改 内容如下
[ req ]
# 上面的内容省略,主要增加这个属性(默认在最后一行被注释了,解开即可)
req_extensions = v3_req
[ v3_req ]
# 修改 subjectAltName
subjectAltName = @alt_names
[ alt_names ]
# 此节点[ alt_names ]为新增的,内容如下
IP.1=10.211.55.16   # 扩展IP(私服所在服务器IP)
DNS.1=*.xran.me     # 扩展域名(一般用于公网这里做测试)
DNS.2=*.baidu.com   # 可添加多个扩展域名和IP
完整的配置文件如下
[ req ]
default_bits            = 2048
default_keyfile         = privkey.pem
distinguished_name      = req_distinguished_name
attributes              = req_attributes
x509_extensions = v3_ca # The extentions to add to the self signed cert

# Passwords for private keys if not present they will be prompted for
# input_password = secret
# output_password = secret

# This sets a mask for permitted string types. There are several options.
# default: PrintableString, T61String, BMPString.
# pkix   : PrintableString, BMPString (PKIX recommendation before 2004)
# utf8only: only UTF8Strings (PKIX recommendation after 2004).
# nombstr : PrintableString, T61String (no BMPStrings or UTF8Strings).
# MASK:XXXX a literal mask value.
# WARNING: ancient versions of Netscape crash on BMPStrings or UTF8Strings.
string_mask = utf8only

req_extensions = v3_req # The extensions to add to a certificate request
[ v3_req ]

# Extensions to add to a certificate request

basicConstraints = CA:FALSE
keyUsage = nonRepudiation, digitalSignature, keyEncipherment
subjectAltName = @alt_names

[ alt_names ]
IP.1=10.211.55.16
DNS.1=*.xran.me
DNS.2=*.baidu.com
1.2、创建 CA 及自签名
具体原理这里不做过多阐述,直接堆命令,详细请看 互联网加密及OpenSSL介绍和简单使用
cd ~
# 创建 CA 工作目录
mkdir -p demoCA/{private,certs,crl,newcerts}
# 创建 CA 私钥
(umask 077; openssl genrsa -out demoCA/private/cakey.pem 2048)
# 执行自签名(信息不要乱填,参考下面截图)
openssl req -new -x509 -key demoCA/private/cakey.pem -days 3655 -out demoCA/cacert.pem
# 初始化相关文件
touch demoCA/{index.txt,serial,crlnumber}
# 初始化序列号
echo "01" > demoCA/serial
自签名证书截图如下

1.3、创建证书并通过 CA 签名
同样,直接上命令……嘎嘣脆,奏是这个味
注意: 创建签名请求(csr文件)命令和签名命令(ca)与 互联网加密及OpenSSL介绍和简单使用 中稍有不同,openssl.cnf 为第一步修改后的,签名请求密码留空即可
# 证书存放目录
mkdir dockercrt
# 创建私钥
openssl genrsa -out dockercrt/docker.key 2048
# 生成带有 SAN 的证书请求
openssl req -new -key dockercrt/docker.key -out dockercrt/docker.csr -config openssl.cnf
# 签名带有 SAN 的证书
openssl ca -in dockercrt/docker.csr -out dockercrt/docker.crt -config openssl.cnf -extensions v3_req
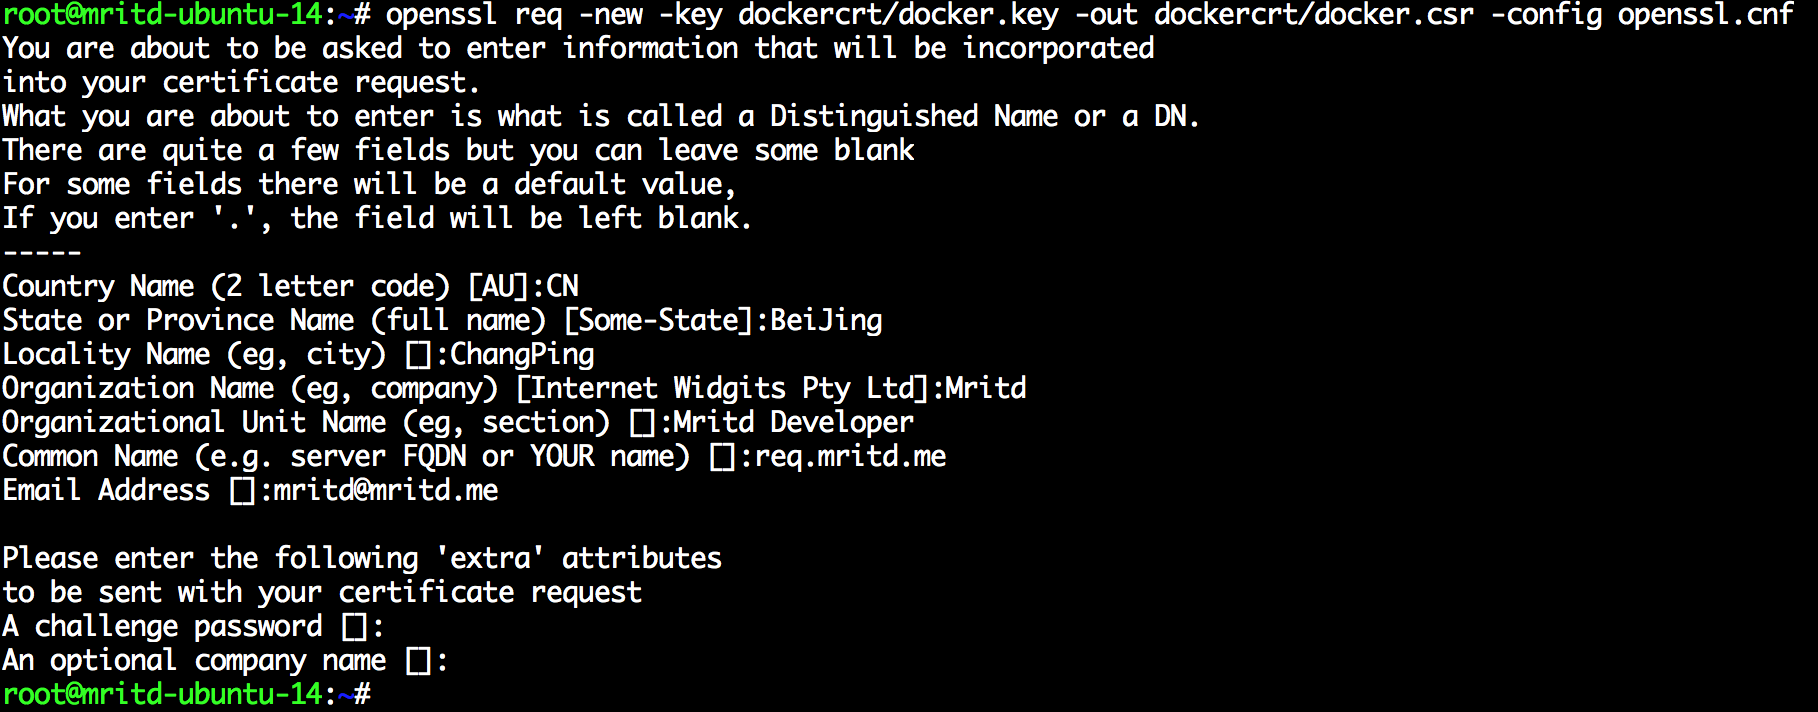
创建签名请求信息填写截图如下

二、配置 Harbor HTTPS
2.1、服务端配置
服务端配置相对简单,只需要修改一下 Harbor 的 Nginx 配置文件,并把签名好的证书和私钥复制过去即可
cd ~/harbor/Deploy
# 复制 crt、key
cp ~/dockercrt/docker.crt .
cp ~/dockercrt/docker.key .
# 修改配置
vim config/nginx/nginx.conf
Nginx 样例配置如下
worker_processes auto;

events {
  worker_connections 1024;
  use epoll;
  multi_accept on;
}

http {
  tcp_nodelay on;

  # this is necessary for us to be able to disable request buffering in all cases
  proxy_http_version 1.1;


  upstream registry {
    server registry:5000;
  }

  upstream ui {
    server ui:80;
  }


  server {
    # listen 80;
    listen 443 ssl;

    # disable any limits to avoid HTTP 413 for large image uploads
    client_max_body_size 0;

    ssl on;
    ssl_certificate /etc/nginx/cert/docker.crt;
    ssl_certificate_key /etc/nginx/cert/docker.key;

    location / {
      proxy_pass http://ui/;
      proxy_set_header Host $host;
      proxy_set_header X-Real-IP $remote_addr;
      proxy_set_header X-Forwarded-For $proxy_add_x_forwarded_for;

      # When setting up Harbor behind other proxy, such as an Nginx instance, remove the below line if the proxy already
has similar settings.
      proxy_set_header X-Forwarded-Proto $scheme;

      proxy_buffering off;
      proxy_request_buffering off;
    }

    location /v1/ {
      return 404;
    }

    location /v2/ {
      proxy_pass http://registry/v2/;
      proxy_set_header Host $http_host;
      proxy_set_header X-Real-IP $remote_addr;
      proxy_set_header X-Forwarded-For $proxy_add_x_forwarded_for;

      # When setting up Harbor behind other proxy, such as an Nginx instance, remove the below line if the proxy already has similar settings.
      proxy_set_header X-Forwarded-Proto $scheme;

      proxy_buffering off;
      proxy_request_buffering off;

    }

    location /service/ {
      proxy_pass http://ui/service/;
      proxy_set_header Host $host;
      proxy_set_header X-Real-IP $remote_addr;
      proxy_set_header X-Forwarded-For $proxy_add_x_forwarded_for;

      # When setting up Harbor behind other proxy, such as an Nginx instance, remove the below line if the proxy already has similar settings.
      proxy_set_header X-Forwarded-Proto $scheme;

      proxy_buffering off;
      proxy_request_buffering off;
    }
  }

  server {
    listen 80;
    rewrite ^/(.*) https://$server_name$1 permanent;
  }
}
最后重新创建 contianer 即可
cd ~/harbor/Deploy
./prepare
# 先 down 一下删除原有配置
docker-compose down
docker-compose up
此时访问 https://hostname 即可
2.2、客户端配置
客户端需要将签名 CA 的自签名根证书加入到本机的信任列表中,Ubuntu 下操作如下
cd ~
# 本人测试用的两个 虚拟机,需要远程拷贝
scp root@10.211.55.16:~/demoCA/cacert.pem .
# 备份一下 系统原有的根证书信任列表
cp /etc/ssl/certs/ca-certificates.crt /etc/ssl/certs/ca-certificates.crt.bak
# 追加 自签名的 CA 根证书到 系统信任列表
cat cacert.pem >> /etc/ssl/certs/ca-certificates.crt
# 重启 docker 服务
service docker restart
2.3、客户端测试
客户端直接登录,并 push 即可, 如果原来修改过 /etc/default/docker 文件的,并加入了 --insecure-registry 选项的需要将其去除
# 登录 如果登录成功就代表没问题了
docker login 10.211.55.16
# push 测试
docker push 10.211.55.16/mritd/nginx:1.9
正文到此结束
热门推荐
相关文章
Loading...


![[HBLOG]公众号](https://www.liuhaihua.cn/img/qrcode_gzh.jpg)

