iOS动画--进阶(一)
前言
优秀的动画来源于设计,优秀的设计来源于灵感和动效的积累。我们不是设计师,但可以积累动画的基础。在动画的进阶部分,我们先积累一些与动画相关的知识。
- 贝塞尔曲线
- CAShapeLayer、CAReplicatorLayer
贝塞尔曲线
Bezier curve(贝塞尔曲线)是应用于二维图形应用程序的数学曲线.主要有起始点、终止点(也称锚点)、控制点这几个概念。通过调整控制点,贝塞尔曲线的形状会发生变化。
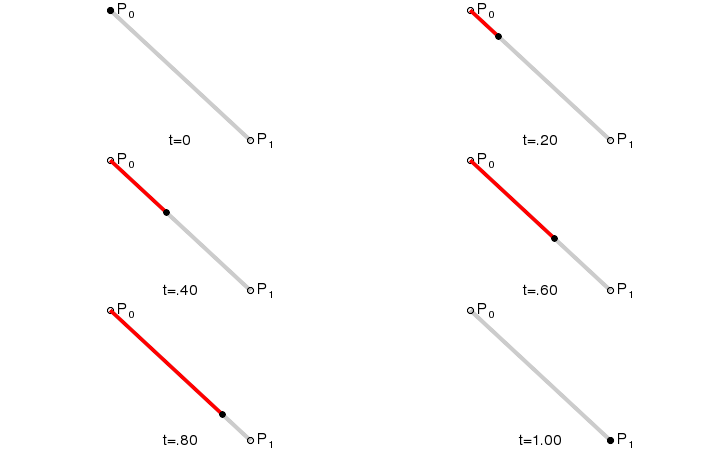
一阶贝塞尔曲线(线段):


二阶贝塞尔曲线(抛物线):


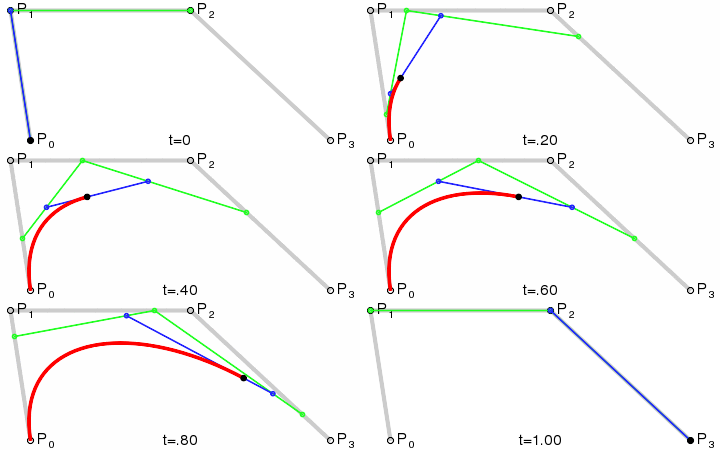
三阶贝塞尔曲线:


三阶以上的贝塞尔曲线在iOS开发中使用较少,这里不再赘述。在iOS中使用 UIBezierPath 来实现贝塞尔曲线。 贝塞尔曲线能描述动画的轨迹,但是UIBezierPath不具有显示的功能。所以下面我们还需要了解iOS负责View显示的CALayer。
CAShapeLayer
CAShapeLayer继承自CALayer,是一个通过矢量图形( 非bitmap) 来绘制的图层类。
CALayer在被初始化时是需要给一个frame值的(一般等于view的bounds值),本身有形状的,且为矩形。 CAShapeLayer需通过CGPath 来定义想要绘制的形状,因此常与UIBezierPath配合使用。
与使用 Core Graphics 直接向 CALayer 的内容中绘制一个路径(- drawLayer: inContext:)相比,使用 CAShapeLayer 有以下优点:
- 渲染快:CAShapeLayer 使用了硬件加速,绘制图层较快。
- 内存消耗少: CAShapeLayer 不需要创建寄宿图形(CALayer需要),内存消耗少。
- 不会被图层边界剪裁掉: CAShapeLayer 可以在边界之外绘制,因此图层路径不会被剪裁掉.
- 不会出现像素化:使用CAShapeLayer 做 3D 变换时,由于无寄宿图所以不会出现像素化问题。
CAReplicatorLayer
CAReplicatorLayer可以复制自己子层的layer,并且复制的出来的layer和原来的子layer拥有相同的动效。
实践比理论更加易懂,下面就以例子来续动画的话题。
环形进度条

进度条的构成为进度环和底色环。

两个环的实现依赖于以上所讲的贝塞尔曲线和CAShapeLayer。 首先,使用贝塞尔曲线描绘底色环的路径
UIBezierPath *path=[UIBezierPath bezierPathWithArcCenter:CGPointMake(50,50) radius:25 startAngle:CATDegreesToRadians(_startAngle) endAngle:CATDegreesToRadians(_endAngle) clockwise:YES];
然后将其赋予CAShapeLayer的path属性,最后将其加入self.layer显示
_trackLayer=[CAShapeLayer layer]; _trackLayer.frame=self.bounds; _trackLayer.fillColor = [UIColor clearColor].CGColor; _trackLayer.strokeColor = _curveBgColor.CGColor; _trackLayer.lineCap = kCALineCapRound; _trackLayer.path=path.CGPath; [self.layer addSublayer:_trackLayer];
进度环的实现与底色环相近,并结合CATransaction实现动画
[CATransaction begin]; [CATransaction setDisableActions:!animated]; [CATransaction setAnimationTimingFunction:[CAMediaTimingFunction functionWithName:kCAMediaTimingFunctionEaseIn]]; [CATransaction setAnimationDuration:1]; _progressLayer.strokeEnd=progress; [CATransaction commit];
具体实现见工程: CATCurveProgressView
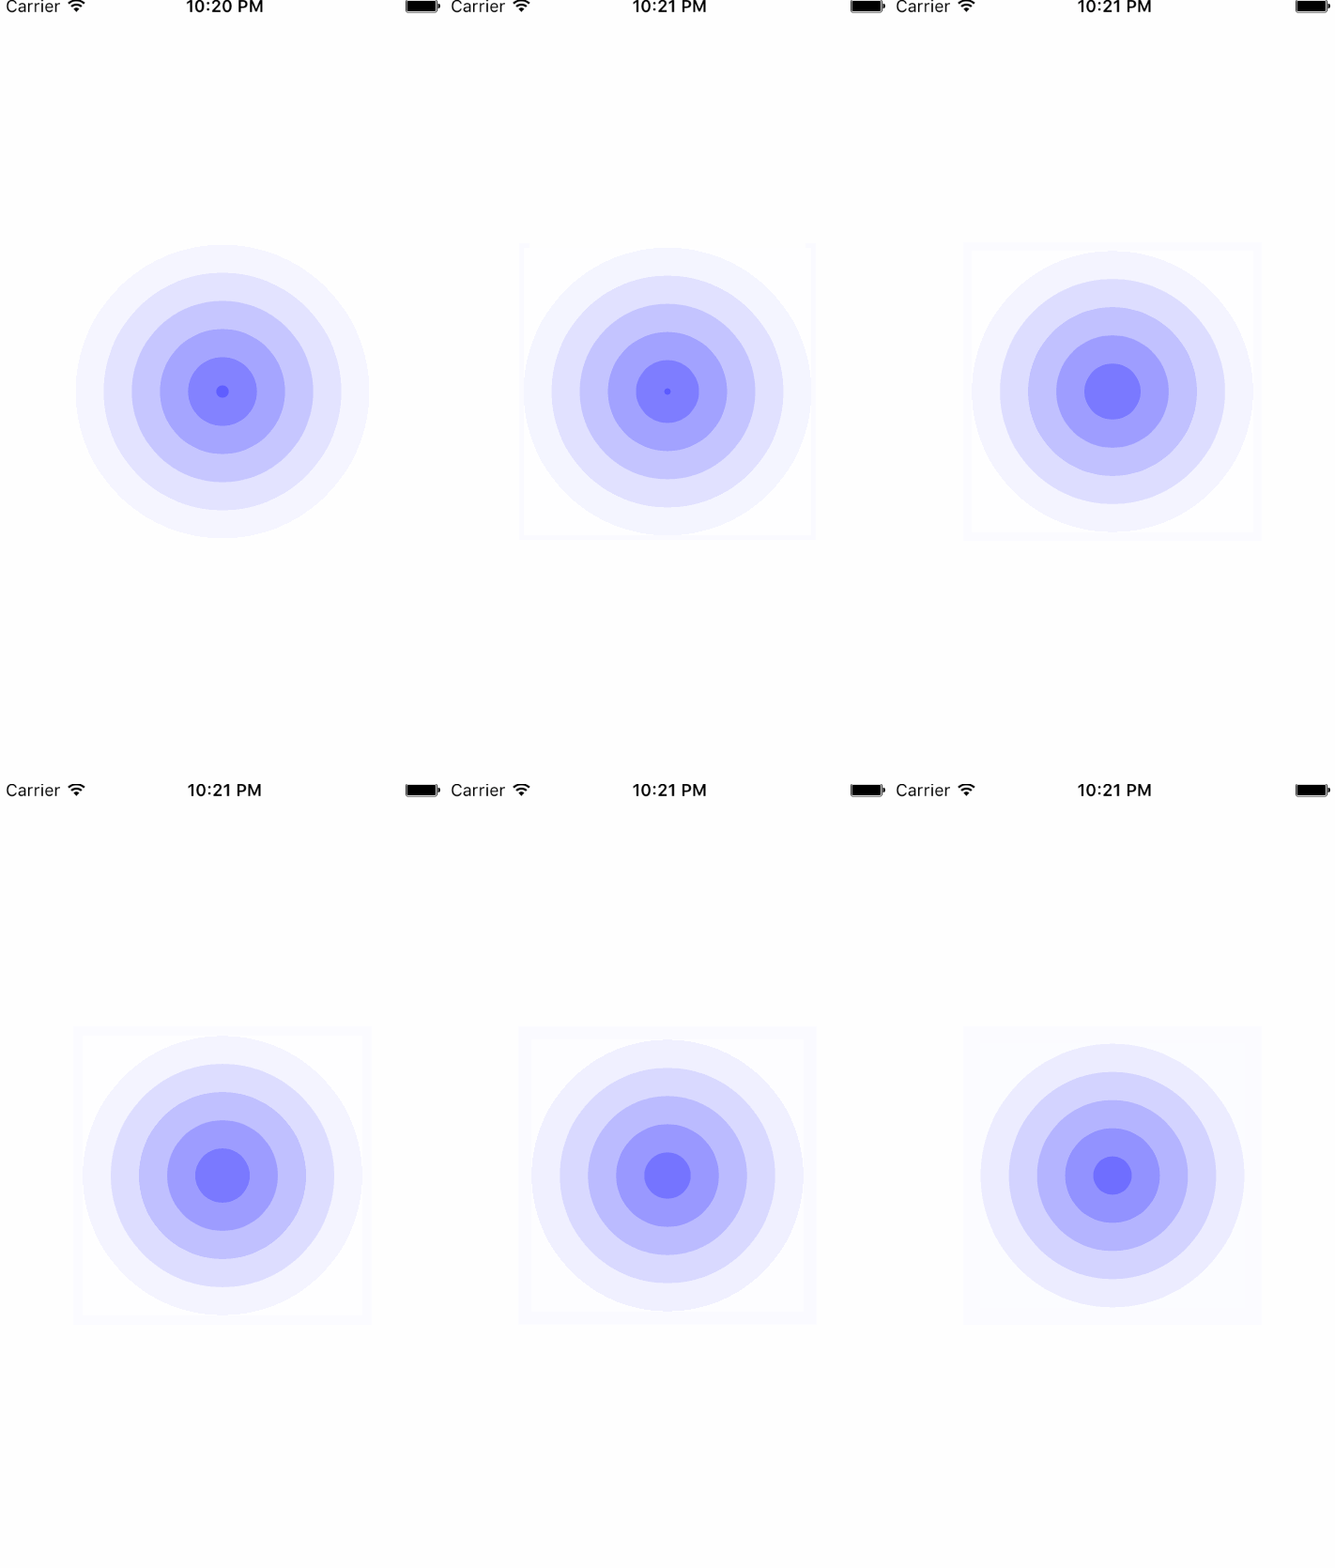
雷达图(咻一咻、波纹)

雷达图的实现分为三个步骤,首先利用CAShapeLayer创建脉冲层(pulseLayer,就是一个圈圈…)
_pulseLayer = [CAShapeLayer layer]; _pulseLayer.frame = self.layer.bounds; _pulseLayer.path = [UIBezierPath bezierPathWithOvalInRect:_pulseLayer.bounds].CGPath; _pulseLayer.fillColor = [UIColor blueColor].CGColor;
然后使用CAReplicatorLayer复制多个脉冲层
_replicatorLayer = [CAReplicatorLayer layer]; _replicatorLayer.frame = self.bounds; _replicatorLayer.instanceCount = 6; _replicatorLayer.instanceDelay = 1.5; [_replicatorLayer addSublayer:self.pulseLayer];
最后加上透明度与大小的动画,来实现雷达的效果
CABasicAnimation *scaleAnima = [CABasicAnimation animationWithKeyPath:@"transform"]; scaleAnima.fromValue = [NSValue valueWithCATransform3D:CATransform3DScale(CATransform3DIdentity, 0.0, 0.0, 0.0)]; scaleAnima.toValue = [NSValue valueWithCATransform3D:CATransform3DScale(CATransform3DIdentity, 1.0, 1.0, 0.0)]; _opacityAnima = [CABasicAnimation animationWithKeyPath:@"opacity"]; _opacityAnima.fromValue = @(0.3); _opacityAnima.toValue = @(0.0); _animaGroup = [CAAnimationGroup animation]; _animaGroup.animations = @[self.opacityAnima, scaleAnima]; _animaGroup.duration = 9; _animaGroup.autoreverses = NO; _animaGroup.repeatCount = HUGE; [self.pulseLayer addAnimation:self.animaGroup forKey:@"groupAnimation"];
具体实现见工程: CATRadarView
进阶部分的首篇就先到这了,咱们下一篇见。


![[HBLOG]公众号](https://www.liuhaihua.cn/img/qrcode_gzh.jpg)

