AutoLayout进阶篇
前言
AutoLayout用来布局已经不是什么新鲜事了,我之前也写过三篇入门的文章
1.IB 自动生成
2.IB拖拽
3.代码实现
当然,实际开发中,如果是多人协同开发,基本上是弃用Storyboard和XIB文件的。因为这两种文件本质上是XML,
多人协同开发一起修改这样的大XML是一件很蛋疼的事情。
所以,大部分时候,Layout约束都是纯代码实现的。
除非某些公司要实现自己的Layout引擎。否则,更多的还是使用第三方库
4.Masonry
使用Masonry能够让约束创建变得很容易。但是,为了更好的利用AutoLayout,很多约束相关的基础知识要了解,这样能够帮助你实现更复杂更灵活的布局。
约束优先级
NSLayoutConstraint有个属性是priority,类型是UILayoutPriority,本质上其实是float类型
typealias UILayoutPriority = Float
可以去取如下值,当然也可以直接设置float值
enum {
   UILayoutPriorityRequired = 1000,
   UILayoutPriorityDefaultHigh = 750,
   UILayoutPriorityDefaultLow = 250,
   UILayoutPriorityFittingSizeLevel = 50,
};
typedef float UILayoutPriority;
用处:当两个约束发生冲突的时候,会break优先级低的约束
举个例子先,
例如,我希望有这样的一个View
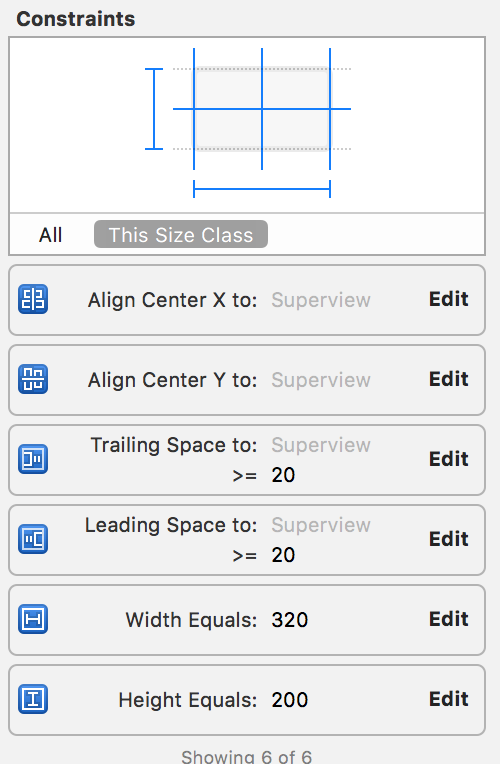
1.水平垂直居中
2.宽度320,高度200
3.距离左右的最小间隔大于等于20(为了适配小屏幕)
这时候,添加的约束如下
然后,我们看看预览
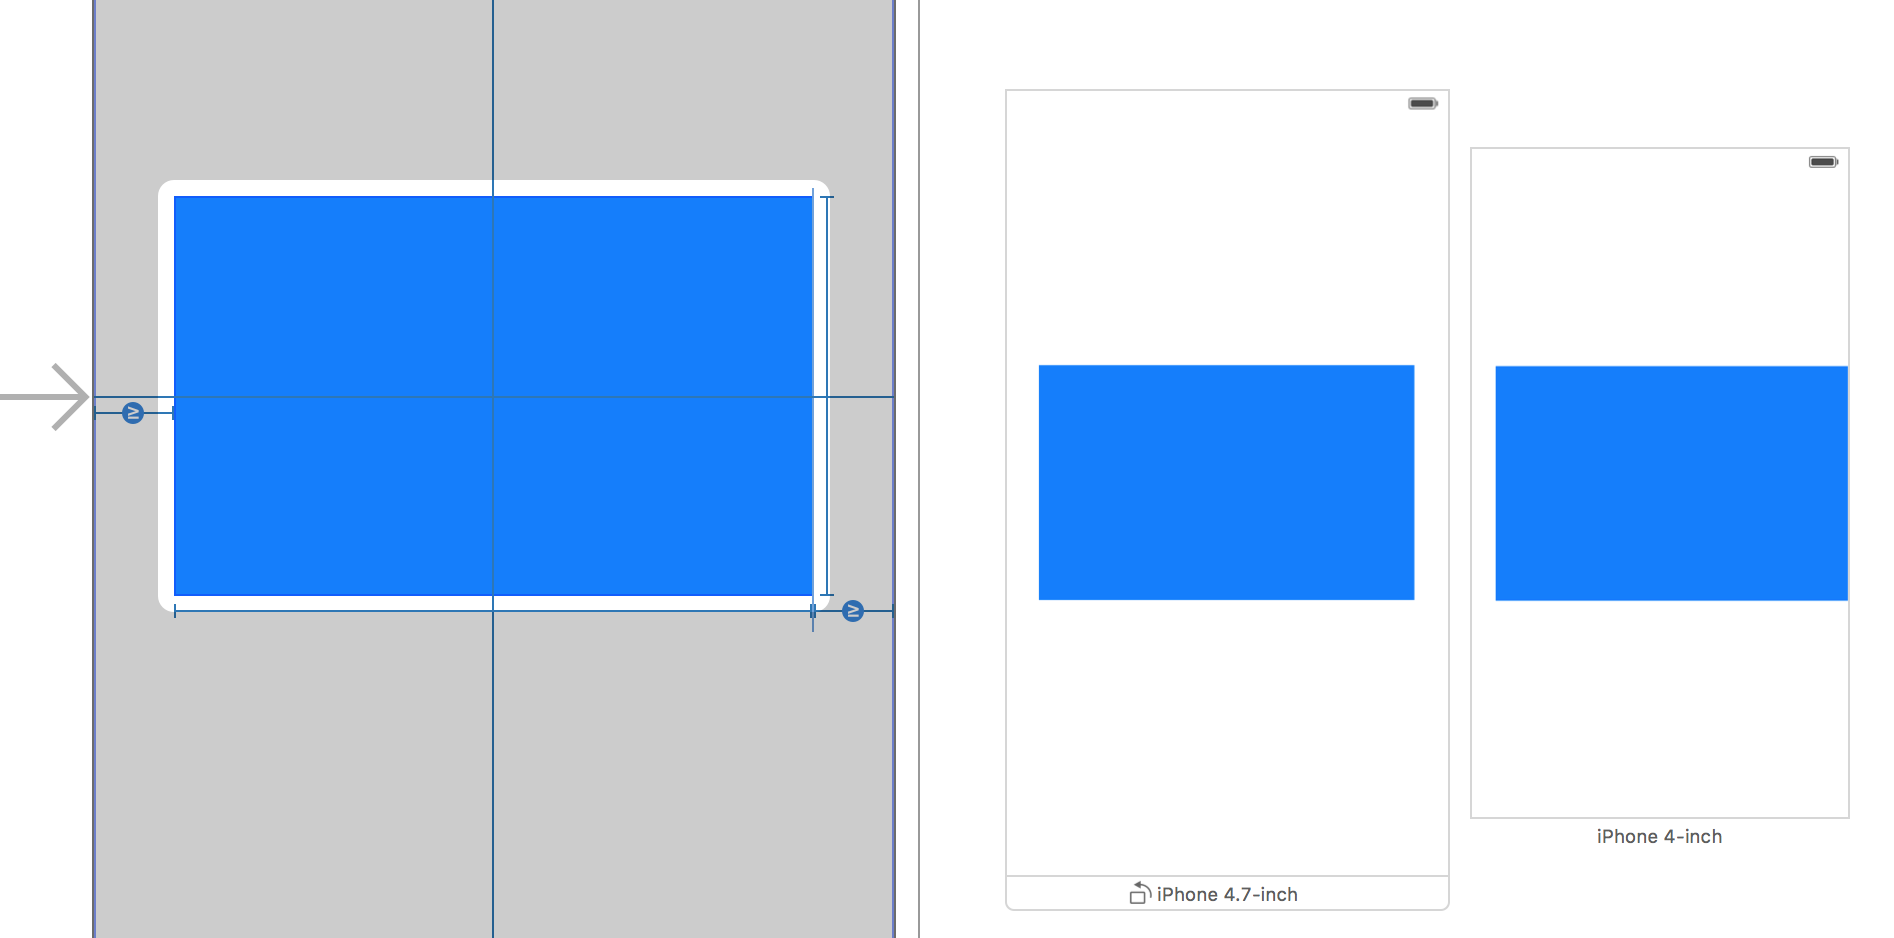
在4s上,预览是不正确的,但是在大屏上,一切正常
如果这时候运行4s模拟器,会发现Log
2016-06-03 23:01:40.339 OCTest[1004:26277] Unable to simultaneously satisfy constraints.
    Probably at least one of the constraints in the following list is one you don't want.
    Try this:
        (1) look at each constraint and try to figure out which you don't expect;
        (2) find the code that added the unwanted constraint or constraints and fix it.
(
    "<NSLayoutConstraint:0x79159c40 H:|-(>=20)-[UIView:0x79159c70]   (Names: '|':UIView:0x79158e50 )>",
    "<NSLayoutConstraint:0x79159dc0 UIView:0x79159c70.centerX == UIView:0x79158e50.centerX>",
    "<NSLayoutConstraint:0x79159e50 H:[UIView:0x79159c70(320)]>",
    "<NSLayoutConstraint:0x79144ba0 'UIView-Encapsulated-Layout-Width' H:[UIView:0x79158e50(320)]>"
)
Will attempt to recover by breaking constraint
<NSLayoutConstraint:0x79159e50 H:[UIView:0x79159c70(320)]>
Make a symbolic breakpoint at UIViewAlertForUnsatisfiableConstraints to catch this in the debugger.
The methods in the UIConstraintBasedLayoutDebugging category on UIView listed in <UIKit/UIView.h> may also be helpful.
原因不难发现,
1.4s上屏幕宽度是320,如果要保证View的左右距离边框大于等于20,那么View的宽度小于等于280
2. View还有个约束是宽度为320
这就是优先级的作用了,我们设置宽度的优先级更低,这样在有约束和宽度发生冲突的时候,默认break宽度约束
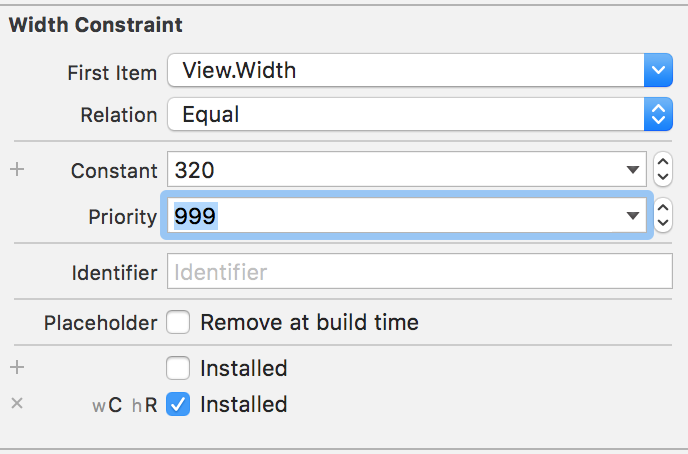
在IB上,可以这么设置
由于默认的priority是1000,这里我们只需要将其设置为999就可以了
然后,预览和运行后都正常了
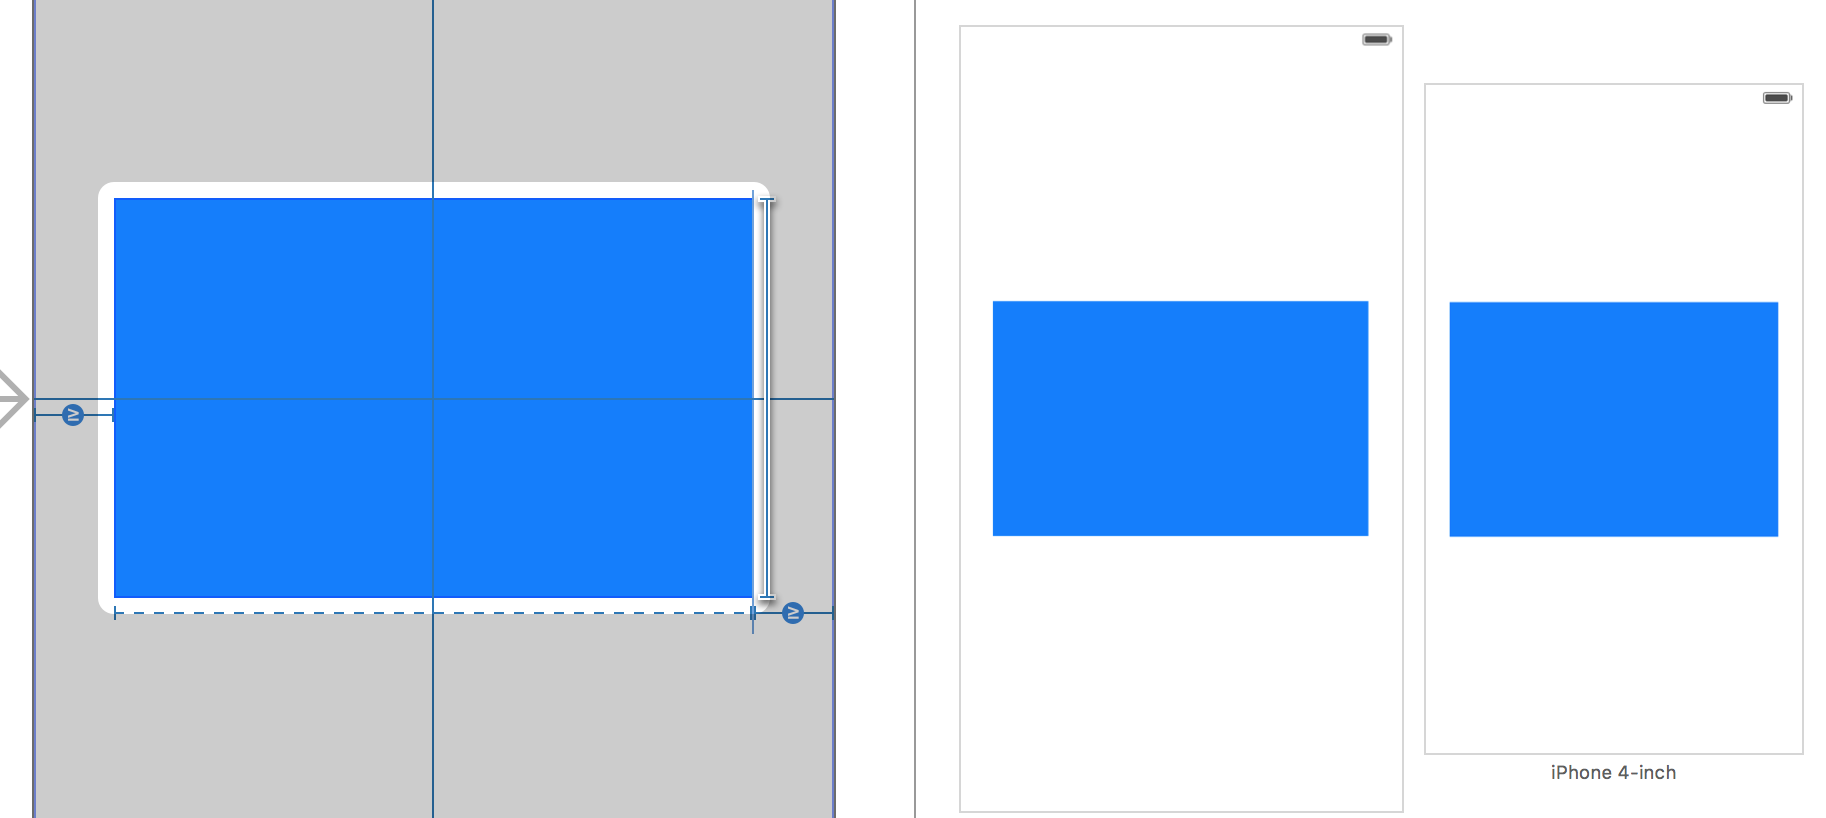
Tips:在IB上,如果你看到一个约束的是虚线表示的时候,那么这个约束的优先级是小于默认的
Intrinsic Size(内在大小)
我们知道,UILabel和UIButton在设置约束的时候,只需要确定位置就足矣了,而不需要设置大小的约束。因为,UILabel和UIButton有内在大小
内在大小是UIView的一个方法,也就是说,你可以通过继承,为UIView及其子类返回自定义的内在大小
-(CGSize)intrinsicContentSize{
    return [super intrinsicContentSize];
}
一个很典型的例子,假如我只为一个UIView设置水平和垂直居中
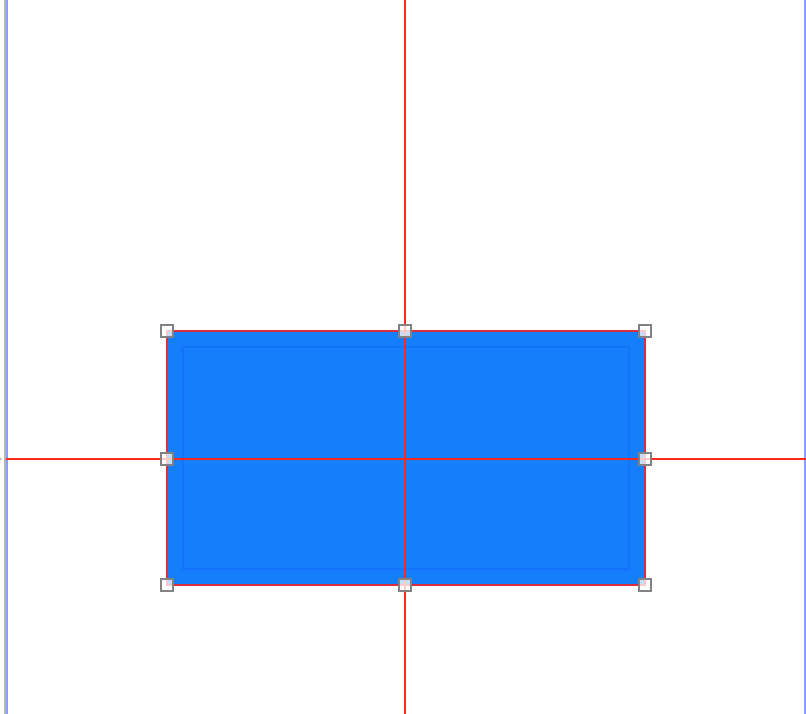
这时候,你会发现,约束是红色的,也就是只确定了位置,没确定大小,autolayout无法确认view的状态
这时候,在IB上设置内置大小为300*200,设置内在大小的位置在下图最下一个选项 Intrinsic size
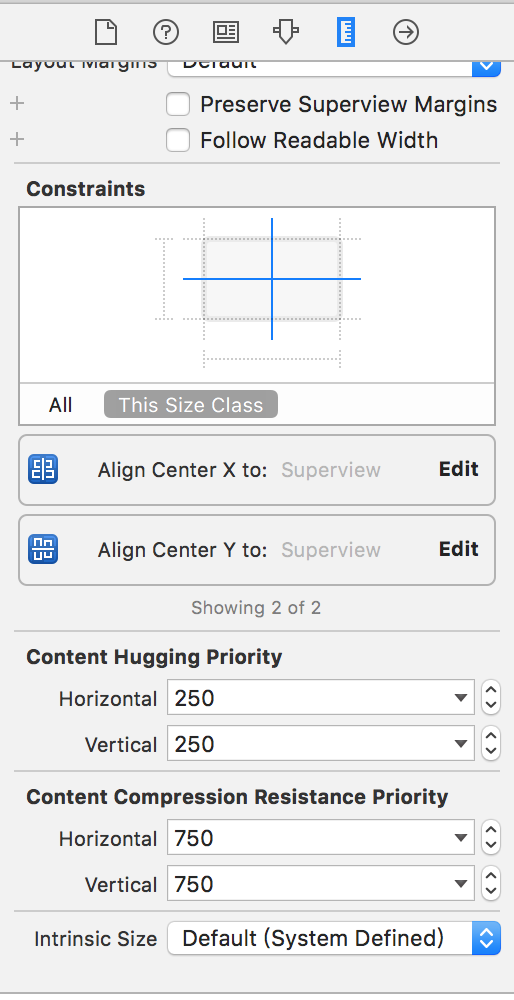
设置完以后,发现IB正常了。
这样设置并不会影响运行时,只会去除IB警告
所以,我们新建一个UIView子类,然后将该视图的类修改
@interface AutoAdjustView : UIView
@end
@implementation AutoAdjustView
-(CGSize)intrinsicContentSize{
    return CGSizeMake(300, 200);
}
@end
在运行发现一切正常。
Intrinsic Size有两个很常见的使用场景
场景一,为UILabe,UIButton等设置额外的Padding
举个例子,一个默认的UIButton,设置文字后的效果是这样子的
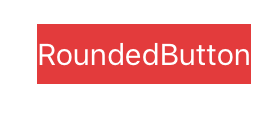
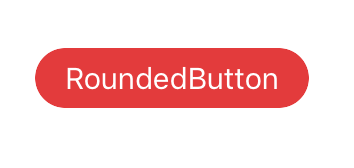
当我们写一个子类,重载intrinsicContentSize
@implementation RoundButton
-(CGSize)intrinsicContentSize{
CGSize size = [super intrinsicContentSize];
size.width += size.height;
return size;
}
-(void)layoutSubviews{
[super layoutSubviews];
self.layer.cornerRadius = ceil(self.bounds.size.height/2);
self.layer.masksToBounds = YES;
}
@end
效果是是这样子的,可以看到,我们不管实际宽度多少,都添加了额外的padding。
场景二,让父视图根据子视图来自适应自己的大小(为了方便,我在IB上拖拽了,代码实现类似)
首先,拖拽一个背景色为蓝色的view作为父视图,然后父视图中添加一个label。
父视图的设置
1.水平垂直居中
2.Intrinsic Size 为0,0
Label的设置
3.距离top,bottom,leading,trailing,距离为20
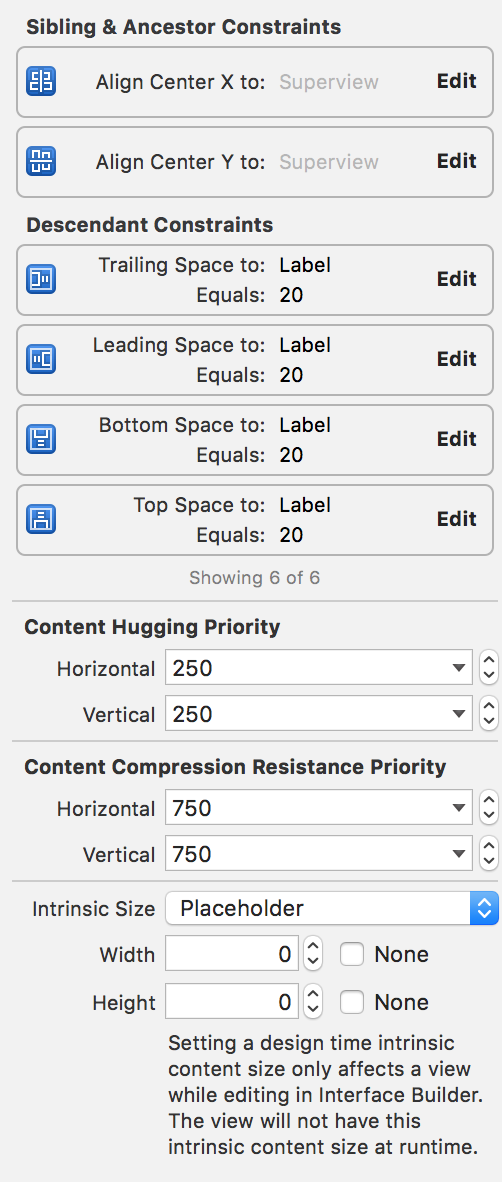
这时候,预览如下(仅仅修改label文字)
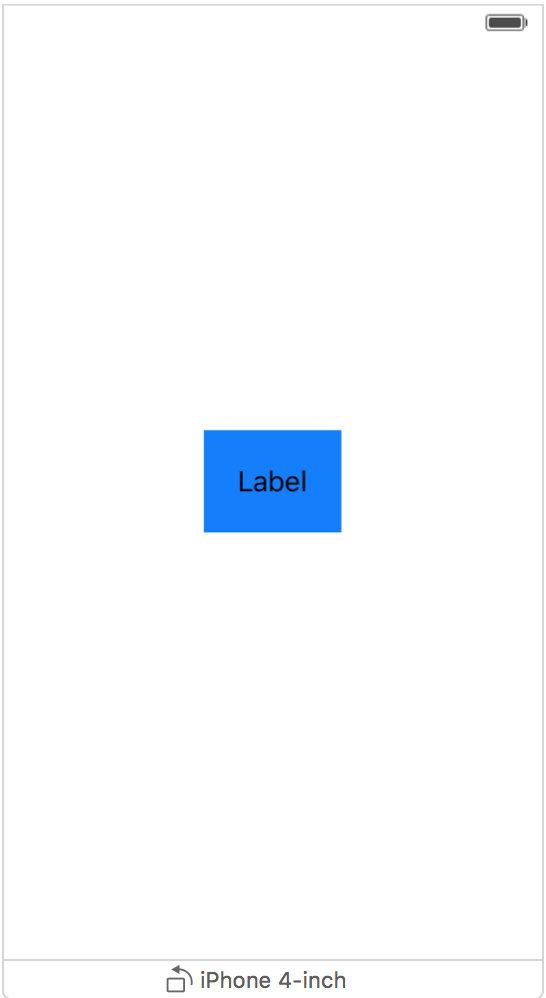

可以看到,我们并没有设置蓝色视图的高度宽度,它可以自适应内部包含视图。MBProgressHUD的中间区域自适应大小就是这么做的。
Hugging Priority
UIView有一个方法是
setContentHuggingPriority: forAxis:
Sets the priority with which a view resists being made larger than its intrinsic size.
(当View的大小大于内置大小的时候,抗拒变大的优先级,也就是说,优先级越大,抗拒能力越强)
其中,priority是UILayoutPriority,和上文的一致。Axis是坐标系
typedef NS_ENUM(NSInteger, UILayoutConstraintAxis) {
UILayoutConstraintAxisHorizontal = 0,
 UILayoutConstraintAxisVertical = 1
};
就是,你可以分别设置水平垂直的优先级。
举个例子
IB拖拽红蓝两个View
蓝色设置如下
1.距离顶部8
2.距离左边20
3.内置大小120*50
红色设置如下
1.距离顶部8
2.距离右面20
3.内置大小120*50 这时候4.7英寸屏幕预览如下
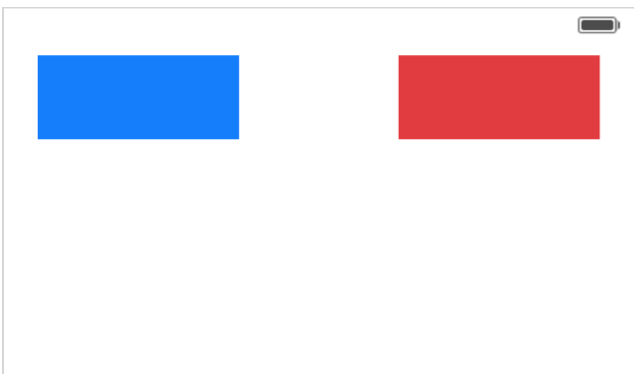
接下来,添加两个View的水平间隔为10
可以看到,约束发生冲突了,因为两个view的抗拉伸优先级是一样的。
由于默认的优先级值是250,所以,我们选中蓝色View,设置优先级为249的时候,会拉伸蓝色自己,如果是251,则会拉伸红色

Compression Resistance Priority
Sets the priority with which a view resists being made smaller than its intrinsic size.
也就是说和上文提到的Hugging Priority类似,只不过这个是抗压缩优先级,这里再举例子了。
- (void)setContentCompressionResistancePriority:(UILayoutPriority)priority forAxis:(UILayoutConstraintAxis)axis
systemLayoutSizeFittingSize
很多时候,比如UITableviewCell,比如UICollectionViewCell,我们需要知道当前视图内部子视图的最合适的的高度是多少。很幸运,UIView为我们提供了这个方法
systemLayoutSizeFittingSize
Returns the size of the view that satisfies the constraints it holds.
The size of the view that satisfies the constraints it holds.
也就是说,根据子视图的约束,按照fittings Size来返回最合适的大小。
其中fittings Size可选值如下
const CGSize UILayoutFittingCompressedSize;//满足约束的最可能小的大小
const CGSize UILayoutFittingExpandedSize;//满足约束的最可能大的大小
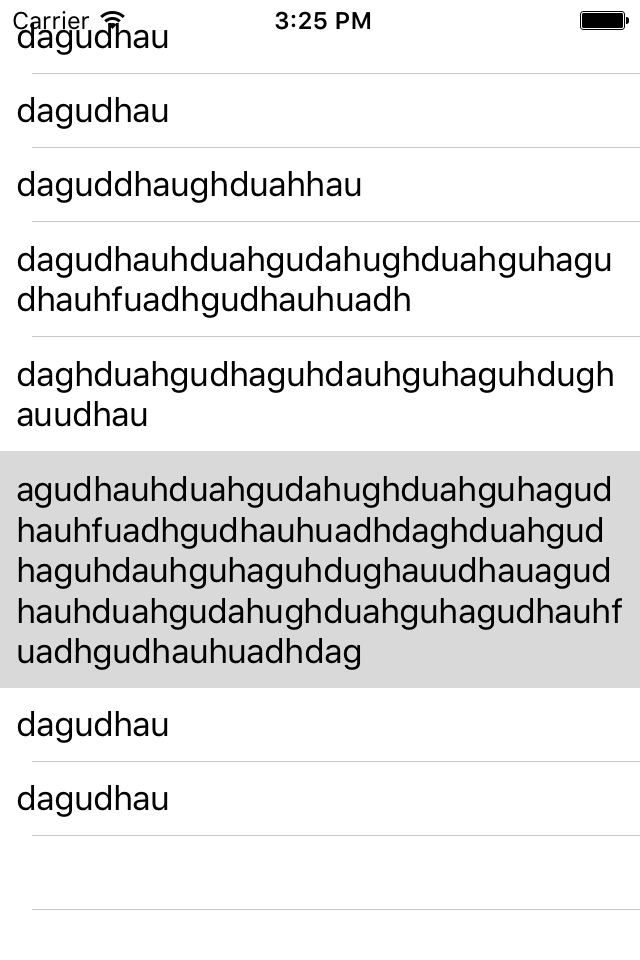
以TableViewCell高度计算为例
假如我们有这样的一个Cell
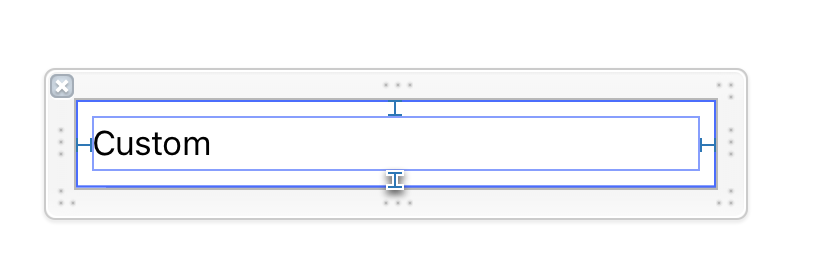
子视图就一个Label,上下左右各具contentView距离为8
那么,如何在heightForRowAtIndexPath里返回高度呢?
方法一,根据Model计算
根据boundingRectWithSize: options: attributes: context:来计算高度,最后加上padding。-iOS 7之前常用,很土,但是通用的方法。
方法二,交给UIKit,自己去计算高度
-(CGFloat)tableView:(UITableView *)tableView heightForRowAtIndexPath:(NSIndexPath *)indexPath{
    return UITableViewAutomaticDimension;
}
-(CGFloat)tableView:(UITableView *)tableView estimatedHeightForRowAtIndexPath:(NSIndexPath *)indexPath{
    return UITableViewAutomaticDimension;
}
方法三,用systemLayoutSizeFittingSize来计算
这里有个地方要注意,我们只有固定了宽度,才能计算出高度,所以,从下文代码里你能看到,我们添加了一个宽度约束小于等于屏幕宽度
注意:当有accessoryView的时候或者Table不是全屏,cell的宽度并不是屏幕宽度
@interface TableViewController ()
@property (strong,nonatomic)CustomCell * sizeCell;
@end
@implementation TableViewController
- (void)viewDidLoad {
[super viewDidLoad];
[self.tableView registerNib:[UINib nibWithNibName:@"CustomCell" bundle:nil] forCellReuseIdentifier:@"cell"];
self.sizeCell = [[NSBundle mainBundle] loadNibNamed:@"CustomCell" owner:self options:nil].firstObject;
CGFloat screenWidth = [UIScreen mainScreen].bounds.size.width;
[self.sizeCell.contentView addConstraint:[NSLayoutConstraint constraintWithItem:self.sizeCell.contentView attribute:
NSLayoutAttributeWidth relatedBy:NSLayoutRelationLessThanOrEqual toItem:nil attribute:NSLayoutAttributeWidth multiplier:1.0 constant:screenWidth]];
}
-(NSArray *)cellTexts{
return @[
@"dagudhau",
@"dagudhau",
@"daguddhaughduahhau",
@"dagudhauhduahgudahughduahguhagudhauhfuadhgudhauhuadh",
@"daghduahgudhaguhdauhguhaguhdughauudhau",
@"agudhauhduahgudahughduahguhagudhauhfuadhgudhauhuadhdaghduahgudhaguhdauhguhaguhdughauudhauagudhauhduahgu
dahughduahguhagudhauhfuadhgudhauhuadhdag",
@"dagudhau",
@"dagudhau",
];
}
#pragma mark - Table view data source
-(CGFloat)tableView:(UITableView *)tableView heightForRowAtIndexPath:(NSIndexPath *)indexPath{
self.sizeCell.customLabel.text = [self cellTexts][indexPath.row];
CGSize fitSize = [self.sizeCell systemLayoutSizeFittingSize:UILayoutFittingCompressedSize];
return fitSize.height;
}
- (NSInteger)numberOfSectionsInTableView:(UITableView *)tableView {
return 1;
}
- (NSInteger)tableView:(UITableView *)tableView numberOfRowsInSection:(NSInteger)section {
return [self cellTexts].count;
}
- (UITableViewCell *)tableView:(UITableView *)tableView cellForRowAtIndexPath:(NSIndexPath *)indexPath {
CustomCell *cell = [tableView dequeueReusableCellWithIdentifier:@"cell" forIndexPath:indexPath];
cell.customLabel.text = [self cellTexts][indexPath.row];
return cell;
}
效果如下
iphone 6

iphone 4s


![[HBLOG]公众号](https://www.liuhaihua.cn/img/qrcode_gzh.jpg)

