有关Activity中View根布局的思考
在Android开发中经常会使用hierarchyviewer查看一下布局的层级树,发现第一层级总是PhoneWindow$DecorView。PhoneWindow$DecorView是java编译后内部类的表示形式,从这里看出Activity中根布局其实就是DecorView了。
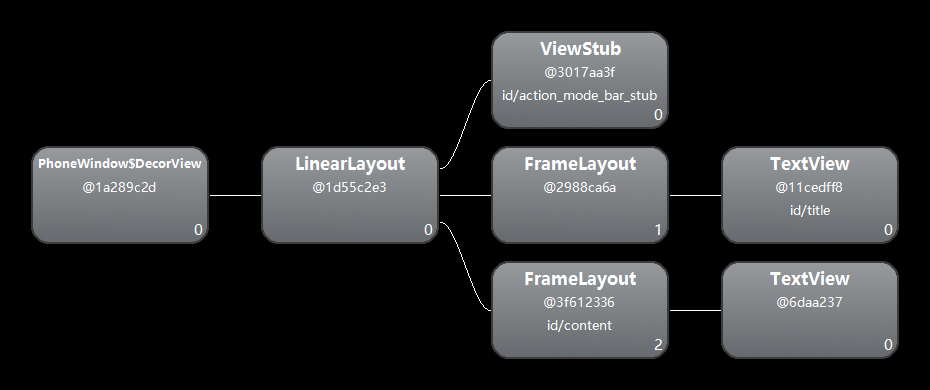
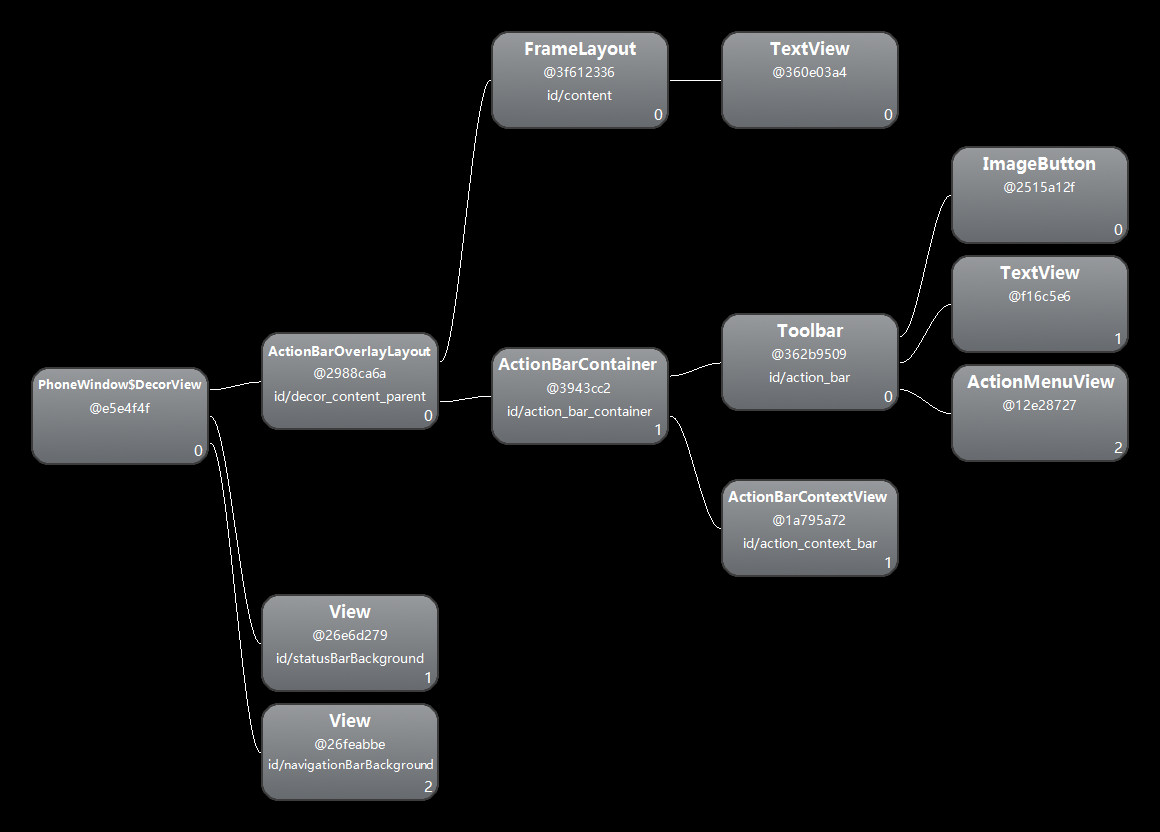
经过上面简单的分析可以知道开发中我们所有的布局都是在DecorView视图下面的,可是问题又来了,当我们设置不同主题时,DecorView中又内置了许多顶级布局,这些布局又是如何加载进来的呢?下面是一个Activity的布局文件,仅仅放置了一个TextView,通过设置的不同主题,我们可以看到视图层级树明显不同。
<TextViewxmlns:android="http://schemas.android.com/apk/res/android"
    android:layout_width="match_parent"
    android:layout_height="match_parent"
    android:gravity="center"
    android:text="@string/hello_world"/>
Theme.Light

Theme.Light.NoTitleBar与Theme.Light.NoTitleBar.Fullscreen

Theme.Material.NoActionBar

Theme.Material.Light

Window
在Activity中设置视图View是通过setContentView()方法,事实上Activity类中使用的是Window的setContentView()方法设置的。
public void setContentView(@LayoutRes int layoutResID) {
 getWindow().setContentView(layoutResID);
 initWindowDecorActionBar();
}
getWindow()方法获取的是一个Window对象,Window类的部分源码如下:
public abstract class Window {
 //...
 //指定Activity窗口的风格类型
 public static final int FEATURE_NO_TITLE = 1;
 public static final int FEATURE_INDETERMINATE_PROGRESS = 5;

 //设置布局文件
 public abstract void setContentView(int layoutResID);

 public abstract void setContentView(Viewview);

 //返回根布局DecorView
 public abstract ViewgetDecorView();

 //请求指定Activity窗口的风格类型
 public boolean requestFeature(int featureId) {
 final int flag = 1<<featureId;
 mFeatures |= flag;
 mLocalFeatures |= mContainer != null ? (flag&~mContainer.mFeatures) : flag;
 return (mFeatures&flag) != 0;
 }
 /**
* PhoneWindow会调用该方法
     * Return the feature bits that are being implemented by this Window.
     * This is the set of features that were given to requestFeature(), and are
     * being handled by only this Window itself, not by its containers.
     *
     * @return int The feature bits.
     */
    protected final int getLocalFeatures(){
        return mLocalFeatures;
    }
 //...
}
Google Developers对于Window的解释是这样的,Window是一个抽象基类,它只是抽象了顶级窗口的界面和行为属性,实现了该类的实例会作为顶级View添加到窗口管理器中。它提供了标准UI的属性如背景色、标题和默认键处理等等。
Window只有一个子类就是android.view.PhoneWindow,当创建一个Window时都会实例化该类。
上面已经介绍了Activity的根布局就是DecorView,而DecorView是PhoneWindow的内部类,Window它只有一个子类就是PhoneWindow。
PhoneWindow
PhoneWindow无论是在eclipse或者Android Studio中都查看不了源码,如果是从网上下载的src,该类的路径是src/com/android/internal/policy/PhoneWindow.java,但是如果下载的是frameworks,路径是/frameworks/policies/base/phone/com/android/internal/policy/impl/PhoneWindow.java。查看源代码看不了是因为该类加上了注解 @hide 。
public class PhoneWindowextends Windowimplements MenuBuilder.Callback {
    // This is the top-level view of the window, containing the window decor.
    private DecorViewmDecor;

    // This is the view in which the window contents are placed. It is either
    // mDecor itself, or a child of mDecor where the contents go.
    private ViewGroupmContentParent;

    private ViewGroupmContentRoot;

    @Override
    public boolean requestFeature(int featureId) {
        if (mContentParent != null) {
            throw new AndroidRuntimeException("requestFeature() must be called before adding content");
        }
        //...
        return super.requestFeature(featureId);
    }

    @Override
    public void setContentView(int layoutResID) {
        if (mContentParent == null) {
            installDecor();
        } else if (!hasFeature(FEATURE_CONTENT_TRANSITIONS)) {
            mContentParent.removeAllViews();
        }
        //...
    }

    private void installDecor() {
        if (mDecor == null) {
            mDecor = generateDecor();
            //...
        }
        if (mContentParent == null) {
            mContentParent = generateLayout(mDecor);
          //...
        }
    }

    protected DecorViewgenerateDecor() {
        return new DecorView(getContext(), -1);
    }

    //返回mContentParent布局视图
    protected ViewGroupgenerateLayout(DecorViewdecor) {
        //...

        /**
         * 根据条件执行不同requestFeature方法
         * requestFeature会计算出getLocalFeatures需要的各种features
         *
         */
        if (a.getBoolean(R.styleable.Window_windowNoTitle, false)) {
            requestFeature(FEATURE_NO_TITLE);
        }
        //...

        // Inflate the window decor.
        int layoutResource;

        //获取requestFeature中计算的features
        int features = getLocalFeatures();

        //根据不同features获取不同的资源文件
        if ((features & (1 << FEATURE_SWIPE_TO_DISMISS)) != 0) {
            layoutResource = R.layout.screen_swipe_dismiss;//①
        } else if ((features & ((1 << FEATURE_LEFT_ICON) | (1 << FEATURE_RIGHT_ICON))) != 0) {
            //...
            layoutResource = R.layout.screen_title_icons;//②
            //...
        } else if ((features & ((1 << FEATURE_PROGRESS) | (1 << FEATURE_INDETERMINATE_PROGRESS))) != 0
                && (features & (1 << FEATURE_ACTION_BAR)) == 0) {
            layoutResource = R.layout.screen_progress;//③
        } else if ((features & (1 << FEATURE_CUSTOM_TITLE)) != 0) {
            //...
            layoutResource = R.layout.screen_custom_title;//④
            //...
        } else if ((features & (1 << FEATURE_NO_TITLE)) == 0) {
            //...
            if ((features & (1 << FEATURE_ACTION_BAR)) != 0) {
                layoutResource = a.getResourceId(
                        R.styleable.Window_windowActionBarFullscreenDecorLayout,//⑤ screen_toolbar
                        R.layout.screen_action_bar);//⑥
            } else {
                layoutResource = R.layout.screen_title;//⑦
            }
            //...
        } else if ((features & (1 << FEATURE_ACTION_MODE_OVERLAY)) != 0) {
            layoutResource = R.layout.screen_simple_overlay_action_mode;//⑧
        } else {
            layoutResource = R.layout.screen_simple;//⑨
        }

        Viewin = mLayoutInflater.inflate(layoutResource, null);
        decor.addView(in, new ViewGroup.LayoutParams(MATCH_PARENT, MATCH_PARENT));
        //赋值到内容区根布局
        mContentRoot = (ViewGroup) in;

        //查找到contentParent并返回
        //contentParent就是我们通过hierarchyviewer看到的@id/content
        ViewGroupcontentParent = (ViewGroup)findViewById(ID_ANDROID_CONTENT);
        if (contentParent == null) {
            throw new RuntimeException("Window couldn't find content container view");
        }
        return contentParent;
    }
    private final class DecorView extends FrameLayout implements RootViewSurfaceTaker{
        //...
    }
}
从上面源代码中可以知道DecorView其实就是一个FrameLayout的子类,mContentRoot其实是DecorView的一个子View。
private ViewGroupmContentRoot;
Viewin = mLayoutInflater.inflate(layoutResource, null);
decor.addView(in, new ViewGroup.LayoutParams(MATCH_PARENT, MATCH_PARENT));
//赋值到内容区根布局
mContentRoot = (ViewGroup) in;
通过hierarchyviewer看到的@id/content其实就是contentParent,在开发中layout资源文件的布局都是contentParent属性的子View。
public static final int ID_ANDROID_CONTENT = com.android.internal.R.id.content;
ViewGroupcontentParent = (ViewGroup)findViewById(ID_ANDROID_CONTENT);
if (contentParent == null) {
 throw new RuntimeException("Window couldn't find content container view");
}
通过上面的源码我们可以很深入的分析出平常开发中为什么有些代码的先后顺序绝对不可以颠倒。
requestWindowFeature为什么必须放在setContentView之前
在Activity中requestWindowFeature其实调用的是Window的requestFeature方法。
public final boolean requestWindowFeature(int featureId) {
 return getWindow().requestFeature(featureId);
}
而window的requestFeature会最总计算出getLocalFeatures的features值。在setContentView方法中会计算出mContentParent和mContentRoot的值,而setContentView在计算上述两个属性值之前根据features值进行判断。
@Override
public boolean requestFeature(int featureId) {
 if (mContentParent != null) {
 throw new AndroidRuntimeException("requestFeature() must be called before adding content");
 }
 //...
 return super.requestFeature(featureId);
}
requestFeature会判断mContentParent,所以两个方法一点颠倒,这里的mContentParent就不是null,就会抛出异常。
为什么不同Theme主题会加载不同的顶级布局
因为在Android系统中设置了不同的主题Window中feature不同,如在Activity中设置requestWindowFeature(Window.FEATURE_NO_TITLE),事实上跟在主题中设置Theme.Light.NoTitleBar表现效果一样。有PhoneWindow的源代码知道不同feature加载的系统顶级布局也不一样。
//根据不同features获取不同的资源文件
if ((features & (1 << FEATURE_SWIPE_TO_DISMISS)) != 0) {
 layoutResource = R.layout.screen_swipe_dismiss;//①
} else if ((features & ((1 << FEATURE_LEFT_ICON) | (1 << FEATURE_RIGHT_ICON))) != 0) {
 //...
 layoutResource = R.layout.screen_title_icons;//②
 //...
} else if ((features & ((1 << FEATURE_PROGRESS) | (1 << FEATURE_INDETERMINATE_PROGRESS))) != 0
 && (features & (1 << FEATURE_ACTION_BAR)) == 0) {
 layoutResource = R.layout.screen_progress;//③
} else if ((features & (1 << FEATURE_CUSTOM_TITLE)) != 0) {
 //...
 layoutResource = R.layout.screen_custom_title;//④
 //...
} else if ((features & (1 << FEATURE_NO_TITLE)) == 0) {
 //...
 if ((features & (1 << FEATURE_ACTION_BAR)) != 0) {
 layoutResource = a.getResourceId(
 R.styleable.Window_windowActionBarFullscreenDecorLayout,//⑤ screen_toolbar
 R.layout.screen_action_bar);//⑥
 } else {
 layoutResource = R.layout.screen_title;//⑦
 }
 //...
} else if ((features & (1 << FEATURE_ACTION_MODE_OVERLAY)) != 0) {
 layoutResource = R.layout.screen_simple_overlay_action_mode;//⑧
} else {
 layoutResource = R.layout.screen_simple;//⑨
}
而事实上在frameworks/base/core/res/layout/目录下面有10种同布局,上面列出来了9种,还有一种是screen.xml,源码来自Android5.1.0。
当我们设置主题为Theme.Light.NoTitleBar,加载的布局文件是screen_simple.xml文件,文件内容如下。
<LinearLayoutxmlns:android="http://schemas.android.com/apk/res/android"
    android:layout_width="match_parent"
    android:layout_height="match_parent"
    android:fitsSystemWindows="true"
    android:orientation="vertical">
    <ViewStubandroid:id="@+id/action_mode_bar_stub"
              android:inflatedId="@+id/action_mode_bar"
              android:layout="@layout/action_mode_bar"
              android:layout_width="match_parent"
              android:layout_height="wrap_content"
              android:theme="?attr/actionBarTheme"/>
    <FrameLayout
        android:id="@android:id/content"
        android:layout_width="match_parent"
        android:layout_height="match_parent"
        android:foregroundInsidePadding="false"
        android:foregroundGravity="fill_horizontal|top"
        android:foreground="?android:attr/windowContentOverlay"/>
</LinearLayout>
跟文章开始时根据hierarchyviewer截图能看到的布局视图一样,如果我们设置主题Theme.Light,加载的布局文件是screen_title.xml,文件内容如下:
<LinearLayoutxmlns:android="http://schemas.android.com/apk/res/android"
    android:orientation="vertical"
    android:fitsSystemWindows="true">
    <!-- Popout bar for action modes -->
    <ViewStubandroid:id="@+id/action_mode_bar_stub"
              android:inflatedId="@+id/action_mode_bar"
              android:layout="@layout/action_mode_bar"
              android:layout_width="match_parent"
              android:layout_height="wrap_content"
              android:theme="?attr/actionBarTheme"/>
    <FrameLayout
        android:layout_width="match_parent"
        android:layout_height="?android:attr/windowTitleSize"
        style="?android:attr/windowTitleBackgroundStyle">
        <TextViewandroid:id="@android:id/title"
            style="?android:attr/windowTitleStyle"
            android:background="@null"
            android:fadingEdge="horizontal"
            android:gravity="center_vertical"
            android:layout_width="match_parent"
            android:layout_height="match_parent"/>
    </FrameLayout>
    <FrameLayoutandroid:id="@android:id/content"
        android:layout_width="match_parent"
        android:layout_height="0dip"
        android:layout_weight="1"
        android:foregroundGravity="fill_horizontal|top"
        android:foreground="?android:attr/windowContentOverlay"/>
</LinearLayout>
小结
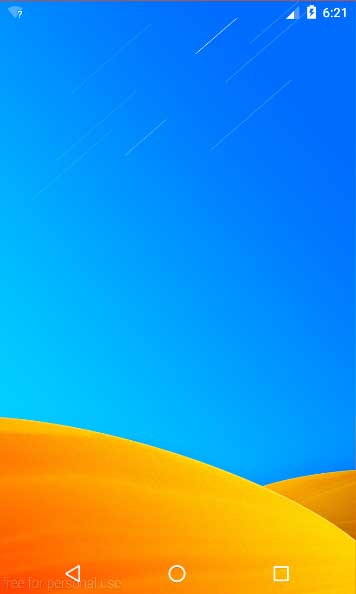
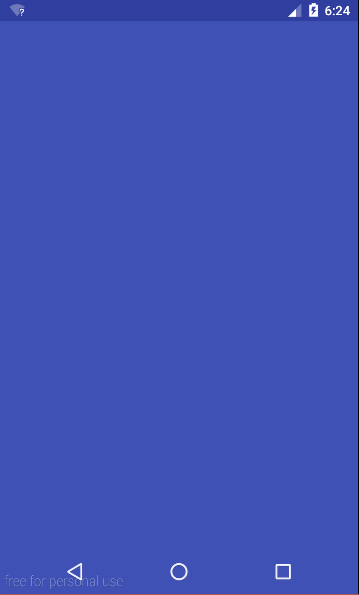
有关Activity中View根布局的思考就记录这么多了,对于根布局的了解先深入到这里,那么知道了这些在以后的开发中有什么作用呢,沉寖式状态栏作为Android开发者应该不陌生了吧,对于API19及其以上都支持,可是支持的效果不太好,下一篇我们就可以根据目前对于Activity中根布局的理解来探索一下沉寖式状态栏,这里先上两张图,开发中下面两种效果也很常见。


本文地址:
参考资料
Android减少布局层次–有关Activity根视图DecorView的思考
Android 从Activity 获取 rootView 根节点
Android中将布局文件/View添加至窗口过程分析 —- 从setContentView()谈起


![[HBLOG]公众号](https://www.liuhaihua.cn/img/qrcode_gzh.jpg)

