React Native之WebStorm配置
WebStormIDE直接完成编码+运行项目工作。
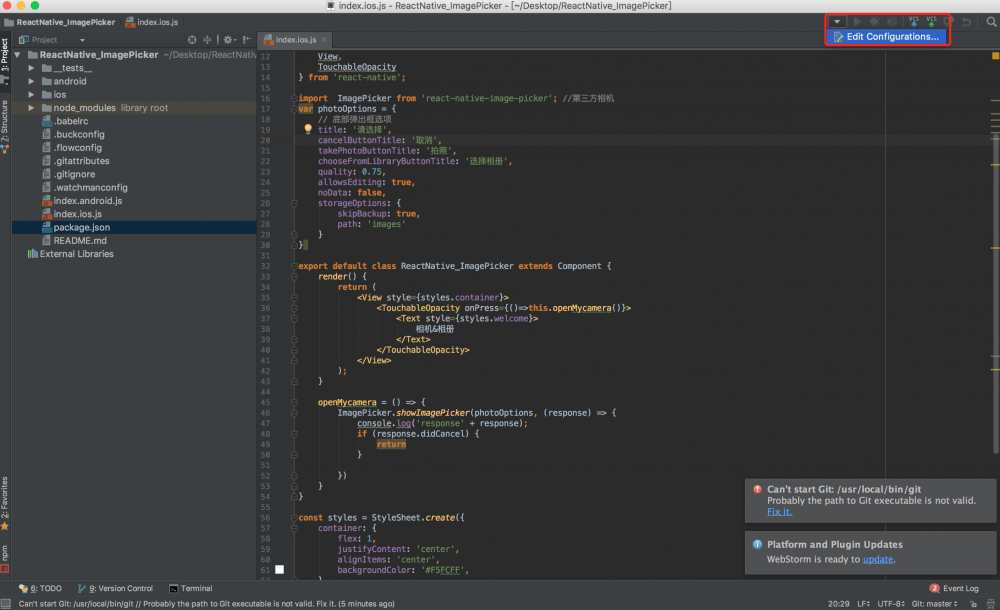
一、首先点击WebStorm右上方的下拉箭头弹出的Edit Configurations
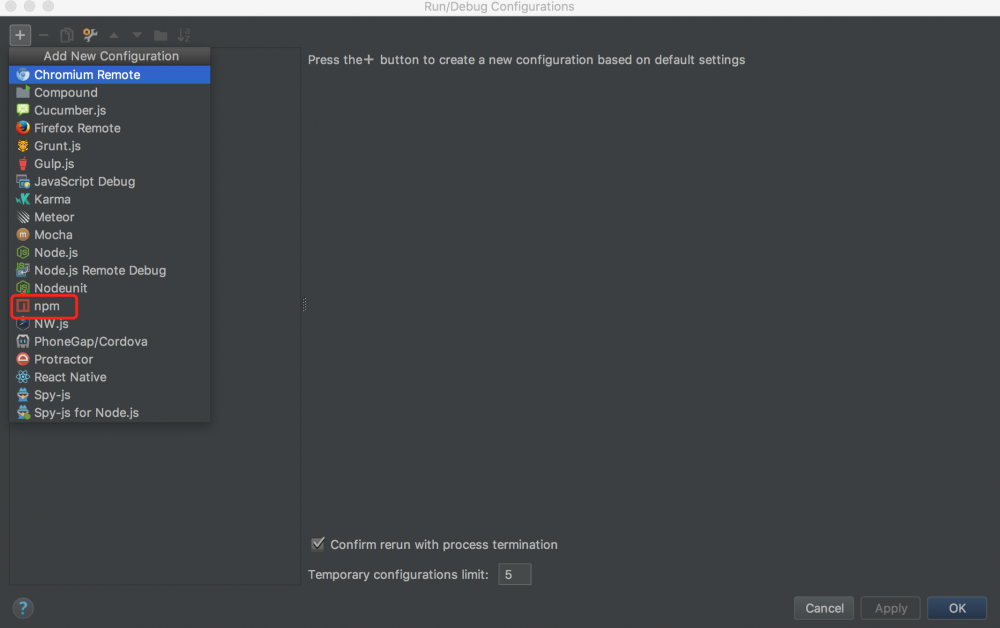
二、然后会进入一个配置页面.点击左上方的+.在弹出的列表中选中npm
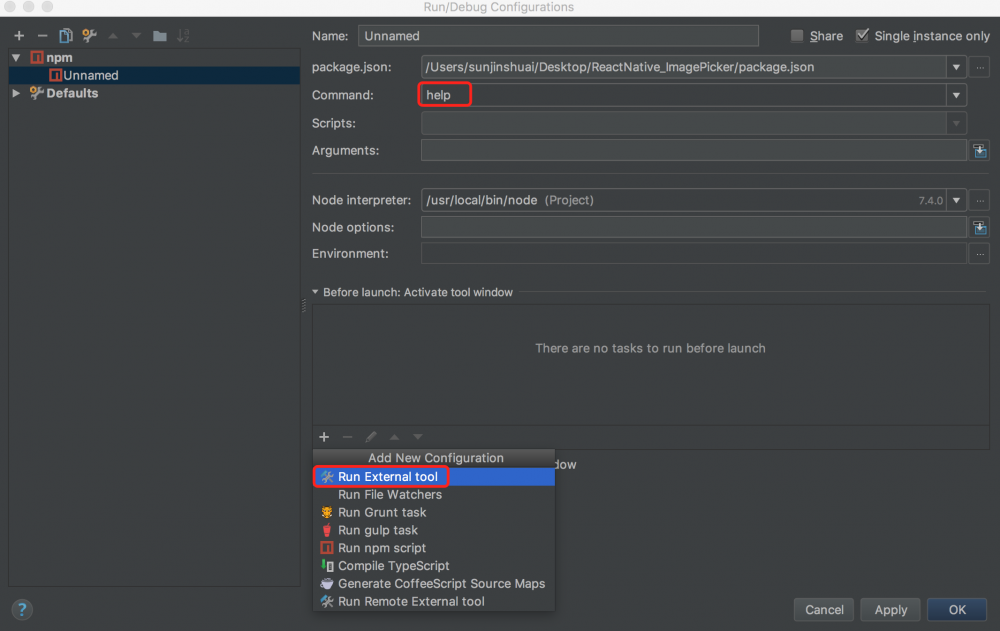
三、在右边的配置框中,先选择Command为help.接着点击下方的+号.再点击Run External tool.
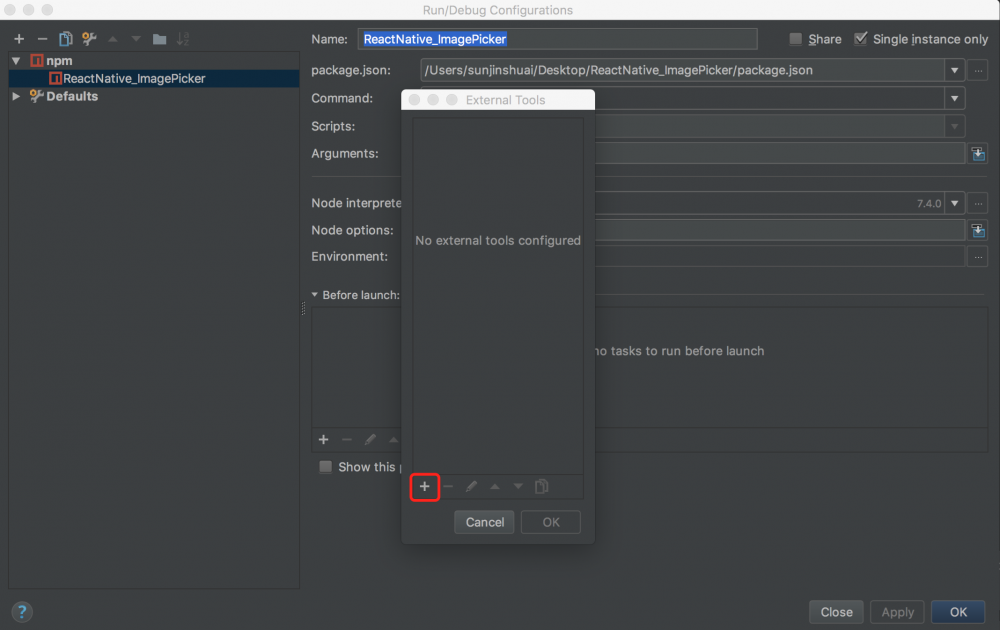
四、在弹出框中选择+号
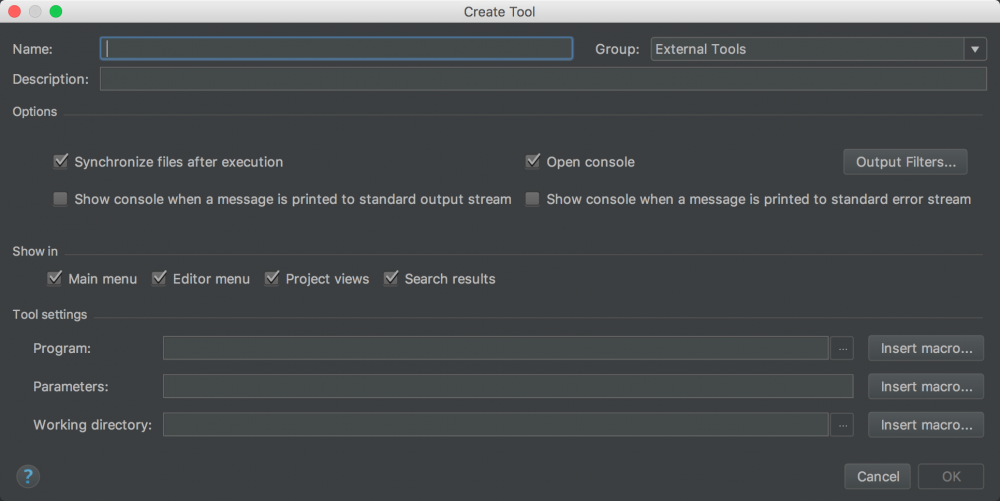
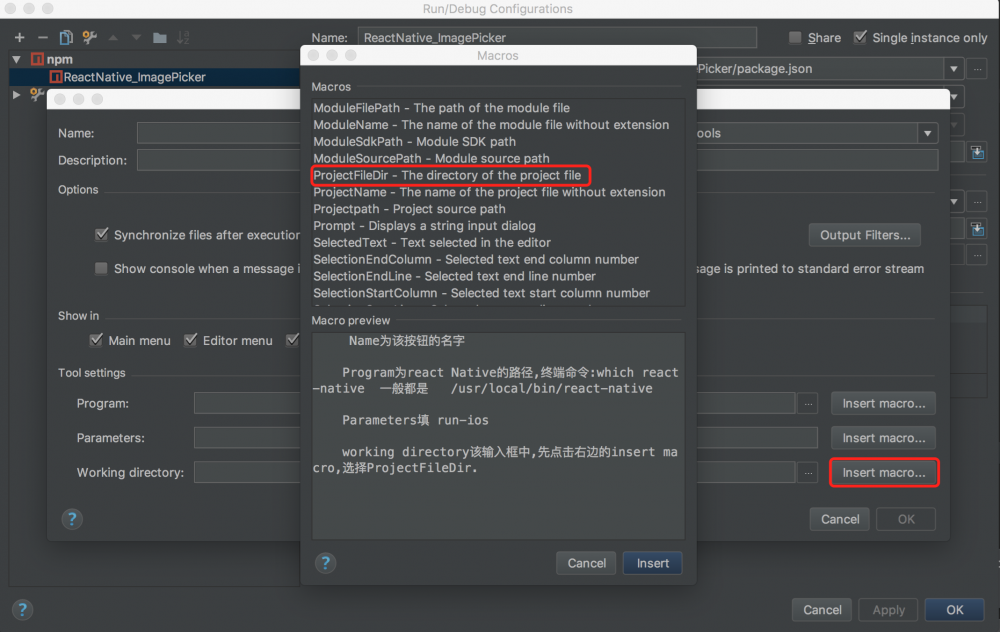
五、在弹出的配置框中,填写相应信息
注:
1、Name为该按钮的名字
2、Program为react Native的路径,终端命令:which react-native 一般都是
/usr/local/bin/react-native
3、Parameters填 run-ios
4、working directory该输入框中,先点击右边的insert macro,选择ProjectFileDir.
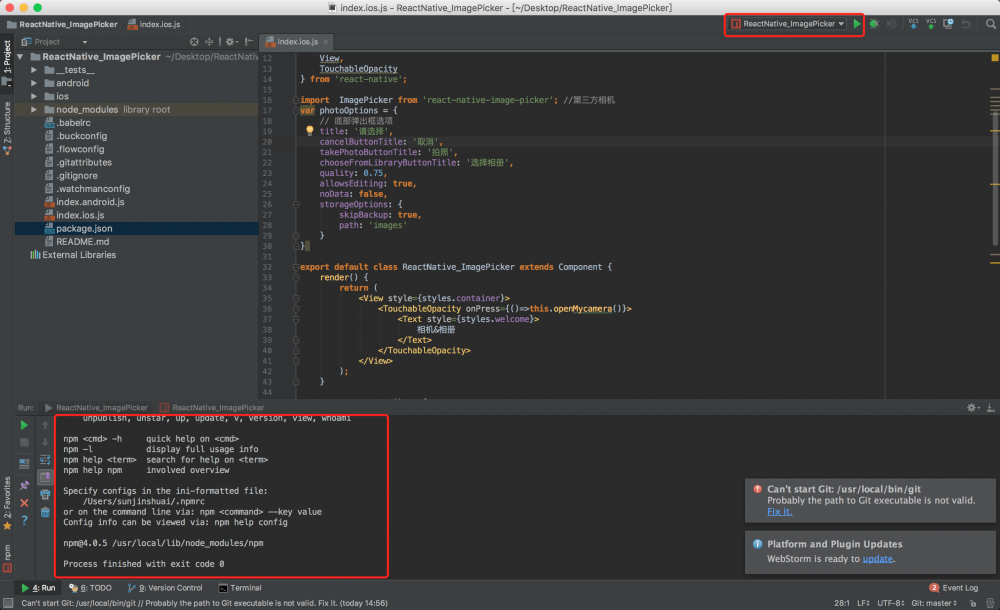
六、点击OK.接下来点击Apply回到主界面.可以看见右上方的按钮.点击即可运行项目了
注:
需要更换不同的机型看看运行效果,这时,需要先切换至Terminal.然后敲入相应命令
react-native run-ios --simulator "iPhone 5"
正文到此结束
热门推荐
相关文章
Loading...


![[HBLOG]公众号](https://www.liuhaihua.cn/img/qrcode_gzh.jpg)

