Android tint着色器初探
tint简介
tint着色器对于多数开发者应该都不陌生了,即使没有直接使用过该属性但是也已经在一定程度上见到它所带来的效果了,它是伴随着Android Metrial Design出现的一个新的属性。Metrial Design设计干净简约,界面扁平统一且色彩鲜艳,因此很多控件都是使用高度统一的颜色值控制的,如何跟控件附上与主题匹配的色彩这就是tint所做的事情。
在Android Metrial Design设计规范出现后,官方提供了兼容较低版本的support包,很多情况下我们开发App使用主题都是这么设计的:
<stylename="AppTheme" parent="Theme.AppCompat.Light.DarkActionBar">
 <itemname="colorPrimary">@color/colorPrimary</item>
 <itemname="colorPrimaryDark">@color/colorPrimaryDark</item>
 <itemname="colorAccent">@color/colorAccent</item>
</style>
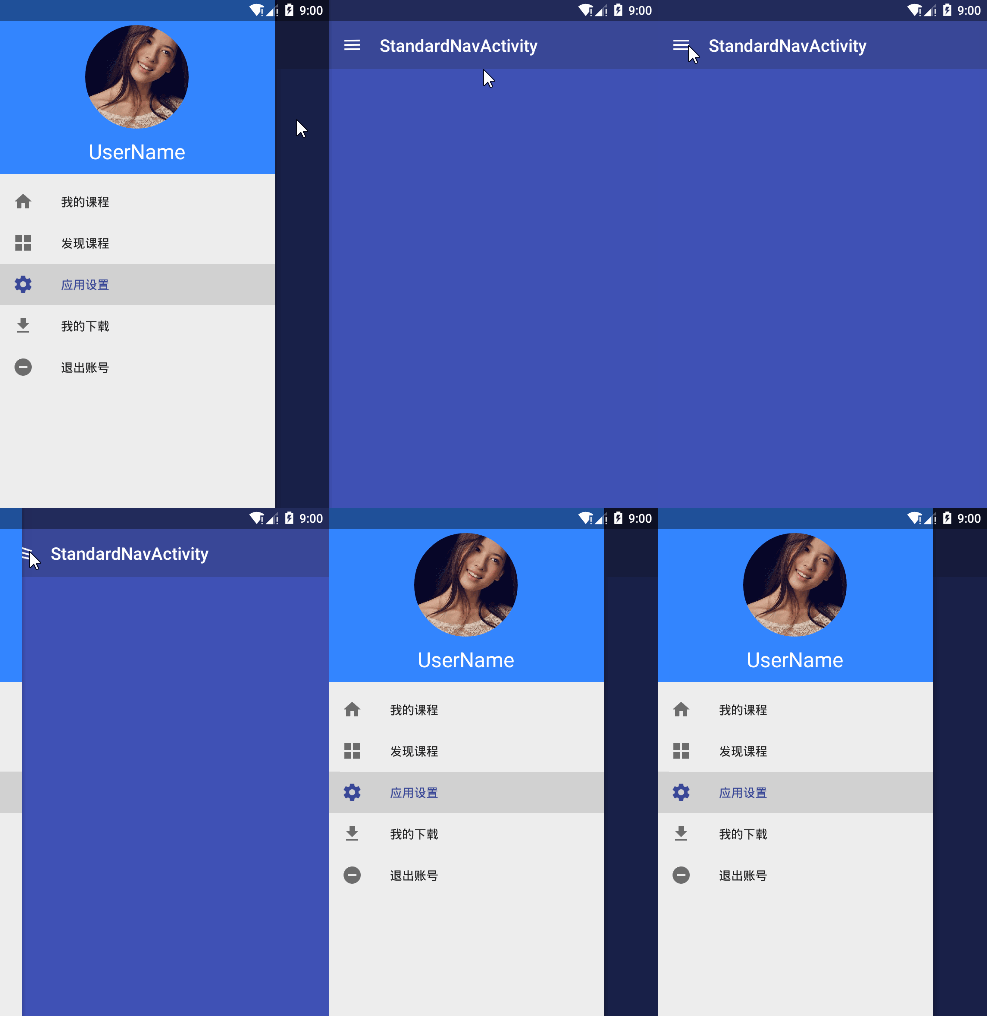
实际上colorAccent这个属性就是通过tint操作变现的,一旦使用了该属性App中文本框单复选按钮等都会自动呈现出该属性值的颜色。特别能够体现tint着色器功能的就是NavigationView,因为该控件列表填充来自menu,不管菜单中使用的是什么颜色的icon,呈现结果都高度统一,如果想设计不同色彩的icon,只需要简单的设置一下setItemIconTintList(null)即可。有关NavigationView的使用详情可以参看 Android Material Design之NavigationView 。

tint的简单使用
在Android5.0以上的系统我们在布局文件中可以使用android:tint和android:tintMode这两个属性,在低版本上面即使使用了support包目前还不能直接使用app:tint或者app:tintMode这两个属性。虽然兼容性的控件使用直接使Java代码硬编码也可以使用,但是不建议使用,因为support包是一个极其不稳定且更新频率很快的包,不同版本中控件命名方式都存在极大的不同。如在support v22中有一个TintManager类,还对应了许多TingXXX控件,但是在support v23中包名和类名都变换掉了,TintManager更改为了AppCompatDrawableManager,TintXXX控件也相应的更改为了AppCompatXXX。
为了支持低版本开发中我们一般使用support包中提供的DrawableCompat类,该类提供了如下两个方法:
public void setTint(Drawable drawable, int tint)
public void setTintList(Drawable drawable, ColorStateList tint)
事实上setTint方法也是调用的setTintList方法。
public void setTint(@ColorInt int tintColor) {
 setTintList(ColorStateList.valueOf(tintColor));
}
ColorStateList就不用多讲了,它提供了一个颜色选择器。使用tint有一个非常好的地方就是我们可以在多状态下只是用一张图片就可以了,相应不同的状态使用tint分别着色,可以有效减少对图片资源的引用。当然了缺点就是现在低版本不支持,而且即使使用support有部分属性还是不能很好的支持,下面会通过具体示例介绍。
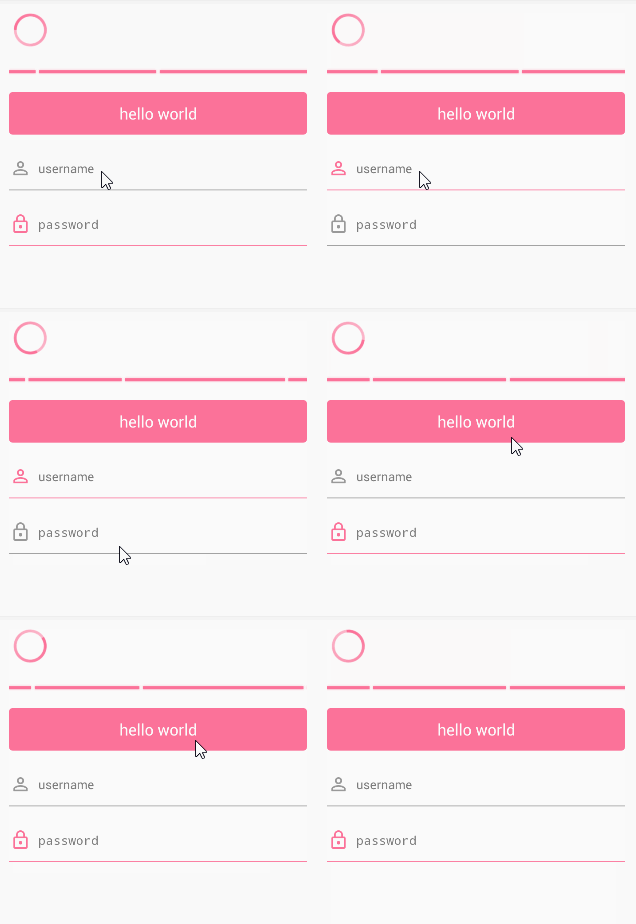
在开发中登录或者注册时文本输入框在设计的时候前面喜欢放置一个小的icon,我们希望在EditText获取焦点的时候,文本框下划线连同icon都更改为focus颜色。
先看一下颜色选择器文件:
<selectorxmlns:android="http://schemas.android.com/apk/res/android">
    <itemandroid:color="@color/color_theme" android:state_focused="true"/>
    <itemandroid:color="@color/gray_dark"/>
</selector>
在布局文件中设置一下EditText需要的相关属性:
<com.sunny.demo.widget.TintEditText
 android:layout_width="match_parent"
 android:layout_height="48dp"
 android:layout_marginTop="15dp"
 android:background="@drawable/ic_edit_text_default"
 android:drawableLeft="@drawable/ic_person_outline_white_24dp"
 android:drawablePadding="8dp"
 android:gravity="center_vertical"
 android:hint="username"
 android:singleLine="true"
 android:textSize="14sp"/>
EditText中设置了一个背景 android:background 和一个左侧图标 android:drawableLeft ,在自定义EditText的时候我们需要将背景和icon获取到然后使用tint着色即可。
public class TintEditText extends EditText {
 public TintEditText(Contextcontext) {
 this(context, null);
 }

 public TintEditText(Contextcontext, AttributeSetattrs) {
 this(context, attrs, android.R.attr.editTextStyle);
 }

 public TintEditText(Contextcontext, AttributeSetattrs, int defStyleAttr) {
 super(context, attrs, defStyleAttr);
 if (isInEditMode()) {
 return;
 }
 loadFromAttribute(context, attrs, defStyleAttr);
 }

 private void loadFromAttribute(Contextcontext, AttributeSetattrs,
 int defStyleAttr) {
 //设置背景
 DrawablebackgroundDrawable = getBackground();
 backgroundDrawable = DrawableCompat.wrap(backgroundDrawable.mutate());
 DrawableCompat.setTintList(backgroundDrawable, ContextCompat.getColorStateList(context, R.color.selector_focus));
 setBackgroundDrawable(backgroundDrawable);

 //设置icon
 Drawable [] drawables=getCompoundDrawables();
 for(int i=0;i<drawables.length;i++){
 if(drawables[i]!=null){
 drawables[i]=DrawableCompat.wrap(drawables[i].mutate());
 DrawableCompat.setTintList(drawables[i], ContextCompat.getColorStateList(context, R.color.selector_focus));
 }
 }
 setCompoundDrawablesWithIntrinsicBounds(drawables[0],drawables[1],drawables[2],drawables[3]);
 }
}
通过上面自定义EditText源码可以看到在进行tint着色之前都会调用DrawableCompat.wrap(drawable.mutate()),mutate方法是为了在着色的时候防止影响原图片,否则原图片也会着色,有时候一个图片资源在App中会被引用多次,但是有些地方并不需要进行重新着色,所以在使用过程中一定不要忘了使用该方法,因为Drawable在内存中是通过ConstantState共享状态的,使用mutate方法后会在对应Drawable子类中重新生成一个ConstantState实例,这样就不会影响到其它源了。
下面是一个ColorDrawable中mutate方法的实现:
 @Override
public Drawablemutate() {
 if (!mMutated && super.mutate() == this) {
 mColorState = new ColorState(mColorState);
 mMutated = true;
 }
 return this;
}
DrawableCompat的wrap方法就是为了着色进行的包装,只有包装后才可以进行着色,下面介绍tint实现机制的时候通过源码介绍更方便。
使用tint方法不一定在所有的控件中都有效,这也是需要慎用的原因之一,在设置ProgressBar的时候,使用tint着色器在某些版本的手机上就会不起作用,查看support V22源码会发现,在进行tintDrawable的时候不是直接使用的DrawableCompat的setTintList方法,而是直接使用tint实现机制直接设置的。
//support v22 TintManager源码
void tintDrawable(final int resId, final Drawabledrawable) {
 PorterDuff.ModetintMode = null;
 tintDrawableUsingColorFilter(drawable, color, tintMode);
 ...
}
虽然在support V23和support V24中AppCompatDrawableManager已经做了更改直接使用的DrawableCompat的setTintList,但是它们的widget包中都没有相对应的ProgressBar兼容控件。如果下载本文示例源代码也会发现,如果ProgressBar使用setTintList在有些手机上是可以看到tint着色后效果的,但是也有很多手机看不到任何画面。

tint实现机制
tint实际上是使用的Android系统自带的PorterDuff.Mode对图片进行混合渲染的,PorterDuff.Mode有16中模式,tint中默认使用的是PorterDuff.Mode.SRC_IN模式,当然了也可以传入其它的PorterDuff.Mode模式,因为tint一般使用颜色来处理图片,所以这里也是借助于系统提供的专有类PorterDuffColorFilter, PorterDuffColorFilter(int color, PorterDuff.Mode mode) 构造方法中默认传入两个值,一个是颜色,一个是PorterDuff.Mode常量,然后与我们特定Drawable进行混合产生最终的效果。
一般在进行tint之前都会对源Drawable进行包装一下,包装后会生成一个TintAwareDrawable的子类DrawableWrapperDonut实例,最终的着色就是在该类的updateTint方法中完成的。
@Override
public Drawablewrap(Drawabledrawable) {
 return DrawableCompatBase.wrapForTinting(drawable);
}

//包装成TintAwareDrawable子类实例
public static DrawablewrapForTinting(Drawabledrawable) {
 if (!(drawableinstanceof TintAwareDrawable)) {
 return new DrawableWrapperDonut(drawable);
 }
 return drawable;
}

class DrawableWrapperDonutextends Drawable
        implements Drawable.Callback, DrawableWrapper, TintAwareDrawable {
 @Override
    public void setTintList(ColorStateListtint) {
        mState.mTint = tint;
        updateTint(getState());
    }

 private boolean updateTint(int[] state) {
        if (!isCompatTintEnabled()) {
            // If compat tinting is not enabled, fail fast
            return false;
        }

        final ColorStateListtintList = mState.mTint;
        final PorterDuff.ModetintMode = mState.mTintMode;

        if (tintList != null && tintMode != null) {
            final int color = tintList.getColorForState(state, tintList.getDefaultColor());
            if (!mColorFilterSet || color != mCurrentColor || tintMode != mCurrentMode) {
                setColorFilter(color, tintMode);
                mCurrentColor = color;
                mCurrentMode = tintMode;
                mColorFilterSet = true;
                return true;
            }
        } else {
            mColorFilterSet = false;
            clearColorFilter();
        }
        return false;
    }
}
//设置颜色滤镜
public void setColorFilter(@ColorInt int color, @NonNull PorterDuff.Modemode) {
 setColorFilter(new PorterDuffColorFilter(color, mode));
}
系统是如何替换为support中兼容控件的呢
这里就有点扯远了,多了解一些也没坏处,事实上只要我们使用的Activity是继承自相应版本的AppCompatActivity类,系统就会自动生成对应support版本的兼容控件。
AppCompatActivity类的onCreate方法:
protected void onCreate(@Nullable BundlesavedInstanceState) {
 final AppCompatDelegatedelegate = getDelegate();
 delegate.installViewFactory();
 ...
}
AppCompatDelegate的实现类AppCompatDelegateImplV7中installViewFactory实现如下:
@Override
public void installViewFactory() {
 LayoutInflaterlayoutInflater = LayoutInflater.from(mContext);
 if (layoutInflater.getFactory() == null) {
 LayoutInflaterCompat.setFactory(layoutInflater, this);
 } else {
 if (!(LayoutInflaterCompat.getFactory(layoutInflater)
 instanceof AppCompatDelegateImplV7)) {
 Log.i(TAG, "The Activity's LayoutInflater already has a Factory installed"
 + " so we can not install AppCompat's");
 }
 }
}
LayoutInflaterFactory.setFactory(layoutInflater, this)中传入的是this,因为setFactory第二个参数是LayoutInflaterFactory对象,该接口只有一个方法就是onCreateView,onCreateView返回一个createView方法,下面是该方法的实现:
public ViewcreateView(Viewparent, final String name, @NonNull Contextcontext,
 @NonNull AttributeSetattrs) {
 final boolean isPre21 = Build.VERSION.SDK_INT < 21;

 if (mAppCompatViewInflater == null) {
 mAppCompatViewInflater = new AppCompatViewInflater();
 }

 // We only want the View to inherit its context if we're running pre-v21
 final boolean inheritContext = isPre21 && shouldInheritContext((ViewParent) parent);

 return mAppCompatViewInflater.createView(parent, name, context, attrs, inheritContext,
 isPre21, /* Only read android:theme pre-L (L+ handles this anyway) */
 true, /* Read read app:theme as a fallback at all times for legacy reasons */
 VectorEnabledTintResources.shouldBeUsed() /* Only tint wrap the context if enabled */
 );
}
在AppCompatViewInflater类的createView方法就可以看到了,如果是TextView就创建一个AppCompatTextView等等。
public final ViewcreateView(Viewparent, final String name, @NonNull Contextcontext,
 @NonNull AttributeSetattrs, boolean inheritContext,
 boolean readAndroidTheme, boolean readAppTheme, boolean wrapContext) {
 final ContextoriginalContext = context;
 switch (name) {
 case "TextView":
 view = new AppCompatTextView(context, attrs);
 break;
 case "ImageView":
 view = new AppCompatImageView(context, attrs);
 break;
 case "Button":
 view = new AppCompatButton(context, attrs);
 break;
 case "EditText":
 view = new AppCompatEditText(context, attrs);
 break;
 case "Spinner":
 view = new AppCompatSpinner(context, attrs);
 break;
 case "ImageButton":
 view = new AppCompatImageButton(context, attrs);
 break;
 case "CheckBox":
 view = new AppCompatCheckBox(context, attrs);
 break;
 case "RadioButton":
 view = new AppCompatRadioButton(context, attrs);
 break;
 case "CheckedTextView":
 view = new AppCompatCheckedTextView(context, attrs);
 break;
 case "AutoCompleteTextView":
 view = new AppCompatAutoCompleteTextView(context, attrs);
 break;
 case "MultiAutoCompleteTextView":
 view = new AppCompatMultiAutoCompleteTextView(context, attrs);
 break;
 case "RatingBar":
 view = new AppCompatRatingBar(context, attrs);
 break;
 case "SeekBar":
 view = new AppCompatSeekBar(context, attrs);
 break;
 }

 return view;
}
有关LayoutInflater.setFactory该方法后续在另起一篇博文介绍,该方法在换肤的时候非常有用。所以走到这里大家就知道了,系统内置会创建对应support包中相对应的兼容控件,因为只要不同support包对外暴露的AppCompatActivity不变,就不用担心会出问题,然而作为开发者却不可以轻易使用内置的兼容控件,否则一旦support包更换麻烦的还是自己。当然了可以使用第三方库,B站开源了一个库可以全面支持tint属性的自定义控件,可以点击这里下载 MagicaSakura 。
示例源代码下载
参考资料
Android的Drawable缓存机制源码分析
Android SDK文档之Drawable Mutations
Android 着色器 Tint 研究
浅谈 Android L 的 Tint(着色)
安卓着色器(tint)使用实践
谈谈Android Material Design 中的Tint(着色)


![[HBLOG]公众号](https://www.liuhaihua.cn/img/qrcode_gzh.jpg)

