Spring Boot 框架快速入门
访问 Spring 生成一个 Spring Boot 的项目。
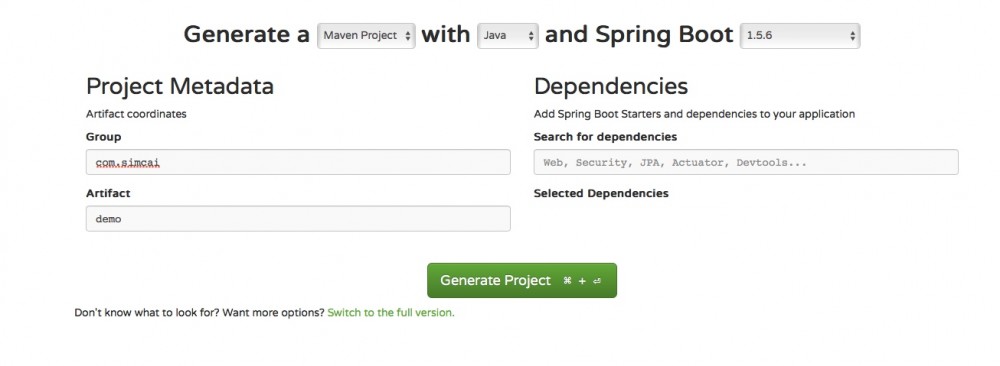
填写 Group 和 Artifact , 然后点 Generate Project 生成你的工程。
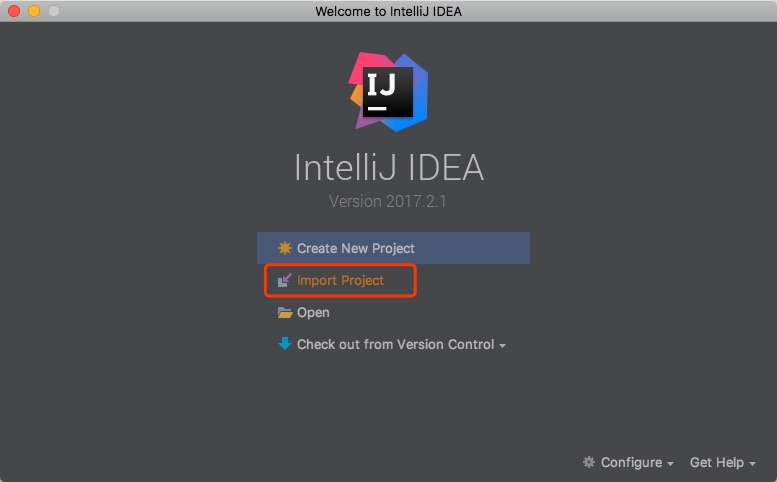
使用 IntelliJ 导入工程。
选择工程目录
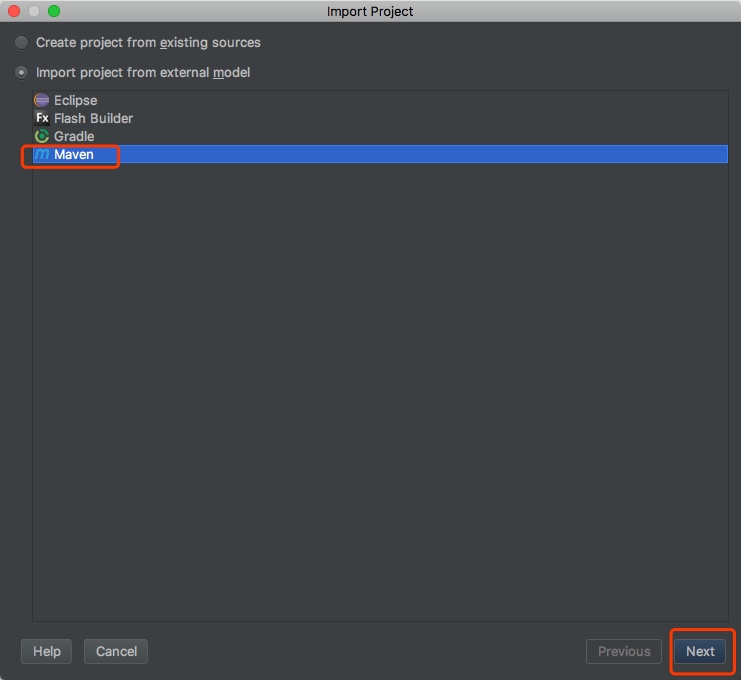
然后反复 Next 吧。
工程目录结构

最后我们的工程目录是这样的。
-
src/main/java下的DemoApplication是程序的入口。 -
src/main/resources下的application.properties是个配置文件。 -
src/test/java下的DemoApplicationTests是单元测试的入口。
配置 pom.xml
打开 pom.xml ,可以看到有两个默认依赖配置
-
spring-boot-starter: 核心模块,包括自动配置支持、日志和YAML -
spring-boot-starter-test: 测试模块, 包括JUnit、Hamcrest、Mockito
<dependencies>
	<dependency>
		<groupId>org.springframework.boot</groupId>
			<artifactId>spring-boot-starter</artifactId>
	</dependency>

	<dependency>
		<groupId>org.springframework.boot</groupId>
			<artifactId>spring-boot-starter-test</artifactId>
			<scope>test</scope>
		</dependency>
</dependencies>
引入 Web 模块
要使用 Web 相关的服务,需要引入 Web 模块,需添加 spring-boot-starter-web 模块:
<dependency>
	<groupId>org.springframework.boot</groupId>
	<artifactId>spring-boot-starter-web</artifactId>
</dependency>
写一个 HelloWorld 服务
- 创建
package命名为controller(可根据个人习惯修改) - 创建
HelloController类,内容如下
@RestController
public class HelloController{

    @RequestMapping("/hello")
    public String index() {
        return "Hello World";
    }

}
- 启动主程序,打开浏览器访问
http://localhost:8080/hello,可以看到页面输出Hello World
所有的学习都是由 Hello World 开始,下次写写如何实现注册登录服务吧。
后续所有 Spring Boot 相关的学习源码,我都会上传到这个仓库地址上 SpringBoot-Learning
正文到此结束
热门推荐


相关文章

近期评论
-
谢谢
-
https://www.newcmy.com/register?aff=HBVX建议您试试草莓云机场,可以流畅观看youtube和tiktok,上reddit/x也没有问题,还有各种ai优化节点。
-
-
-
想购买您这个站,我的联系方式QQ741756694微信同步 能卖联系
-
-
-
-
-
https://www.liuhaihua.cn/archives/40657.html 这篇博客中的图片打不开了
Loading...
![[HBLOG]公众号](https://www.liuhaihua.cn/img/qrcode_gzh.jpg)

