使用 Angular 5.0 和 Spring Boot 2.0 构建一个基本的 CRUD 应用
在所有 Web 开发的框架中,Anglar 和 Spring Boot 可以说是两个最流行的了。那么我们不妨看看如何在你的应用中使用它们。
现在技术进展得很快,跟上最新的趋势以及你喜欢的项目的最新发布版本是很有挑战性的。Anglar 和 Spring Boot 是我最喜欢的两个项目。因此我想我应该给你们写个指南,让你清楚如何使用它们最新、最完整的版本构建一个基本的应用程序。
对于 Spring Boot,在 2.0 版本中最重要的变化是它的全新 Web 框架:Spring WebFlux。在 Angular 5.0 中我们也在表格中有了一个新的 HttpClient。这个类代替了 Http,并且使用起来更简单一些,使用更少的样板(boilerplate)代码即可。但今天,我并不打算去探索 Spring WebFlux,因为在我们能够支持 Okta Spring Boot Starte 之前我们 还有一些工作要做 。
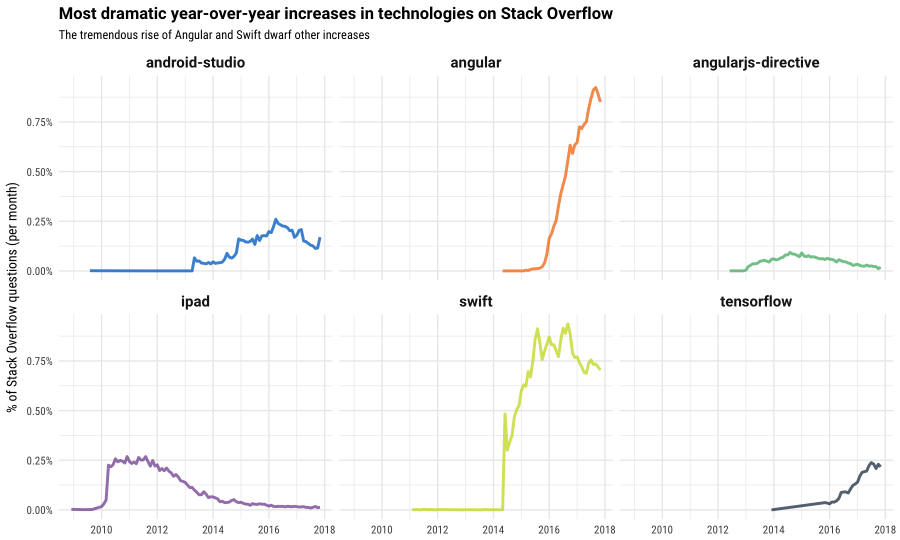
好消息是我们的 Angular SDK 能够很好地与 Angular 5 兼容,我将在这篇博文中展示如何使用它。说到 Angular,你知道 在 Stack Overflow 上,Angular 是最引人注目的问题之一 吗?你可能认为这意味着很多人都对 Angular 有相关的疑问。我更偏向于认为是使用人数庞大,开发者在使用新技术时经常有疑问(所导致)。这是一个健康的社区的明确标志。对于垂死的技术你很少会在 Stack Overflow 上看到很多的问题。
本文将讲解如何构建一个简单的 CRUD 应用来显示一个酷的汽车的列表。它允许你去编辑这个列表,并且它将显示一个与汽车名称相匹配的源于 GIPHY 的 gif 动画。你也会学习到如何使用 Okta’s Spring Boot starter 和 Angular SDK 来保护你的应用程序。
本教程中,你将会需要在电脑中安装 Java 8 和 Node.js 8 。
使用 Spring Boot 2.0 创建 API
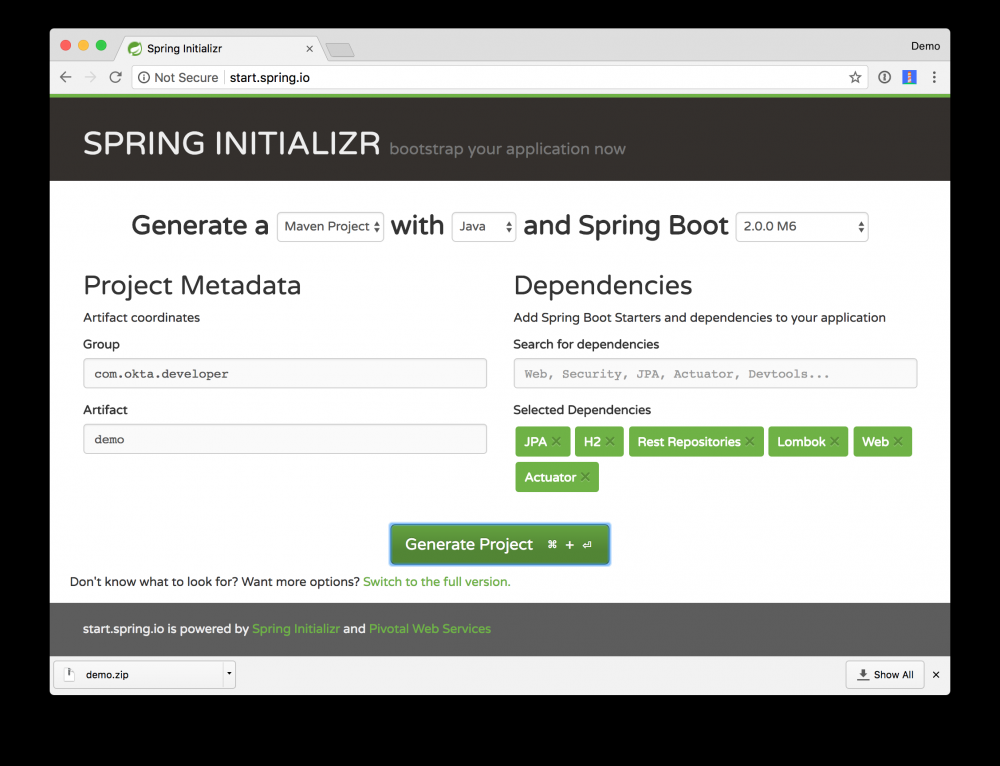
在一开始使用 Spring Boot 2.0 时,你可以使用最新的里程碑版本。访问 start.spring.io ,然后使用 Java、Spring Boot 2.0.0 M6 创建一个新项目,并选择创建一个简单的 API:JPA,H2,Rest Repositories,Lombok 和 Web。在这个例子中,我已经添加了Actuator(执行器),它是 Spring Boot 中 一个非常酷的功能 。
创建一个目录来存放你的服务器和客户端应用程序。我的目录命名为 okta-spring-boot-2-angular-5-example,你可以命名为你喜欢的任意名称。如果你只想看该应用程序运行而不是编写代码,那么你可以 在 GitHub 上查看示例 ,或使用以下命令进行本地克隆和运行。
git clone https://github.com/oktadeveloper/okta-spring-boot-2-angular-5-example.git
cd okta-spring-boot-2-angular-5-example/client && npm install && ng serve &
cd ../server && ./mvnw spring-boot:run
从 start.spring.io 下载了 demo.zip 后,将其解压并将 demo 文件复制到应用程序存放目录。将 demo 重命名为 server。用你喜欢的 IDE 打开项目,在 src/main/java/com/okta/developer/demo 目录下创建一个 Car.java 文件。 你可以使用 Lombok 注解来减少样板代码。
package com.okta.developer.demo;

import lombok.*;

import javax.persistence.Id;
import javax.persistence.GeneratedValue;
import javax.persistence.Entity;

@Entity
@Getter @Setter
@NoArgsConstructor
@ToString @EqualsAndHashCode
public class Car {
    @Id @GeneratedValue
    private Long id;
    private @NonNull String name;
}
创建 CarRepository 类以在 Car 实体上执行 CRUD(创建,读取,更新和删除)。
package com.okta.developer.demo;

import org.springframework.data.jpa.repository.JpaRepository;
import org.springframework.data.rest.core.annotation.RepositoryRestResource;

@RepositoryRestResource
interface CarRepository extends JpaRepository<Car, Long> {
}
将 ApplicationRunner bean 添加到 DemoApplication 类(在 src/main/java/com/okta/developer/demo/DemoApplication.java 中),并使用它添加一些默认数据到数据库。
package com.okta.developer.demo;

import org.springframework.boot.ApplicationRunner;
import org.springframework.boot.SpringApplication;
import org.springframework.boot.autoconfigure.SpringBootApplication;
import org.springframework.context.annotation.Bean;
import java.util.stream.Stream;

@SpringBootApplication
public class DemoApplication {

    public static void main(String[] args) {
        SpringApplication.run(DemoApplication.class, args);
    }

    @Bean
    ApplicationRunner init(CarRepository repository) {
        return args -> {
            Stream.of("Ferrari", "Jaguar", "Porsche", "Lamborghini", "Bugatti",
                      "AMC Gremlin", "Triumph Stag", "Ford Pinto", "Yugo GV").forEach(name -> {
                Car car = new Car();
                car.setName(name);
                repository.save(car);
            });
            repository.findAll().forEach(System.out::println);
        };
    }
}
如果你在添加此代码后启动你的应用程序(使用 ./mvnw spring-boot:run),则会在启动时看到汽车列表显示在控制台中。
Car(id=1, name=Ferrari)
Car(id=2, name=Jaguar)
Car(id=3, name=Porsche)
Car(id=4, name=Lamborghini)
Car(id=5, name=Bugatti)
Car(id=6, name=AMC Gremlin)
Car(id=7, name=Triumph Stag)
Car(id=8, name=Ford Pinto)
Car(id=9, name=Yugo GV)
添加一个 CoolCarController 类(在 src/main/java/com/okta/developer/demo/CoolCarController.java 中),该类用于返回一个汽车列表,并在 Angular 客户端中显示。
package com.okta.developer.demo;

import org.springframework.web.bind.annotation.GetMapping;
import org.springframework.web.bind.annotation.RestController;
import java.util.Collection;
import java.util.stream.Collectors;

@RestController
class CoolCarController {
    private CarRepository repository;

    public CoolCarController(CarRepository repository) {
        this.repository = repository;
    }

    @GetMapping("/cool-cars")
    public Collection<Car> coolCars() {
        return repository.findAll().stream()
                .filter(this::isCool)
                .collect(Collectors.toList());
    }

    private boolean isCool(Car car) {
        return !car.getName().equals("AMC Gremlin") &&
                !car.getName().equals("Triumph Stag") &&
                !car.getName().equals("Ford Pinto") &&
                !car.getName().equals("Yugo GV");
    }
}
如果你重启服务器应用程序,并使用浏览器或命令行客户端键入 localhost:8080/cool-cars,则应该会看到过滤后的汽车列表。
http localhost:8080/cool-cars
HTTP/1.1 200
Content-Type: application/json;charset=UTF-8
Date: Sun, 19 Nov 2017 21:29:22 GMT
Transfer-Encoding: chunked

[
    {
        "id": 1,
        "name": "Ferrari"
    },
    {
        "id": 2,
        "name": "Jaguar"
    },
    {
        "id": 3,
        "name": "Porsche"
    },
    {
        "id": 4,
        "name": "Lamborghini"
    },
    {
        "id": 5,
        "name": "Bugatti"
    }
]
使用 Angular CLI 创建一个客户端
Angular CLI 是一个命令行工具,可为你生成一个 Angular 项目。它不仅可以创建新项目,还可以生成代码。这是一个方便的工具,因为它还提供了命令用来构建和优化生产环境中使用的项目。它使用 covers 下的 webpack 用于构建。如果你想了解更多关于 webpack 的信息,推荐这个网站 —— webpack.academy 。
你可以通过 https://cli.angular.io 了解 Angular CLI 的基础知识。
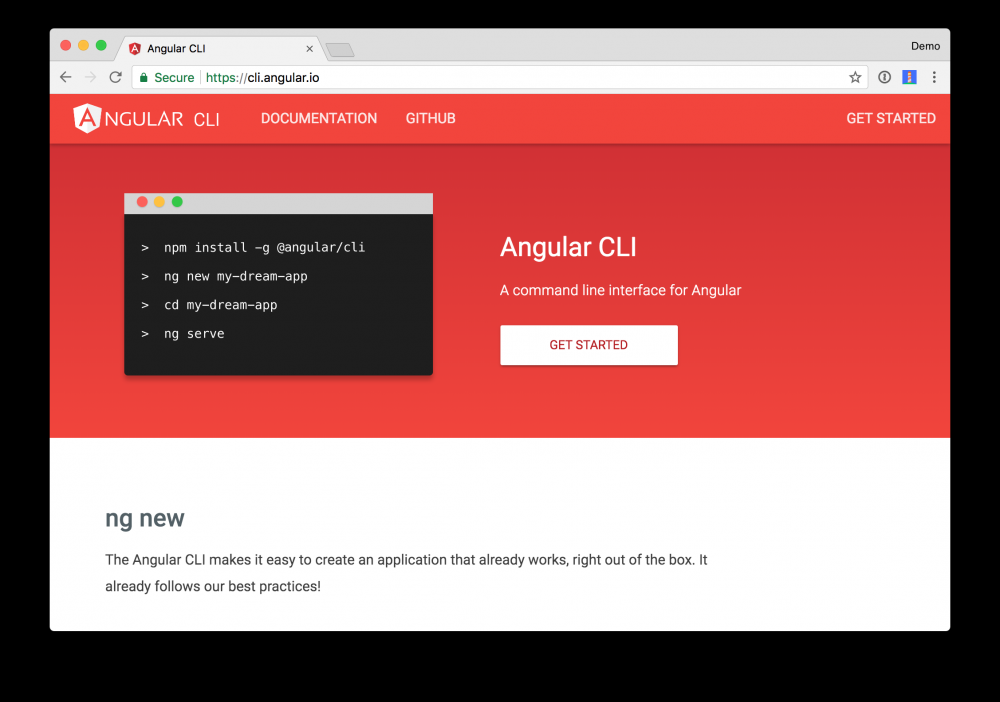
安装最新版本的 Angular CLI,版本号是 1.5.2。
npm install -g @angular/cli@1.5.2
在你创建的伞形目录中新建一个项目。我的名字命名为 okta-spring-boot-2-angular-5-example。
ng new client
客户端创建后,导航到其目录并安装 Angular Material。
cd client
npm install --save @angular/material @angular/cdk
你将使用 Angular Material 的组件来使 UI 看起来更好,特别是在手机上。安装 Angular 的动画库,因为其中的 Angular Material 组件有时会用到。
npm install --save @angular/animations
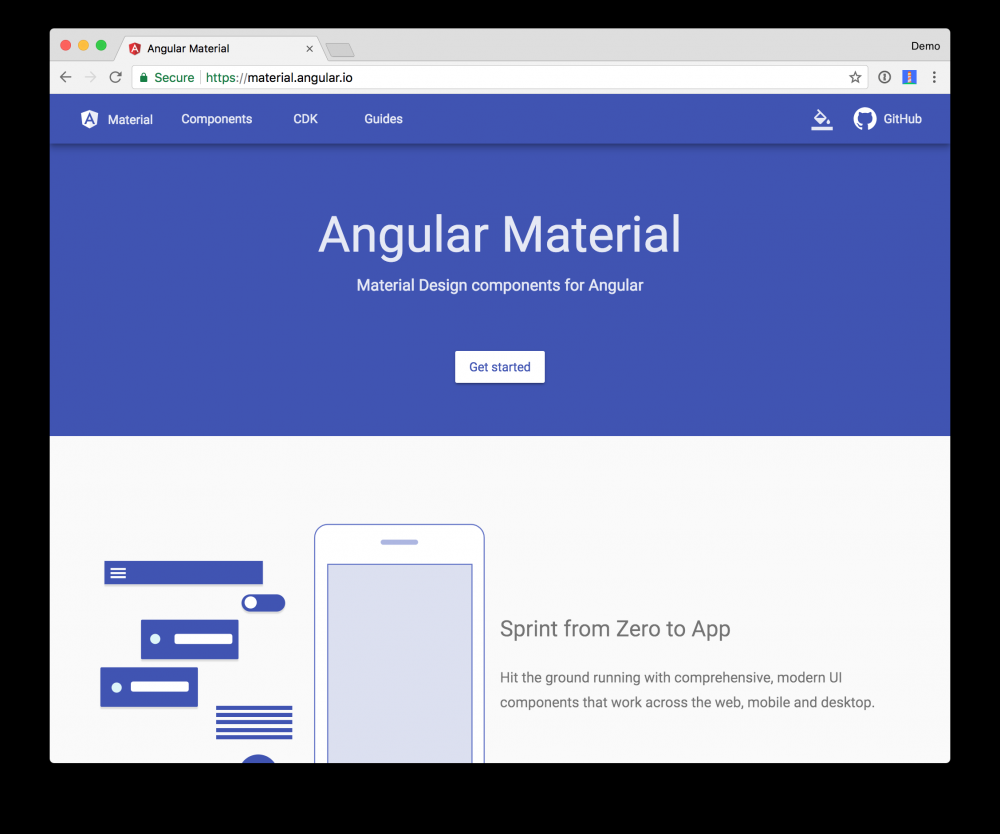
如果你想了解有关 Angular Material 的更多信息,请参阅 https://material.angular.io 。它有各种组件的大量文档以及如何使用它们。
构建一个汽车列表页面
使用 Angular CLI 生成可与 Cool Cars API 交互的汽车服务。
ng g s car
将生成的文件移动到 client/src/app/shared/car 目录。
mkdir -p src/app/shared/car
mv src/app/car.service.* src/app/shared/car/.
更新 car.service.ts 中的代码以从服务器获取汽车列表。
import { Injectable } from '@angular/core';
import { HttpClient } from '@angular/common/http';
import { Observable } from 'rxjs/Observable';

@Injectable()
export class CarService {

  constructor(private http: HttpClient) {
  }

  getAll(): Observable<any> {
    return this.http.get('//localhost:8080/cool-cars');
  }
}
在 src/app/app.module.ts 中将此服务作为提供者添加,并导入 HttpClientModule。
import { CarService } from './shared/car/car.service';
import { HttpClientModule } from '@angular/common/http';

@NgModule({
  declarations: [
    AppComponent,
    CarListComponent
  ],
  imports: [
    BrowserModule,
    HttpClientModule
  ],
  providers: [CarService],
  bootstrap: [AppComponent]
})
生成 car-list 组件以显示汽车列表。
ng g c car-list
更新 client/src/app/car-list/car-list.component.ts 以使用 CarService 获取列表并在本地 cars 变量中设置值。
import { CarService } from '../shared/car/car.service';

export class CarListComponent implements OnInit {
  cars: Array<any>;

  constructor(private carService: CarService) { }

  ngOnInit() {
    this.carService.getAll().subscribe(data => {
      this.cars = data;
    });
  }
}
更新 client/src/app/car-list/car-list.component.html 以显示汽车列表。
<h2>Car List</h2>

<div *ngFor="let car of cars">
  {{car.name}}
</div>
更新 client/src/app/app.component.html 以拥有 app-car-list 元素。
<div style="text-align:center">
  <h1>Welcome to {{title}}!</h1>
</div>

<app-car-list></app-car-list>
使用 ng serve 启动客户端应用程序。打开你喜欢的浏览器访问 http://localhost:4200。不过你目前还不会看到汽车列表,如果你打开开发者控制台,就会看到原因。
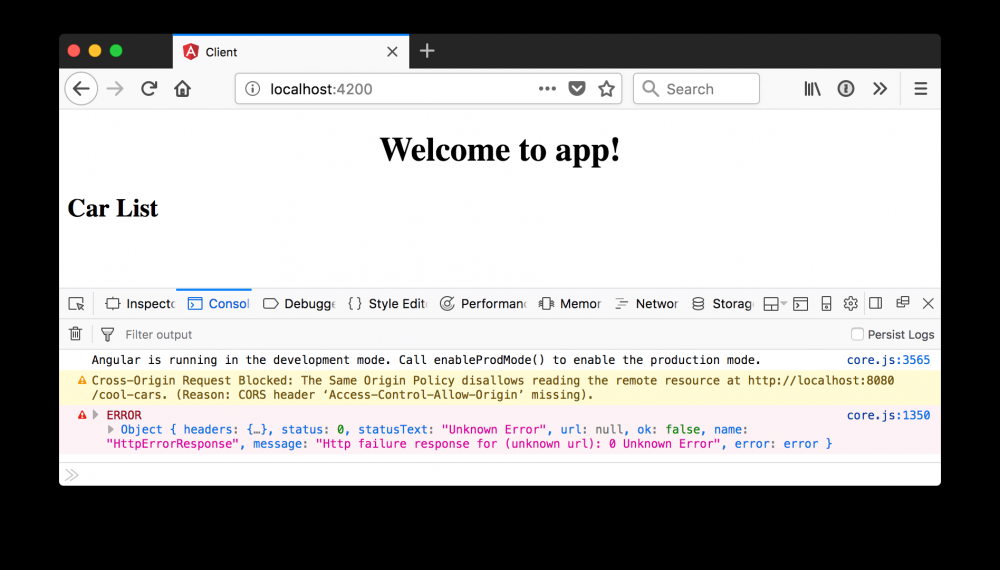
发生此错误是因为你尚未在服务器上启用 CORS 服务(跨源资源共享)。
在服务器上启用 CORS
要在服务器上启用 CORS,请将 @CrossOrigin 注释添加到 CoolCarController(在 server/src/main/java/com/okta/developer/demo/CoolCarController.java 中)。
import org.springframework.web.bind.annotation.CrossOrigin;
...
@GetMapping("/cool-cars")
@CrossOrigin(origins = "http://localhost:4200")
public Collection<Car> coolCars() {
    return repository.findAll().stream()
            .filter(this::isCool)
            .collect(Collectors.toList());
}
另外,将它添加到 CarRepository 中,以便在添加/删除/编辑时可以与其端点进行通信。
@RepositoryRestResource
@CrossOrigin(origins = "http://localhost:4200")
interface CarRepository extends JpaRepository<Car, Long> {
}
重新启动服务器,刷新客户端,然后就可以在浏览器中看到汽车列表。
添加 Angular Material
你已经安装了 Angular Material,要使用它的组件,只需导入它们即可。打开 client/src/app/app.module.ts,并为动画,Material 的工具栏,按钮,输入,列表和卡片布局添加导入。
import { MatButtonModule, MatCardModule, MatInputModule, MatListModule, MatToolbarModule } from '@angular/material';
import { BrowserAnimationsModule } from '@angular/platform-browser/animations';

@NgModule({
  ...
  imports: [
    BrowserModule,
    HttpClientModule,
    BrowserAnimationsModule,
    MatButtonModule,
    MatCardModule,
    MatInputModule,
    MatListModule,
    MatToolbarModule,
  ],
  ...
})
更新 client/src/app/app.component.html 以使用工具栏组件。
<mat-toolbar color="primary">
  <span>Welcome to {{title}}!</span>
</mat-toolbar>

<app-car-list></app-car-list>
更新 client/src/app/car-list/car-list.component.html 以使用卡片布局和列表组件。
<mat-card>
  <mat-card-header>Car List</mat-card-header>
  <mat-card-content>
    <mat-list>
      <mat-list-item *ngFor="let car of cars">
        <img mat-list-avatar src="{{car.giphyUrl}}" alt="{{car.name}}">
        <h3 mat-line>{{car.name}}</h3>
      </mat-list-item>
    </mat-list>
  </mat-card-content>
</mat-card>
修改 client/src/styles.csss 来指定主题和图标。
@import "~@angular/material/prebuilt-themes/pink-bluegrey.css";
@import '~https://fonts.googleapis.com/icon?family=Material+Icons';

body {
 margin: 0;
 font-family: Roboto, sans-serif;
}
如果你用 ng serve 运行你的客户端并访问 http://localhost:4200,你会看到汽车列表,但没有与它们关联的图像。

使用 Giphy 添加动画 GIFs
要将 giphyUrl 属性添加到汽车,请创建 client/src/app/shared/giphy/giphy.service.ts 并用下面的代码填充它。
import { Injectable } from '@angular/core';
import { HttpClient } from '@angular/common/http';
import 'rxjs/add/operator/map';

@Injectable()
export class GiphyService {

  // Public beta key: https://github.com/Giphy/GiphyAPI#public-beta-key
  giphyApi = '//api.giphy.com/v1/gifs/search?api_key=dc6zaTOxFJmzC&limit=1&q=';

  constructor(public http: HttpClient) {
  }

  get(searchTerm) {
    const apiLink = this.giphyApi + searchTerm;
    return this.http.get(apiLink).map((response: any) => {
      if (response.data.length > 0) {
        return response.data[0].images.original.url;
      } else {
        return 'https://media.giphy.com/media/YaOxRsmrv9IeA/giphy.gif'; // dancing cat for 404
      }
    });
  }
}
在 client/src/app/app.module.ts 中添加 GiphyService 作为提供者。
import { GiphyService } from './shared/giphy/giphy.service';

@NgModule({
  ...
  providers: [CarService, GiphyService],
  bootstrap: [AppComponent]
})
更新 client/src/app/car-list/car-list.component.ts 中的代码以设置每辆车的 giphyUrl 属性。
import { GiphyService } from '../shared/giphy/giphy.service';

export class CarListComponent implements OnInit {
  cars: Array<any>;

  constructor(private carService: CarService, private giphyService: GiphyService) { }

  ngOnInit() {
    this.carService.getAll().subscribe(data => {
      this.cars = data;
      for (const car of this.cars) {
        this.giphyService.get(car.name).subscribe(url => car.giphyUrl = url);
      }
    });
  }
}
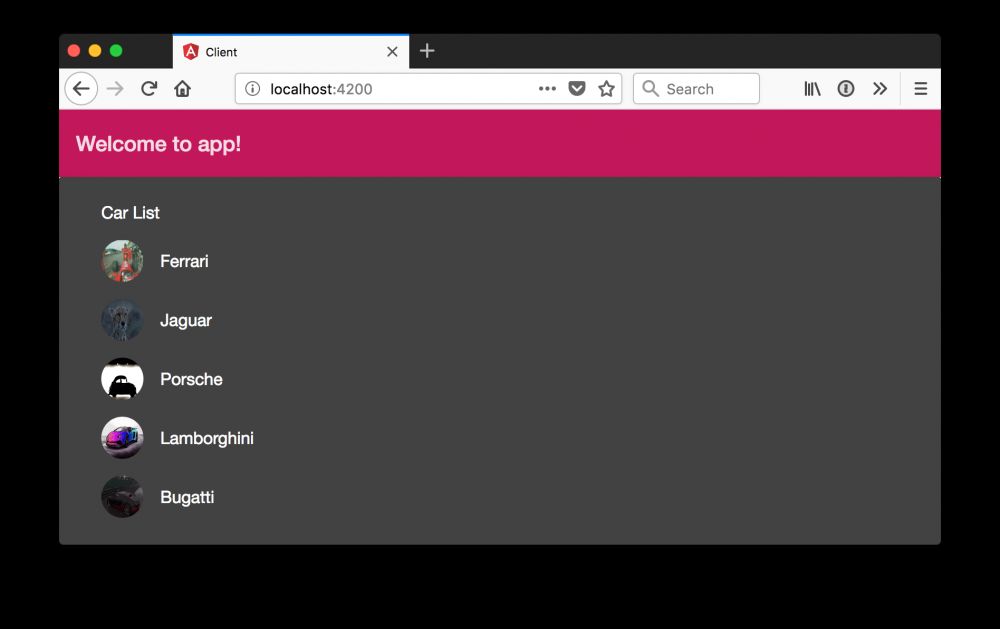
现在你的浏览器应该会显示汽车名称列表,以及旁边的头像图片。
添加编辑功能
有一个汽车名称和图像的列表显得十分美观,但如果能和它进行交互就更好了!要添加编辑功能,首先生成一个 car-edit 组件。
ng g c car-edit
更新 client/src/app/shared/car/car.service.ts 以拥有添加、删除和更新汽车的方法。这些方法与 CarRepository 和 @RepositoryRestResource 注释提供的端点进行交互。
import { Injectable } from '@angular/core';
import { HttpClient } from '@angular/common/http';
import { Observable } from 'rxjs/Observable';

@Injectable()
export class CarService {
  public API = '//localhost:8080';
  public CAR_API = this.API + '/cars';

  constructor(private http: HttpClient) {
  }

  getAll(): Observable<any> {
    return this.http.get(this.API + '/cool-cars');
  }

  get(id: string) {
    return this.http.get(this.CAR_API + '/' + id);
  }

  save(car: any): Observable<any> {
    let result: Observable<Object>;
    if (car['href']) {
      result = this.http.put(car.href, car);
    } else {
      result = this.http.post(this.CAR_API, car);
    }
    return result;
  }

  remove(href: string) {
    return this.http.delete(href);
  }
}
在 client/src/app/car-list/car-list.component.html 中,添加一个到编辑组件的链接。另外,在底部添加一个按钮来添加一辆新车。
<mat-card>
  <mat-card-header>Car List</mat-card-header>
  <mat-card-content>
    <mat-list>
      <mat-list-item *ngFor="let car of cars">
        <img mat-list-avatar src="{{car.giphyUrl}}" alt="{{car.name}}">
        <h3 mat-line>
          <a mat-button [routerLink]="['/car-edit', car.id]">{{car.name}}</a>
        </h3>
      </mat-list-item>
    </mat-list>
  </mat-card-content>

  <button mat-fab color="primary" [routerLink]="['/car-add']">Add</button>
</mat-card>
在 client/src/app/app.module.ts 中,添加路由并导入 FormsModule。
import { FormsModule } from '@angular/forms';
import { RouterModule, Routes } from '@angular/router';

const appRoutes: Routes = [
  { path: '', redirectTo: '/car-list', pathMatch: 'full' },
  {
    path: 'car-list',
    component: CarListComponent
  },
  {
    path: 'car-add',
    component: CarEditComponent
  },
  {
    path: 'car-edit/:id',
    component: CarEditComponent
  }
];

@NgModule({
  ...
  imports: [
    ...
    FormsModule,
    RouterModule.forRoot(appRoutes)
  ],
  ...
})
修改 client/src/app/car-edit/car-edit.component.ts 以从 URL 上传递的 id 获取汽车的信息,并添加保存和删除的方法。
import { Component, OnDestroy, OnInit } from '@angular/core';
import { Subscription } from 'rxjs/Subscription';
import { ActivatedRoute, Router } from '@angular/router';
import { CarService } from '../shared/car/car.service';
import { GiphyService } from '../shared/giphy/giphy.service';
import { NgForm } from '@angular/forms';

@Component({
  selector: 'app-car-edit',
  templateUrl: './car-edit.component.html',
  styleUrls: ['./car-edit.component.css']
})
export class CarEditComponent implements OnInit, OnDestroy {
  car: any = {};

  sub: Subscription;

  constructor(private route: ActivatedRoute,
              private router: Router,
              private carService: CarService,
              private giphyService: GiphyService) {
  }

  ngOnInit() {
    this.sub = this.route.params.subscribe(params => {
      const id = params['id'];
      if (id) {
        this.carService.get(id).subscribe((car: any) => {
          if (car) {
            this.car = car;
            this.car.href = car._links.self.href;
            this.giphyService.get(car.name).subscribe(url => car.giphyUrl = url);
          } else {
            console.log(`Car with id '${id}' not found, returning to list`);
            this.gotoList();
          }
        });
      }
    });
  }

  ngOnDestroy() {
    this.sub.unsubscribe();
  }

  gotoList() {
    this.router.navigate(['/car-list']);
  }

  save(form: NgForm) {
    this.carService.save(form).subscribe(result => {
      this.gotoList();
    }, error => console.error(error))
  }

  remove(href) {
    this.carService.remove(href).subscribe(result => {
      this.gotoList();
    }, error => console.error(error))
  }
}
更新 client/src/app/car-edit/car-edit.component.html 中的 HTML 以使用汽车名称的表格,以及显示来自 Giphy 的图像。
<mat-card>
  <form #carForm="ngForm" (ngSubmit)="save(carForm.value)">
    <mat-card-header>
      <mat-card-title><h2>{{car.name ? 'Edit' : 'Add'}} Car</h2></mat-card-title>
    </mat-card-header>
    <mat-card-content>
      <input type="hidden" name="href" [(ngModel)]="car.href">
      <mat-form-field>
        <input matInput placeholder="Car Name" [(ngModel)]="car.name"
               required name="name" #name>
      </mat-form-field>
    </mat-card-content>
    <mat-card-actions>
      <button mat-raised-button color="primary" type="submit"
              [disabled]="!carForm.form.valid">Save</button>
      <button mat-raised-button color="secondary" (click)="remove(car.href)"
              *ngIf="car.href" type="button">Delete</button>
      <a mat-button routerLink="/car-list">Cancel</a>
    </mat-card-actions>
    <mat-card-footer>
      <div class="giphy">
        <img src="{{car.giphyUrl}}" alt="{{car.name}}">
      </div>
    </mat-card-footer>
  </form>
</mat-card>
将下面的 CSS 添加到 client/src/app/car-edit/car-edit.component.css 中,以在图片周围添加一些填充。
.giphy {
  margin: 10px;
}
修改 client/src/app/app.component.html 并用 <router-outlet></router-outlet> 替换 <app-car-list></app-car-list>。这种更改是必要的,或者组件之间的路由不起作用。
<mat-toolbar color="primary">
  <span>Welcome to !</span>
</mat-toolbar>

<router-outlet></router-outlet>
完成所有这些更改后,你应该可以添加、编辑或删除任何汽车。 以下是包含添加按钮的显示列表的屏幕截图。
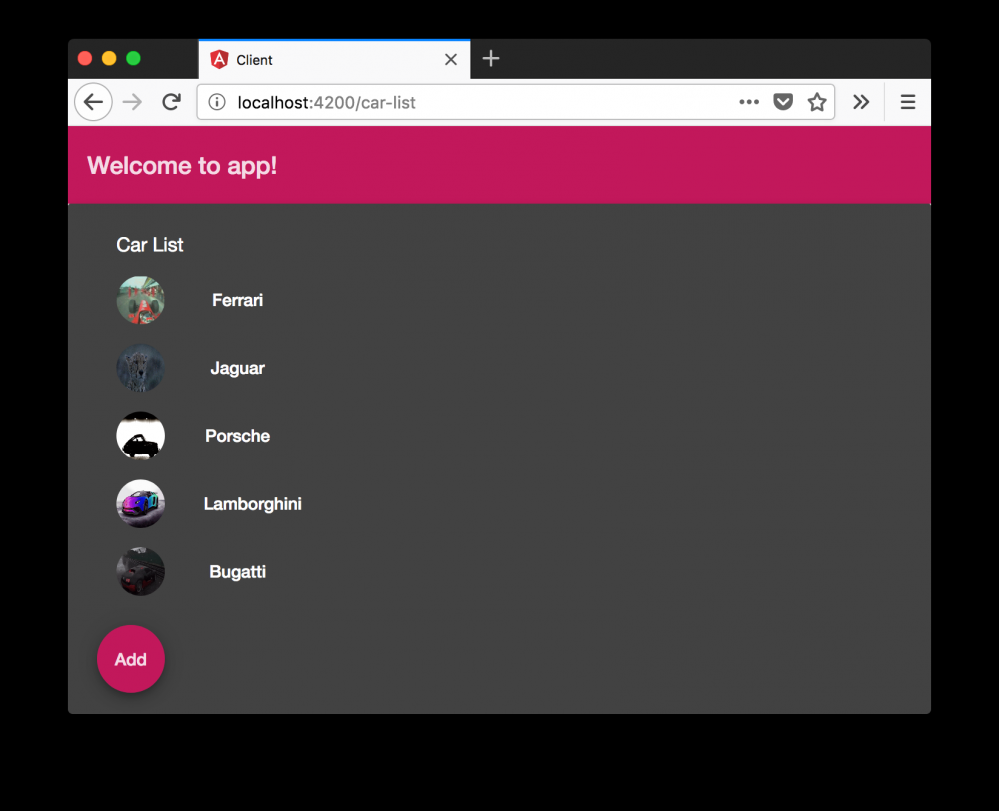
以下屏幕截图显示了编辑你添加的汽车的状态。
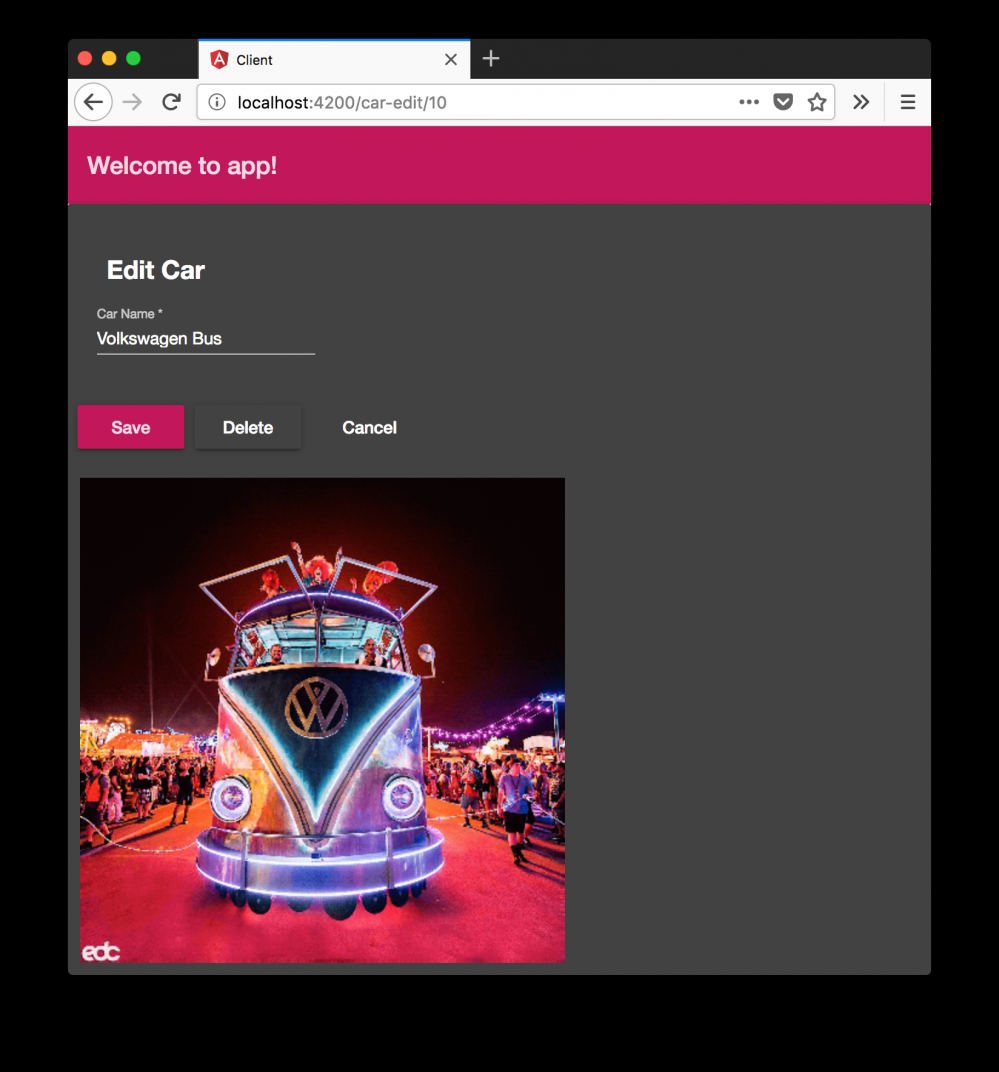
使用 Okta 添加认证
使用 Okta 添加验证是一个极好的你可以添加到此应用的功能。如果你想为你的应用程序添加审核或个性化功能(例如评级功能),那么知道对方是谁可以派得上用场。
Okta 的 Spring Boot Starter
在服务器端,你可以使用 Okta Spring Boot starter 来锁定一些事物。打开 server/pom.xml 并添加以下依赖项。
<dependency>
    <groupId>com.okta.spring</groupId>
    <artifactId>okta-spring-boot-starter</artifactId>
    <version>0.2.0</version>
</dependency>
现在你需要配置服务器以使用 Okta 进行认证,为此你将需要在 Okta 中创建一个 OIDC 应用。
在 Okta 创建一个 OIDC 应用程序
登录你的 Okta 开发者帐户(如果没有帐户的话点此进行 注册 ),然后导航到 Applications > Add Application。 点击 Single-page App ,再点击 Next, 并给程序取个你能记住的名字。更改本地主机的所有实例 localhost:8080 到 localhost:4200,并点击 Done。
拷贝 client ID 到你的 server/src/main/resources/application.properties 文件中。当你在里面的时候,添加一个与你的 Okta 域匹配的 okta.oauth2 issuer 属性。例如:
okta.oauth2.issuer=https://{你的Okta域名}.com/oauth2/default
okta.oauth2.clientId={clientId}
升级 server/src/main/java/com/okta/developer/demo/DemoApplication.java 来启用它作为资源服务器。
import org.springframework.security.oauth2.config.annotation.web.configuration.EnableResourceServer;

@EnableResourceServer
@SpringBootApplication
在作出这些变更后,你应该能够重启你的 app 并且当你尝试导航到 http://localhost:8080 时看到拒绝访问。
不幸的是,你可能会看到一个带有以下错误的堆栈跟踪。
Caused by: java.lang.ClassNotFoundException:
org.springframework.boot.autoconfigure.security.oauth2.resource.AuthoritiesExtractor
原因是 Spring Boot 2.0.0.M6 包括了 Spring Security 5.0.0.RC1,它不包括 Resource Server 的支持。如果你想知道这个问题何时解决,你可以在 GitHub 上订阅 Okta Spring Boot Starter issue #30 。
为了解决这个问题,你可以将 Okta Spring Boot starter 降级为 0.1.0。一定要将它的名称从 spring-boot 改为 spring-security!
<dependency>
    <groupId>com.okta.spring</groupId>
    <artifactId>okta-spring-security-starter</artifactId>
    <version>0.1.0</version>
</dependency>
你还需要更改应用程序中的属性名称,属性是 oauth 而不是 oauth2。
okta.oauth.issuer=https://{你的Okta域名}.com/oauth2/default
okta.oauth.clientId={clientId}
现在,当你重新启动服务器时,你应该在浏览器中看到如下所示的消息。
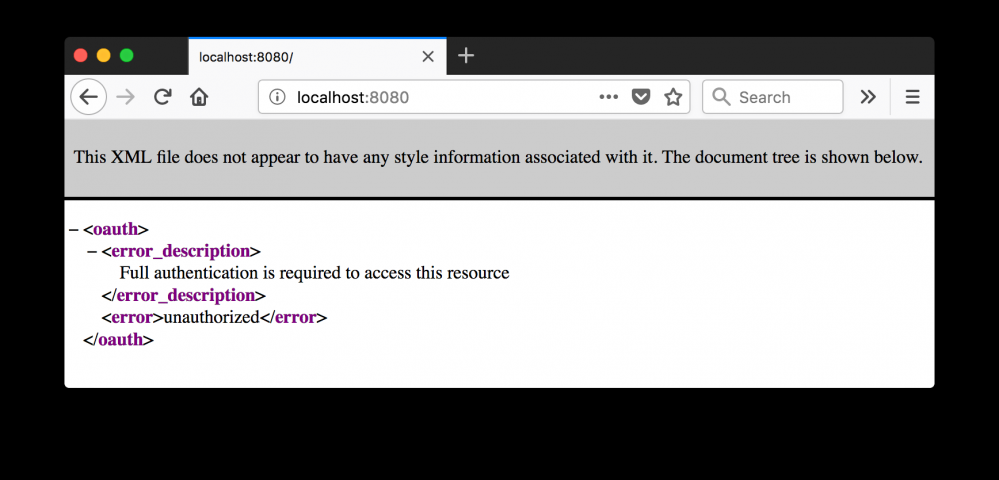
很好,你的服务器已被锁定,但是现在你需要配置你的客户端来与之对话。这就是 Okta 对 Angluar 的支持派上用场的地方。
Okta 的 Angular 支持
Okta Angular SDK 是在 Okta Auth JS 上的一个封装,它构建在 OIDC 之上。更多关于 Okta Angular 库的信息可在 npmjs.com 上找到。
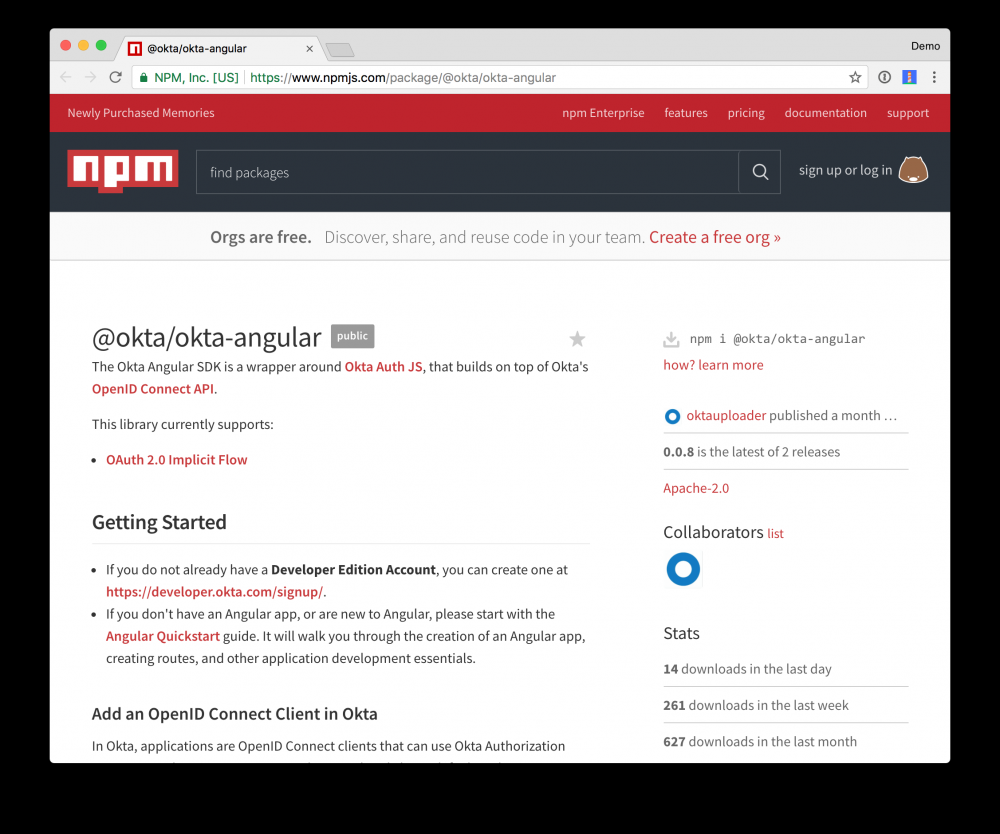
要安装它,请在客户端目录下执行以下命令:
npm install --save @okta/okta-angular
在 client/src/app/app.module.ts 中,添加一个用于配置你的 OIDC 应用的 config 变量。
const config = {
  issuer: 'https://{yourOktaDomain}.com/oauth2/default',
  redirectUri: 'http://localhost:4200/implicit/callback',
  clientId: '{clientId}'
};
在同一个文件中,你同样需要为 redirectUri 添加一个新的路由,它将指向 OktaCallbackComponent。
import { OktaCallbackComponent, OktaAuthModule } from '@okta/okta-angular';

const appRoutes: Routes = [
  ...
  {
    path: 'implicit/callback',
    component: OktaCallbackComponent
  }
];
接下来,初始化并导入 OktaAuthModule。
@NgModule({
  ...
  imports: [
    ...
    OktaAuthModule.initAuth(config)
  ],
  ...
})
这里有三个你在使用 Okta 时需要配置 Angular 应用的步骤。为了方便,在 HTTP 请求中添加不记名令牌时,可以使用 HttpInterceptor 。
创建 client/src/app/shared/okta/auth.interceptor.ts,并在其中添加以下代码。
import { Injectable } from '@angular/core';
import { HttpRequest, HttpHandler, HttpEvent, HttpInterceptor } from '@angular/common/http';
import { Observable } from 'rxjs/Observable';
import { OktaAuthService } from '@okta/okta-angular';

@Injectable()
export class AuthInterceptor implements HttpInterceptor {

  constructor(private oktaAuth: OktaAuthService) {
  }

  intercept(request: HttpRequest<any>, next: HttpHandler): Observable<HttpEvent<any>> {

    // Only add to localhost requests since Giphy's API fails when the request include a token
    if (request.url.indexOf('localhost') > -1) {
      request = request.clone({
        setHeaders: {
          Authorization: `Bearer ${this.oktaAuth.getAccessToken().accessToken}`
        }
      });
    }

    return next.handle(request);
  }
}
为了注册此拦截器,在 client/src/app/app.module.ts 中将其添加为 provider。
import { HTTP_INTERCEPTORS } from '@angular/common/http';
import { AuthInterceptor } from './shared/okta/auth.interceptor';

@NgModule({
  ...
  providers: [CarService, GiphyService,
    {provide: HTTP_INTERCEPTORS, useClass: AuthInterceptor, multi: true}
  ],
  ...
})
修改 client/src/app/app.component.html 以添加 login 和 logout 按钮。
<mat-toolbar color="primary">
  <span>Welcome to {{title}}!</span>
  <span class="toolbar-spacer"></span>
  <button mat-raised-button color="accent" *ngIf="oktaAuth.isAuthenticated()"
          (click)="oktaAuth.logout()">Logout
  </button>
</mat-toolbar>

<mat-card *ngIf="!oktaAuth.isAuthenticated()">
  <mat-card-content>
    <button mat-raised-button color="accent"
            (click)="oktaAuth.loginRedirect()">Login
    </button>
  </mat-card-content>
</mat-card>

<router-outlet></router-outlet>
你可能已经注意到有个支持工具栏类的 span 存在。为了使其按照预期工作,更新 client/src/app/app.component.css 以包含以下类。
.toolbar-spacer {
  flex: 1 1 auto;
}
这里也存在一个指向 oktaAuth 用于检查已认证状态的引用。为了使其有效,在 client/src/app/app.component.ts 中将其作为依赖项添加到构造函数中。
import { OktaAuthService } from '@okta/okta-angular';

@Component({
  selector: 'app-root',
  templateUrl: './app.component.html',
  styleUrls: ['./app.component.css']
})
export class AppComponent {
  title = 'app';

  constructor(private oktaAuth: OktaAuthService) {
  }
}
现在如果你重启客户端,就可以看到登录按钮了。
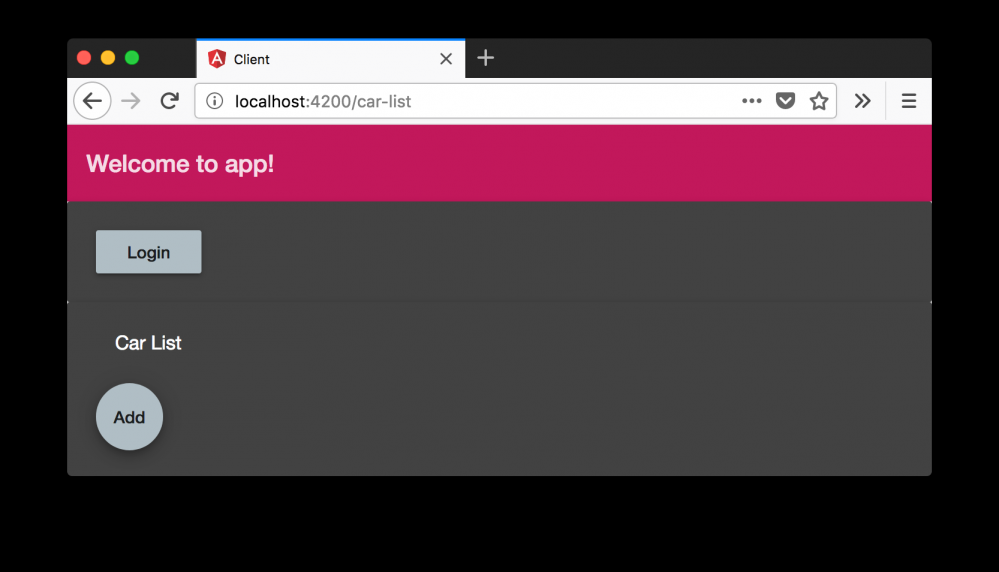
注意这里使用 car-list 组件来显示元素。为了修正这种依赖,你可以创建一个 home 组件,并把其作为默认路由。
ng g c home
修改 client/src/app/app.module.ts 以更新路由。
const appRoutes: Routes = [
  {path: '', redirectTo: '/home', pathMatch: 'full'},
  {
    path: 'home',
    component: HomeComponent
  },
  ...
}
将 Login 按钮相关的 HTML 从 app.component.html 移动到 client/src/app/home/home.component.html中。
<mat-card>
  <mat-card-content>
    <button mat-raised-button color="accent" *ngIf="!oktaAuth.isAuthenticated()"
            (click)="oktaAuth.loginRedirect()">Login
    </button>
    <button mat-raised-button color="accent" *ngIf="oktaAuth.isAuthenticated()"
            [routerLink]="['/car-list']">Car List
    </button>
  </mat-card-content>
</mat-card>
在 client/src/app/home/home.component.ts 中将 oktaAuth 作为依赖项添加。
import { OktaAuthService } from '@okta/okta-angular';

export class HomeComponent {
  constructor(private oktaAuth: OktaAuthService) {
  }
}
更新 client/src/app/app.component.html,这样 Logout 按钮在点击之后将重定向到 home。
<mat-toolbar color="primary">
  <span>Welcome to {{title}}!</span>
  <span class="toolbar-spacer"></span>
  <button mat-raised-button color="accent" *ngIf="oktaAuth.isAuthenticated()"
          (click)="oktaAuth.logout()" [routerLink]="['/home']">Logout
  </button>
</mat-toolbar>

<router-outlet></router-outlet>
现在你应该能够在你的浏览器打开 http://localhost:4200 并且点击 Login 按钮。如果您已经正确配置了所有内容,你将会跳转到 Okta 的登录界面。
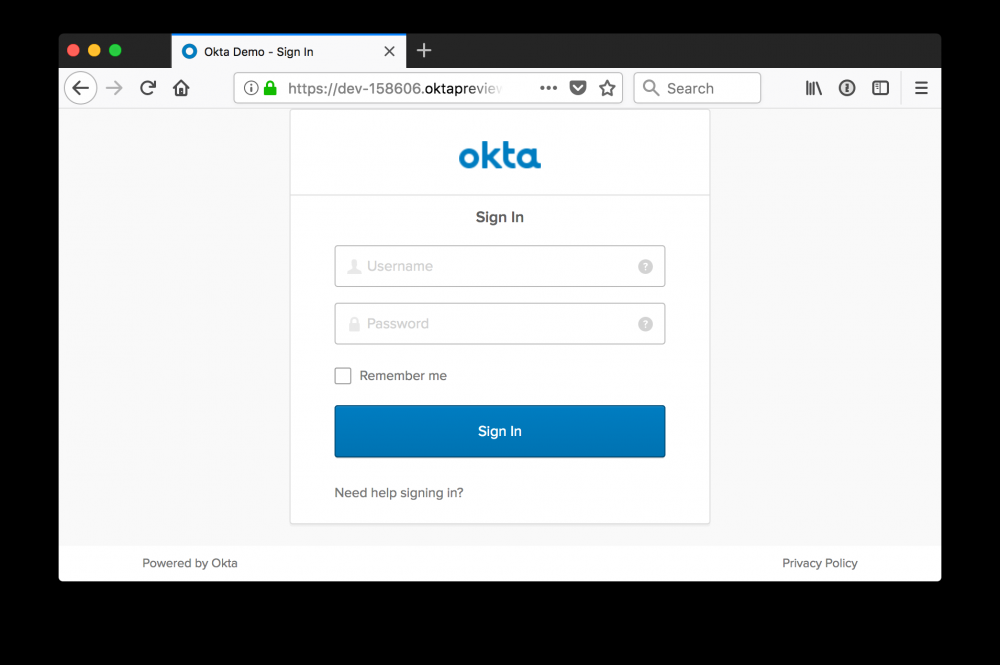
输入您用于注册帐户的凭据,应该会重定向回到你的 app。然而,由于 CORS 错误,你的车辆列表并不会加载。出现这个情况是因为 Spring 的 @CrossOrigin 与 Spring Security 不兼容导致。
通过将一个 bean 添加到处理 CORS 的 DemoApplication.java 来修复它。
import org.springframework.boot.web.servlet.FilterRegistrationBean;
import org.springframework.core.Ordered;
import org.springframework.web.cors.CorsConfiguration;
import org.springframework.web.cors.UrlBasedCorsConfigurationSource;
import org.springframework.web.filter.CorsFilter;
import java.util.Collections;

...

@Bean
public FilterRegistrationBean simpleCorsFilter() {
    UrlBasedCorsConfigurationSource source = new UrlBasedCorsConfigurationSource();
    CorsConfiguration config = new CorsConfiguration();
    config.setAllowCredentials(true);
    config.setAllowedOrigins(Collections.singletonList("http://localhost:4200"));
    config.setAllowedMethods(Collections.singletonList("*"));
    config.setAllowedHeaders(Collections.singletonList("*"));
    source.registerCorsConfiguration("/**", config);
    FilterRegistrationBean bean = new FilterRegistrationBean(new CorsFilter(source));
    bean.setOrder(Ordered.HIGHEST_PRECEDENCE);
    return bean;
}
重启你的服务,庆祝一切顺利!

你可以在 GitHub 上的 https://github.com/oktadeveloper/okta-spring-boot-2-angular-5-example 看到本教程中开发的应用程序的完整源代码。
- 本文标签: XML Developer 删除 Action Spring Boot java node js 安装 API App provider http Security id spring tab https map CSS CTO Collections 锁 主机 Authorization Collection 目录 authenticate git 网站 Bootstrap 域名 json 开发 core Persistence IO token logo 认证 struct cat IDE 注释 实例 REST entity JPA 图片 Lua 服务器 ip 数据库 数据 代码 URLs list src 下载 ORM bug root servlet find 开发者 GitHub Select value client 汽车 bean springboot web tar UI Node.js DOM key example ACE Service Spring Security zip pom 配置 Google HTML
- 版权声明: 本文为互联网转载文章,出处已在文章中说明(部分除外)。如果侵权,请联系本站长删除,谢谢。
- 本文海报: 生成海报一 生成海报二


![[HBLOG]公众号](https://www.liuhaihua.cn/img/qrcode_gzh.jpg)

