SSH【史上最详细整合】
最详细搭建SSH框架环境
本博文主要是讲解如何 搭建一个比较规范的SSH开发环境,以及对它测试【在前面的搭建中,只是整合了SSH框架,能够使用SSH实现功能】,而这次是相对规范的。
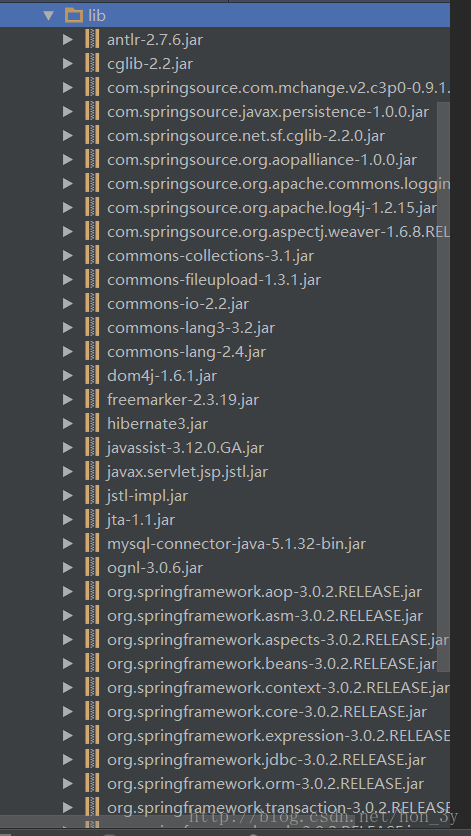
导入开发包
在Struts配置文件中添加常量
    <!-- 禁用动态方法访问 -->
    <constant name="struts.enable.DynamicMethodInvocation" value="false" />
    <!-- 配置成开发模式 -->
    <constant name="struts.devMode" value="true" />
    <!-- 配置拓展名为action -->
    <constant name="struts.action.extention" value="action" />
    <!-- 把主题配置成simple -->
    <constant name="struts.ui.theme" value="simple" />

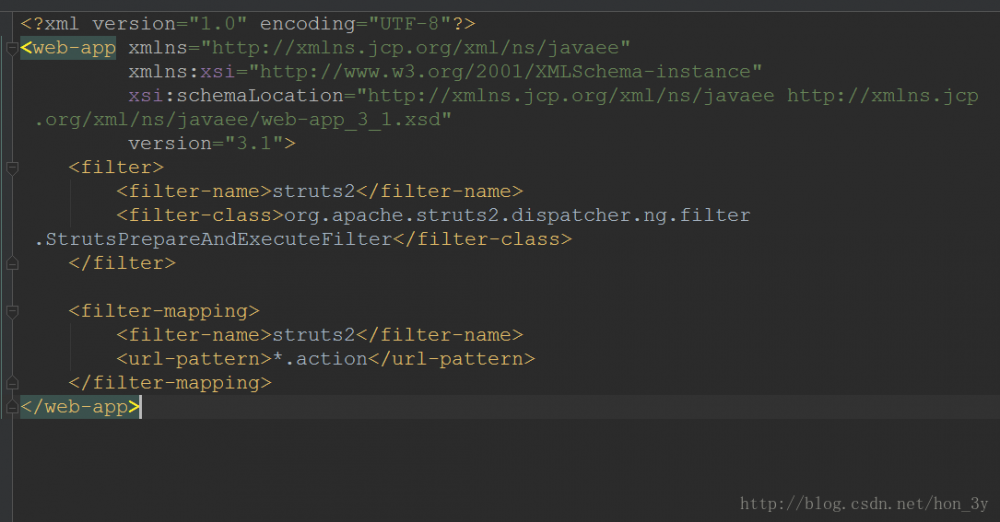
添加struts2过滤器
<filter>
        <filter-name>struts2</filter-name>    <filter-class>org.apache.struts2.dispatcher.ng.filter.StrutsPrepareAndExecuteFilter</filter-class>
    </filter>

    <filter-mapping>
        <filter-name>struts2</filter-name>
        <url-pattern>*.action</url-pattern>
    </filter-mapping>
添加Spring配置文件
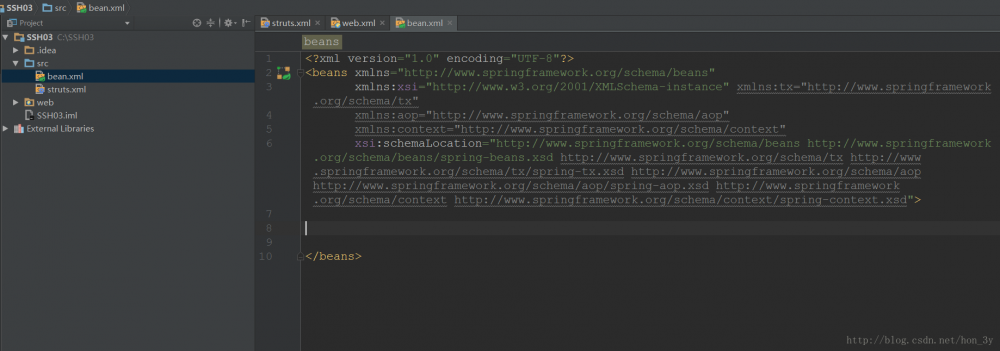
把Spring的配置文件添加到src的目录下:
<?xml version="1.0" encoding="UTF-8"?>
<beans xmlns="http://www.springframework.org/schema/beans"
       xmlns:xsi="http://www.w3.org/2001/XMLSchema-instance" xmlns:tx="http://www.springframework.org/schema/tx"
       xmlns:aop="http://www.springframework.org/schema/aop"
       xmlns:context="http://www.springframework.org/schema/context"
       xsi:schemaLocation="http://www.springframework.org/schema/beans http://www.springframework.org/schema/beans/spring-beans.xsd http://www.springframework.org/schema/tx http://www.springframework.org/schema/tx/spring-tx.xsd http://www.springframework.org/schema/aop http://www.springframework.org/schema/aop/spring-aop.xsd http://www.springframework.org/schema/context http://www.springframework.org/schema/context/spring-context.xsd">
</beans>
注册监听器
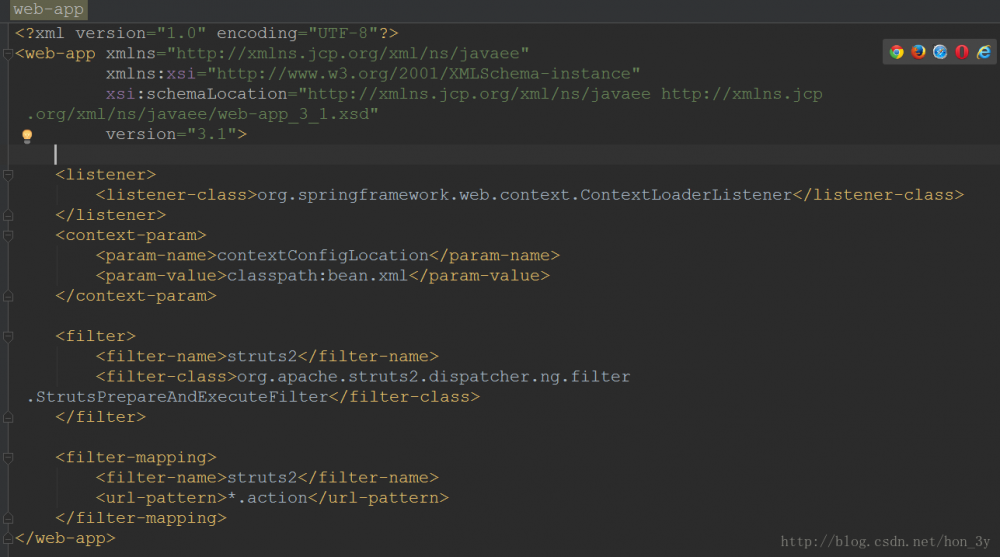
在web.xml文件中注册监听器:
    <listener>
       <listener-class>org.springframework.web.context.ContextLoaderListener</listener-class>
    </listener>
    <context-param>
        <param-name>contextConfigLocation</param-name>
        <param-value>classpath:applicationContext.xml</param-value>
    </context-param>
测试SSH
我们会一般会新建一个test包来测试,与src是平级的。
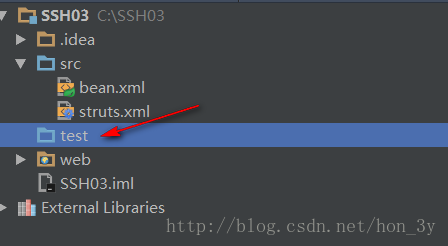
Struts2和Spring
预期: 如果可以在action中能够正确调用service里面的方法执行并返回到一个页面中;那么我们认定struts和spring的整合是成功的。
测试IOC容器
- 测试是否能够得到IOC容器
    private ClassPathXmlApplicationContext context;

    @Test
    public void load() {

        context = new ClassPathXmlApplicationContext("bean.xml");

        System.out.println(context);

    }
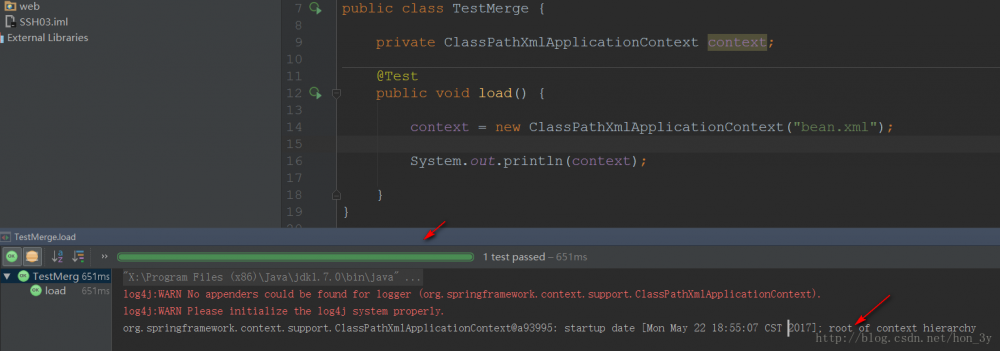
测试Spring
- 创建接口
package zhongfucheng.test.service;

/**
 * Created by ozc on 2017/5/22.
 */
public interface TestService {
     void say();
}
- 创建实现,并使用Service注解
package zhongfucheng.test.service.impl;

import org.springframework.stereotype.Service;

/**
 * Created by ozc on 2017/5/22.
 */

@Service
public class TestServiceImpl implements zhongfucheng.test.service.TestService {
    @Override
    public void say() {
        System.out.println("hi ");
    }
}
- 在test包下创建config包,专门来放测试的配置文件的 。把Spring的配置文件放进去,并扫描test包
<context:component-scan base-package="zhongfucheng.test"/>

- 在总配置文件中导入在test的Spring配置文件,不然Spring哪知道你配置了哪里
<import resource="classpath:zhongfucheng/test/config/test-spring.xml"/>

- 测试Spring是否能拿到Service对象
    @Test
    public void testSpring() {

        TestService testService = (TestService) context.getBean("testServiceImpl");
        System.out.println(testService);
    }
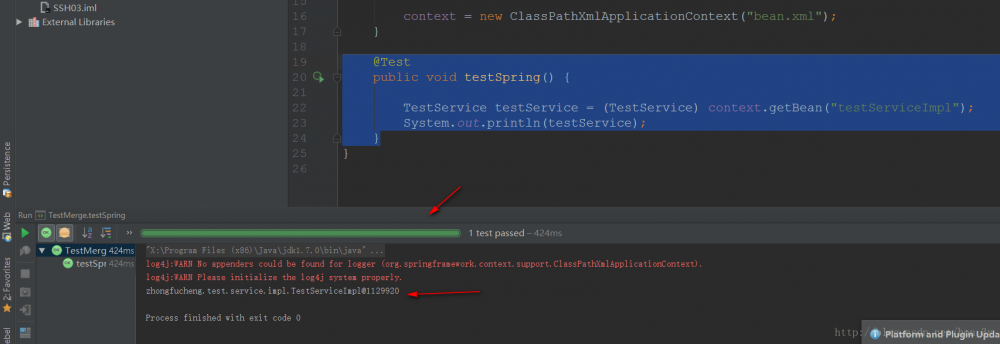
测试Struts
创建action目录,创建TestAction
package zhongfucheng.test.action;

import com.opensymphony.xwork2.ActionSupport;

/**
 * Created by ozc on 2017/5/22.
 */
public class TestAction extends ActionSupport {

    public String test2()  {
        return SUCCESS;
    }
}
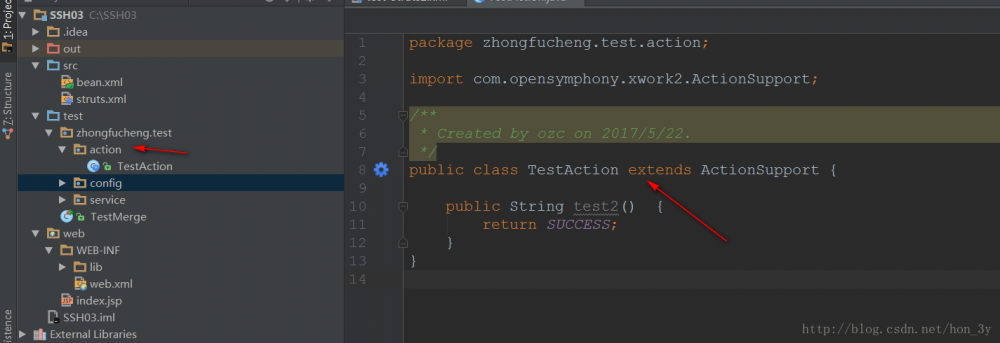
在config下多添加一个Struts的配置文件,配置对应的信息。 在Class中要么我们在配置Action的时候把对象交给Spring管理,要么就直接写上类的全名交给Struts2管理。这两种方式都是可以的! 【这里我们使用的是把对象交给Struts2管理,Spring是可以感知的,因为我们导入了Struts2-Spring.jar包】
<?xml version="1.0" encoding="UTF-8"?>

<!DOCTYPE struts PUBLIC
        "-//Apache Software Foundation//DTD Struts Configuration 2.0//EN"
        "http://struts.apache.org/dtds/struts-2.0.dtd">

<struts>

    <package name="test" namespace="/" extends="struts-default">
        <action name="test_*" class="zhongfucheng.test.action.TestAction" method="{1}">
            <result name="success">/WEB-INF/jsp/test/test.jsp</result>
        </action>
    </package>

</struts>

当然了, 在Struts2的总配置文件中也要把test中的Struts配置文件引入

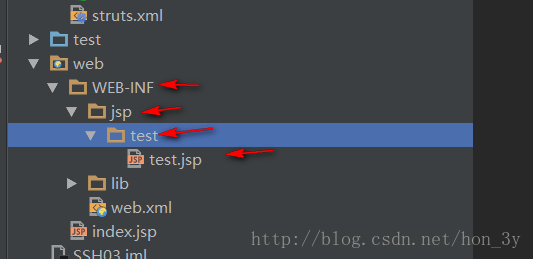
在WEB-INF下创建专门管理JSP的目录,其中创建用于测试的test.jsp
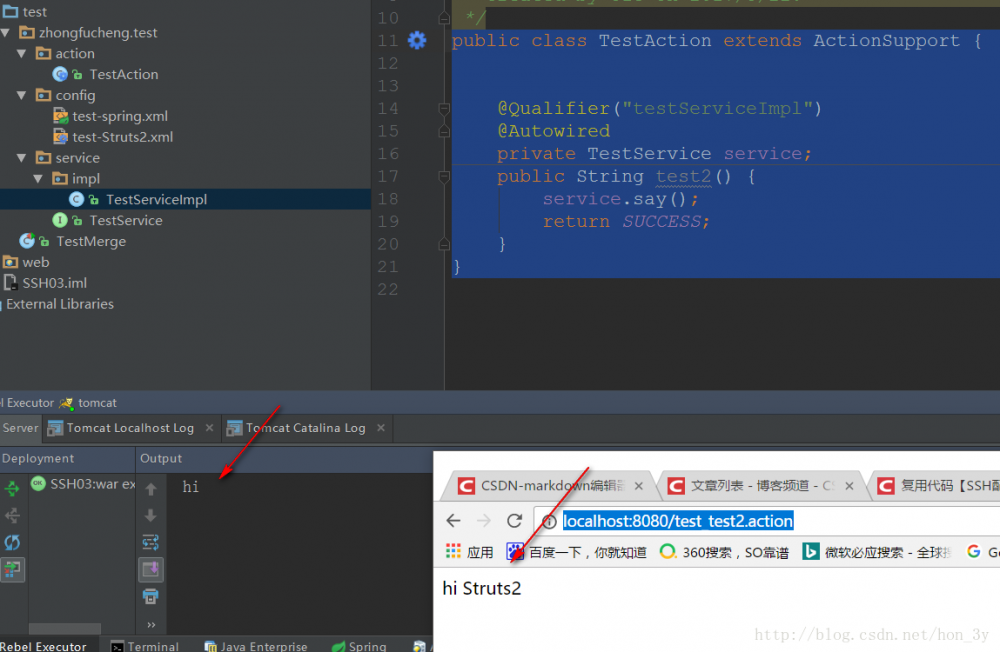
- 测试,在Action中调用Service的方法,看能不能跳转到对应的JSP页面和控制台输出数据
public class TestAction extends ActionSupport {


    @Qualifier("testServiceImpl")
    @Autowired
    private TestService service;
    public String test2() {
        service.say();
        return SUCCESS;
    }
}
整合hibernate和spring
C3P0连接池
- 在Spring总配置文件下导入C3P0连接池配置信息,我们发现 外部还导入了一个properties配置文件。
<!-- 导入外部的properties配置文件 -->
    <context:property-placeholder location="classpath:db.properties" />

    <!-- 配置c3p0数据源 -->
    <bean id="dataSource" class="com.mchange.v2.c3p0.ComboPooledDataSource" destroy-method="close">
        <property name="jdbcUrl" value="${jdbcUrl}"></property>
        <property name="driverClass" value="${driverClass}"></property>
        <property name="user" value="${user}"></property>
        <property name="password" value="${password}"></property>
        <!--初始化时获取三个连接,取值应在minPoolSize与maxPoolSize之间。Default: 3 -->
        <property name="initialPoolSize" value="${initialPoolSize}"></property>
        <!--连接池中保留的最小连接数。Default: 3 -->
        <property name="minPoolSize" value="3"></property>
        <!--连接池中保留的最大连接数。Default: 15 -->
        <property name="maxPoolSize" value="${maxPoolSize}"></property>
        <!--当连接池中的连接耗尽的时候c3p0一次同时获取的连接数。Default: 3 -->
        <property name="acquireIncrement" value="3"></property>
        <!--最大空闲时间,1800秒内未使用则连接被丢弃,若为0则永不丢弃。Default: 0 -->
        <property name="maxIdleTime" value="1800"></property>
    </bean>
- 由于配置文件有点多,于是我们也用一个包来整理,db.properties
jdbcUrl=jdbc:mysql://localhost:3306/SSH03?useUnicode=true&characterEncoding=utf8
driverClass=com.mysql.jdbc.Driver
user=root
password=root
initialPoolSize=10
maxPoolSize=30

sessionFactory
    <bean id="sessionFactory"
          class="org.springframework.orm.hibernate3.LocalSessionFactoryBean">
        <property name="dataSource" ref="dataSource"></property>
        <property name="hibernateProperties">
            <props>
                <prop key="hibernate.dialect">org.hibernate.dialect.MySQL5Dialect</prop>
                <prop key="hibernate.show_sql">true</prop>
                <prop key="hibernate.hbm2ddl.auto">update</prop>
                <prop key="javax.persistence.validation.mode">none</prop>
            </props>
        </property>
        <property name="mappingLocations">
            <list>
                <value>classpath:zhongfucheng/test/entity/*.hbm.xml</value>
            </list>
        </property>
    </bean>
测试Spring与Hibernate
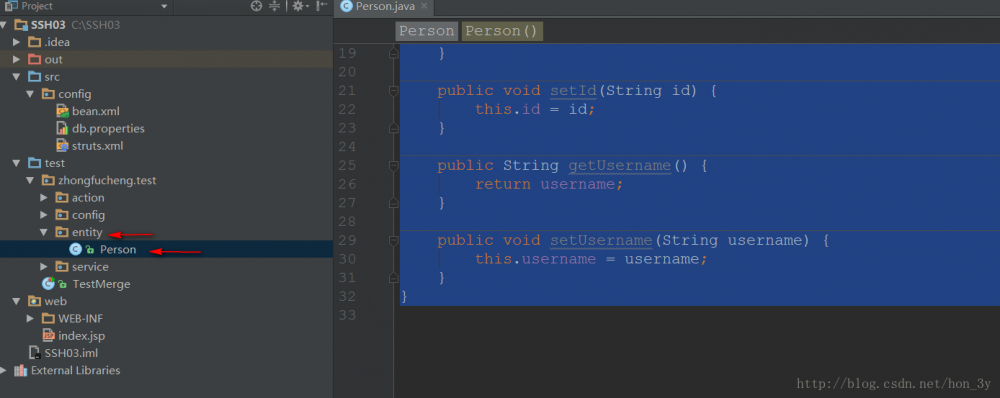
- 编写entity包,写一个Person.java来测试【 一般地,JavaBean我们现在都实现Serializable接口 】
package zhongfucheng.test.entity;

/**
 * Created by ozc on 2017/5/22.
 */
public class Person implements Serializable {

    private String id;
    private String username;
    public Person() {
    }
    public Person(String username) {
        this.username = username;

    }

    public String getId() {
        return id;
    }

    public void setId(String id) {
        this.id = id;
    }

    public String getUsername() {
        return username;
    }

    public void setUsername(String username) {
        this.username = username;
    }
}
- Person.hbm.xml映射文件
<?xml version="1.0" encoding="utf-8"?>
<!DOCTYPE hibernate-mapping PUBLIC "-//Hibernate/Hibernate Mapping DTD 3.0//EN"
"http://hibernate.sourceforge.net/hibernate-mapping-3.0.dtd">

<hibernate-mapping>
    <class name="zhongfucheng.test.entity.Person" table="person">
        <id name="id" type="java.lang.String">
            <column name="id" length="32" />
            <generator class="uuid.hex" />
        </id>
        <property name="username" type="java.lang.String">
            <column name="username" length="20" not-null="true" />
        </property>
    </class>
</hibernate-mapping>
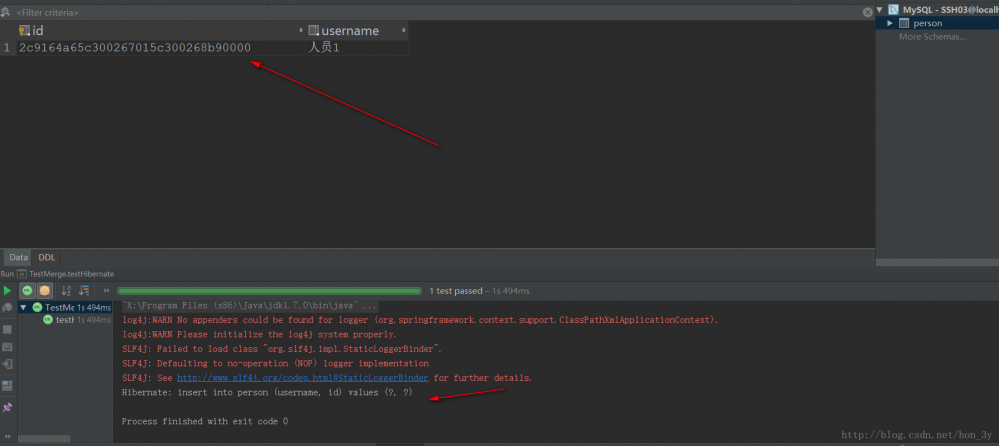
- 使用Junit测试:
    @Test
    public void testHibernate() {

        SessionFactory factory = (SessionFactory) context.getBean("sessionFactory");

        Session session = factory.openSession();
        session.beginTransaction();

        session.save(new Person("人员1"));

        session.getTransaction().commit();
        session.close();
    }
测试框架分层的整合(service与dao)
创建TestDao接口,创建TestDaoImpl实例,继承HibernateDaoSupport这个类【方便开发】,实现TestDao接口
public class TestDaoImpl extends HibernateDaoSupport implements TestDao {

    @Override
    public void save(Person person) {
        getHibernateTemplate().save(person);
    }
}

值得注意的是: 继承了HibernateDaoSupport这个类,这个类是需要SessionFactory的,通过注解的方式给不了【给属性的话,属性只与TestDaoImpl相关,而HibernateDaoSupport的setFactory()被定义了final】,因此只能通过XML的方式来配置【XML配置TestDaoImpl,TestDaoImpl是拥有setFactory方法的,不能改写,但是能通过XML注入呀】
    <bean id="testDaoImpl" class="zhongfucheng.test.dao.impl.TestDaoImpl">
        <property name="sessionFactory" ref="sessionFactory"></property>
    </bean>

@Service
public class TestServiceImpl implements zhongfucheng.test.service.TestService {


    @Autowired
    private TestDao testDaoImpl;
    @Override
    public void save(Person person) {
        testDaoImpl.save(person);
    }
}
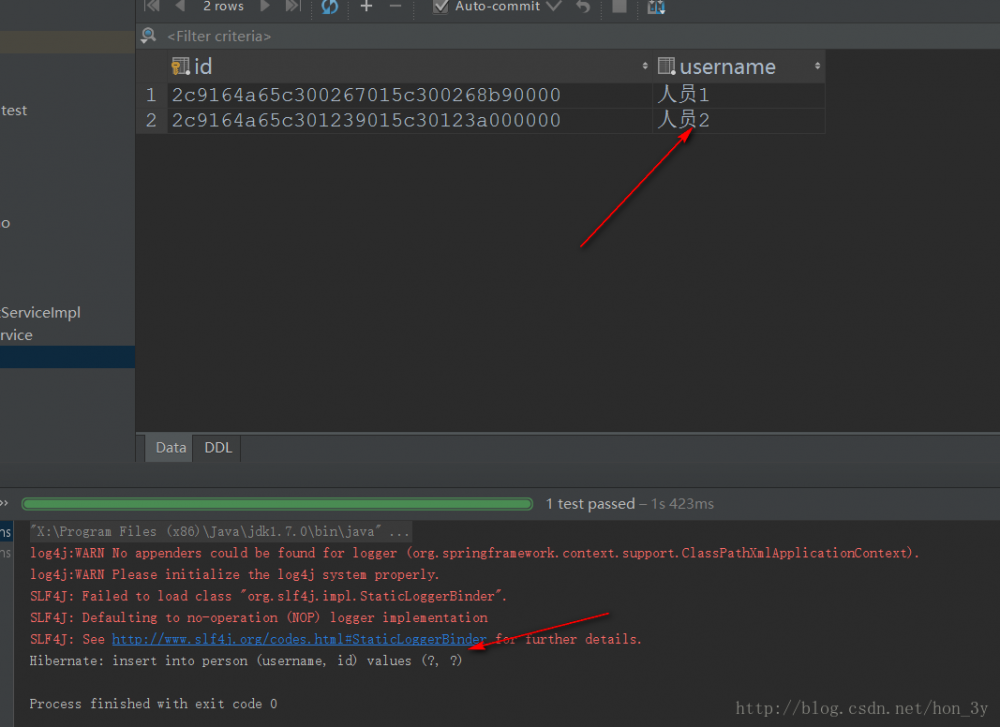
- 测试框架分层
    @Test
    public void testMVC() {

        TestService service = (TestService) context.getBean("testServiceImpl");
        service.save(new Person("人员2"));
    }
测试Spring事务
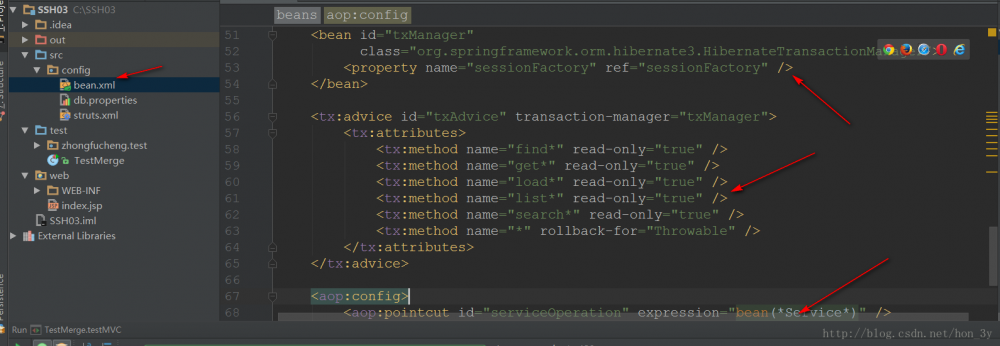
在Spring的总配置文件下添加以下配置:
    <bean id="txManager"
          class="org.springframework.orm.hibernate3.HibernateTransactionManager">
        <property name="sessionFactory" ref="sessionFactory" />
    </bean>

    <tx:advice id="txAdvice" transaction-manager="txManager">
        <tx:attributes>
            <tx:method name="find*" read-only="true" />
            <tx:method name="get*" read-only="true" />
            <tx:method name="load*" read-only="true" />
            <tx:method name="list*" read-only="true" />
            <tx:method name="search*" read-only="true" />
            <tx:method name="*" rollback-for="Throwable" />
        </tx:attributes>
    </tx:advice>

    <aop:config>
        <aop:pointcut id="serviceOperation" expression="bean(*Service*)" />
        <aop:advisor advice-ref="txAdvice" pointcut-ref="serviceOperation" />
    </aop:config>

    <!-- 所有业务配置文件都要用到sessionFactory,那么这个就是专门来创建sessionFactory的,其他的业务配置文件指定parent就有了该属性 -->
    <!-- 所有业务dao的parent -->
    <bean id="baseDao" abstract="true">
        <property name="sessionFactory" ref="sessionFactory"></property>
    </bean>
- 测试事务, 在Service方法中添加一个异常在保存下面,看看有没有回滚事务,如果有就证明事务有效了。
@Service
public class TestServiceImpl implements zhongfucheng.test.service.TestService {


    @Autowired
    private TestDao testDaoImpl;
    @Override
    public void save(Person person) {
        testDaoImpl.save(person);
        int i = 1 / 0;
    }
}
    @Test
    public void testTx() {

        TestService service = (TestService) context.getBean("testServiceImpl");
        service.save(new Person("人员3"));
    }

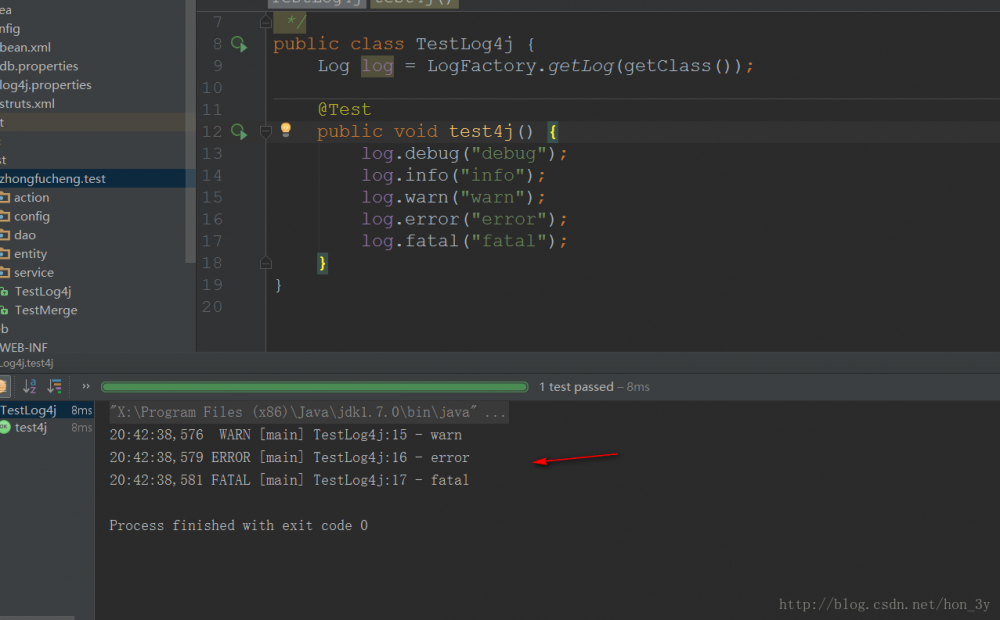
配置log4j
我们发现,每当使用Junit测试的时候都出现了以下的红色信息,虽然对我们的功能没有任何影响:

它出现的原因是没有配置log4j, 其实log4j对我们很有用。可以根据日志文件来找到对应的错误,我们在开发中也应该使用它 。
要配置log4j, 要导入jar包:com.springsource.org.apache.log4j-1.2.15.jar【在导入SSH的jar包中已经存在了】
配置 log4j.properties
log4j.appender.stdout=org.apache.log4j.ConsoleAppender
log4j.appender.stdout.Target=System.out
log4j.appender.stdout.layout=org.apache.log4j.PatternLayout
log4j.appender.stdout.layout.ConversionPattern=%d{ABSOLUTE} %5p [%t] %c{1}:%L - %m%n

#默认从warn开始
log4j.rootLogger=warn, stdout, R

log4j.logger.zhongfucheng=debug

log4j.appender.R=org.apache.log4j.DailyRollingFileAppender

#R.File是把日志信息输出到哪里
log4j.appender.R.File=D:/itcast/itcast.log
log4j.appender.R.layout=org.apache.log4j.PatternLayout
log4j.appender.R.layout.ConversionPattern=%d [%t] %5p  %c - %m%n
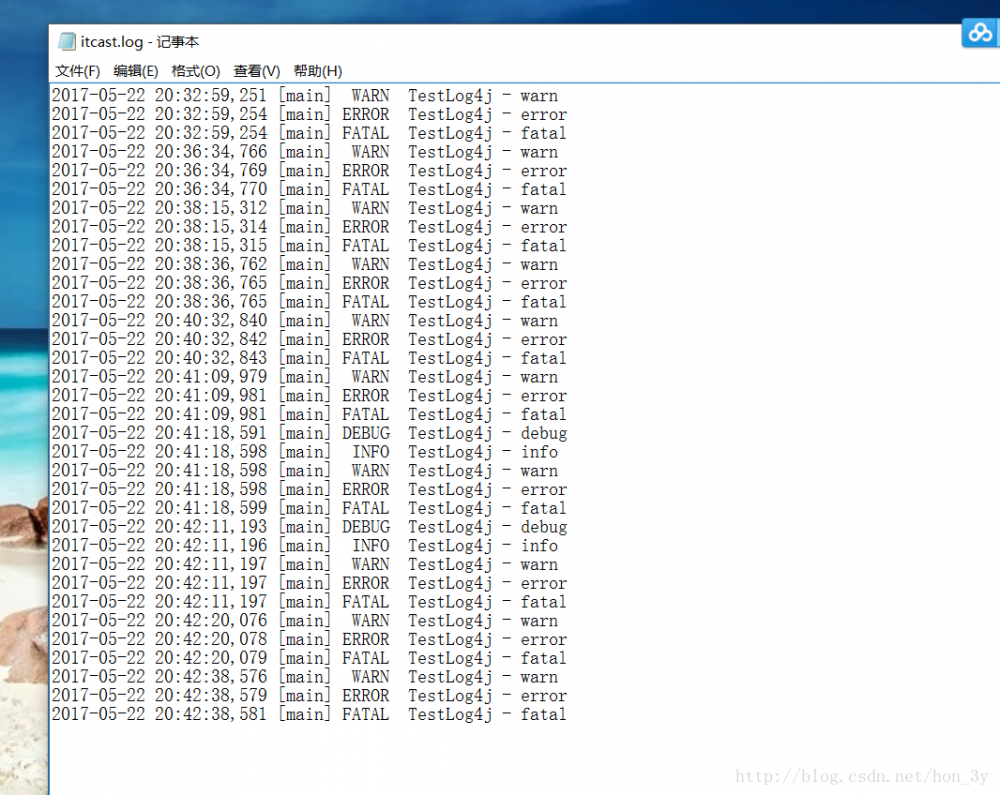
输出到硬盘的日志文件:
编写基类BaseDao
package zhongfucheng.core.dao;

import java.io.Serializable;
import java.util.List;

public interface BaseDao<T> {
    //新增
    public void save(T entity);
    //更新
    public void update(T entity);
    //根据id删除
    public void delete(Serializable id);
    //根据id查找
    public T findObjectById(Serializable id);
    //查找列表
    public List<T> findObjects();
}
- BaseDao的实现:
package zhongfucheng.core.dao.impl;

import org.hibernate.Query;
import org.springframework.orm.hibernate3.support.HibernateDaoSupport;
import zhongfucheng.core.dao.BaseDao;

import java.io.Serializable;
import java.lang.reflect.ParameterizedType;
import java.util.List;


public abstract class BaseDaoImpl<T> extends HibernateDaoSupport implements BaseDao<T> {

    Class<T> clazz;

    public BaseDaoImpl(){
        ParameterizedType pt =  (ParameterizedType)this.getClass().getGenericSuperclass();//BaseDaoImpl<User>
        clazz = (Class<T>)pt.getActualTypeArguments()[0];
    }

    @Override
    public void save(T entity) {
        getHibernateTemplate().save(entity);
    }

    @Override
    public void update(T entity) {
        getHibernateTemplate().update(entity);
    }

    @Override
    public void delete(Serializable id) {
        getHibernateTemplate().delete(findObjectById(id));
    }

    @Override
    public T findObjectById(Serializable id) {
        return getHibernateTemplate().get(clazz, id);
    }

    @Override
    public List<T> findObjects() {
        Query query = getSession().createQuery("FROM " + clazz.getSimpleName());
        return query.list();
    }

}
- 本文标签: schema classpath cat 监听器 时间 IO 开发 update DDL https UI Service 实例 bug mysql MySQL5 测试 find ACE 管理 ORM list ssh core 配置 Action App id dataSource root tar Word NSA ioc value java entity db map Property CTO AOP C3P0 web 删除 IDE bean key spring src tab sql Persistence CEO Struts2 final apache http js 数据 constant XML 目录
- 版权声明: 本文为互联网转载文章,出处已在文章中说明(部分除外)。如果侵权,请联系本站长删除,谢谢。
- 本文海报: 生成海报一 生成海报二


![[HBLOG]公众号](https://www.liuhaihua.cn/img/qrcode_gzh.jpg)

