自己动手在Spring-Boot上加强国际化功能
公司将项目由Struts2转到Springmvc了,由于公司业务是境外服务,所以对国际化功能需求很高。Struts2自带的国际化功能相对Springmvc来说更加完善,不过spring很大的特性就是可定定制化性强,所以在公司项目移植的到Springmvc的时候增加了其国际化的功能。特此整理记录并且完善了一下。
本文主要实现的功能:
- 从文件夹中直接加载多个国际化文件
- 后台设置前端页面显示国际化信息的文件
- 利用拦截器和注解自动设置前端页面显示国际化信息的文件
注:本文不详细介绍怎么配置国际化,区域解析器等。
实现
国际化项目初始化
先创建一个基本的Spring-Boot+thymeleaf+国际化信息(message.properties)项目,如果有需要可以从我的 Github 下载。
简单看一下项目的目录和文件
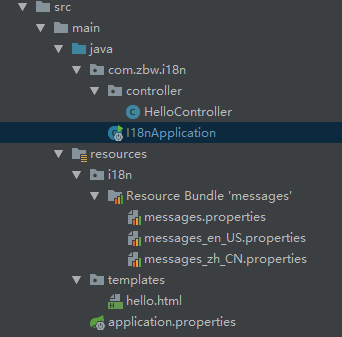
其中I18nApplication.java设置了一个 CookieLocaleResolver ,采用cookie来控制国际化的语言。还设置一个 LocaleChangeInterceptor 拦截器来拦截国际化语言的变化。
@SpringBootApplication
@Configuration
public class I18nApplication {
    public static void main(String[] args) {
        SpringApplication.run(I18nApplication.class, args);
    }

    @Bean
    public LocaleResolver localeResolver() {
        CookieLocaleResolver slr = new CookieLocaleResolver();
        slr.setCookieMaxAge(3600);
        slr.setCookieName("Language");//设置存储的Cookie的name为Language
        return slr;
    }

    @Bean
    public WebMvcConfigurer webMvcConfigurer() {
        return new WebMvcConfigurer() {
            //拦截器
            @Override
            public void addInterceptors(InterceptorRegistry registry) {
                registry.addInterceptor(new LocaleChangeInterceptor()).addPathPatterns("/**");
            }
        };
    }
}
我们再看一下hello.html中写了什么:
<!DOCTYPE html>
<html xmlns="http://www.w3.org/1999/xhtml" xmlns:th="http://www.thymeleaf.org">
<head>
    <title>Hello World!</title>
</head>
<body>
<h1 th:text="#{i18n_page}"></h1>
<h3 th:text="#{hello}"></h3>
</body>
</html>
现在启动项目并且访问 http://localhost:9090/hello (我在application.properties)中设置了端口为9090。
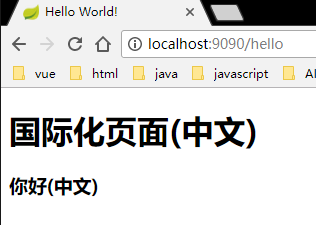
由于浏览器默认的语言是中文,所以他默认会去messages_zh_CN.properties中找,如果没有就会去messages.properties中找国际化词。
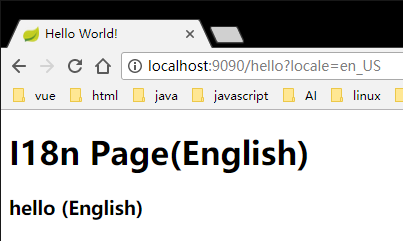
然后我们在浏览器中输入 http://localhost:9090/hello?locale=en_US ,语言就会切到英文。同样的如果url后参数设置为 locale=zh_CH ,语言就会切到中文。
从文件夹中直接加载多个国际化文件
在我们hello.html页面中,只有'i18n_page'和'hello'两个国际化信息,然而在实际项目中肯定不会只有几个国际化信息那么少,通常都是成千上百个的,那我们肯定不能把这么多的国际化信息都放在 messages.properties 一个文件中,通常都是把国际化信息分类存放在几个文件中。但是当项目大了以后,这些国际化文件也会越来越多,这时候在 application.properties 文件中一个个的去配置这个文件也是不方便的,所以现在我们实现一个功能自动加载制定目录下所有的国际化文件。
继承ResourceBundleMessageSource
在项目下创建一个类继承 ResourceBundleMessageSource 或者 ReloadableResourceBundleMessageSource ,起名为 MessageResourceExtension 。并且注入到bean中起名为 messageSource ,这里我们继承ResourceBundleMessageSource。
@Component("messageSource")
public class MessageResourceExtension extends ResourceBundleMessageSource {
}
注意这里我们的Component名字必须为'messageSource',因为在初始化 ApplicationContext 的时候,会查找bean名为'messageSource'的bean。这个过程在 AbstractApplicationContext.java 中,我们看一下源代码
/**
* Initialize the MessageSource.
* Use parent's if none defined in this context.
*/
protected void initMessageSource() {
	ConfigurableListableBeanFactory beanFactory = getBeanFactory();
	if (beanFactory.containsLocalBean(MESSAGE_SOURCE_BEAN_NAME)) {
		this.messageSource = beanFactory.getBean(MESSAGE_SOURCE_BEAN_NAME, MessageSource.class);
	...
	}
}
...
在这个初始化MessageSource的方法中,beanFactory查找注入名为 MESSAGE_SOURCE_BEAN_NAME(messageSource) 的bean,如果没有找到,就会在其父类中查找是否有该名的bean。
实现文件加载
现在我们可以开始在刚才创建的 MessageResourceExtension
中写加载文件的方法了。
@Component("messageSource")
public class MessageResourceExtension extends ResourceBundleMessageSource {

    private final static Logger logger = LoggerFactory.getLogger(MessageResourceExtension.class);

    /**
     * 指定的国际化文件目录
     */
    @Value(value = "${spring.messages.baseFolder:i18n}")
    private String baseFolder;

    /**
     * 父MessageSource指定的国际化文件
     */
    @Value(value = "${spring.messages.basename:message}")
    private String basename;

    @PostConstruct
    public void init() {
        logger.info("init MessageResourceExtension...");
        if (!StringUtils.isEmpty(baseFolder)) {
            try {
                this.setBasenames(getAllBaseNames(baseFolder));
            } catch (IOException e) {
                logger.error(e.getMessage());
            }
        }
        //设置父MessageSource

        ResourceBundleMessageSource parent = new ResourceBundleMessageSource();
        parent.setBasename(basename);
        this.setParentMessageSource(parent);
    }

    /**
     * 获取文件夹下所有的国际化文件名
     *
     * @param folderName 文件名
     * @return
     * @throws IOException
     */
    private String[] getAllBaseNames(String folderName) throws IOException {
        Resource resource = new ClassPathResource(folderName);
        File file = resource.getFile();
        List<String> baseNames = new ArrayList<>();
        if (file.exists() && file.isDirectory()) {
            this.getAllFile(baseNames, file, "");
        } else {
            logger.error("指定的baseFile不存在或者不是文件夹");
        }
        return baseNames.toArray(new String[baseNames.size()]);
    }

    /**
     * 遍历所有文件
     *
     * @param basenames
     * @param folder
     * @param path
     */
    private void getAllFile(List<String> basenames, File folder, String path) {
        if (folder.isDirectory()) {
            for (File file : folder.listFiles()) {
                this.getAllFile(basenames, file, path + folder.getName() + File.separator);
            }
        } else {
            String i18Name = this.getI18FileName(path + folder.getName());
            if (!basenames.contains(i18Name)) {
                basenames.add(i18Name);
            }

        }
    }

    /**
     * 把普通文件名转换成国际化文件名
     *
     * @param filename
     * @return
     */
    private String getI18FileName(String filename) {
        filename = filename.replace(".properties", "");
        for (int i = 0; i < 2; i++) {
            int index = filename.lastIndexOf("_");
            if (index != -1) {
                filename = filename.substring(0, index);
            }
        }
        return filename;
    }
}
依次解释一下几个方法。
-
init()方法上有一个@PostConstruct注解,这会在MessageResourceExtension类被实例化之后自动调用init()方法。这个方法获取到baseFolder目录下所有的国际化文件并设置到basenameSet中。并且设置一个ParentMessageSource,这会在找不到国际化信息的时候,调用父MessageSource来查找国际化信息。 -
getAllBaseNames()方法获取到baseFolder的路径,然后调用getAllFile()方法获取到该目录下所有的国际化文件的文件名。 -
getAllFile()遍历目录,如果是文件夹就继续遍历,如果是文件就调用getI18FileName()把文件名转为’i18n/basename/‘格式的国际化资源名。
所以简单来说就是在 MessageResourceExtension 被实例化之后,把'i18n'文件夹下的资源文件的名字,加载到 Basenames 中。现在来看一下效果。
首先我们在application.properties文件中添加一个 spring.messages.baseFolder=i18n ,这会把'i18n'这个值赋值给 MessageResourceExtension 中的 baseFolder 。
在启动后看到控制台里打印出了init信息,表示被 @PostConstruct 注解的init()方法已经执行。

然后我们再创建两组国际化信息文件:'dashboard'和'merchant',里面分别只有一个国际化信息:'dashboard.hello'和'merchant.hello'。
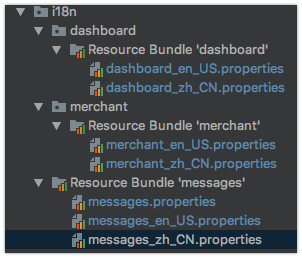
之后再修改一下hello.html文件,然后访问hello页面。
...
<body>
<h1>国际化页面!</h1>
<p th:text="#{hello}"></p>
<p th:text="#{merchant.hello}"></p>
<p th:text="#{dashboard.hello}"></p>
</body>
...
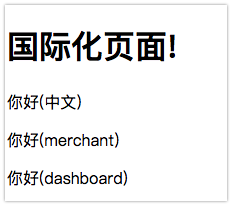
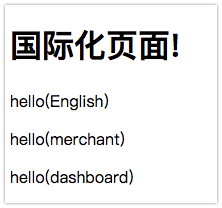
可以看到网页中加载了'message','dashboard'和'merchant'中的国际化信息,说明我们已经成功一次性加载了'i18n'文件夹下的文件。
后台设置前端页面显示国际化信息的文件
s刚才那一节我们成功加载了多个国际化文件并显示出了他们的国际化信息。但是'dashboard.properties'中的国际化信息为'dashboard.hello'而'merchant.properties'中的是'merchant.hello',这样每个都要写一个前缀岂不是很麻烦,现在我想要在'dashboard'和'merchant'的国际化文件中都只写'hello'但是显示的是'dashboard'或'merchant'中的国际化信息。
在 MessageResourceExtension 重写 resolveCodeWithoutArguments 方法(如果有字符格式化的需求就重写 resolveCode 方法)。
@Component("messageSource")
public class MessageResourceExtension extends ResourceBundleMessageSource {
    ...
    public static String I18N_ATTRIBUTE = "i18n_attribute";

    @Override
    protected String resolveCodeWithoutArguments(String code, Locale locale) {
        // 获取request中设置的指定国际化文件名
        ServletRequestAttributes attr = (ServletRequestAttributes) RequestContextHolder.currentRequestAttributes();
        final String i18File = (String) attr.getAttribute(I18N_ATTRIBUTE, RequestAttributes.SCOPE_REQUEST);
        if (!StringUtils.isEmpty(i18File)) {
            //获取在basenameSet中匹配的国际化文件名
            String basename = getBasenameSet().stream()
                    .filter(name -> StringUtils.endsWithIgnoreCase(name, i18File))
                    .findFirst().orElse(null);
            if (!StringUtils.isEmpty(basename)) {
                //得到指定的国际化文件资源
                ResourceBundle bundle = getResourceBundle(basename, locale);
                if (bundle != null) {
                    return getStringOrNull(bundle, code);
                }
            }
        }
        //如果指定i18文件夹中没有该国际化字段,返回null会在ParentMessageSource中查找
        return null;
    }
    ...
}
在我们重写的 resolveCodeWithoutArguments 方法中,从HttpServletRequest中获取到‘I18N_ATTRIBUTE’(等下再说这个在哪里设置),这个对应我们想要显示的国际化文件名,然后我们在 BasenameSet 中查找该文件,再通过 getResourceBundle 获取到资源,最后再 getStringOrNull 获取到对应的国际化信息。
现在我们到我们的 HelloController 里加两个方法。
@Controller
public class HelloController {

    @GetMapping("/hello")
    public String index(HttpServletRequest request) {
        request.setAttribute(MessageResourceExtension.I18N_ATTRIBUTE, "hello");
        return "system/hello";
    }

    @GetMapping("/dashboard")
    public String dashboard(HttpServletRequest request) {
        request.setAttribute(MessageResourceExtension.I18N_ATTRIBUTE, "dashboard");
        return "dashboard";
    }

    @GetMapping("/merchant")
    public String merchant(HttpServletRequest request) {
        request.setAttribute(MessageResourceExtension.I18N_ATTRIBUTE, "merchant");
        return "merchant";
    }
}
看到我们在每个方法中都设置一个对应的'I18N_ATTRIBUTE',这会在每次请求中设置对应的国际化文件,然后在 MessageResourceExtension 中获取。
这时我们看一下我们的国际化文件,我们可以看到所有关键字都是'hello',但是信息却不同。


同时新增两个html文件分别是'dashboard.html'和'merchant.html',里面只有一个'hello'的国际化信息和用于区分的标题。
<!-- 这是hello.html -->
<body>
<h1>国际化页面!</h1>
<p th:text="#{hello}"></p>
</body>
<!-- 这是dashboard.html -->
<body>
<h1>国际化页面(dashboard)!</h1>
<p th:text="#{hello}"></p>
</body>
<!-- 这是merchant.html -->
<body>
<h1>国际化页面(merchant)!</h1>
<p th:text="#{hello}"></p>
</body>
这时我们启动项目看一下。
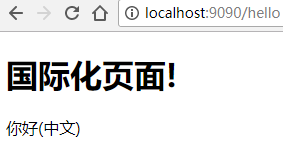
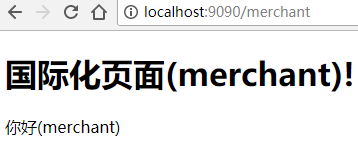
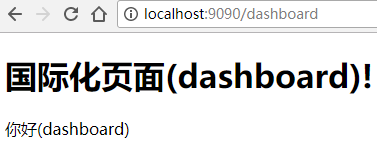
可以看到虽然在每个页面的国际化词都是'hello',但是我们在对应的页面显示了我们想要显示的信息。
利用拦截器和注解自动设置前端页面显示国际化信息的文件
虽然已经可以指定对应的国际化信息,但是这样要在每个controller里的HttpServletRequest中设置国际化文件实在太麻烦了,所以现在我们实现自动判定来显示对应的文件。
首先我们创建一个注解,这个注解可以放在类上或者方法上。
@Target({ElementType.TYPE, ElementType.METHOD})
@Retention(RetentionPolicy.RUNTIME)
public @interface I18n {
    /**
     * 国际化文件名
     */
    String value();
}
然后我们把这个创建的 I18n 注解放在刚才的Controller方法中,为了显示他的效果,我们再创建一个 ShopController 和 UserController ,同时也创建对应的'shop'和'user'的国际化文件,内容也都是一个'hello'。
@Controller
public class HelloController {
    @GetMapping("/hello")
    public String index() {
        return "system/hello";
    }

    @I18n("dashboard")
    @GetMapping("/dashboard")
    public String dashboard() {
        return "dashboard";
    }

    @I18n("merchant")
    @GetMapping("/merchant")
    public String merchant() {
        return "merchant";
    }
}
@I18n("shop")
@Controller
public class ShopController {
    @GetMapping("shop")
    public String shop() {
        return "shop";
    }
}
@Controller
public class UserController {
    @GetMapping("user")
    public String user() {
        return "user";
    }
}
我们把 I18n 注解分别放在 HelloController 下的 dashboard 和 merchant 方法下,和 ShopController 类上。并且去除了原来 dashboard 和 merchant 方法下设置‘I18N_ATTRIBUTE’的语句。
准备工作都做好了,现在看看如何实现根据这些注解自动的指定国际化文件。
public class MessageResourceInterceptor implements HandlerInterceptor {
    @Override
    public void postHandle(HttpServletRequest req, HttpServletResponse rep, Object handler, ModelAndView modelAndView) {

        // 在方法中设置i18路径
        if (null != req.getAttribute(MessageResourceExtension.I18N_ATTRIBUTE)) {
            return;
        }

        HandlerMethod method = (HandlerMethod) handler;
        // 在method上注解了i18
        I18n i18nMethod = method.getMethodAnnotation(I18n.class);
        if (null != i18nMethod) {
            req.setAttribute(MessageResourceExtension.I18N_ATTRIBUTE, i18nMethod.value());
            return;
        }

        // 在Controller上注解了i18
        I18n i18nController = method.getBeanType().getAnnotation(I18n.class);
        if (null != i18nController) {
            req.setAttribute(MessageResourceExtension.I18N_ATTRIBUTE, i18nController.value());
            return;
        }

        // 根据Controller名字设置i18
        String controller = method.getBeanType().getName();
        int index = controller.lastIndexOf(".");
        if (index != -1) {
            controller = controller.substring(index + 1, controller.length());
        }
        index = controller.toUpperCase().indexOf("CONTROLLER");
        if (index != -1) {
            controller = controller.substring(0, index);
        }
        req.setAttribute(MessageResourceExtension.I18N_ATTRIBUTE, controller);
    }

    @Override
    public boolean preHandle(HttpServletRequest req, HttpServletResponse rep, Object handler) {
        // 在跳转到该方法先清除request中的国际化信息
        req.removeAttribute(MessageResourceExtension.I18N_ATTRIBUTE);
        return true;
    }
}
简单讲解一下这个拦截器。
首先,如果request中已经有'I18N_ATTRIBUTE',说明在Controller的方法中指定设置了,就不再判断。
然后判断一下进入拦截器的方法上有没有 I18n 的注解,如果有就设置'I18N_ATTRIBUTE'到request中并退出拦截器,如果没有就继续。
再判断进入拦截的类上有没有 I18n 的注解,如果有就设置'I18N_ATTRIBUTE'到request中并退出拦截器,如果没有就继续。
最后假如方法和类上都没有 I18n 的注解,那我们可以根据Controller名自动设置指定的国际化文件,比如'UserController'那么就会去找'user'的国际化文件。
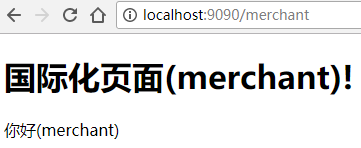
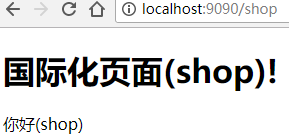
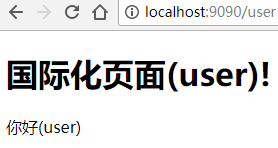
现在我们再运行一下看看效果,看到每个链接都显示的他们对应的国际化信息里的内容。

最后
刚才完成了我们整个国际化增强的基本功能,最后我把全部代码整理了一下,并且整合了bootstrap4来展示了一下功能的实现效果。


详细的代码可以看我Github上 Spring-Boot-I18n-Pro 的代码
原文地址:zzzzbw.cn
- 本文标签: 定制 https IDE 解析 参数 IO web git UI HTML SpringMVC bean java struct 配置 App list message ArrayList spring servlet map CTO value 下载 Dashboard 目录 标题 需求 XML ACE springboot 端口 cat 代码 实例 http tab find GitHub HTML文件 src id classpath tar Bootstrap 遍历 final Struts2
- 版权声明: 本文为互联网转载文章,出处已在文章中说明(部分除外)。如果侵权,请联系本站长删除,谢谢。
- 本文海报: 生成海报一 生成海报二


![[HBLOG]公众号](https://www.liuhaihua.cn/img/qrcode_gzh.jpg)

