07-10Spring Cloud 入门 之 Feign 篇(三)
一、前言
在上一篇文章 《Spring Cloud 入门 之 Ribbon 篇(二)》 中介绍了 Ribbon 使用负载均衡调用微服务,但存在一个问题:消费端每个请求方法中都需要拼接请求服务的 URL 地址,存在硬编码问题且不符合面向对象编程思想。如果服务名称发生变化,消费端也需要跟着修改。
本篇文章将介绍 Feign 来解决上边的问题。
二、简单介绍
Feign 是一个声明式的 Web Service 客户端。使用 Feign 能让编写 Web Service 客户端更加简单,同时支持与Eureka、Ribbon 组合使用以支持负载均衡。
Spring Cloud 对 Feign 进行了封装,使其支持了 Spring MVC 标准注解和 HttpMessageConverters。
Feign 的使用方法是定义一个接口,然后在其上边添加 @FeignClient 注解。
三、实战演练
本次测试案例基于之前发表的文章中介绍的案例进行演示,不清楚的读者请先转移至 《Spring Cloud 入门 之 Ribbon 篇(二)》 进行浏览。
3.1 添加依赖
在 common-api 和 user-web 项目中添加依赖:
- <dependency>
- <groupId>org.springframework.cloud</groupId>
- <artifactId>spring-cloud-starter-feign</artifactId>
- </dependency>
3.2 定义接口
在 common-api 中定义接口:
- @FeignClient(value="USER-API")
- public interface UserFeignService {
- @RequestMapping("/provider/user/get/{id}")
- public User get(@PathVariable("id") Integer id);
使用 @FeignClient 注解指定调用的微服务名称,封装了调用 USER-API 的过程,作为消费方调用模板。
3.3 修改服务消费方
修改 user-api 控制层代码:
- @RestController
- @RequestMapping("/user")
- public class UserController {
- @Autowired
- private UserFeignService userFeignService;
- @RequestMapping("get/{id}")
- public User get(@PathVariable("id") Integer id) throws Exception {
- // 使用 Feign 封装的模板
- return this.userFeignService.get(id);
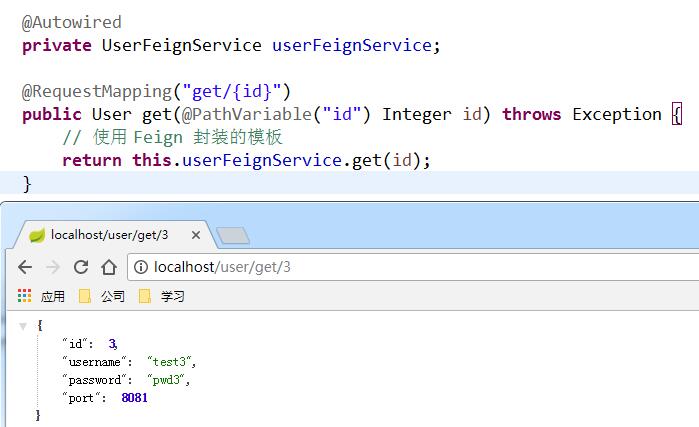
直接使用 Feign 封装模板调用服务方,从而实现面向对象编程。
3.4 启动 Feign 功能
在启动类上添加 @EnableEeignClients 注解:
- @@EnableFeignClients(basePackages={"com.extlight.springcloud"})
- @ComponentScan("com.extlight.springcloud")
- public class ConsumerApplication {
- public static void main(String[] args) {
- SpringApplication.run(ConsumerApplication.class, args);
打开浏览器访问 user-web 项目,请求结果如下图:

四、案例源码
Feign demo 源码
正文到此结束
热门推荐
相关文章
Loading...


![[HBLOG]公众号](https://www.liuhaihua.cn/img/qrcode_gzh.jpg)

