Maven 教程之发布 jar 到私服或中央仓库
为了避免重复造轮子,相信每个 Java 程序员都想打造自己的脚手架或工具包(自己定制的往往才是最适合自己的)。那么如何将自己的脚手架发布到中央仓库呢?下面我们将一步步来实现。
在 Sonatype 创建 Issue
(1)注册 Sonatype 账号
发布 Java 包到 Maven 中央仓库,首先需要在Sonatype 网站创建一个工单(Issues)。
第一次使用这个网站的时候需要注册自己的帐号(这个帐号和密码需要记住,后面会用到)。
(2)创建 Issue
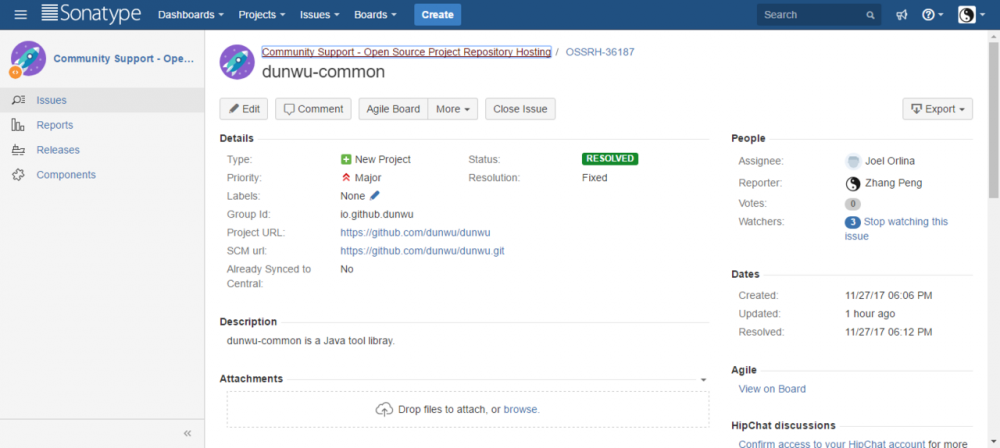
注册账号成功后,根据你 Java 包的功能分别写上 Summary 、 Description 、 Group Id 、 SCM url 以及 Project URL 等必要信息,可以参见我之前创建的 Issue:OSSRH-36187。

创建完之后需要等待 Sonatype 的工作人员审核处理,审核时间还是很快的,我的审核差不多等待了两小时。当 Issue 的 Status 变为 RESOLVED 后,就可以进行下一步操作了。
说明:如果你的 Group Id 填写的是自己的网站(我的就是这种情况),Sonatype 的工作人员会询问你那个 Group Id 是不是你的域名,你只需要在上面回答是就行,然后就会通过审核。
使用 GPG 生成公私钥对
(1)安装 Gpg4win
Windows 系统,可以下载 Gpg4win 软件来生成密钥对。
Gpg4win 下载地址
安装后,执行命令 gpg --version 检查是否安装成功。
C:/Program Files (x86)/GnuPG/bin>gpg --version
gpg (GnuPG) 2.2.10
libgcrypt 1.8.3
Copyright (C) 2018 Free Software Foundation, Inc.
License GPLv3+: GNU GPL version 3 or later <https://gnu.org/licenses/gpl.html>
This is free software: you are free to change and redistribute it.
There is NO WARRANTY, to the exdunwu permitted by law.

Home: C:/Users/Administrator/AppData/Roaming/gnupg
Supported algorithms:
Pubkey: RSA, ELG, DSA, ECDH, ECDSA, EDDSA
Cipher: IDEA, 3DES, CAST5, BLOWFISH, AES, AES192, AES256, TWOFISH,
        CAMELLIA128, CAMELLIA192, CAMELLIA256
Hash: SHA1, RIPEMD160, SHA256, SHA384, SHA512, SHA224
Compression: Uncompressed, ZIP, ZLIB, BZIP2
复制代码
(2)生成密钥对
执行命令 gpg --gen-key
C:/Program Files (x86)/GnuPG/bin>gpg --gen-key
gpg (GnuPG) 2.2.10; Copyright (C) 2018 Free Software Foundation, Inc.
This is free software: you are free to change and redistribute it.
There is NO WARRANTY, to the exdunwu permitted by law.

Note: Use "gpg --full-generate-key" for a full featured key generation dialog.

GnuPG needs to construct a user ID to identify your key.

Real name: Zhang Peng
Email address: forbreak@163.com
You selected this USER-ID:
    "Zhang Peng <forbreak@163.com>"

Change (N)ame, (E)mail, or (O)kay/(Q)uit? O
复制代码
说明:按照提示,依次输入用户名、邮箱。
(3)查看公钥
C:/Program Files (x86)/GnuPG/bin>gpg --list-keys

gpg: checking the trustdb
gpg: marginals needed: 3  completes needed: 1  trust model: pgp
gpg: depth: 0  valid:   2  signed:   0  trust: 0-, 0q, 0n, 0m, 0f, 2u
gpg: next trustdb check due at 2020-11-05
C:/Users/Administrator/AppData/Roaming/gnupg/pubring.kbx
--------------------------------------------------------
pub   rsa2048 2018-11-06 [SC] [expires: 2020-11-06]
      E4CE537A3803D49C35332221A306519BAFF57F60
uid           [ultimate] forbreak <forbreak@163.com>
sub   rsa2048 2018-11-06 [E] [expires: 2020-11-06]
复制代码
说明:其中,E4CE537A3803D49C35332221A306519BAFF57F60 就是公钥
(4)将公钥发布到 PGP 密钥服务器
执行 gpg --keyserver hkp://pool.sks-keyservers.net --send-keys 发布公钥:
C:/Program Files (x86)/GnuPG/bin>gpg --keyserver hkp://pool.sks-keyservers.net --send-keys E4CE537A3803D49C35332221A306519BAFF57F60
gpg: sending key A306519BAFF57F60 to hkp://pool.sks-keyservers.net
复制代码
注意:有可能出现 gpg: keyserver receive failed: No dat 错误,等大约 30 分钟后再执行就不会报错了。
(5)查看公钥是否发布成功
执行 gpg --keyserver hkp://pool.sks-keyservers.net --recv-keys 查看公钥是否发布成功。
C:/Program Files (x86)/GnuPG/bin>gpg --keyserver hkp://pool.sks-keyservers.net --recv-keys E4CE537A3803D49C35332221A306519BAFF57F60
gpg: key A306519BAFF57F60: "forbreak <forbreak@163.com>" not changed
gpg: Total number processed: 1
gpg:              unchanged: 1
复制代码
Maven 配置
完成了前两个章节的准备工作,就可以将 jar 包上传到中央仓库了。当然了,我们还要对 maven 做一些配置。
settings.xml 配置
一份完整的 settings.xml 配置示例如下:
<?xml version="1.0" encoding="UTF-8"?>

<settings xmlns="http://maven.apache.org/SETTINGS/1.0.0"
  xmlns:xsi="http://www.w3.org/2001/XMLSchema-instance" xsi:schemaLocation="http://maven.apache.org/SETTINGS/1.0.0 http://maven.apache.org/xsd/settings-1.0.0.xsd">

  <pluginGroups>
    <pluginGroup>org.sonatype.plugins</pluginGroup>
  </pluginGroups>

  <!-- 用户名、密码就是 Sonatype 账号、密码 -->
  <servers>
    <server>
      <id>sonatype-snapshots</id>
      <username>xxxxxx</username>
      <password>xxxxxx</password>
    </server>
    <server>
      <id>sonatype-staging</id>
      <username>xxxxxx</username>
      <password>xxxxxx</password>
    </server>
  </servers>

  <!-- 使用 aliyun maven 仓库加速下载 -->
  <mirrors>
    <mirror>
      <id>nexus-aliyun</id>
      <mirrorOf>*</mirrorOf>
      <name>Aliyun</name>
      <url>http://maven.aliyun.com/nexus/condunwu/groups/public</url>
    </mirror>
  </mirrors>

  <!-- gpg 的密码,注意,这里不是指公钥 -->
  <profiles>
    <profile>
      <id>sonatype</id>
      <properties>
        <gpg.executable>C:/Program Files (x86)/GnuPG/bin/gpg.exe</gpg.executable>
        <gpg.passphrase>xxxxxx</gpg.passphrase>
      </properties>
    </profile>
  </profiles>

  <activeProfiles>
    <activeProfile>sonatype</activeProfile>
  </activeProfiles>
</settings>
复制代码
pom.xml 配置
(1)添加 licenses、scm、developers 配置:
<licenses>
  <license>
    <name>The Apache Software License, Version 2.0</name>
    <url>http://www.apache.org/licenses/LICENSE-2.0.txt</url>
    <distribution>repo</distribution>
  </license>
</licenses>

<developers>
  <developer>
    <name>xxxxxx</name>
    <email>forbreak@163.com</email>
    <url>https://github.com/dunwu</url>
  </developer>
</developers>

<scm>
  <url>https://github.com/dunwu/dunwu</url>
  <connection>git@github.com:dunwu/dunwu.git</connection>
  <developerConnection>https://github.com/dunwu</developerConnection>
</scm>
复制代码
(2)添加 distributionManagement 配置
<distributionManagement>
  <snapshotRepository>
    <id>sonatype-snapshots</id>
    <url>https://oss.sonatype.org/content/repositories/snapshots</url>
  </snapshotRepository>
  <repository>
    <id>sonatype-staging</id>
    <url>https://oss.sonatype.org/service/local/staging/deploy/maven2</url>
  </repository>
</distributionManagement>
复制代码
说明: <snapshotRepository> 指定的是 snapshot 仓库地址; <repository> 指定的是 staging (正式版)仓库地址。需要留意的是,这里的 id 需要和 settings.xml 中的 <server> 的 id 保持一致。
(3)添加 profiles 配置
<profiles>
  <profile>
    <id>sonatype</id>
    <build>
      <plugins>
        <plugin>
          <groupId>org.sonatype.plugins</groupId>
          <artifactId>nexus-staging-maven-plugin</artifactId>
          <version>1.6.7</version>
          <extensions>true</extensions>
          <configuration>
            <serverId>sonatype-snapshots</serverId>
            <nexusUrl>https://oss.sonatype.org/</nexusUrl>
            <autoReleaseAfterClose>true</autoReleaseAfterClose>
          </configuration>
        </plugin>
        <plugin>
          <groupId>org.apache.maven.plugins</groupId>
          <artifactId>maven-javadoc-plugin</artifactId>
          <version>3.0.1</version>
          <configuration>
            <failOnError>false</failOnError>
            <quiet>true</quiet>
          </configuration>
          <executions>
            <execution>
              <id>attach-javadocs</id>
              <goals>
                <goal>jar</goal>
              </goals>
            </execution>
          </executions>
        </plugin>

        <plugin>
          <groupId>org.apache.maven.plugins</groupId>
          <artifactId>maven-gpg-plugin</artifactId>
          <version>1.6</version>
          <executions>
            <execution>
              <id>sign-artifacts</id>
              <phase>verify</phase>
              <goals>
                <goal>sign</goal>
              </goals>
            </execution>
          </executions>
        </plugin>
      </plugins>
    </build>
  </profile>
</profiles>
复制代码
部署和发布
按照上面的步骤配置完后,一切都已经 OK。
此时,使用 mvn clean deploy -P sonatype 命令就可以发布 jar 包到中央仓库了:
说明:-P 参数后面的 sonatype 需要和 pom.xml 中 <profile> 的 id 保持一致,才能激活 profile。
部署 maven 私服
工作中,Java 程序员开发的商用 Java 项目,一般不想发布到中央仓库,使得人人尽知。这时,我们就需要搭建私服,将 maven 服务器部署在公司内部网络,从而避免 jar 包流传出去。怎么做呢,让我们来一步步学习吧。
下载安装 Nexus
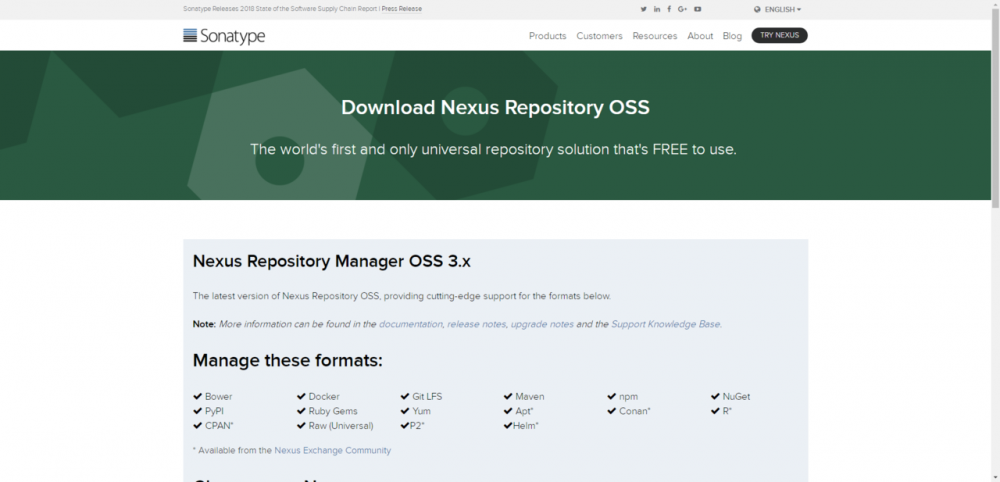
进入官方下载地址,选择合适版本下载。

本人希望将 Nexus 部署在 Linux 机器,所以选用的是 Unix 版本。
这里,如果想通过命令方式直接下载(比如用脚本安装),可以在官方历史发布版本页面中找到合适版本,然后执行以下命令:
wget -O /opt/maven/nexus-unix.tar.gz http://download.sonatype.com/nexus/3/nexus-3.13.0-01-unix.tar.gz
tar -zxf nexus-unix.tar.gz
复制代码
解压后,有两个目录:
- nexus-3.13.0-01 - 包含了 Nexus 运行所需要的文件。是 Nexus 运行必须的。
- sonatype-work - 包含了 Nexus 生成的配置文件、日志文件、仓库文件等。当我们需要备份 Nexus 的时候默认备份此目录即可。
启动停止 Nexus
进入 nexus-3.13.0-01/bin 目录,有一个可执行脚本 nexus。
执行 ./nexus ,可以查看允许执行的参数,如下所示,含义可谓一目了然:
$ ./nexus
Usage: ./nexus {start|stop|run|run-redirect|status|restart|force-reload}
复制代码
./nexus start
启动成功后,在浏览器中访问 http://<ip>:8081 ,欢迎页面如下图所示:

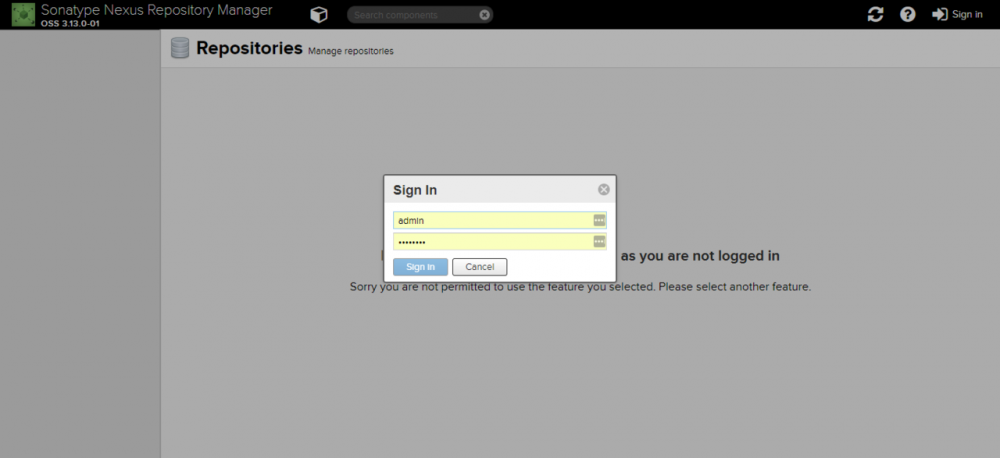
点击右上角 Sign in 登录,默认用户名/密码为:admin/admin123。
有必要提一下的是,在 Nexus 的 Repositories 管理页面,展示了可用的 maven 仓库,如下图所示:

说明:
- maven-central - maven 中央库(如果没有配置 mirror,默认就从这里下载 jar 包),从 repo1.maven.org/maven2/ 获取资源
- maven-releases - 存储私有仓库的发行版 jar 包
- maven-snapshots - 存储私有仓库的快照版(调试版本) jar 包
- maven-public - 私有仓库的公共空间,把上面三个仓库组合在一起对外提供服务,在本地 maven 基础配置 settings.xml 中使用。
使用 Nexus
如果要使用 Nexus,还必须在 settings.xml 和 pom.xml 中配置认证信息。
配置 settings.xml
一份完整的 settings.xml :
<?xml version="1.0" encoding="UTF-8"?>

<settings xmlns="http://maven.apache.org/SETTINGS/1.0.0"
  xmlns:xsi="http://www.w3.org/2001/XMLSchema-instance" xsi:schemaLocation="http://maven.apache.org/SETTINGS/1.0.0 http://maven.apache.org/xsd/settings-1.0.0.xsd">
  <pluginGroups>
    <pluginGroup>org.sonatype.plugins</pluginGroup>
  </pluginGroups>

  <!-- Maven 私服账号信息 -->
  <servers>
    <server>
      <id>releases</id>
      <username>admin</username>
      <password>admin123</password>
    </server>
    <server>
      <id>snapshots</id>
      <username>admin</username>
      <password>admin123</password>
    </server>
  </servers>

  <!-- jar 包下载地址 -->
  <mirrors>
    <mirror>
      <id>public</id>
      <mirrorOf>*</mirrorOf>
      <url>http://10.255.255.224:8081/repository/maven-public/</url>
    </mirror>
  </mirrors>

  <profiles>
    <profile>
      <id>zp</id>
      <repositories>
        <repository>
          <id>central</id>
          <url>http://central</url>
          <releases>
            <enabled>true</enabled>
          </releases>
          <snapshots>
            <enabled>true</enabled>
          </snapshots>
        </repository>
      </repositories>
      <pluginRepositories>
        <pluginRepository>
          <id>central</id>
          <url>http://central</url>
          <releases>
            <enabled>true</enabled>
          </releases>
          <snapshots>
            <enabled>true</enabled>
            <updatePolicy>always</updatePolicy>
          </snapshots>
        </pluginRepository>
      </pluginRepositories>
    </profile>
  </profiles>

  <activeProfiles>
    <activeProfile>zp</activeProfile>
  </activeProfiles>
</settings>
复制代码
配置 pom.xml
在 pom.xml 中添加如下配置:
<distributionManagement>
    <repository>
      <id>releases</id>
      <name>Releases</name>
      <url>http://10.255.255.224:8081/repository/maven-releases</url>
    </repository>
    <snapshotRepository>
      <id>snapshots</id>
      <name>Snapshot</name>
      <url>http://10.255.255.224:8081/repository/maven-snapshots</url>
    </snapshotRepository>
  </distributionManagement>
复制代码
注意:
-
<repository>和<snapshotRepository>的 id 必须和settings.xml配置文件中的<server>标签中的 id 匹配。 -
<url>标签的地址需要和 maven 私服的地址匹配。
执行 maven 构建
如果要使用 settings.xml 中的私服配置,必须通过指定 -P zp 来激活 profile。
示例:
## 编译并打包 maven 项目
$ mvn clean package -Dmaven.skip.test=true -P zp

## 编译并上传 maven 交付件(jar 包)
$ mvn clean deploy -Dmaven.skip.test=true -P zp
复制代码
参考资料
- www.jianshu.com/p/8c3d7fb09…
- www.ruanyifeng.com/blog/2013/0…
- www.cnblogs.com/hoobey/p/61…
- blog.csdn.net/wzygis/arti…
- blog.csdn.net/clj19860606…
- 本文标签: SDN 希望 apache Select windows Developer zlib 下载 rmi UI 空间 部署 编译 软件 mail dist cat 管理 IO wget HTML tab 开发 https Word 目录 配置 时间 tag JavaDocs list pom build description plugin zip IDE 程序员 unix 参数 git http linux 安装 代码 回答 服务器 key maven schema tar Service update redis App 认证 快的 struct src 密钥 GitHub id 备份 XML db Connection FAQ java 调试 域名 定制 REST ip lib 网站
- 版权声明: 本文为互联网转载文章,出处已在文章中说明(部分除外)。如果侵权,请联系本站长删除,谢谢。
- 本文海报: 生成海报一 生成海报二


![[HBLOG]公众号](https://www.liuhaihua.cn/img/qrcode_gzh.jpg)

