spring-cloud-config 搭建-入门级(二)
启动provider时,总是报错如下:
2019-05-08 15:21:36.723 ERROR 14424 --- [           main] o.s.boot.SpringApplication               : Application run failed

org.springframework.beans.factory.BeanCreationException: Error creating bean with name 'scopedTarget.orderController': Injection of autowired dependencies failed; nested exception is java.lang.IllegalArgumentException: Could not resolve placeholder 'myconfigtest' in value "${myconfigtest}"
	at org.springframework.beans.factory.annotation.AutowiredAnnotationBeanPostProcessor.postProcessProperties(AutowiredAnnotationBeanPostProcessor.java:380) ~[spring-beans-5.1.6.RELEASE.jar:5.1.6.RELEASE]
	at org.springframework.beans.factory.support.AbstractAutowireCapableBeanFactory.populateBean(AbstractAutowireCapableBeanFactory.java:1411) ~[spring-beans-5.1.6.RELEASE.jar:5.1.6.RELEASE]
	at org.springframework.beans.factory.support.AbstractAutowireCapableBeanFactory.doCreateBean(AbstractAutowireCapableBeanFactory.java:592) ~[spring-beans-5.1.6.RELEASE.jar:5.1.6.RELEASE]
复制代码
解决:
忘记了添加config依赖! 方法一:修改父工程,用我自己的,不用springboot的
方法二:添加config依赖
2 几种不同的玩法
针对:我在 github 上 修改了配置文件的内容 , 但是不想重启机器 ,想实时读取到而做的几种不同的策略
2.1 低级
重启client端,再刷新就可以了
2.2 高级 手动刷新
缺点: 如果有成百上千个(夸张的讲),那么需要挨个服务刷新,会容易出错,也不简便
搭建过程如下:
1. 添加依赖
<dependency>
			<groupId>org.springframework.boot</groupId>
			<artifactId>spring-boot-starter-actuator</artifactId>
		</dependency>
复制代码
2. 非常重要!非常容易忘记!添加配置文件中的监控端点
management:
  endpoints:
    web:
      exposure:
        include: "*"   开启所有的端点
复制代码
3. 加入@RefreshScope注解

4. 修改github上的配置文件,获取修改的属性
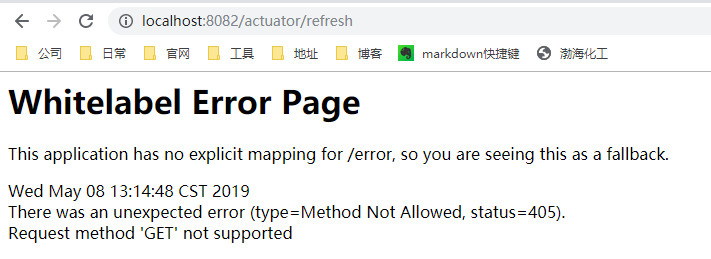
http://localhost:8082/order/testManualRefresh 结果:会发现依然不生效,如下图所示,所以继续第5步
5. 必须要手动刷新
http://localhost:8082/actuator/refresh 注意一定要用 POST请求 !
6. 再次测试
http://localhost:8082/order/testManualRefresh 会发现 要获取的属性是修改后的值了
2.3 顶级——使用BUS
2.3.1 先搭建Rabbitmq
这个比较简单,大家可以自行百度
2.3.2 服务端server-添加BUS依赖
<dependency>
			<groupId>org.springframework.cloud</groupId>
			<artifactId>spring-cloud-starter-bus-amqp</artifactId>
		</dependency>

		<dependency>
			<groupId>org.springframework.boot</groupId>
			<artifactId>spring-boot-starter-actuator</artifactId>
		</dependency>
复制代码
2.3.3 服务端server-添加配置
spring:
  rabbitmq:
    host: 127.0.0.1
    port: 5672
    virtual-host: linRabbit
    username: guest
    password: guest
    connection-timeout: 10000
    template:
      mandatory: true
复制代码
这里需要特别注意一点,rabbitmq的端口问题: 5672 是 用TLS访问的端口,也就是我们配置文件中需要配置的端口 15672 是 HTTP 访问的端口,也就是管理端从浏览器打开的端口
2.3.4 服务端server-手动刷新
http://localhost:8888/actuator/bus-refresh
2.3.5 客户端config-client-添加依赖
注意:和服务端添加一样的依赖! 千万不要忘记! 客户端一般有多个,但是每个工程也都要添加这些依赖的,所以我想还是后面可以放到一个父工程中
2.3.6 客户端config-client-添加配置
没有什么特别的,和服务端一样的配置添加 rabbitmq 节点的配置
2.3.7 客户端config-client-测试
-
客户端临时又添加了一个 provider,分别是eureka-provider1 和 eureka-provider2
-
访问地址: http://localhost:8082/order/testManualRefresh http://localhost:8080/order/testManualRefresh
测试过程:
- 先确定当前属性值,比如说是 Y
- 分别用客户端打开,屏幕打印也都是 Y
- 修改配置文件中心的属性值,改成 N
- 刷新客户端地址,依旧是 Y
- 手动刷新 http://localhost:8888/actuator/bus-refresh 服务端地址
- 再次刷新客户端地址, 屏幕打印值会更新为 N 了
2.4 顶级-自己搭建
2.4.1 服务端server-添加依赖
<dependency>
	<groupId>org.springframework.boot</groupId>
	<artifactId>spring-boot-starter-amqp</artifactId>
</dependency>
<dependency>
	<groupId>org.springframework.boot</groupId>
	<artifactId>spring-boot-starter-web</artifactId>
</dependency>
<dependency>
	<groupId>org.springframework.cloud</groupId>
	<artifactId>spring-cloud-config-server</artifactId>
</dependency>
<dependency>
	<groupId>com.alibaba</groupId>
	<artifactId>fastjson</artifactId>
	<version>1.2.56</version>
</dependency>
复制代码
2.4.2 服务端server-添加配置
spring:
  rabbitmq:
    host: 127.0.0.1
    port: 5672
    virtual-host: linRabbit
    username: guest
    password: guest
    connection-timeout: 10000
    template:
      mandatory: true
复制代码
2.4.3 服务端server-添加注解
@EnableConfigServer
@SpringBootApplication
@EnableConfigServer  // 非常重要
public class ConfigServerApplication {

	public static void main(String[] args) {
		SpringApplication.run(ConfigServerApplication.class, args);
	}

}
复制代码
2.4.4 服务端server-提供刷新接口
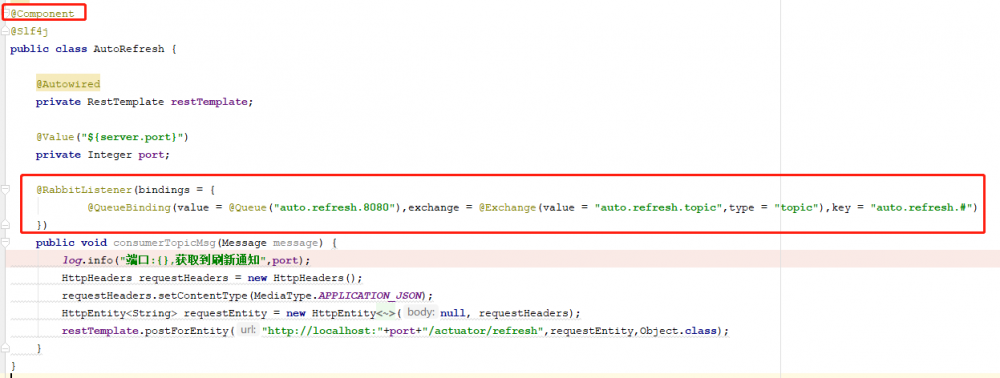
提供一个全局刷新接口,往mq broker上发送刷新消息 http://localhost:8888/autoRefresh
@RestController
public class AutoRefreshController {

    @Autowired
    private RabbitTemplate rabbitTemplate;

    @RequestMapping("/autoRefresh")
    public Object autoRefresh() {
        Map<String,Object> sendMap = new HashMap<String,Object>();
        sendMap.put("isNew","Y");
        rabbitTemplate.convertAndSend("auto.refresh.topic","auto.refresh.all", JSON.toJSONString(sendMap));
        return "OK";
    }
}
复制代码
2.4.5 客户端client-添加依赖
和服务端类似
<dependency>
	<groupId>org.springframework.cloud</groupId>
	<artifactId>spring-cloud-starter-config</artifactId>
</dependency>

<dependency>
	<groupId>org.springframework.boot</groupId>
	<artifactId>spring-boot-starter-amqp</artifactId>
</dependency>

<dependency>
	<groupId>org.springframework.boot</groupId>
	<artifactId>spring-boot-starter-actuator</artifactId>
</dependency>
复制代码
2.4.6 客户端client-添加配置
spring:
  rabbitmq:
    host: 127.0.0.1
    port: 5672
    virtual-host: linRabbit
    username: guest
    password: guest
    connection-timeout: 10000
    template:
      mandatory: true
复制代码
2.4.7 客户端client-提供消息消费监听
2.5 解决配置文件放在服务器,但是有数据库明文的问题
2.5.1 加密过程
- jce-policy-8.zip (一定要和jdk 版本一致) 解压,放到指定目录java_home/jre/lib/security/下
www.oracle.com/technetwork…
- config-server 添加配置
encrypt:
  key: alin
复制代码
这个配置必须加在配置 叫做bootstrap。yml的文件夹下,没有就新建一个
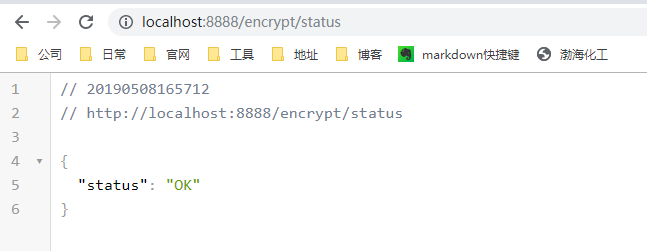
访问地址 localhost:8888/encrypt/status ,会出现下图:
- 加密密码 与 解密密码 jdk 配置的 JCE加密。对称加密
POST请求 加密: http://localhost:8888/encrypt
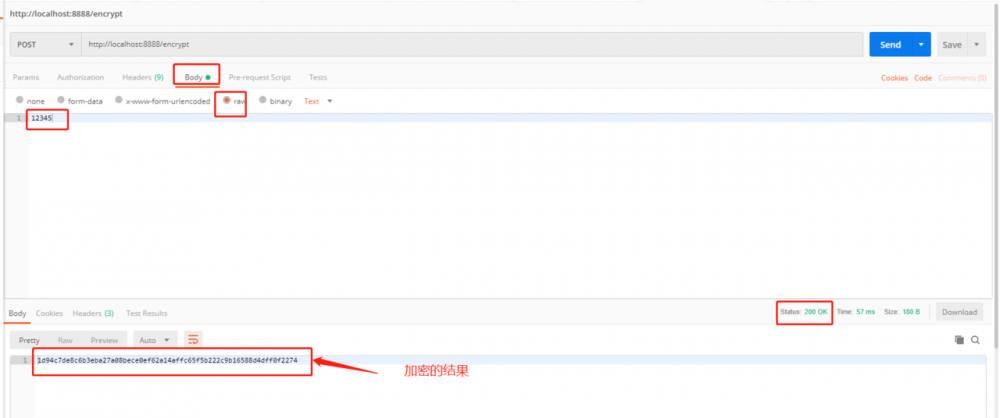

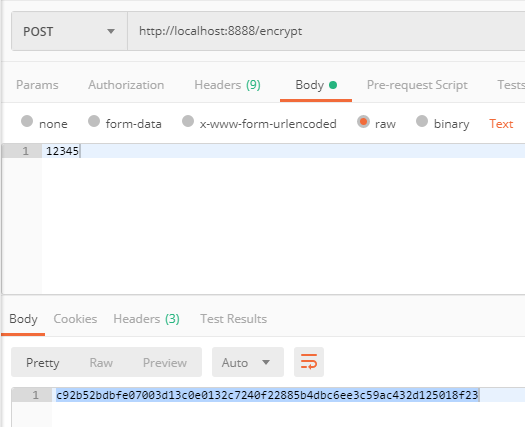
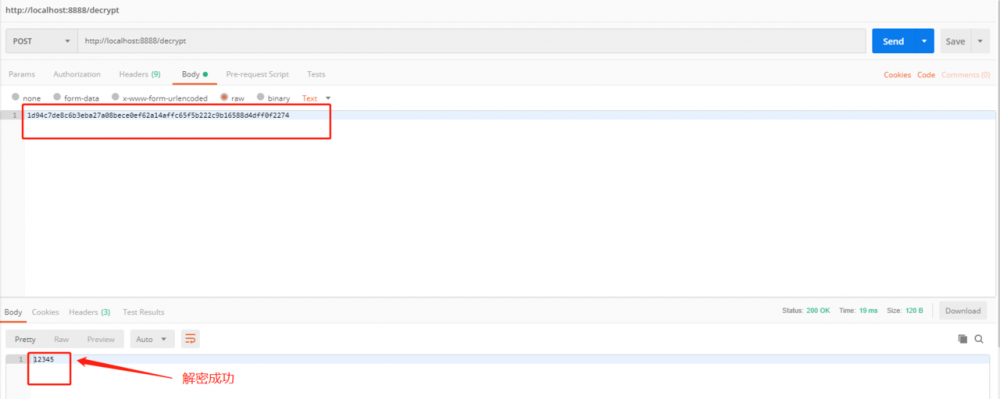
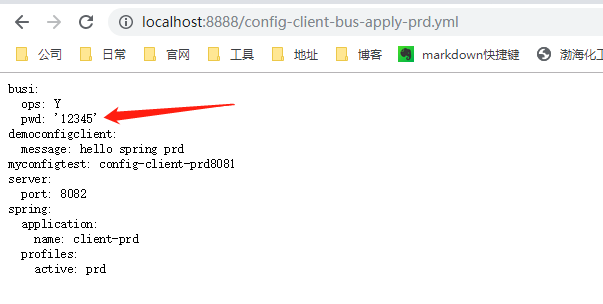
访问 http://localhost:8888/config-client-bus-apply-prd.yml, 会发现还是用明文传输的
2.5.2 先加密
http://localhost:8888/encrypt
2.5.3 再配置到git上
busi:
  ops: Y
  pwd: '{cipher}c92b52bdbfe07003d13c0e0132c7240f22885b4dbc6ee3c59ac432d125018f23'
复制代码
2.5.4 最后查看
http://localhost:8888/config-client-bus-apply-prd.yml
2.5.5 加入security控制:
直接访问http://localhost:8888/config-client-bus-apply-prd.yml 会显示明文,我们可以加上 security
2.5.5.1 服务端
第一,加入security依赖
<!--加入安全配置依赖的Jar包-->
        <dependency>
            <groupId>org.springframework.boot</groupId>
            <artifactId>spring-boot-starter-security</artifactId>
        </dependency>
复制代码
第二,yml添加配置
spring:
  security:
    user:
      name: root
      password: 123456
复制代码
- 本文标签: 服务端 cat GitHub 2019 dependencies web ACE https UI bus json client 端口 MQ 数据库 管理 加密 REST zip Word git rabbitmq 配置 App Connection 测试 IO Oracle Bootstrap JVM Eureka java http ip springboot map CTO provider 服务器 bean tar IDE HashMap value spring src id 安全 代码 百度 root Security js 数据 amqp key 目录 lib db
- 版权声明: 本文为互联网转载文章,出处已在文章中说明(部分除外)。如果侵权,请联系本站长删除,谢谢。
- 本文海报: 生成海报一 生成海报二


![[HBLOG]公众号](https://www.liuhaihua.cn/img/qrcode_gzh.jpg)

