WebFlux 集成 Redis,Spring Boot 2 教程
号外:为读者持续整理了几份最新教程,覆盖了 Spring Boot、Spring Cloud、微服务架构等PDF。
获取方式:关注右侧公众号"泥瓦匠BYSocket",来领取吧!
摘要: 原创出处 https://www.bysocket.com 「公众号:泥瓦匠BYSocket 」欢迎关注和转载,保留摘要,谢谢!
这是泥瓦匠的第106篇原创
文章工程:
* JDK 1.8
* Maven 3.5.2
* Spring Boot 2.1.3.RELEASE
* 工程名:springboot-webflux-6-redis
* 工程地址:见文末
前言
上一讲,讲了如何整合 MongoDB,这里继续讲如何操作 Redis 这个数据源。那什么是 Reids?
Redis 是一个高性能的 key-value 数据库。GitHub 地址:https://github.com/antirez/redis 。Github 是这么描述的:
Redis is an in-memory database that persists on disk. The data model is key-value, but many different kind of values are supported: Strings, Lists, Sets, Sorted Sets, Hashes, HyperLogLogs, Bitmaps.
Redis 是内存式数据库,存储在磁盘。支持的数据类型很多:Strings, Lists, Sets, Sorted Sets, Hashes, HyperLogLogs, Bitmaps 等。
安装简易教程(适用 Mac/Linux)
下载并解压
下载安装包 redis-x.x.x.tar.gz
## 解压
tar zxvf redis-2.8.17.tar.gz
编译安装
cd redis-x.x.x/
make ## 编译
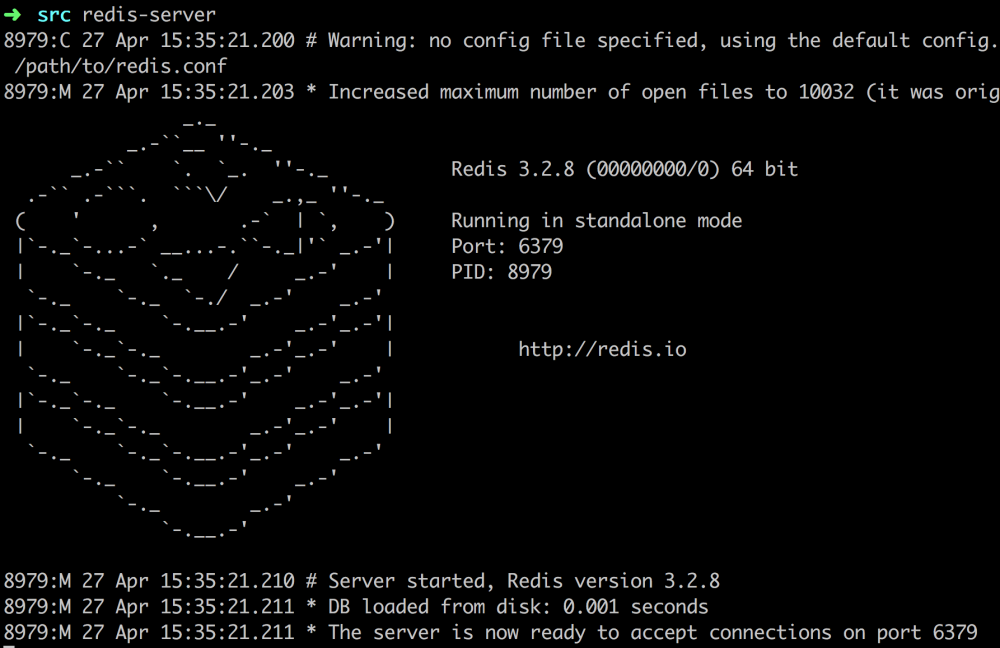
启动 Redis
cd src/
redis-server
如果需要运行在守护进程,设置 daemonize 从 no 修改成 yes,并指定运行: redis-server redis.conf
结构
类似上面讲的工程搭建,新建一个工程编写此案例。工程如图:
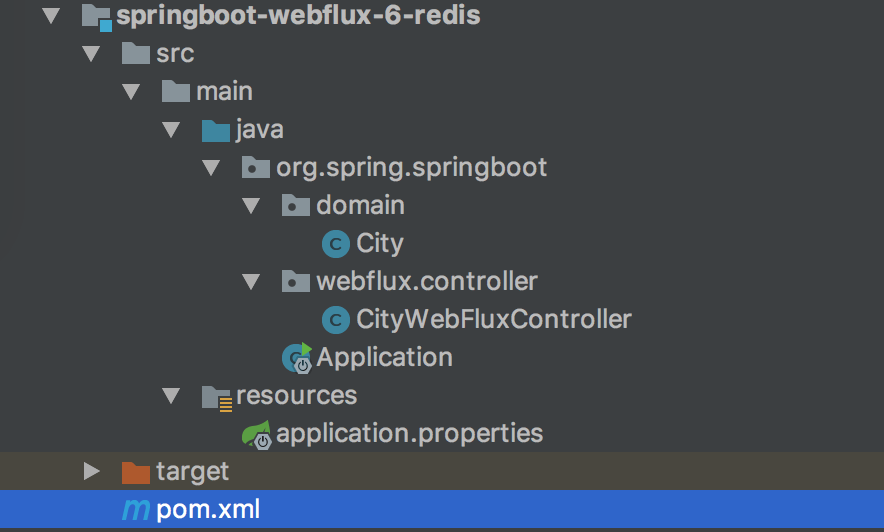
目录核心如下
- pom.xml maven 配置
- application.properties 配置文件
- domain 实体类
- controller 控制层,本文要点
新增 POM 依赖与配置
在 pom.xml 配置新的依赖:
<!-- Spring Boot 响应式 Redis 依赖 -->
    <dependency>
      <groupId>org.springframework.boot</groupId>
      <artifactId>spring-boot-starter-data-redis-reactive</artifactId>
    </dependency>
类似 MongoDB 配置,在 application.properties 配置连接 Redis :
## Redis 配置
## Redis服务器地址
spring.redis.host=127.0.0.1
## Redis服务器连接端口
spring.redis.port=6379
## Redis服务器连接密码(默认为空)
spring.redis.password=
# 连接超时时间(毫秒)
spring.redis.timeout=5000
默认 密码为空,这里注意的是连接超时时间不能太少或者为 0 ,不然会引起异常 RedisCommandTimeoutException: Command timed out 。
对象
修改 org.spring.springboot.domain 包里面的城市实体对象类。城市(City)对象 City,代码如下:
import org.springframework.data.annotation.Id;

import java.io.Serializable;

/**
 * 城市实体类
 *
 */
public class City implements Serializable {

    private static final long serialVersionUID = -2081742442561524068L;

    /**
     * 城市编号
     */
    @Id
    private Long id;

    /**
     * 省份编号
     */
    private Long provinceId;

    /**
     * 城市名称
     */
    private String cityName;

    /**
     * 描述
     */
    private String description;

    public Long getId() {
        return id;
    }

    public void setId(Long id) {
        this.id = id;
    }

    public Long getProvinceId() {
        return provinceId;
    }

    public void setProvinceId(Long provinceId) {
        this.provinceId = provinceId;
    }

    public String getCityName() {
        return cityName;
    }

    public void setCityName(String cityName) {
        this.cityName = cityName;
    }

    public String getDescription() {
        return description;
    }

    public void setDescription(String description) {
        this.description = description;
    }
}
值得注意点:
java.lang.IllegalArgumentException: DefaultSerializer requires a Serializable payload but received an object of type
控制层 CityWebFluxController
代码如下:
import org.spring.springboot.domain.City;
import org.springframework.beans.factory.annotation.Autowired;
import org.springframework.data.redis.core.RedisTemplate;
import org.springframework.data.redis.core.ValueOperations;
import org.springframework.web.bind.annotation.*;
import reactor.core.publisher.Mono;

import java.util.concurrent.TimeUnit;

@RestController
@RequestMapping(value = "/city")
public class CityWebFluxController {

    @Autowired
    private RedisTemplate redisTemplate;

    @GetMapping(value = "/{id}")
    public Mono<City> findCityById(@PathVariable("id") Long id) {
        String key = "city_" + id;
        ValueOperations<String, City> operations = redisTemplate.opsForValue();
        boolean hasKey = redisTemplate.hasKey(key);
        City city = operations.get(key);

        if (!hasKey) {
            return Mono.create(monoSink -> monoSink.success(null));
        }
        return Mono.create(monoSink -> monoSink.success(city));
    }

    @PostMapping()
    public Mono<City> saveCity(@RequestBody City city) {
        String key = "city_" + city.getId();
        ValueOperations<String, City> operations = redisTemplate.opsForValue();
        operations.set(key, city, 60, TimeUnit.SECONDS);

        return Mono.create(monoSink -> monoSink.success(city));
    }

    @DeleteMapping(value = "/{id}")
    public Mono<Long> deleteCity(@PathVariable("id") Long id) {
        String key = "city_" + id;
        boolean hasKey = redisTemplate.hasKey(key);
        if (hasKey) {
            redisTemplate.delete(key);
        }
        return Mono.create(monoSink -> monoSink.success(id));
    }
}
代码详解
- 使用 @Autowired 注入 RedisTemplate 对象。这个对象和 Spring 的 JdbcTemplate 功能十分相似,RedisTemplate 封装了 RedisConnection,具有连接管理、序列化和各个操作等。还有针对 String 的支持对象 StringRedisTemplate。
- 删除 Redis 某对象,直接通过 key 值调用 delete(key)。
- Redis 操作视图接口类用的是 ValueOperations,对应的是 Redis String/Value 操作。get 是获取数据;set 是插入数据,可以设置失效时间。这里设置的失效时间是 60 s。
- 还有其他的操作视图,ListOperations、SetOperations、ZSetOperations 和 HashOperations 。
运行工程
一个操作 Redis 工程就开发完毕了,下面运行工程验证下。使用 IDEA 右侧工具栏,点击 Maven Project Tab ,点击使用下 Maven 插件的 install 命令。或者使用命令行的形式,在工程根目录下,执行 Maven 清理和安装工程的指令:
cd springboot-webflux-6-redis
mvn clean install
在控制台中看到成功的输出:
... 省略
[INFO] ------------------------------------------------------------------------
[INFO] BUILD SUCCESS
[INFO] ------------------------------------------------------------------------
[INFO] Total time: 01:30 min
[INFO] Finished at: 2018-10-15T10:00:54+08:00
[INFO] Final Memory: 31M/174M
[INFO] ------------------------------------------------------------------------
在 IDEA 中执行 Application 类启动,任意正常模式或者 Debug 模式。可以在控制台看到成功运行的输出:
... 省略
2018-04-10 08:43:39.932  INFO 2052 --- [ctor-http-nio-1] r.ipc.netty.tcp.BlockingNettyContext     : Started HttpServer on /0:0:0:0:0:0:0:0:8080
2018-04-10 08:43:39.935  INFO 2052 --- [           main] o.s.b.web.embedded.netty.NettyWebServer  : Netty started on port(s): 8080
2018-04-10 08:43:39.960  INFO 2052 --- [           main] org.spring.springboot.Application        : Started Application in 6.547 seconds (JVM running for 9.851)
打开 POST MAN 工具,开发必备。进行下面操作:
新增城市信息 POST http://127.0.0.1:8080/city
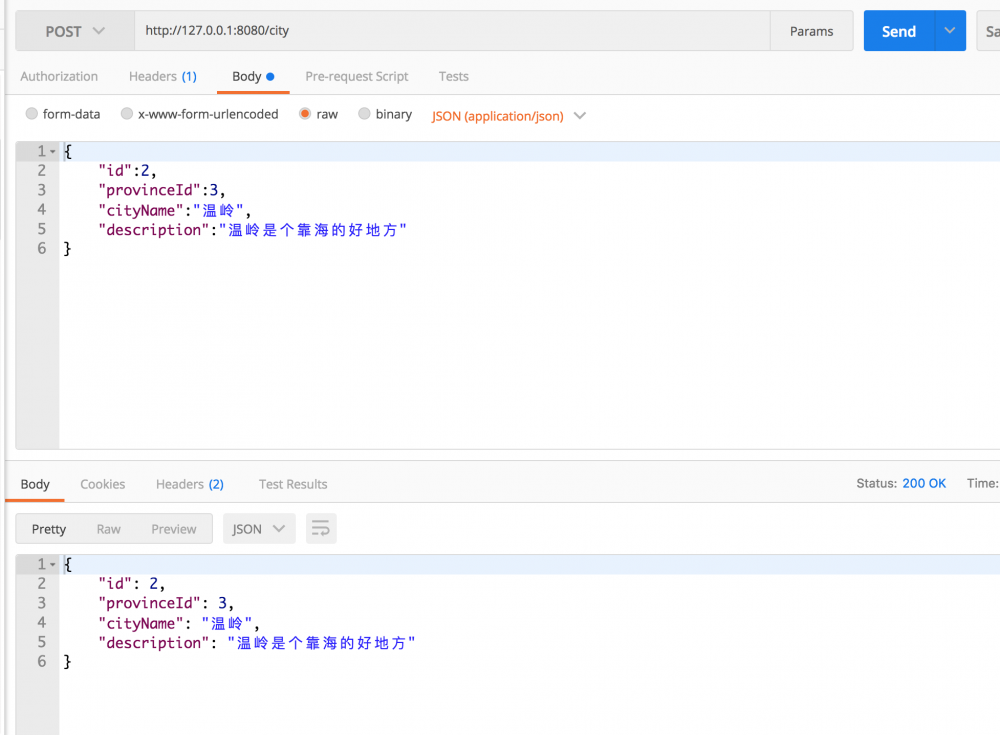
获取城市信息 GET http://127.0.0.1:8080/city/2

如果等待 60s 以后,再次则会获取为空。因为保存的时候设置了失效时间是 60 s。
总结
这里,探讨了 Spring WebFlux 的如何整合 Redis。介绍了如何通过 RedisTemplate 去操作 Redis。因为 Redis 在获取资源性能极佳,常用 Redis 作为缓存存储对象。下面我们利用 Reids 实现缓存操作。
代码 GiHub :https://github.com/JeffLi1993/springboot-learning-example
系列教程目录
- 《01:WebFlux 系列教程大纲》
- 《02:WebFlux 快速入门实践》
- 《03:WebFlux Web CRUD 实践》
- 《04:WebFlux 整合 Mongodb》
- 《05:WebFlux 整合 Thymeleaf》
- 《06:WebFlux 中 Thymeleaf 和 Mongodb 实践》
- 《07:WebFlux 整合 Redis》
- 《08:WebFlux 中 Redis 实现缓存》
- 《09:WebFlux 中 WebSocket 实现通信》
- 《10:WebFlux 集成测试及部署》
- 《11:WebFlux 实战图书管理系统》
代码示例
本文示例读者可以通过查看下面仓库的中的模块工程名: 2-x-spring-boot-webflux-handling-errors:
- Github: https://github.com/JeffLi1993/springboot-learning-example
- Gitee: https://gitee.com/jeff1993/springboot-learning-example
如果您对这些感兴趣,欢迎 star、follow、收藏、转发给予支持!
参考资料
- Spring Boot 2.x WebFlux 系列:https://www.bysocket.com/archives/2290
- spring.io 官方文档
以下专题教程也许您会有兴趣
- 《程序兵法:算法与数据结构》 https://www.bysocket.com/archives/2314/algorithm
- 《Spring Boot 2.x 系列教程》
https://www.bysocket.com/springboot - 《Java 核心系列教程》
https://www.bysocket.com/archives/2100

 (关注微信公众号,领取 Java 精选干货学习资料) (添加我微信:bysocket01。加入纯技术交流群,成长技术)
正文到此结束
- 本文标签: 删除 数据 Spring Boot web TCP zab ip list cat dist 微信公众号 Netty Spring cloud tab MongoDB tar final http UI id java 响应式 Reactor pom value 进程 build 下载 管理 mongo 测试 HTML 开发 ask 配置 IO spring 时间 缓存 maven key 数据库 example 文章 IDE bug 编译 App 部署 https REST core 安装 NIO 目录 代码 JDBC db XML description Connection Word redis springboot 服务器 CTO 微服务 git 插件 src map bean linux GitHub JVM 端口 DOM find 总结
- 版权声明: 本文为互联网转载文章,出处已在文章中说明(部分除外)。如果侵权,请联系本站长删除,谢谢。
- 本文海报: 生成海报一 生成海报二
热门推荐


相关文章

近期评论
-
ws0132613@gmail.comhttps://getmacos.com/gopanel/william smith
-
谢谢
-
https://www.newcmy.com/register?aff=HBVX建议您试试草莓云机场,可以流畅观看youtube和tiktok,上reddit/x也没有问题,还有各种ai优化节点。
-
-
-
想购买您这个站,我的联系方式QQ741756694微信同步 能卖联系
-
-
-
-
Loading...
![[HBLOG]公众号](https://www.liuhaihua.cn/img/qrcode_gzh.jpg)

