跟我学spring boot thymeleaf系列文章第一章 一个简单的示例入门
源码地址:
https://github.com/pony-maggie/spring-boot-thymeleaf-learn
第一章肯定要先引入概念。然后给一个基本的示例。
什么是thymeleaf
thymeleaf是一种用于Web和独立环境的现代服务器端的Java模板引擎。(这基本是官方说法)市面上的模板引擎已经有很多了,thymeleaf存在自然有它的理由。
thymeleaf其中一个亮点在于它可以不需要服务端的支持进行开发和调试,对于一些动态的后端数据可以直接在浏览器端看到显示效果(JSP就不行)。比如下面一个例子:
JSP实现
<form:inputText name="userName" value="${user.name}" />
thymeleaf实现同样的效果,
<input type="text" name="userName" value="e-learn" th:value="${user.name}" />
在无法从后端拿到user.name的值的时候,thymeleaf就可以再浏览器看到缺省的效果,但是JSP不行。
下面的示例还会有相关的效果演示!
thymeleaf官方文档地址:
https://www.thymeleaf.org/doc/tutorials/3.0/usingthymeleaf.html
关于spring boot和thymeleaf
模板引擎已经很多了,不过spring boot官方推荐使用thymeleaf。
Spring Boot 中使用 Thymeleaf模板引擎时非常简单,Spring Boot已经提供了默认的配置,比如解析的文件前缀,文件后缀,文件编码,缓存等等,程序员需要的只是写 html 中的内容即可。
我们可以打开spring-boot-autoconfigure查看ThymeleafProperties源码,可以看到下面的默认配置:
public class ThymeleafProperties {
    private static final Charset DEFAULT_ENCODING;
    public static final String DEFAULT_PREFIX = "classpath:/templates/";
    public static final String DEFAULT_SUFFIX = ".html";
所以缺省要把HTML页面放在classpath:/templates/下,thymeleaf 就能自动渲染html后缀的文件。
用过spring mvc的看着应该觉得很熟悉吧
编写demo
spring boot工程是需要引入spring-boot-starter-thymeleaf。
<dependency>
            <groupId>org.springframework.boot</groupId>
            <artifactId>spring-boot-starter-thymeleaf</artifactId>
        </dependency>
配置文件:
spring:
  thymeleaf:
    cache: false
把缓存设置成false主要是方便热部署进行调试,让修改后的文件能马上生效。
index.html文件,
<!DOCTYPE html>
<html xmlns="http://www.w3.org/1999/xhtml"
      xmlns:th="http://www.thymeleaf.org">
<head>
    <title>Spring boot thymeleaf Learn </title>
</head>
<body>
<div>
    <p th:text="${name}" >name</p>
</div>
</body>
</html>
xmlns:th="http://www.thymeleaf.org"
这个是thymeleaf的命名空间,要记得引入,不然一些thymeleaf的语法会报错。
我们再写一个测试controller,
@Controller
public class TestController {

	@RequestMapping("/")
	public String index(Model model) {
		model.addAttribute("name", "thymeleaf");
		return "index";
	}
}
很简单,设置一个name属性返回给前端index.html文件。
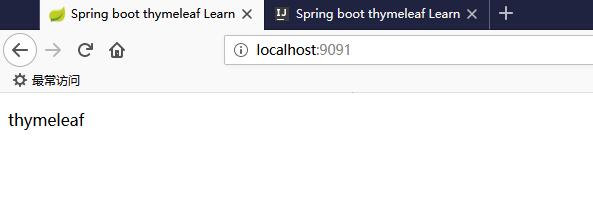
运行spring boot,可以看到这样的效果,

前面讲到了,themeleaf可以不需要后端直接展示效果。我们把spring boot停止,然后直接用浏览器打开index.html,也可以看到缺省的效果:


![[HBLOG]公众号](https://www.liuhaihua.cn/img/qrcode_gzh.jpg)

