使用JustAuth集成企业微信
JustAuth 又㕛叒叕添加新平台啦~
此次更新带来的是 企业微信 ,本文将带领大家使用 JustAuth 快速集成 企业微信 的第三方登录。
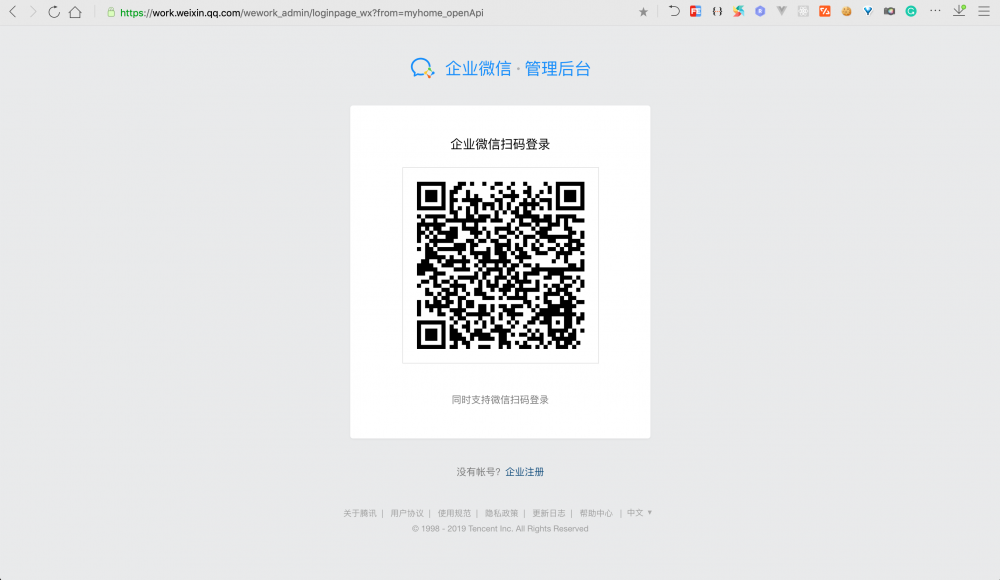
1. 注册并登录企业微信
地址: https://work.weixin.qq.com/wework_admin/loginpage_wx?from=myhome_openApi
如果没有企业可以点击 企业注册
2. 创建企业微信应用
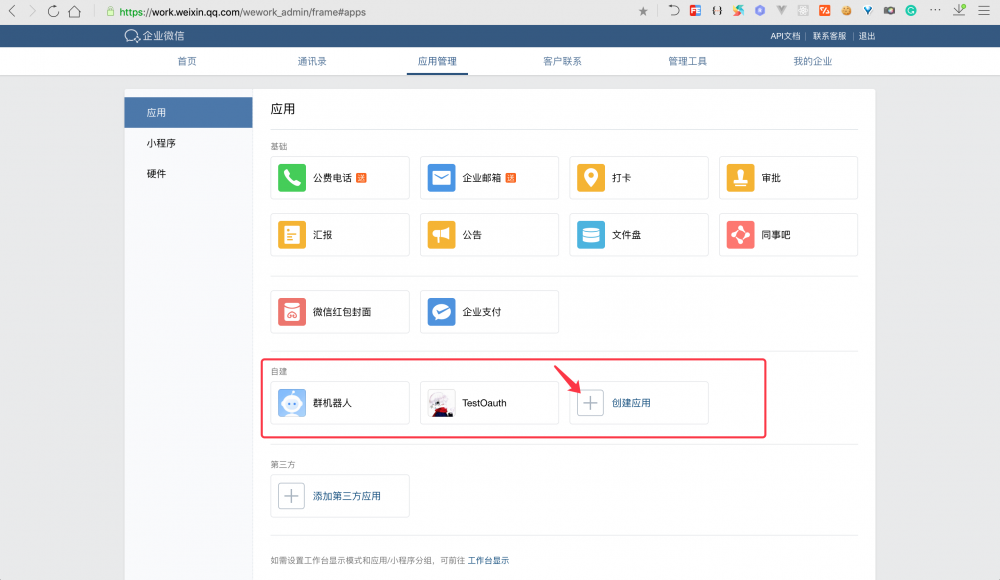
导航栏 – 应用管理 – 自建 – 创建应用
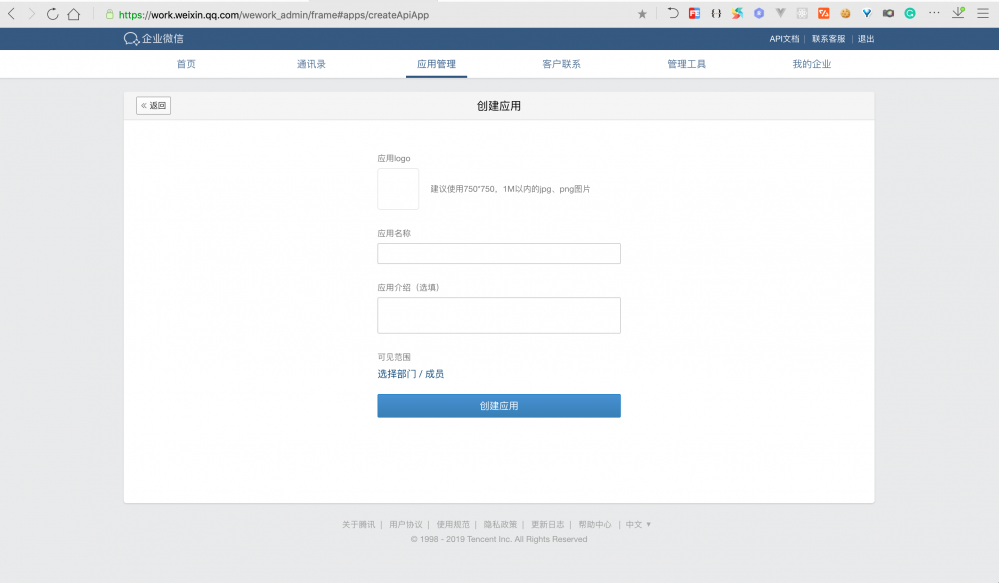
选择合适的应用logo,为应用取个名,同时设置应用的可见范围,创建应用
3. 应用设置及基本关键参数
3.1. 应用设置
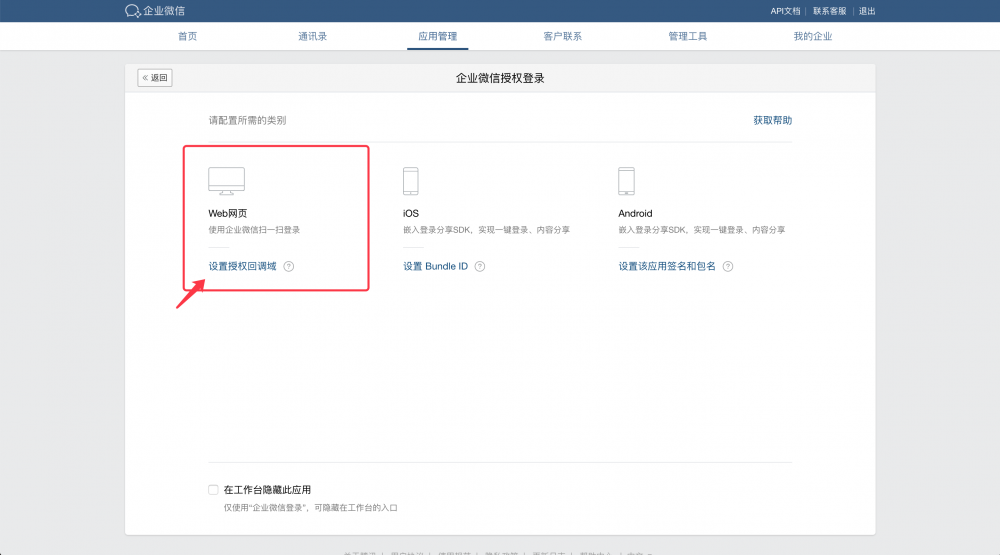
创建完应用之后,拖到应用最下方,配置应用信息
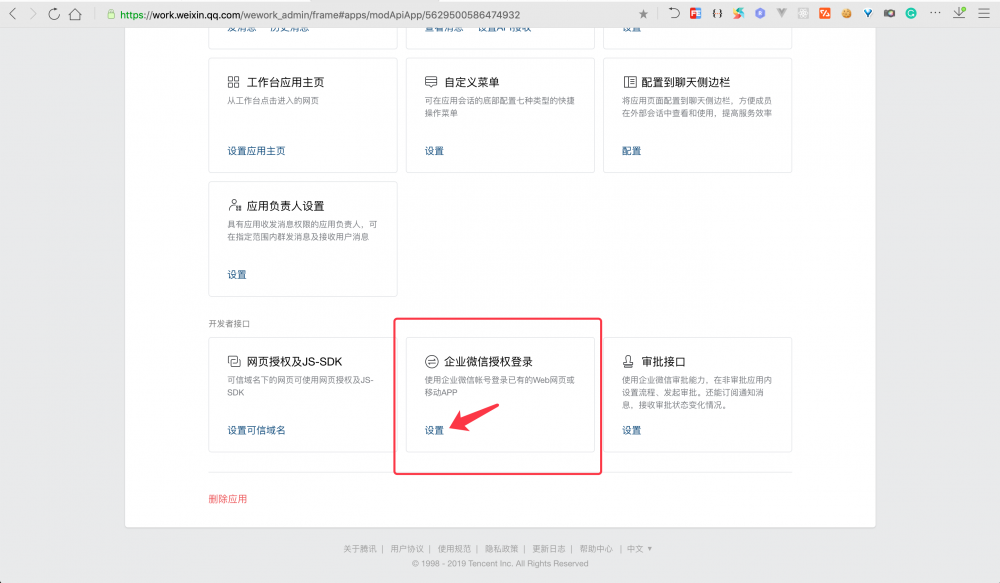
使用 JustAuth 基本都是网页应用,所以这一步我们直接选择 Web网页 – 设置授权回调域
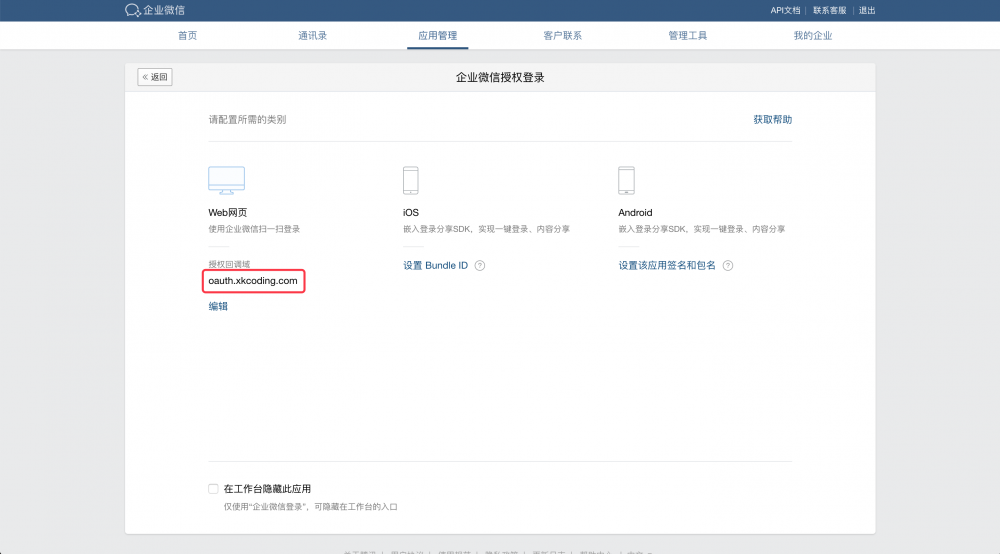
注意:这里 授权回调域 不需要指定 前缀,后缀 等信息,示例如下图
关于授权回调域存在疑问的童鞋请看这里: https://open.work.weixin.qq.com/api/doc#90000/90135/90988
3.2. 基本关键参数获取
使用 JustAuth 进行企业微信登录需要 4 个参数信息: client-id 、 client-secret 、 redirect-uri 、 agent-id
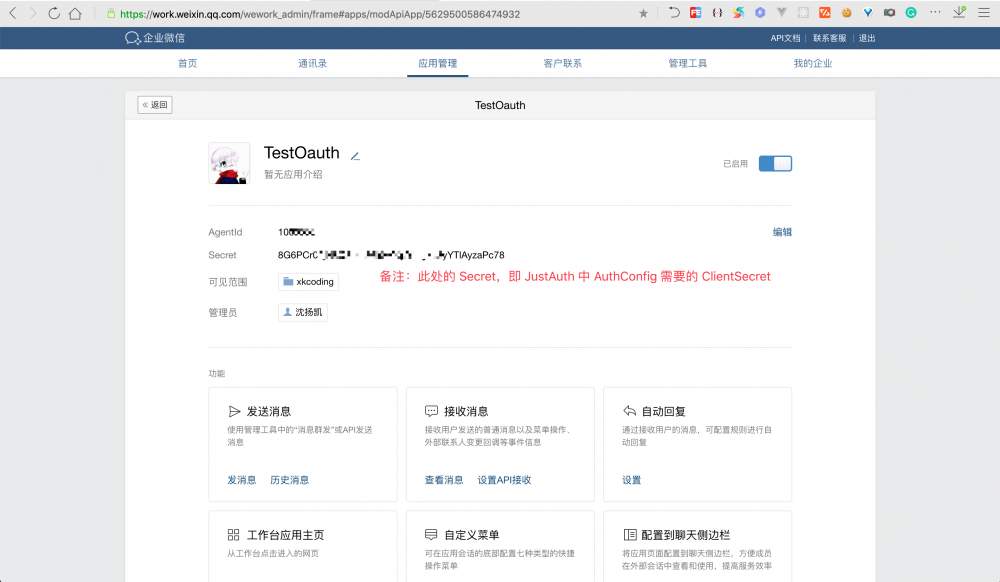
3.2.1. agent-id 及 client-secret 信息
agent-id 和 client-secret 这两个信息均在 应用管理 里可以查看
3.2.2. client-id 信息
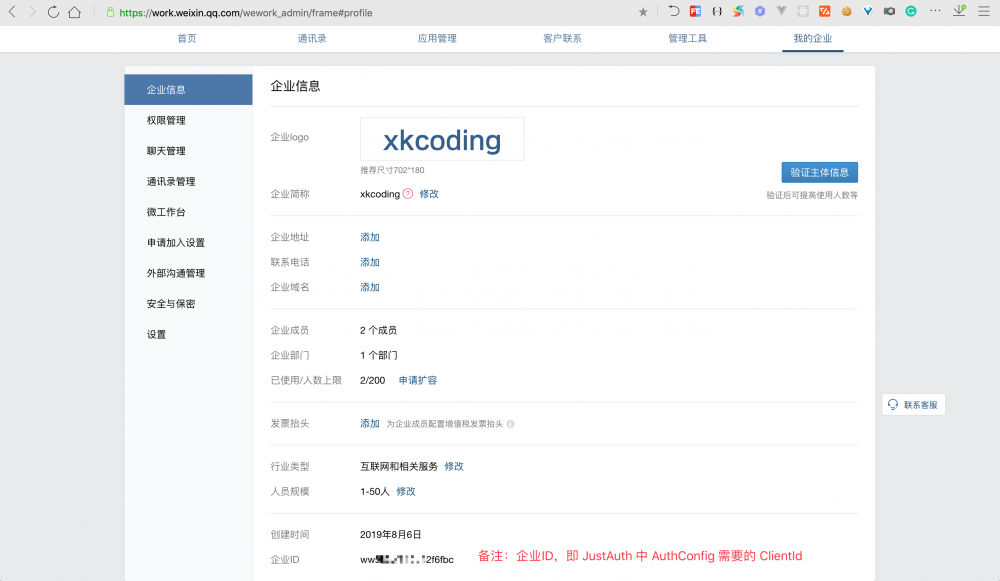
client-id 信息在 我的企业 中可以找到,该信息即 企业ID
3.2.3. redirect-uri 信息
回调地址是根据我们前面配置的 授权回调域 来的,我设置的是 oauth.xkcoding.com ,项目里我的回调地址指定为 http://oauth.xkcoding.com/demo/oauth/wechat_enterprise/callback
4. 开发
4.1. 引入依赖
<dependency>
   <groupId>com.xkcoding</groupId>
   <artifactId>justauth-spring-boot-starter</artifactId>
   <version>0.0.3-SNAPSHOT</version>
</dependency>
4.2. 修改配置文件
justauth:
  enabled: true
  type:
    WECHAT_ENTERPRISE:
      client-id: ww58**********6fbc
      client-secret: 8G6PCr0****************************yzaPc78
      redirect-uri: http://oauth.xkcoding.com/demo/oauth/wechat_enterprise/callback
      agent-id: 10*******02
4.3. 编写 Controller 代码
/**
 * <p>
 * 测试 Controller
 * </p>
 *
 * @author yangkai.shen
 * @date Created in 2019-07-22 11:17
 */
@Slf4j
@RestController
@RequestMapping("/oauth")
@RequiredArgsConstructor(onConstructor_ = @Autowired)
public class TestController {
    private final AuthRequestFactory factory;

    @GetMapping
    public List<String> list() {
        return factory.oauthList();
    }

    @GetMapping("/login/{type}")
    public void login(@PathVariable String type, HttpServletResponse response) throws IOException {
        AuthRequest authRequest = factory.get(getAuthSource(type));
        response.sendRedirect(authRequest.authorize(AuthStateUtils.createState()));
    }

    @RequestMapping("/{type}/callback")
    public AuthResponse login(@PathVariable String type, AuthCallback callback) {
        AuthRequest authRequest = factory.get(getAuthSource(type));
        AuthResponse response = authRequest.login(callback);
        log.info("【response】= {}", JSONUtil.toJsonStr(response));
        return response;
    }

    private AuthSource getAuthSource(String type) {
        if (StrUtil.isNotBlank(type)) {
            return AuthSource.valueOf(type.toUpperCase());
        } else {
            return null;
        }
    }
}
代码地址: https://github.com/xkcoding/justauth-spring-boot-starter-demo
5. 效果演示
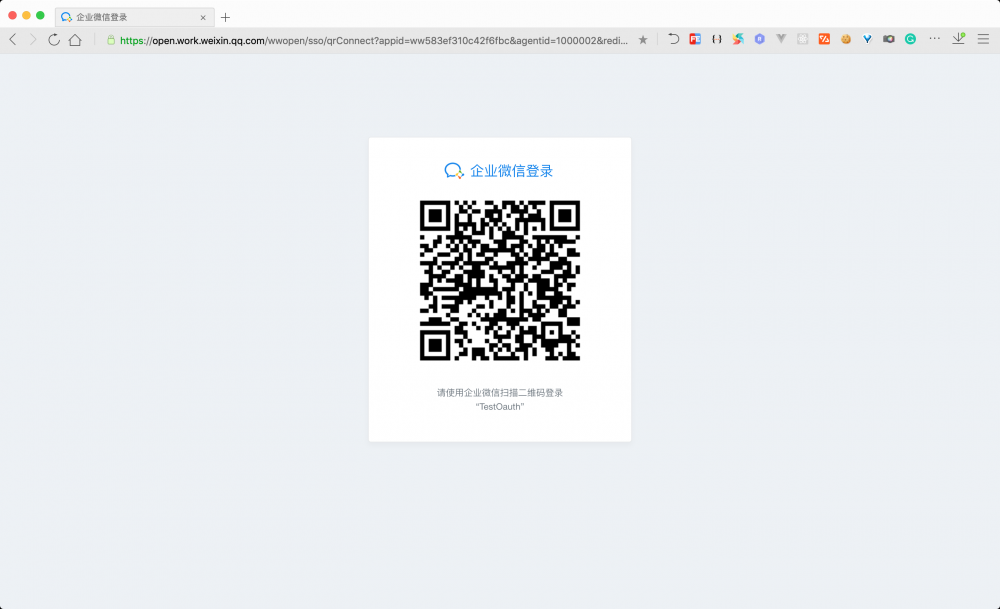
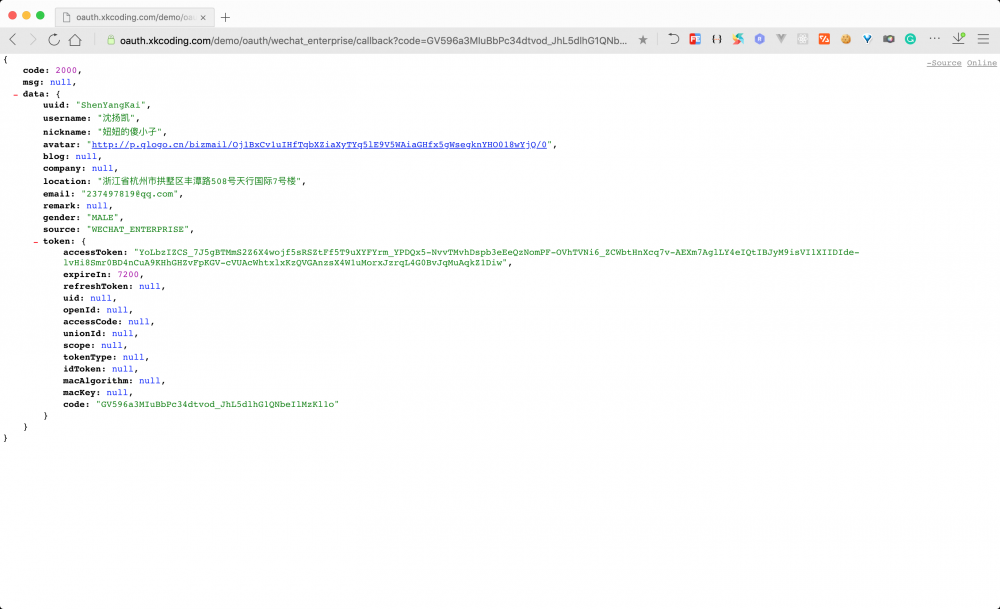
果然! 不得不说: whnb.wang
参考
-
企业微信文档地址: https://open.work.weixin.qq.com/api/doc#90000/90135/90664
-
获取AccessToken: https://open.work.weixin.qq.com/api/doc#90000/90135/91039
-
构建登录二维码: https://open.work.weixin.qq.com/api/doc#90000/90135/91019
-
获取用户身份: https://open.work.weixin.qq.com/api/doc#90000/90135/91437
-
用户身份详细信息: https://open.work.weixin.qq.com/api/doc#90000/90135/90196


![[HBLOG]公众号](https://www.liuhaihua.cn/img/qrcode_gzh.jpg)

