springboot cloud 实践(1) 简单服务、简单服务注册发现、简单服务请求
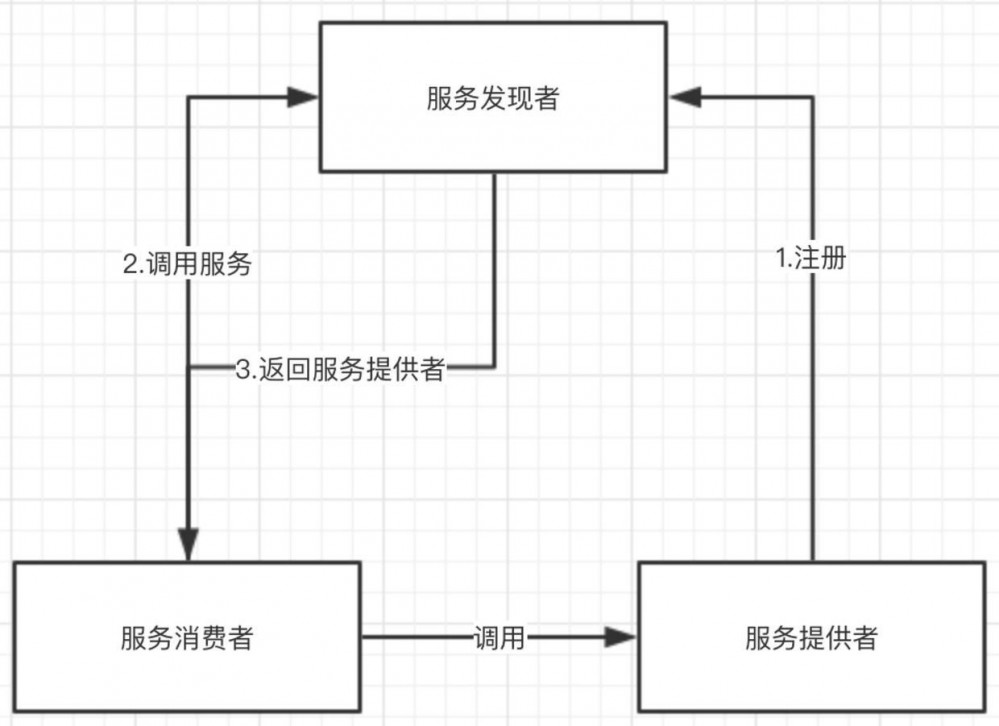
流程介绍
以购买商品为例:
- 消费者(想买篮球的消费者)发起购买的请求。
- 这个请求先到服务发现者(euraka:可以理解为管理所有的服务的系统),服务发现者寻找并返回对应的商家(providerA,下文举例子是阳光篮球场)。
- 消费者就自动的发起请求到商家(阳光篮球场)。
- 商家返回一个篮球,并印有商家(阳光篮球场)的标识。
具体代码编写流程
一、先创建一个Eureka-Server服务注册中心(服务的注册和发现模块)
创建一个项目(用的是idea开发工具) (1) 如图进行选择和配置
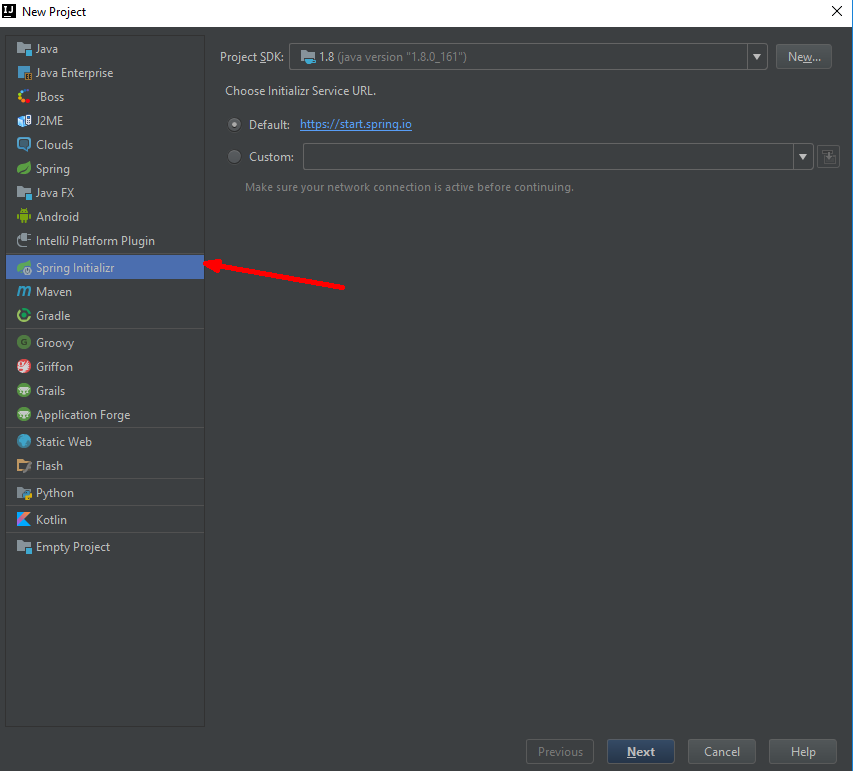
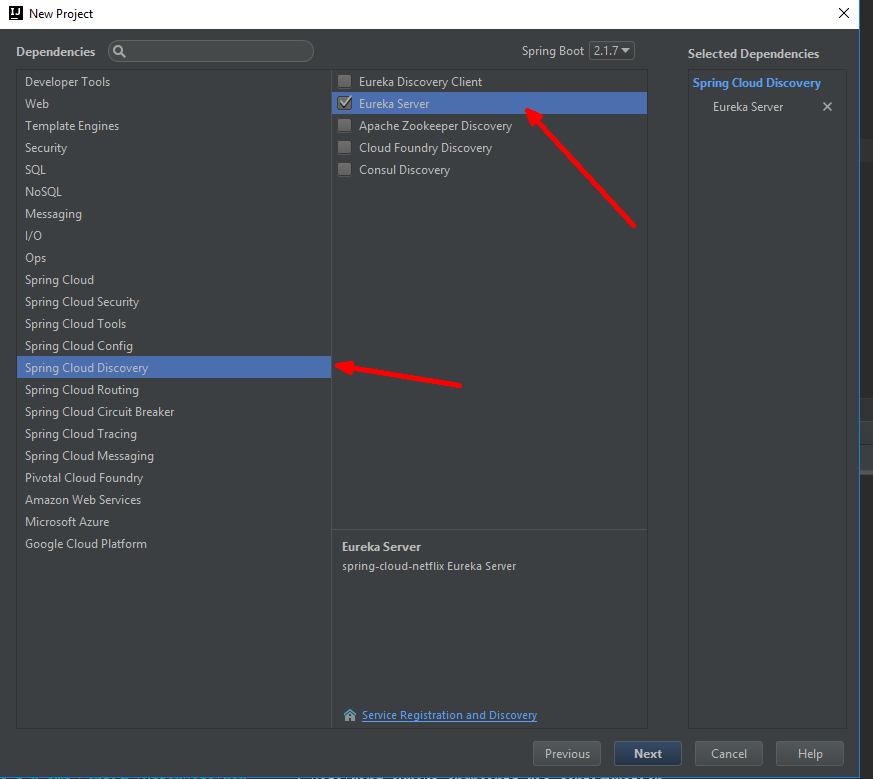
其实就是引入了eureka的包:spring-cloud-starter-netflix-eureka-server (2) 代码调整,使它真正变成eureka服务器 Spring-Boot工程的启动类上加 @EnableEurekaServer 注解。 (3) 配置调整 将application.properties 改为 application.yml,并修改内容
server:
  port: 9999 #服务注册中心端口号
eureka:
  instance:
    hostname: 127.0.0.1 #服务注册中心IP地址
  client:
    registerWithEureka: false #是否向服务注册中心注册自己
    fetchRegistry: false #是否检索服务
    serviceUrl: #服务注册中心的配置内容,指定服务注册中心的位置
      defaultZone: http://${eureka.instance.hostname}:${server.port}/eureka/
复制代码
(4) 启动看效果
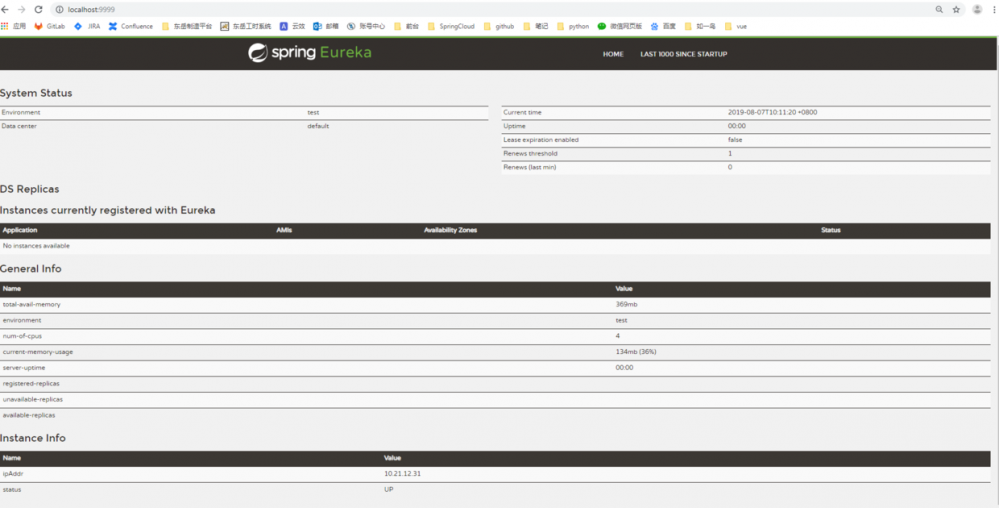
在instances部分就是将来会注册到euraka上的服务商和消费者。但现在并没有,因为还没创建呢。
#####二、先创建一个服务者(并注册到eureka上) (1)创建一个项目,跟创建euraka项目大致选择一样,就不上图了。只有选择依赖的时候,多选一个 spring web。因为服务者要提供服务将来要用到controller这种注解。 (2)修改代码。 使其变成eureka的客户端:在Spring-boot的启动类上通过注解@EnableEurekaClient 表明自己是一个eurekaclient. 提供服务:写一个controller,并编写具体接口。
package com.rest;

import org.springframework.web.bind.annotation.GetMapping;
import org.springframework.web.bind.annotation.ResponseBody;
import org.springframework.web.bind.annotation.RestController;

import java.util.HashMap;
import java.util.Map;

@RestController
public class BasketballController {
    /**
     * 假如这个客户端要提供一个getUser的方法
     * @return
     */
    @GetMapping(value = "/buy")
    @ResponseBody
    public Map<String,Object> getUser(){
        Map<String,Object> data = new HashMap<>();
//        data.put("id",id);
        data.put("size","7#");
        data.put("from","阳光篮球场");
        return data;
    }

}
复制代码
(3)配置调整 将application.properties 改为 application.yml,并修改内容
eureka:
  client:
    serviceUrl: #注册中心的注册地址
      defaultZone: http://127.0.0.1:9999/eureka/
server:
  port: 8081  #服务端口号
spring:
  application:
    name: service-provider #服务名称--调用的时候根据名称来调用该服务的方法
复制代码
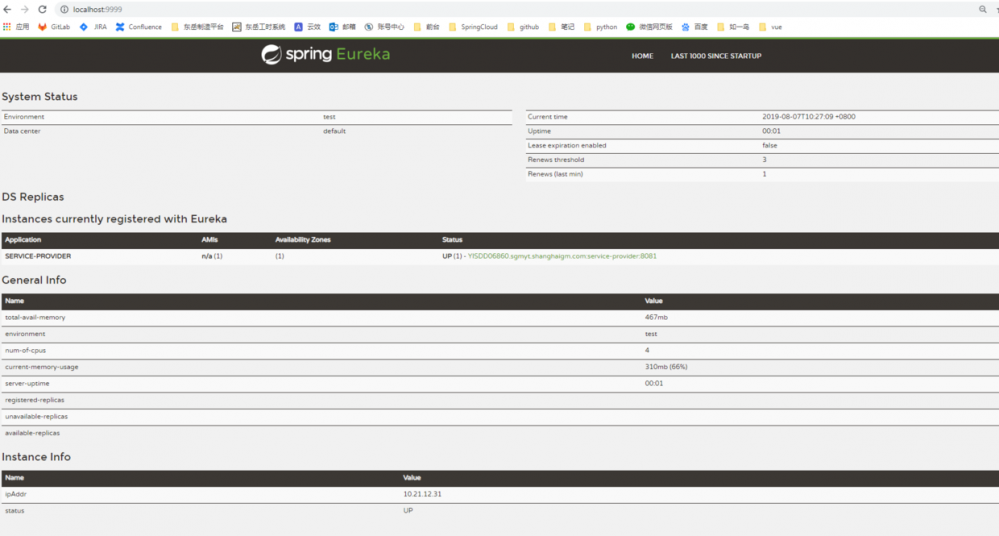
(4) 启动看效果
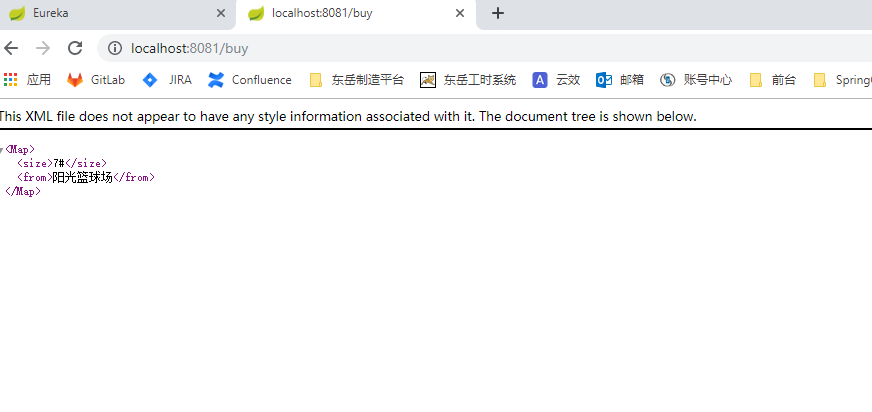
eureka上也已经有了一个客户端了:
#####三、该来人买篮球了:创建一个消费者(并注册到eureka上) (1)创建一个项目,选择与服务者一样。要选择eureka和spring web,因为也要发起请求。 (2)修改代码,使其变成eureka的客户端并可以调用服务。(我在里面加了其他的注解,喜欢研究的可以尝试的去掉看看有没有影响)
package com.eureka.consumer;

import org.springframework.beans.factory.annotation.Autowired;
import org.springframework.boot.SpringApplication;
import org.springframework.boot.autoconfigure.SpringBootApplication;
import org.springframework.boot.autoconfigure.domain.EntityScan;
import org.springframework.boot.web.servlet.ServletComponentScan;
import org.springframework.cloud.client.loadbalancer.LoadBalanced;
import org.springframework.cloud.netflix.eureka.EnableEurekaClient;
import org.springframework.context.annotation.Bean;
import org.springframework.context.annotation.ComponentScan;
import org.springframework.web.bind.annotation.GetMapping;
import org.springframework.web.bind.annotation.RequestParam;
import org.springframework.web.bind.annotation.ResponseBody;
import org.springframework.web.bind.annotation.RestController;
import org.springframework.web.client.RestTemplate;

import java.util.HashMap;
import java.util.Map;

@SpringBootApplication
@EnableEurekaClient
@EntityScan
@ServletComponentScan
@ComponentScan
@RestController
public class ConsumerApplication {
    @Autowired
    RestTemplate restTemplate;

    public static void main(String[] args) {
        SpringApplication.run(ConsumerApplication.class, args);
    }

    @LoadBalanced
    @Bean
    public RestTemplate rest() {
        return new RestTemplate();
    }


    /**
     * Rest服务端使用RestTemplate发起http请求,然后得到数据返回给前端
     *
     * @return
     */
    @GetMapping(value = "/getUser")
    @ResponseBody
    public Map<String, Object> getUser() {
        Map<String, Object> data = restTemplate.getForObject("http://service-provider/buy", Map.class);
        return data;
    }


}
复制代码
(3)别忘了修改配置文件,使其注册到eureka上。
eureka:
  client:
    serviceUrl: #注册中心的注册地址
      defaultZone: http://127.0.0.1:9999/eureka/
server:
  port: 9000  #服务端口号
spring:
  application:
    name: service-consumer #服务名称--调用的时候根据名称来调用该服务的方法
复制代码
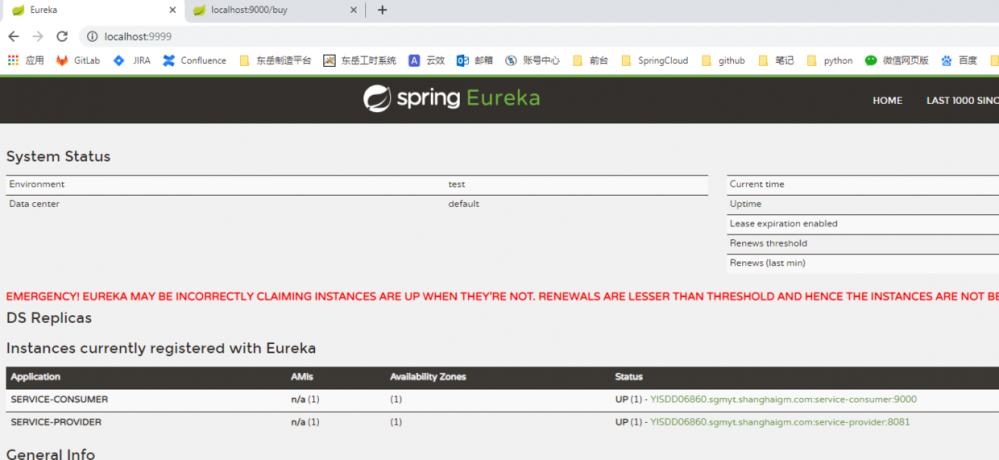
(4)启动看效果 eureka上已经有了这个instance了。
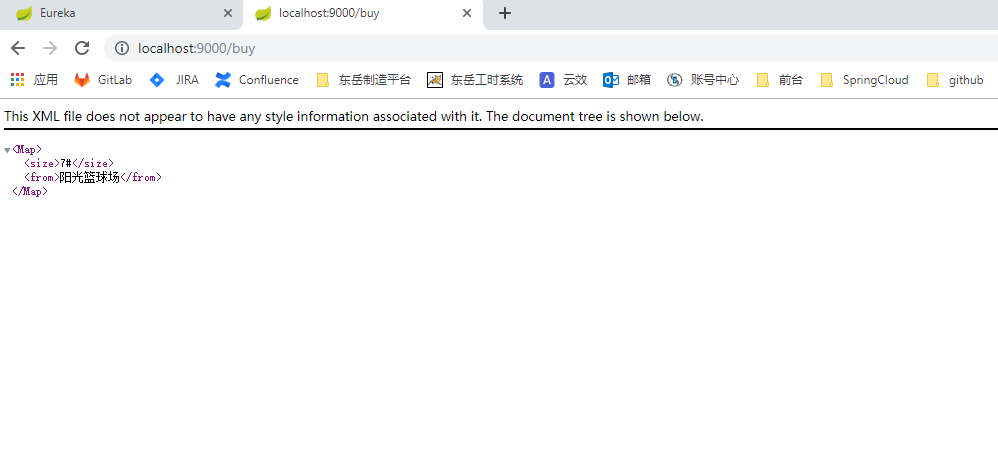
发起买篮球的请求看一下,注意地址:是9000,是这个消费者。之前的服务者是8081。返回阳光篮球场。


![[HBLOG]公众号](https://www.liuhaihua.cn/img/qrcode_gzh.jpg)

