SpringBoot后台权限管理系统(二)—前端工程搭建
工程简介
工程mountain-element-ui是基于 vue-admin-template扩展的, 主要实现权限管理系统,包括用户管理、
角色管理、部门管理、菜单管理等。实现动态路由加载,树形结构展示、表格数据展示等。复制代码
前端工程地址
后端工程地址
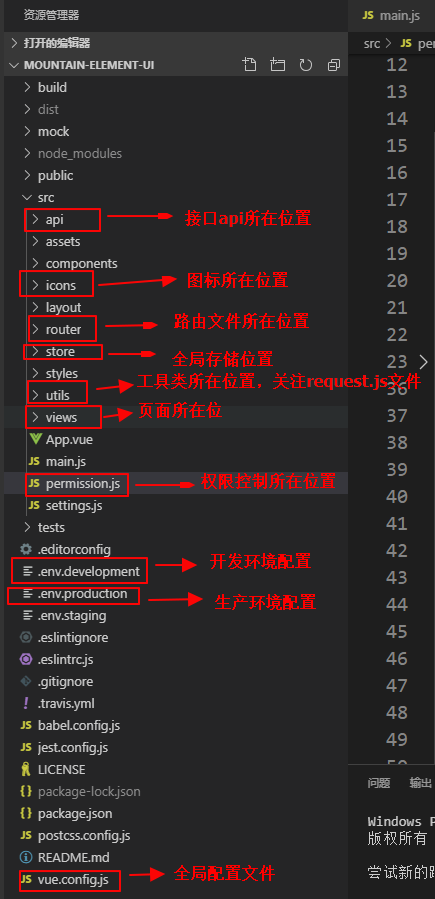
工程目录说明
-
上图列出来了主要需要注意的文件目录,学习这个工程前需要要有vuejs基础,了解webpack框架,用过vue-cli客户端搭建过工程。
框架组件
页面
-
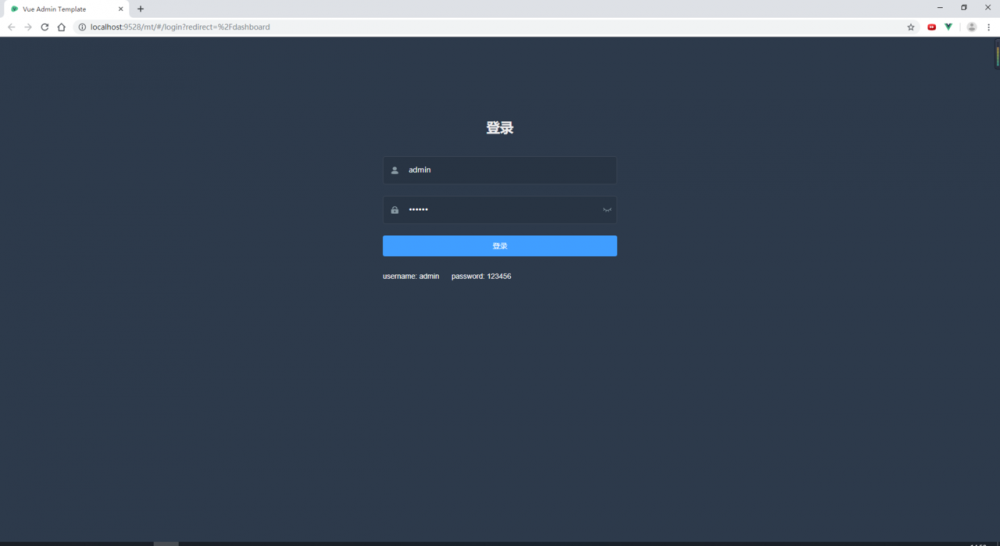
登录页面
-
主页面
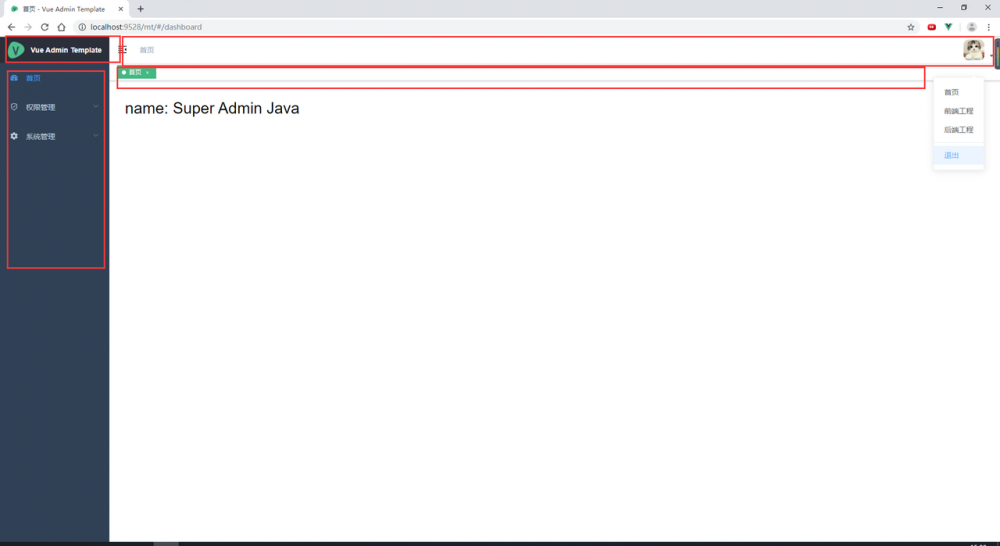
说明
-
登录页面vue代码在
src/views/login路径下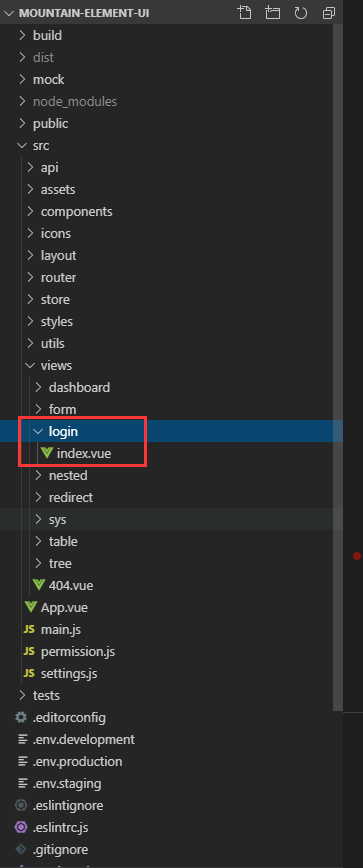
-
主页面header(头文件)和侧边栏页面代码在
src/layout/components这个路径中,左上角图标是在Sidebar侧边栏中使用Logo.vue组件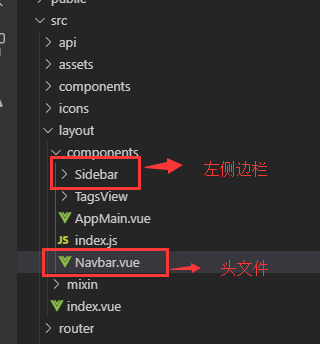
-
页面布局组件:请看
src/layout/index.vue组件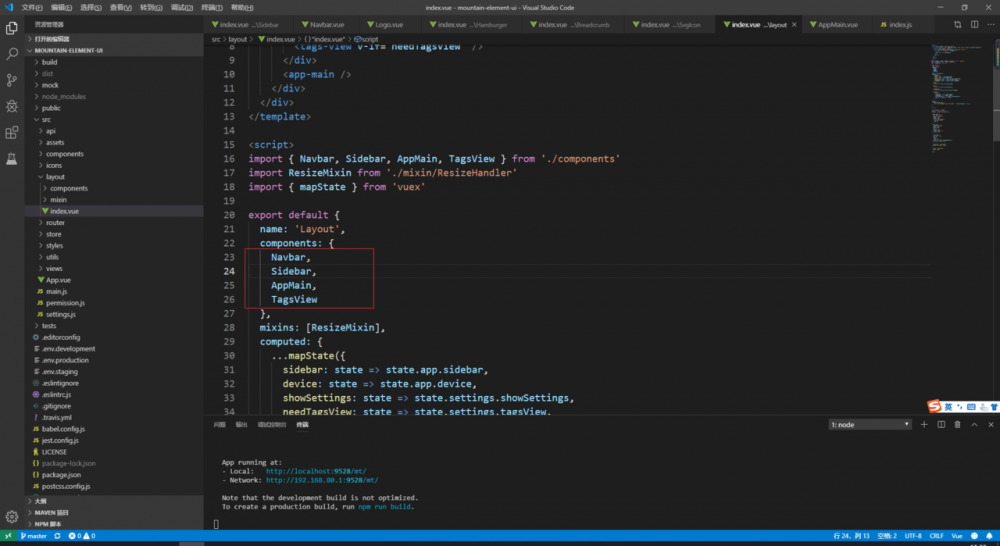
业务页面组件
页面
-
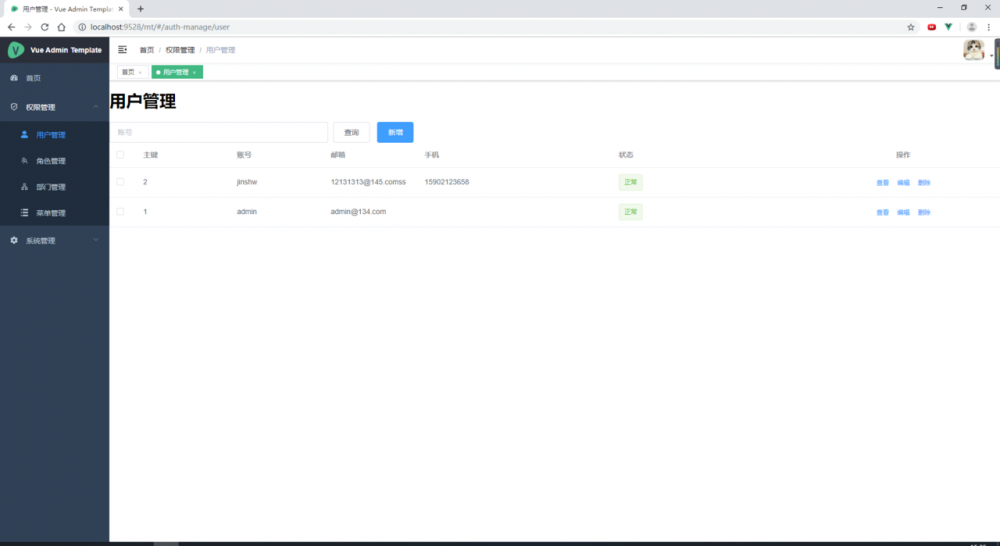
用户管理
-
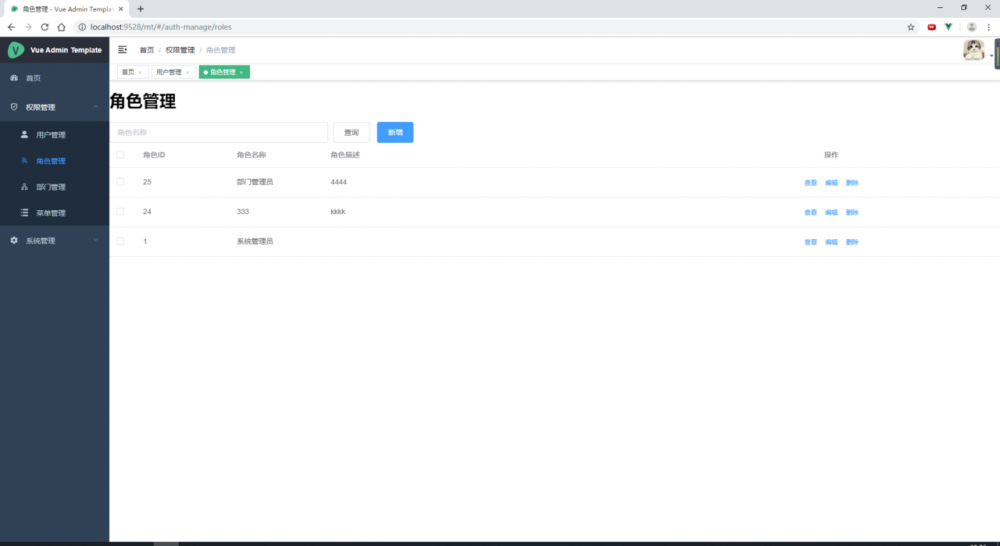
角色管理
-
部门管理
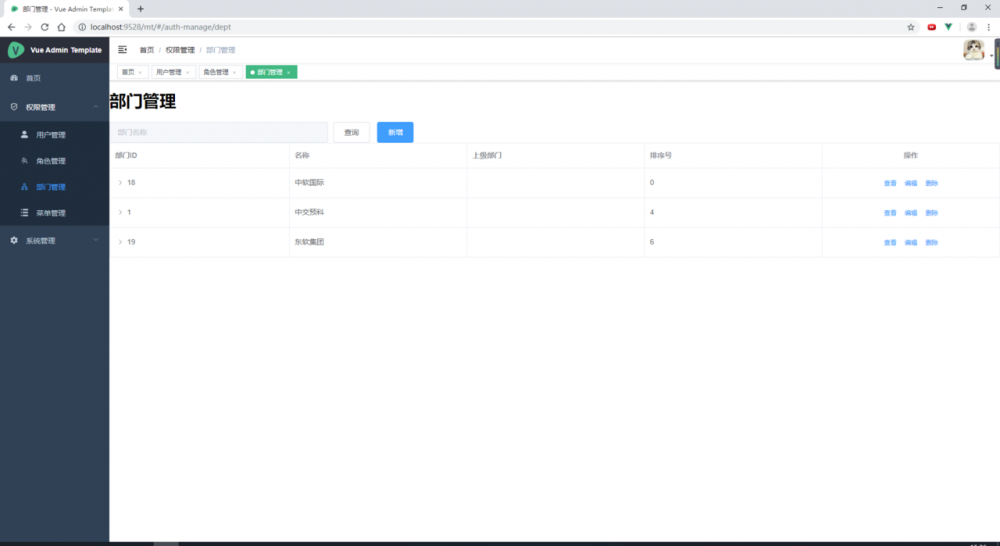
-
菜单管理
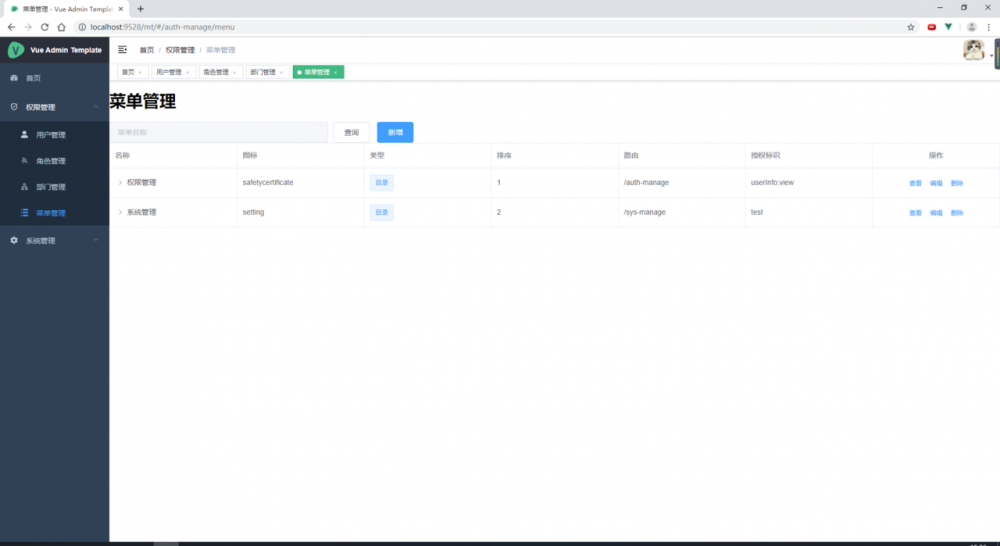
说明
-
页面代码在
src/views/sys/路径下,user:用户管理、dept:部门管理、role:角色管理、menu:菜单管理 -
页面中的组件都是element ui中的,请查看Element UI官网
路由配置
静态路由配置
-
在
src/router/index.js中配置,创建路由路由数组
export const constantRoutes = [
  {
    path: '/redirect',
    component: Layout,
    hidden: true,
    children: [
      {
        path: '/redirect/:path*',
        component: () => import('@/views/redirect/index')
      }
    ]
  },
  {
    path: '/login',
    component: () => import('@/views/login/index'),
    hidden: true
  },

  {
    path: '/404',
    component: () => import('@/views/404'),
    hidden: true
  },

  {
    path: '/',
    component: Layout,
    redirect: '/dashboard',
    children: [{
      path: 'dashboard',
      name: 'Dashboard',
      component: () => import('@/views/dashboard/index'),
      meta: { title: '首页', icon: 'dashboard' }
    }]
  }

]复制代码
-
根据上面的数组创建路由对象
const createRouter = () => new Router({
    // mode: 'history', // require service support
    scrollBehavior: () => ({ y: 0 }),
    routes: constantRoutes
  })

  const router = createRouter()

  // Detail see: https://github.com/vuejs/vue-router/issues/1234#issuecomment-357941465
  export function resetRouter() {
    const newRouter = createRouter()
    router.matcher = newRouter.matcher // reset router
  }复制代码
动态路由添加
-
从后台接口获取菜单配置json数据
-
把菜单数据转化成前端js的路由可用数据
-
动态的把转换的数据添加到路由中
-
主要代码如下:
export function remoteRouter(menuList) {
  const initRouter = getLocalStorage('initRouter')
  router.options.routes = initRouter
  router.addRoutes(router.options.routes)
  const list = getMenuTree(menuList.children)
  // 动态添加路由
  for (let i = 0; i < list.length; i++) {
    var isFlag = router.options.routes.some(function(obj) {
      if (obj.path === list[i].path) {
        return true
      }
    })
    if (!isFlag) {
      router.options.routes.push(list[i])
    }
  }
  router.addRoutes(router.options.routes)
}复制代码
路由全局处理
-
循环路由之前处理事件:
-
获取缓存的静态路由和动态路由数据
-
动态路由添加路由
-
获取缓存token,判断token是否存在,不存在跳转到登录页面
-
router.beforeEach(async(to, from, next) => {
  const initRouterList = getLocalStorage('initRouter')
  const list = getLocalStorage('router')

  if (router.options.routes.length <= initRouterList.length && list != null) {
    const remoteRouter = menuTreeToPageMenu(list)
    // 动态添加路由
    if (remoteRouter !== null && remoteRouter !== undefined) {
      for (let i = 0; i < remoteRouter.length; i++) {
        var isFlag = router.options.routes.some(function(obj) {
          if (obj.path === remoteRouter[i].path) {
            return true
          }
        })
        if (!isFlag) {
          router.options.routes.push(remoteRouter[i])
        }
      }
      router.addRoutes(router.options.routes)
      next({ ...to, replace: true })
    }
  }

  // start progress bar
  NProgress.start()
  // set page title
  document.title = getPageTitle(to.meta.title)
  // determine whether the user has logged in
  const hasToken = getToken()

  if (hasToken) {
    if (to.path === '/login') {
      // if is logged in, redirect to the home page
      next({ path: '/' })
      NProgress.done()
    } else {
      const hasGetUserInfo = store.getters.name
      if (hasGetUserInfo) {
        next()
      } else {
        try {
          // get user info
          await store.dispatch('user/getInfo')

          next()
        } catch (error) {
          // remove token and go to login page to re-login
          await store.dispatch('user/resetToken')
          Message.error(error || 'Has Error')
          next(`/login?redirect=${to.path}`)
          NProgress.done()
        }
      }
    }
  } else {
    /* has no token*/

    if (whiteList.indexOf(to.path) !== -1) {
      // in the free login whitelist, go directly
      next()
    } else {
   // other pages that do not have permission to access are redirected to the login page.
      next(`/login?redirect=${to.path}`)
      NProgress.done()
    }
  }
})复制代码
接口访问
屏蔽mock
由于这个工程师前后分离,前后端工程同时开发,我把后端接口服务允许跨域访问,前端工程没有做跨域配置;同时把原来工程中mock接口屏蔽掉。在 main.js
中注释掉mock引用,如下:
// import { mockXHR } from '../mock'
// if (process.env.NODE_ENV === 'production') {
//   mockXHR()
// }复制代码
登录/退出接口
-
在用户登录时,登录成功后,服务端返回数据中有token,把token存储在全局里,这样其他接口访问时就可以带上这个token参数,后端验证这个token,token值合法在继续查询接口;如果不合法返回前端提示。代码在
src/store/modules/user.js文件中,主要代码如下:login({ commit }, userInfo) { const { username, password } = userInfo return new Promise((resolve, reject) => { login({ username: username.trim(), password: password }).then(response => { const { data } = response commit('SET_TOKEN', data.token) setToken(data.token) if (response.data.sessionId !== undefined) { setCookies('sessionId', response.data.sessionId) } setLocalStorage('router', response.sysMenus.children) remoteRouter(response.sysMenus) resolve(response) }).catch(error => { reject(error) }) }) }复制代码 -
退出接口:在用户退出系统时,清除token、重置router等,主要代码如下:
logout({ commit, state }) {
    return new Promise((resolve, reject) => {
      logout(state.token).then(() => {
        commit('SET_TOKEN', '')
        removeToken()
        resetRouter()
        removeLocalStorage('router')
        resolve()
      }).catch(error => {
        reject(error)
      })
    })
  }复制代码
其他接口
-
请求封装:在请求后端接口时,包装一个全局的访问
request.js文件,在请求接口时,请求头中添加X-Token参数,主要代码如下:service.interceptors.request.use( config => { // do something before request is sent const sessionId = getCookies('sessionId') if (store.getters.token) { // let each request carry token // ['X-Token'] is a custom headers key // please modify it according to the actual situation config.headers['X-Token'] = getToken() } if (sessionId != null && sessionId !== undefined) { config.headers['token'] = sessionId } return config }, error => { // do something with request error console.log(error) // for debug return Promise.reject(error) } ) 复制代码 -
请求返回封装:请求返回数据后,全局判断返回码
code,如果需要做全局判断在这里判断,主要代码如下:response => { const res = response.data // if the custom code is not 20000, it is judged as an error. if (res.code !== 20000) { Message({ message: res.message || 'Error', type: 'error', duration: 5 * 1000 }) // 50008: Illegal token; 50012: Other clients logged in; 50014: Token expired; if (res.code === 50008 || res.code === 50012 || res.code === 50014) { // to re-login MessageBox.confirm('您已经注销,您可以取消以停留在此页面,或再次登录', '确认注销', { confirmButtonText: '重新登录', cancelButtonText: '取消', type: 'warning' }).then(() => { store.dispatch('user/resetToken').then(() => { location.reload() }) }) } if (res.code === 600) { Message({ message: '您没有操作权限', type: 'warning', duration: 5 * 1000 }) return } const promise = new Promise(function(resolve, reject) { reject(new Error(res.message || 'Error')) }) promise.catch(function(error) { console.log(error) }) return promise // return Promise.reject(new Error(res.message || 'Error')) } else { return res } } 复制代码
其他
配置项目名称
-
配置文件路径
/vue.config.js
publicPath: '/mt',
outputDir: 'dist',
assetsDir: 'static',
lintOnSave: process.env.NODE_ENV === 'development'
复制代码
配置环境访问地址
-
开发环境配置:配置文件
.env.developmentVUE_APP_BASE_API = 'http://127.0.0.1:8080/mt' 复制代码
-
生产环境配置:配置文件
.env.productionVUE_APP_BASE_API = 'http://172.22.112.130:8080/mt' 复制代码
执行命令
-
开发启动:
npm run dev -
构建命令:
npm run build:prod
参考资料
-
Element UI 官网
-
vue-element-admin官网
待续...
-
集成Swagger2
-
集成quartz框架
-
集成docker
-
权限管理系统实现:用户管理、角色管理、部门管理、菜单管理等模块
- 本文标签: message js token Menu json src web 服务端 cat 缓存 GitHub 参数 Quartz https 工程师 IDE Document dist spring IO tar session API list ACE git bug 数据 App client rmi constant cookies 管理 key Word node springboot UI 注释 build 目录 Service CDN Dashboard NSA Docker http remote id 配置 2019 代码 开发 logo
- 版权声明: 本文为互联网转载文章,出处已在文章中说明(部分除外)。如果侵权,请联系本站长删除,谢谢。
- 本文海报: 生成海报一 生成海报二


![[HBLOG]公众号](https://www.liuhaihua.cn/img/qrcode_gzh.jpg)

