ReentrantLock源码自读 -- AQS
ReentrantLock公平锁加锁过程
测试代码
public static void main(String[] args) {
    ReentrantLock lock = new ReentrantLock(true);
    new Thread(() -> {
        System.out.println("11111 try get lock");
        lock.lock();
        System.out.println("11111");
        try {
            TimeUnit.SECONDS.sleep(5);
        } catch (InterruptedException e) {
            e.printStackTrace();
        }
        lock.unlock();
    }).start();

    try {
        TimeUnit.MILLISECONDS.sleep(100);
    } catch (InterruptedException e) {
        e.printStackTrace();
    }

    new Thread(() -> {
        System.out.println("22222 try get lock");
        lock.lock();
        System.out.println("22222");
        try {
            TimeUnit.SECONDS.sleep(5);
        } catch (InterruptedException e) {
            e.printStackTrace();
        }
        lock.unlock();
    }).start();

    try {
        TimeUnit.MILLISECONDS.sleep(100);
    } catch (InterruptedException e) {
        e.printStackTrace();
    }

    new Thread(() -> {
        System.out.println("33333 try get lock");
        lock.lock();
        System.out.println("33333");
        try {
            TimeUnit.SECONDS.sleep(5);
        } catch (InterruptedException e) {
            e.printStackTrace();
        }
        lock.unlock();
    }).start();

    try {
        TimeUnit.MILLISECONDS.sleep(100);
    } catch (InterruptedException e) {
        e.printStackTrace();
    }

    System.out.println("main");
}
这里开启 3 个线程,并且让 3 个线程依次执行。
第一个线程加锁
public final void acquire(int arg) {
    if (!tryAcquire(arg) &&
        acquireQueued(addWaiter(Node.EXCLUSIVE), arg))
        selfInterrupt();
}
先来看看上面这段代码中的 tryAcquire 方法。
protected final boolean tryAcquire(int acquires) {
    final Thread current = Thread.currentThread();
    int c = getState();
    if (c == 0) {
        if (!hasQueuedPredecessors() &&
            compareAndSetState(0, acquires)) {
            setExclusiveOwnerThread(current);
            return true;
        }
    }
    else if (current == getExclusiveOwnerThread()) {
        int nextc = c + acquires;
        if (nextc < 0)
            throw new Error("Maximum lock count exceeded");
        setState(nextc);
        return true;
    }
    return false;
}
因为是第一个线程来获取锁,所以 getState() 会得到 state 默认值 0 ,接下来进入第一个 if 代码块,再看 hasQueuedPredecessors 方法。
public final boolean hasQueuedPredecessors() {
    // The correctness of this depends on head being initialized
    // before tail and on head.next being accurate if the current
    // thread is first in queue.
    Node t = tail; // Read fields in reverse initialization order
    Node h = head;
    Node s;
    return h != t &&
        ((s = h.next) == null || s.thread != Thread.currentThread());
}
同样的因为是第一个线程,所以 tail 和 head 也是默认初始值 null ,也就是说 return 语句块中的 h != t 将返回 false ,再回到 tryAcquire 方法中,这时 !hasQueuedPredecessors() 为 true ,所以紧接着执行 compareAndSetState(0, acquires) ,这句代码的意思是将 state 的值由 0 变为 1 ,代表上锁成功,然后将当前线程置为独占所有者。这时上锁完成。
else if
中的代码是什么意思呢?没错,正如你想,是重入逻辑。
至此第一个线程的加锁逻辑完成,有没有发现目前跟 AQS 没有一毛钱的关系。
第二个线程加锁
毫无疑问,我们还是从
tryAcquire 方法开始。
在不考虑重入的情况下,这时执行 getState() 方法得到的值为 1 。所以第一个 if 代码块不会进,同理,当前独占线程也不是我们所谓的第二个线程,所以 else if 代码块也不会进,那么直接返回 false 。这时 !tryAcquire(arg) 为 true ,那么执行 acquireQueued(addWaiter(Node.EXCLUSIVE), arg) 方法。
先看看 addWaiter(Node.EXCLUSIVE) 方法。
/** Marker to indicate a node is waiting in exclusive mode */
static final Node EXCLUSIVE = null;

private Node addWaiter(Node mode) {
    Node node = new Node(Thread.currentThread(), mode);
    // Try the fast path of enq; backup to full enq on failure
    Node pred = tail;
    if (pred != null) {
        node.prev = pred;
        if (compareAndSetTail(pred, node)) {
            pred.next = node;
            return node;
        }
    }
    enq(node);
    return node;
}
可以看到该方法一开始就 new 了一个 Node ,初始化该 Node 包含我们所谓的第二个线程。注意这里开始涉及 AQS(AbstractQueuedSynchronizer) 了,其实就是一个链表队列。
tail 节点为
null ,因此执行
enq(node)
方法。
老规矩,看看代码。
private Node enq(final Node node) {
    for (;;) {
        Node t = tail;
        if (t == null) { // Must initialize
            if (compareAndSetHead(new Node()))
                tail = head;
        } else {
            node.prev = t;
            if (compareAndSetTail(t, node)) {
                t.next = node;
                return t;
            }
        }
    }
}
一进来就看到个死循环。同样的获取尾部节点,没的说,铁定为 null 。那么执行 if 代码块, new 了一个空节点给头部节点,然后又把头部节点赋值给尾部节点(这时头部和尾部指向同一内存地址)。然后第一次循环结束,因为没有返回值,所以执行第二次循环,这时候尾部节点已经不是 null 了(哪怕它是一个空节点),那么进入 else 代码块。
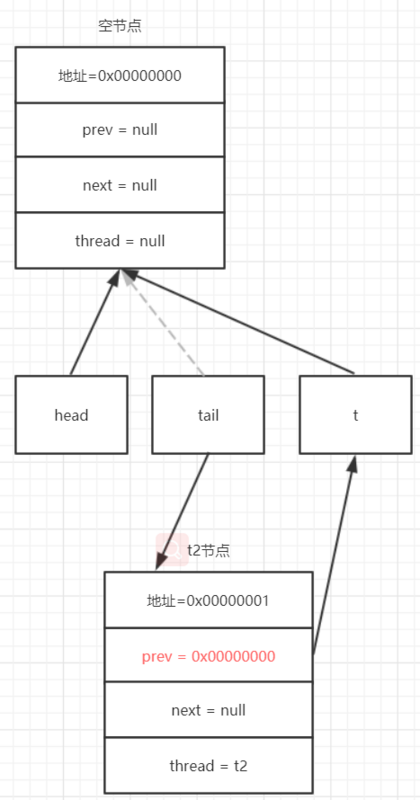
先把传进来的 node (上个方法中 new 出来的包含第二个线程的 node )的上一个节点设为第一次循环设置的空节点。
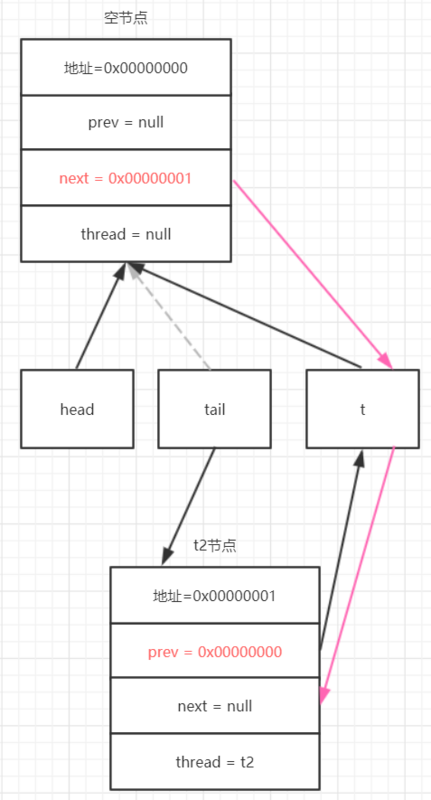
然后把传进来的 node 给尾部节点。
最后把空节点的下一个节点设置为传进来的 node 。
这样就形成了拥有两个节点的双向链表。
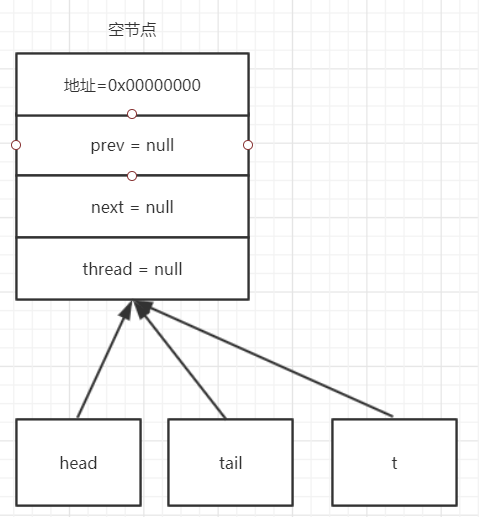
有点难理解,画个幼儿园水平的图来看看。
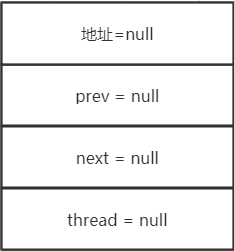
首先定义一个抽象的空节点。
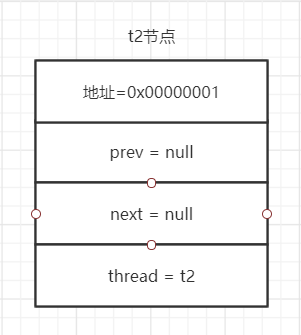
然后定义addWaiter方法new出来的节点,赐名t2节点。
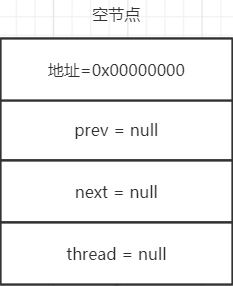
再然后定义一个enq方法new出来的空节点。
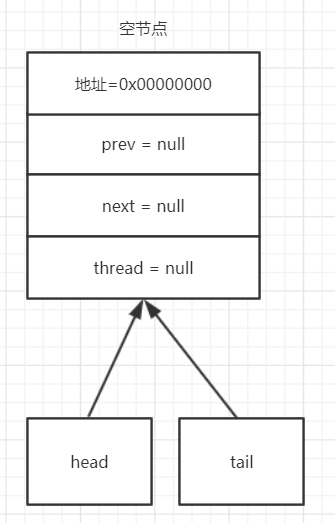
最后看看节点间的关联关系
执行 tail = head; 时
执行 Node t = tail; 时
执行 node.prev = t; 时

执行 compareAndSetTail(t, node) 时
执行 t.next = node; 时
最后形成 AQS 队列
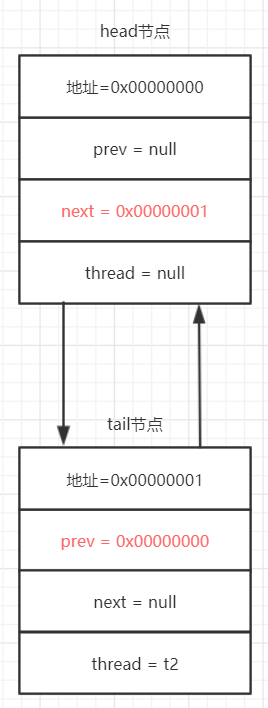
图画完了,仅代表个人理解。
最后看 acquireQueued 方法。
final boolean acquireQueued(final Node node, int arg) {
    boolean failed = true;
    try {
        boolean interrupted = false;
        for (;;) {
            final Node p = node.predecessor();
            if (p == head && tryAcquire(arg)) {
                setHead(node);
                p.next = null; // help GC
                failed = false;
                return interrupted;
            }
            if (shouldParkAfterFailedAcquire(p, node) &&
                parkAndCheckInterrupt())
                interrupted = true;
        }
    } finally {
        if (failed)
            cancelAcquire(node);
    }
}
一进来又是一个死循环。第一次循环 if (p == head && tryAcquire(arg)) 这句代码,因为我们设定的场景,所以肯定加锁失败,所以直接看 shouldParkAfterFailedAcquire 方法。
private static boolean shouldParkAfterFailedAcquire(Node pred, Node node) {
    int ws = pred.waitStatus;
    if (ws == Node.SIGNAL)
        /*
         * This node has already set status asking a release
         * to signal it, so it can safely park.
         */
        return true;
    if (ws > 0) {
        /*
         * Predecessor was cancelled. Skip over predecessors and
         * indicate retry.
         */
        do {
            node.prev = pred = pred.prev;
        } while (pred.waitStatus > 0);
        pred.next = node;
    } else {
        /*
         * waitStatus must be 0 or PROPAGATE.  Indicate that we
         * need a signal, but don't park yet.  Caller will need to
         * retry to make sure it cannot acquire before parking.
         */
        compareAndSetWaitStatus(pred, ws, Node.SIGNAL);
    }
    return false;
}
这时候因为还没有进入等待锁的线程,所以 waitStatus 为 0 ,那么执行 else 中的代码将 waitStatus 置为 -1 ,值得注意的是这里操作的是上一个节点的 waitStatus 。紧接着第二次循环同样会加锁失败(因为我们设定的场景),再一次进入 shouldParkAfterFailedAcquire 方法,这时候 waitStatus 已经被置为 -1 了,所以返回 true 。然后执行 parkAndCheckInterrupt 方法。
private final boolean parkAndCheckInterrupt() {
    LockSupport.park(this);
    return Thread.interrupted();
}
这时候直接调用 native 方法 park() ,使第二个线程进入等待。下面先说第三个线程,再看第二个线程是如何加锁成功的。
第三个线程加锁
再次强调我们设定的场景导致第三次加锁铁定失败,所以直接看 addWaiter 方法。
private Node addWaiter(Node mode) {
    Node node = new Node(Thread.currentThread(), mode);
    // Try the fast path of enq; backup to full enq on failure
    Node pred = tail;
    if (pred != null) {
        node.prev = pred;
        if (compareAndSetTail(pred, node)) {
            pred.next = node;
            return node;
        }
    }
    enq(node);
    return node;
}
这个时候 pred 肯定不是 null 了,所以将第三个线程节点的上一个节点设置为第二个线程节点,然后将第三个线程节点设置为尾节点。然后再看 acquireQueued 方法。
final boolean acquireQueued(final Node node, int arg) {
    boolean failed = true;
    try {
        boolean interrupted = false;
        for (;;) {
            final Node p = node.predecessor();
            if (p == head && tryAcquire(arg)) {
                setHead(node);
                p.next = null; // help GC
                failed = false;
                return interrupted;
            }
            if (shouldParkAfterFailedAcquire(p, node) &&
                parkAndCheckInterrupt())
                interrupted = true;
        }
    } finally {
        if (failed)
            cancelAcquire(node);
    }
}
这个时候 p 节点肯定不是 head 节点(其实是第二个线程节点),所有执行第二个 if 代码块,后面的逻辑就和第二个线程走的一样了。
ReentrantLock公平锁解锁过程
第一个线程解锁
public final boolean release(int arg) {
    if (tryRelease(arg)) {
        Node h = head;
        if (h != null && h.waitStatus != 0)
            unparkSuccessor(h);
        return true;
    }
    return false;
}
直接看 tryRelease 方法
protected final boolean tryRelease(int releases) {
    int c = getState() - releases;
    if (Thread.currentThread() != getExclusiveOwnerThread())
        throw new IllegalMonitorStateException();
    boolean free = false;
    if (c == 0) {
        free = true;
        setExclusiveOwnerThread(null);
    }
    setState(c);
    return free;
}
还是在不考虑重入的情况下, getState 等于 1 ,所以 c 等于 0 ,将独占线程置为 null ,最后将 state 置为 0 。
接下来,因为第一个线程更 AQS 队列没有半毛钱关系,所以直接执行 unparkSuccessor 方法并且返回 true ,解锁完成。
那么再来看看 unparkSuccessor 方法。
private void unparkSuccessor(Node node) {
    /*
     * If status is negative (i.e., possibly needing signal) try
     * to clear in anticipation of signalling.  It is OK if this
     * fails or if status is changed by waiting thread.
     */
    int ws = node.waitStatus;
    if (ws < 0)
        compareAndSetWaitStatus(node, ws, 0);

    /*
     * Thread to unpark is held in successor, which is normally
     * just the next node.  But if cancelled or apparently null,
     * traverse backwards from tail to find the actual
     * non-cancelled successor.
     */
    Node s = node.next;
    if (s == null || s.waitStatus > 0) {
        s = null;
        for (Node t = tail; t != null && t != node; t = t.prev)
            if (t.waitStatus <= 0)
                s = t;
    }
    if (s != null)
        LockSupport.unpark(s.thread);
}
上面说过当有线程进入 AQS 队列时会将 waitStatus 置为 -1 ,所以进入第一个 if 代码块,将 waitStatus 置为 0 ,然后拿到队列中的第二个节点( 也就是第二个线程节点 ),将其唤醒。
然后再说说第二个线程节点被唤醒之候干些什么?
先看看第二个线程进入等待的代码。
private final boolean parkAndCheckInterrupt() {
    LockSupport.park(this);
    return Thread.interrupted();
}
当第二个线程被唤醒之后,将执行 return 语句,这时因为我们外部并没有打断线程,所以返回 false 。然后继续开始循环执行 if (p == head && tryAcquire(arg)) 语句,这时候满足 p == head ,再看 tryAcquire 方法。
protected final boolean tryAcquire(int acquires) {
    final Thread current = Thread.currentThread();
    int c = getState();
    if (c == 0) {
        if (!hasQueuedPredecessors() &&
            compareAndSetState(0, acquires)) {
            setExclusiveOwnerThread(current);
            return true;
        }
    }
    else if (current == getExclusiveOwnerThread()) {
        int nextc = c + acquires;
        if (nextc < 0)
            throw new Error("Maximum lock count exceeded");
        setState(nextc);
        return true;
    }
    return false;
}
这个时候因为第一个线程解锁,将 state 置为了 0 ,所以进入 hasQueuedPredecessors() 方法。
public final boolean hasQueuedPredecessors() {
    // The correctness of this depends on head being initialized
    // before tail and on head.next being accurate if the current
    // thread is first in queue.
    Node t = tail; // Read fields in reverse initialization order
    Node h = head;
    Node s;
    return h != t &&
        ((s = h.next) == null || s.thread != Thread.currentThread());
}
因为这个时候队列里有三个节点(第一个空节点,第二个线程节点,第三个线程节点),所以 h != t 满足条件, (s = h.next) == null 也满足条件,因此返回 true ,然后再反过来看,执行 compareAndSetState(0, acquires) 方法,将 state 置为 1 ,表示第二个线程上锁成功,并且将独占线程置为第二个线程,最后返回 true 。
继续往上层看,这时执行 if (p == head && tryAcquire(arg)) 中的方法。
final boolean acquireQueued(final Node node, int arg) {
    boolean failed = true;
    try {
        boolean interrupted = false;
        for (;;) {
            final Node p = node.predecessor();
            if (p == head && tryAcquire(arg)) {
                setHead(node);
                p.next = null; // help GC
                failed = false;
                return interrupted;
            }
            if (shouldParkAfterFailedAcquire(p, node) &&
                parkAndCheckInterrupt())
                interrupted = true;
        }
    } finally {
        if (failed)
            cancelAcquire(node);
    }
}
将第二个线程节点设置为头节点,并将头节点置为空节点。
private void setHead(Node node) {
    head = node;
    node.thread = null;
    node.prev = null;
}
第二个线程加锁完成。
第三个线程加锁第二个线程相同。不说了。
ReentrantLock非公平锁加锁过程
final void lock() {
    if (compareAndSetState(0, 1))
        setExclusiveOwnerThread(Thread.currentThread());
    else
        acquire(1);
}
可以看到,非公平锁一上来就是尝试去改变 state 状态。失败了走与公平锁一样的路。所有,非公平加锁失败之后还是老老实实排队。
正文到此结束
热门推荐


相关文章

近期评论
-
ws0132613@gmail.comhttps://getmacos.com/gopanel/william smith
-
谢谢
-
https://www.newcmy.com/register?aff=HBVX建议您试试草莓云机场,可以流畅观看youtube和tiktok,上reddit/x也没有问题,还有各种ai优化节点。
-
-
-
想购买您这个站,我的联系方式QQ741756694微信同步 能卖联系
-
-
-
-
Loading...
![[HBLOG]公众号](https://www.liuhaihua.cn/img/qrcode_gzh.jpg)

