Spring Boot 2.x(五):Mybatis-Plus 结合 Spring Boot
简介
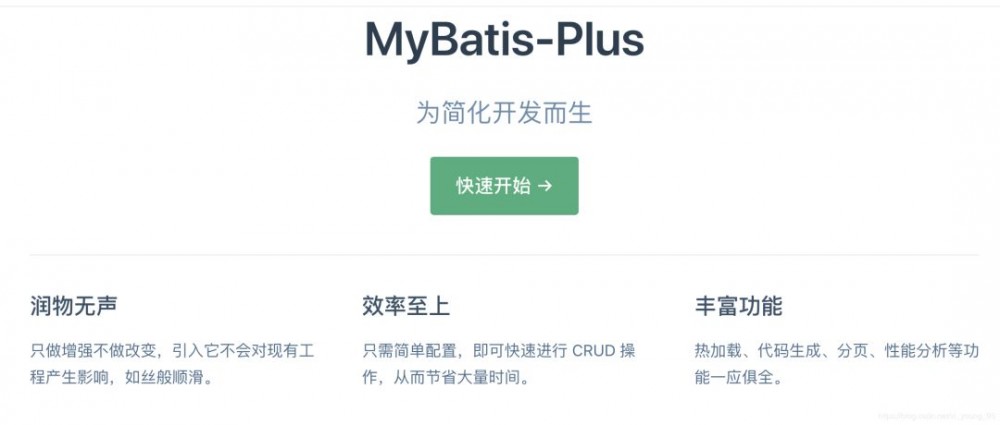
Mybatis-Plus是在Mybatis的基础上,国人开发的一款持久层框架。
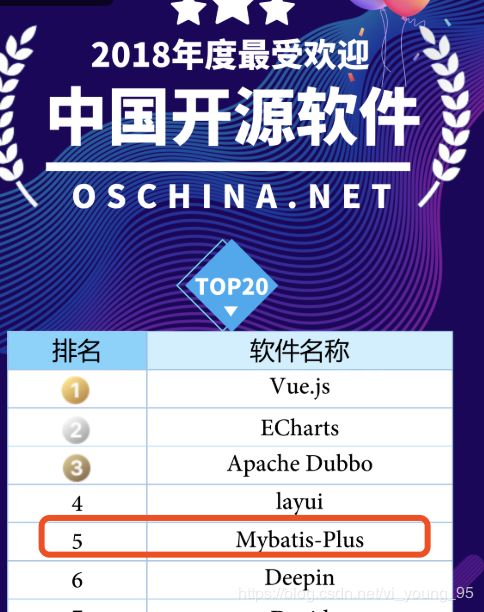
并且荣获了2018年度开源中国最受欢迎的中国软件TOP5
Spring Boot 与
Mybatis-Plus
放在一起会产生什么样的化学反应呢?下面我们来领略一下两者配合带来的效率上的提升。
Mybatis-Plus的作用

可以看到,它给我们提供了一些核心的功能:代码生成器和现成的CRUD接口以及可以结合 Lambda 的条件构造器使我们的代码变得足够优雅,分页的使用也是相当的方便,以及提供了不同的主键生成策略。
Mybatis-Plus
还提供了丰富的插件供我们去使用,我们接下来只讲核心功能,插件的使用会在后面的文章中进行部分的讲解,感兴趣的同学可以先去看一下官方的文档。
使用第一步:引入POM
首先我们需要引入POM,我在这里引用的是最新版本的:

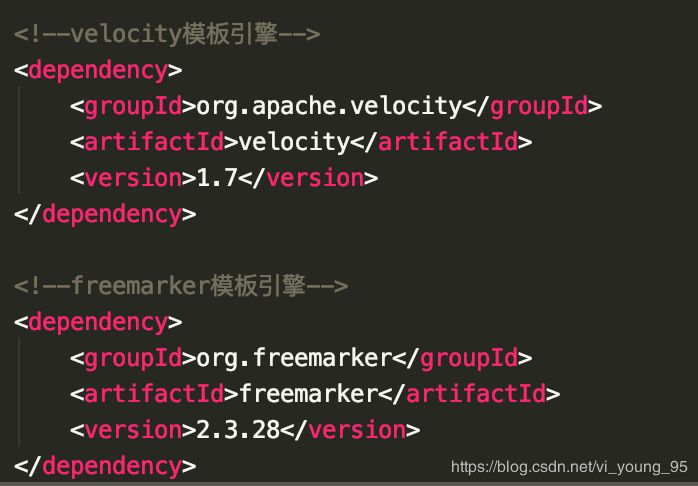
接着,如果我们需要使用代码生成器,需要引入模板引擎的依赖:
到此,pom的引入就告一段落,下面我们来看一下配置文件的编写:
使用第二步:编写配置文件
这里我们使用的是 application.yml 作为配置文件,而非新建 Spring Boot 项目默认的 application.properties ,这里如果不会新建一个 Spring Boot 项目,可以去参考本系列教程的第一篇文章

在这里可以进行打印SQL的配置,便于我们进行排查问题。
使用第三步:建表

使用第四步:使用代码生成器
直接贴出我的代码生成器代码:
public class MpGenerator {
    public static void main(String[] args) {
        GlobalConfig config = new GlobalConfig();
        String dbUrl = "jdbc:mysql://localhost:3306/viboot?useSSL=false";
        DataSourceConfig dataSourceConfig = new DataSourceConfig();
        dataSourceConfig.setDbType(DbType.MYSQL)
                .setUrl(dbUrl)
                .setUsername("root")
                .setPassword("Passw0rd")
                .setDriverName("com.mysql.cj.jdbc.Driver");
        StrategyConfig strategyConfig = new StrategyConfig();
        strategyConfig
                .setCapitalMode(true)
                //这里结合了Lombok,所以设置为true,如果没有集成Lombok,可以设置为false
                .setEntityLombokModel(true)
                .setNaming(NamingStrategy.underline_to_camel);
        //这里因为我是多模块项目,所以需要加上子模块的名称,以便直接生成到该目录下,如果是单模块项目,可以将后面的去掉
        String projectPath = System.getProperty("user.dir") + "/viboot-mybatis-plus";
        // 自定义配置
        InjectionConfig cfg = new InjectionConfig() {
            @Override
            public void initMap() {
            }
        };
        // 如果模板引擎是 freemarker
        String templatePath = "/templates/mapper.xml.ftl";
        // 如果模板引擎是 velocity
        // String templatePath = "/templates/mapper.xml.vm";

        // 自定义输出配置
        List<FileOutConfig> focList = new ArrayList<>();
        // 自定义配置会被优先输出
        focList.add(new FileOutConfig(templatePath) {
            @Override
            public String outputFile(TableInfo tableInfo) {
                // 自定义输出文件名
                return projectPath + "/src/main/resources/mapper/" + "user"
                        + "/" + tableInfo.getEntityName() + "Mapper" + StringPool.DOT_XML;
            }
        });

        cfg.setFileOutConfigList(focList);

        //设置作者,输出路径,是否重写等属性
        config.setActiveRecord(false)
                .setEnableCache(false)
                .setAuthor("viyoung")
                .setOutputDir(projectPath + "/src/main/java")
                .setFileOverride(true)
                .setServiceName("%sService");
        new AutoGenerator()
                .setGlobalConfig(config)
                .setDataSource(dataSourceConfig)
                .setStrategy(strategyConfig)
                .setTemplateEngine(new FreemarkerTemplateEngine())
                .setCfg(cfg)
                //这里进行包名的设置
                .setPackageInfo(
                        new PackageConfig()
                                .setParent("indi.viyoung.viboot.mybatis")
                                .setController("controller")
                                .setEntity("entity")
                                .setMapper("mapper")
                                .setServiceImpl("service.impl")
                                .setService("service")
                ).execute();
    }
}
下面我们来运行main方法,就可以看到生成的包:
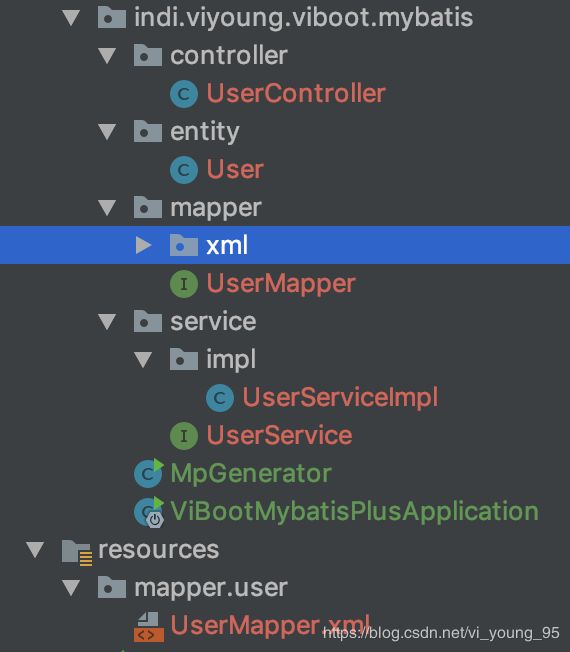
将 mapper 包下面 xml 包删掉,因为我们已经在 resources 中生成了 *mapper.xml 文件。
这里需要注意,需要在SpringBoot的启动类上配置 MapperScan 来帮助我们去找到持久层接口的位置。
使用第四步:编写查询列表进行测试
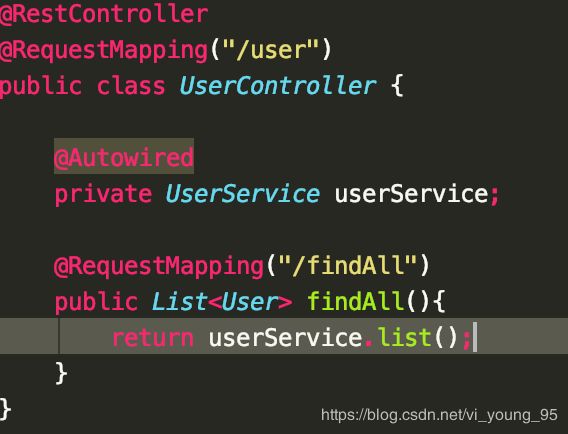
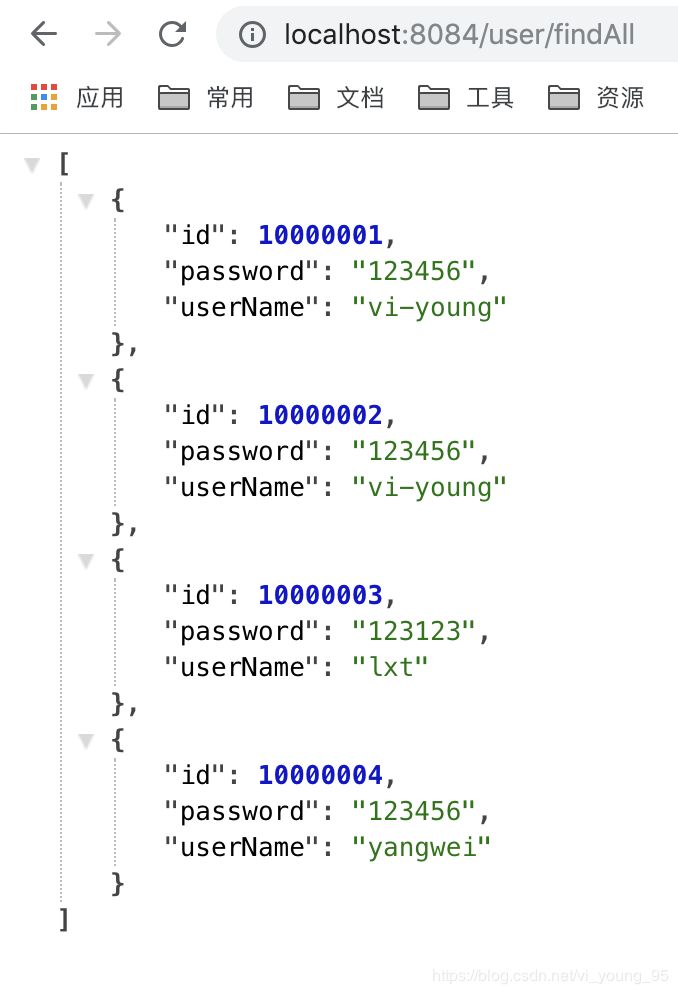
没错,我们只需要写一行代码就可以获取到我们想要的列表,下面我们来访问一下
IService与BaseMapper
有些人可能会好奇,为什么我们只需要在 controller 层中直接去调用就可以获得到列表,这是因为 Mybatis-Plus 给我们封装了一系列的CRUD的基础接口,在通过代码生成器生成的 UserService 接口实际上是继承了 IService 接口的,而 UserServiceImpl 则是继承 ServiceImpl ,所以就可以获取到一些基础的实现。


而 IService 则给我们提供了以下方法来实现基础的CRUD:

同样的, BaseMapper 接口也提供了一些实现:
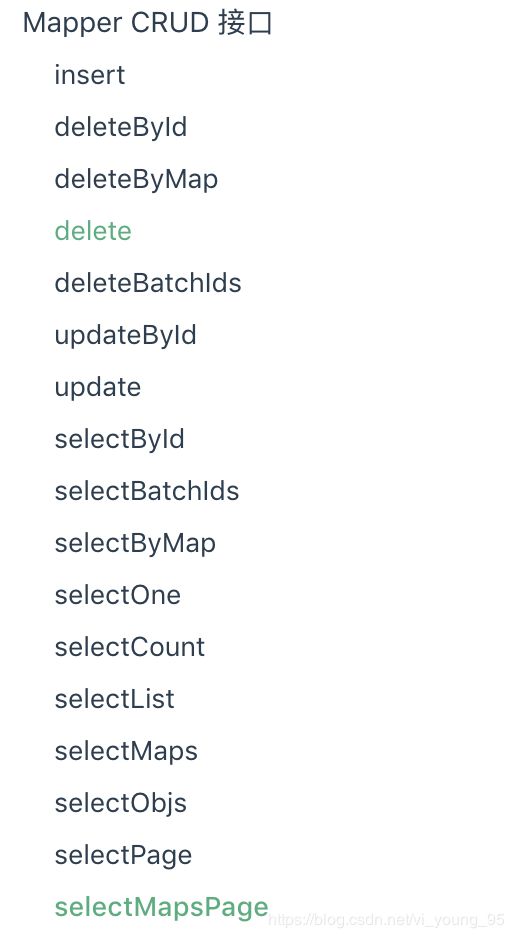
通过这些基础的实现,我们可以完成日常中大部分的基础查询,而省去了编写Service和ServiceImpl的时间,从编码效率上来讲比起JPA更胜一筹。
条件构造器
条件构造器可以构造一些查询条件来获取我们指定的值,同时可以结合Lambda表达式来使用,下面我们直接来编写两个例子:

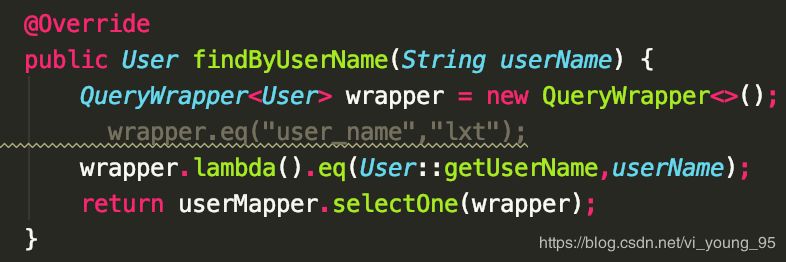
可以看到,被注释掉的部分是不使用Lambda表达式的写法,这样的写法存在魔法值,而且会由于粗心写错column的名称而导致错误,但是使用Lambda表达式就足够直观的可以看出我们是想查询出 userName = ? 的数据,下面,我们来运行一下,看看结果是否符合我们预期的那样

当然,条件构造器的用法还有许许多多,这里就不在一一罗列,有需要的同学可以去官网查看文档
分页查询
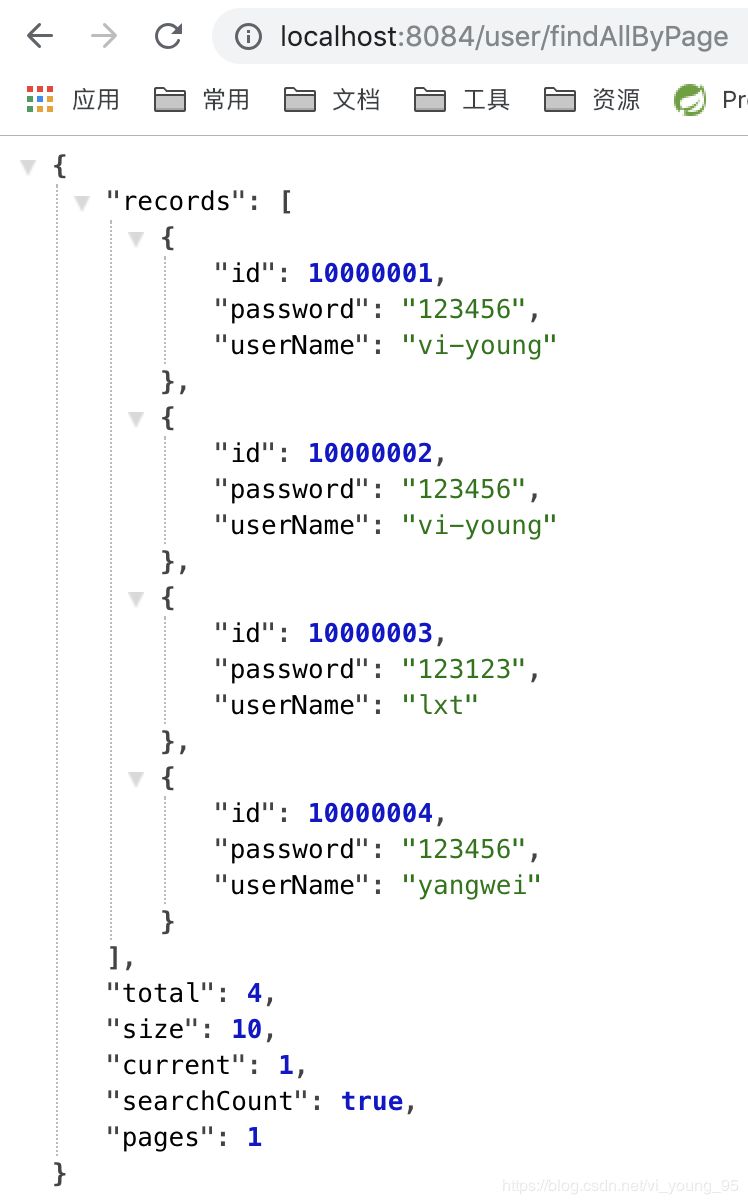
如果我们需要分页查询数据去渲染表格,可以使用 Mybatis-Plus 自带的分页插件:

在启动类中加入上面的代码,然后我们就可以去使用分页了:

我们只需要构建一个 Page 对象,并初始化我们所需的页数(page)和每页数据量(pageSize),然后将其作为 page() 方法的参数传入即可
下面,我们来访问一下:
Mybatis-Plus
就告一段落了,谢谢您的耐心阅读,希望您有所收获~
原创文章,文笔有限,才疏学浅,文中若有不正之处,万望告知。
源码可以去github(https://github.com/viyog/viboot/)或者码云(https://gitee.com/yw18530069930/viboot)上进行下载,后续的例子都会同步更新。
云撸猫

公众号

- 本文标签: 目录 打印sql pom http mapper 数据 ArrayList XML ssl 开源 cat JPA 希望 代码 tk 云 mybatis db entity Service UI token App root 开发 https 下载 MQ GitHub UTC mysql 软件 tab src Property 配置 springboot 注释 java 参数 git 文章 IO API lambda 插件 源码 dataSource Freemarker map Spring Boot 时间 spring 分页 Word cache IDE JDBC list 测试 同步 sql 代码生成器 id 需求
- 版权声明: 本文为互联网转载文章,出处已在文章中说明(部分除外)。如果侵权,请联系本站长删除,谢谢。
- 本文海报: 生成海报一 生成海报二


![[HBLOG]公众号](https://www.liuhaihua.cn/img/qrcode_gzh.jpg)

