基于spring boot(2.1.8) 的 CAS server端搭建(6.0.5)
最近又开始调查单点登录了。(为什么说“又”)
说到单点登录应该第一想到的就是CAS 这套框架。
首先看官网给的CAS流程(非代理): 其他流程可以参考官网
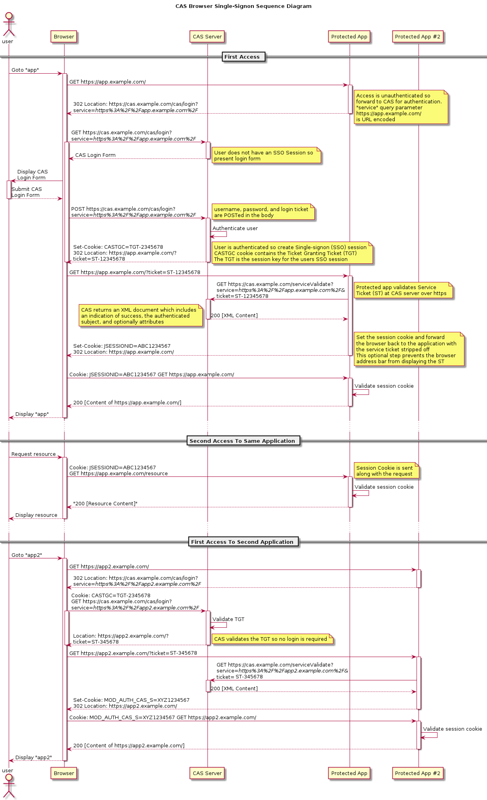
然后明白了流程之后,我按照官网指示的通过overlay的方式搭建自己的CAS server。(官网上说,编译的cas.war其实是可以直接运行的,但是你肯定是要自定义一些内容,所以可以通过overlay来方便你构建)
首先是下载官网提供的模板 apereo/cas-overlay-template 注意官网说建议使用master分支,但是我看了下,master分支是不稳定的版本,所以后来选择了6.0的这个分支。
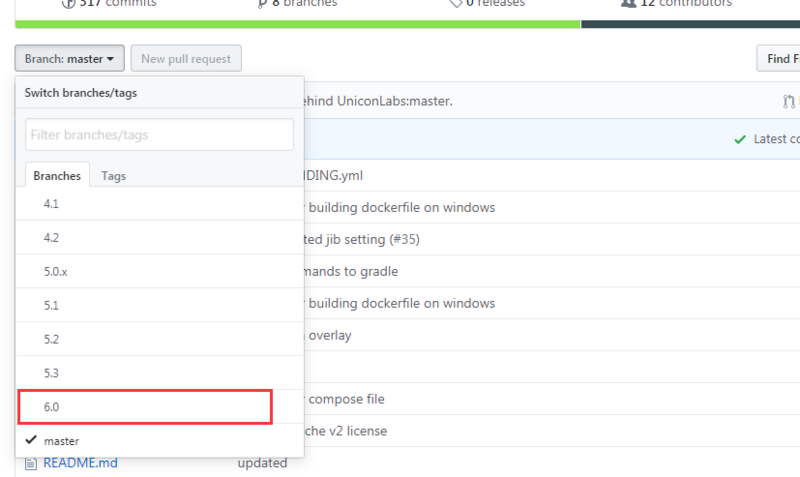
下载好之后呢,开始bulid 目标的cas.war包, 进入目录下可以看的bulid.cmd 和 build.sh 脚本,
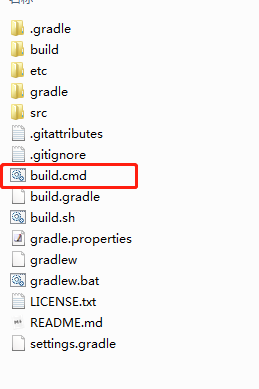
执行 ./build.sh help 可以看到所有可以执行的命令;
执行 ./bulid.sh package 打包,生成文件在bulid/libs 目录下
etc 目录下有 thekeystore,log4j.xml 等配置文件,后面都可以放到/resources目录下
事前工作准备好了,接下来开始构建server吧
1. 创建一个简单的spring boot项目。
就和你平时创建spring boot 项目一样创建一个boot项目:)
<!--首先是依赖父项目, 注意 packaging 是 "war"-->
   <parent>
        <groupId>org.springframework.boot</groupId>
        <artifactId>spring-boot-starter-parent</artifactId>
        <version>2.1.8.RELEASE</version>
        <relativePath/>
    </parent>
    <groupId>org.xxx.cas</groupId>
    <artifactId>cas-server</artifactId>
    <version>0.0.1-SNAPSHOT</version>
    <packaging>war</packaging>
    <name>cas-server</name>
    <description>cas server for Spring Boot</description>

 ....
       <!-- 剔除logback, cas 的中用的是 log4j-->
       <dependency>
            <groupId>org.springframework.boot</groupId>
            <artifactId>spring-boot-starter-web</artifactId>
            <exclusions>
                <exclusion>
                    <groupId>org.springframework.boot</groupId>
                    <artifactId>spring-boot-starter-logging</artifactId>
                </exclusion>
            </exclusions>
        </dependency>
2. 更改pom配置
- 注意点1: maven overlay 的使用
<!--首先是需要引入, 注意 type 是 "war"-->
        <dependency>
            <groupId>org.apereo.cas</groupId>
            <artifactId>cas-server-webapp-tomcat</artifactId>
            <version>6.0.5</version>
            <type>war</type>
        </dependency>


        ....

          <!--其次在build中加入 插件,overlay 元素中加入需要 使用overlay 的模块名称-->
       <plugin>
            <groupId>org.apache.maven.plugins</groupId>
            <artifactId>maven-war-plugin</artifactId>
            <configuration>
                <archiveClasses>false</archiveClasses>
                <failOnMissingWebXml>false</failOnMissingWebXml>
                <overlays>
                    <overlay>
                        <groupId>org.apereo.cas</groupId>
                        <artifactId>cas-server-webapp-tomcat</artifactId>
                    </overlay>
                </overlays>
            </configuration>
        </plugin>
这个引入的cas-server-webapp-tomcat 包,其实就是刚刚先前打出的car.war包。我试过通过local引用,但是无法生成overlay目录,
说以我只好吧car.war放在本地的mavne仓库里,然后改名为 cas-server-webapp-tomcat-6.0.5.war
注意:这个包名是通过cas-overlay-template-6.0 目录下的gradle.properties 与 build.gradle 中的设值 推断出来的。
配置正确后会生成一个overlays目录
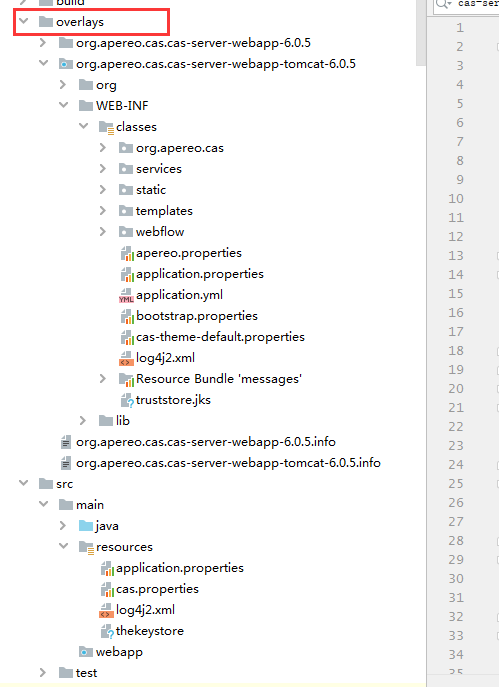
将overlaysorg.apereo.cas.cas-server-webapp-tomcat-6.0.5WEB-INFclasses下的 配置文件 copy 到resources下,主要是application.properties文件
(这是6.0.5的版本的做法,6.1.x的配置文件在一个lib目录下的 某个 resources.jar包里)
- 注意点2: 引入对应的依赖包
<dependency>
            <groupId>org.apereo.cas</groupId>
            <artifactId>cas-server-webapp-init</artifactId>
            <version>6.0.5</version>
        </dependency>

        <dependency>
            <groupId>org.apereo.cas</groupId>
            <artifactId>cas-server-webapp</artifactId>
            <type>pom</type>
            <version>6.0.5</version>
        </dependency>


        <dependency>
            <groupId>org.apereo.cas</groupId>
            <artifactId>cas-server-support-jdbc</artifactId>
            <version>6.0.5</version>
        </dependency>
这里是没弄明白的地方
cas-server-support-jdbc 不用说是支持jdbc
cas-server-webapp-init 含有启动类 org.apereo.cas.web.CasWebApplication
cas-server-webapp 貌似含有一些依赖项目
这两者都不能缺,但是从名字上来看 cas-server-webapp 应该是包含了 cas-server-webapp-init,然而我引入的时候 cas-server-webapp-init 无法自动引入
- 注意点3: 修改application.properties 文件
# thekeystore 的存放地址 thekeystore可以按照普通的ssl生成方式生成
server.ssl.key-store=classpath:thekeystore
server.ssl.key-store-password=changeit
server.ssl.key-password=changeit

# 默认用户名密码
#cas.authn.accept.users=casuser::Mellon
#cas.authn.accept.name=Static Credentials

# 链接数据库 这里用的是mysql
cas.jdbc.showSql=true
cas.authn.jdbc.query[0].dialect=org.hibernate.dialect.MySQLDialect
cas.authn.jdbc.query[0].url=jdbc:mysql://XXXXX/managementAuth?useUnicode=true&characterEncoding=utf8&serverTimezone=GMT%2B8&useSSL=false
cas.authn.jdbc.query[0].user=XXXX
cas.authn.jdbc.query[0].password=XXXXX
cas.authn.jdbc.query[0].sql=select password from tbl_user where username= ?
cas.authn.jdbc.query[0].fieldPassword=password
cas.authn.jdbc.query[0].driverClass=com.mysql.cj.jdbc.Driver
以上是使用内置tomcat的做法,如果要用外置tomcat 唯一的区别是引用包的不同,
去除cas-server-webapp-init 的引用,因为不需要内部启动类 其他保持一致。
<dependency>
            <groupId>org.apereo.cas</groupId>
            <artifactId>cas-server-webapp-init</artifactId>
            <version>6.0.5</version>
        </dependency>
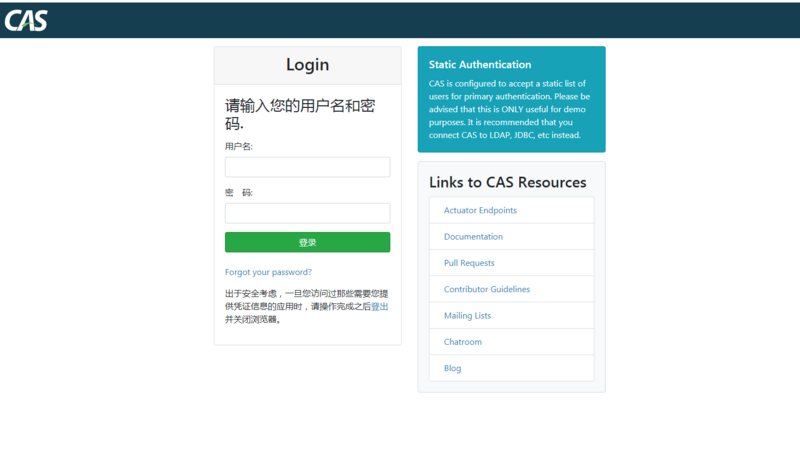
能看到这个画面就算启动成功了。 
总结:
调查了两周才把这一个服务端跑起来,我可能是个渣渣。为什么做了两个周,我想我在实现和版本选择上做了很多测试。
首先是war包,cas是基于spring boot构建的,6.0 以上需要spring boot 2.0以上的支持,网上的大部分教程是5.4的版本,我的项目工程是spring boot 2.0 的,所以做起来有些不一样。6.0 以上的 官方给的war包构建是用gradle ,gradle不熟悉,搞了半天才构建成功。为什么不用最新的6.1.X的版本? 因为需要 spring boot 2.2.0.m6这个版本,可惜现在还不能用貌似(是pre的)所以最后使用了相对稳定的6.0.5。
然后,网上大部分是用外置tomcat启动工程的,然后我看官网上说因为是基于spring boot的大可以用内置tomcat启动,不建议用外置web容器,那找到启动类又花了很长时间。
总的来说我可能是个废材。 
- 本文标签: tar App http apache Spring Boot pom sql 插件 plugin 测试 时间 src spring id maven cat key Logging 编译 GMT https 数据 lib 目录 服务端 db 数据库 XML 下载 ssl Logback ip UI build mysql Master cmd description Select Word web JDBC tomcat 配置 总结 IO classpath
- 版权声明: 本文为互联网转载文章,出处已在文章中说明(部分除外)。如果侵权,请联系本站长删除,谢谢。
- 本文海报: 生成海报一 生成海报二


![[HBLOG]公众号](https://www.liuhaihua.cn/img/qrcode_gzh.jpg)

