Spring Boot 整合 Web 开发
这一节我们主要学习如何整合 Web 相关技术:
- Servlet
- Filter
- Listener
- 访问静态资源
- 文件上传
- 文件下载
Web三大基本组件分别是:Servlet,Listener,Filter。正常来说一旦我们用了框架,这三个基本就用不上了,Servlet 被 Controller 代替,Filter 被拦截器代替。但是可能在一些特殊的场景下不得不使用这三个基本组件时,Spring Boot 中要如何去引用呢?下面我们来一起学习一下。
Spring Boot 集成了 Servlet 容器,当我们在 pom.xml 中增加 spring-boot-starter-web 组件依赖时,不做任何 web 相关的配置便能提供 web 服务,这还得归功于 Spring Boot 自动配置的功能,帮我们创建了一堆默认的配置,以前在 web.xml 中的配置,现在都可以通过 Spring Bean 的方式或者注解方式进行配置,由 Spring 来进行生命周期的管理,大多数情况下,我们需要自定义这些配置,如:修改服务的启动端口,ContextPath,Filter,Listener,Servlet,Session超时时间等等。
Spring Boot 提供了 ServletRegistrationBean , FilterRegistrationBean , ServletListenerRegistrationBean 和 @WebServlet , @WebFilter , @WebListener 三种类型分别配置应用的 Servlet,Filter,Listener。
创建 jar 项目,编写 pom.xml
<?xml version="1.0" encoding="UTF-8"?>

<project xmlns="http://maven.apache.org/POM/4.0.0" xmlns:xsi="http://www.w3.org/2001/XMLSchema-instance"
         xsi:schemaLocation="http://maven.apache.org/POM/4.0.0 http://maven.apache.org/xsd/maven-4.0.0.xsd">
    <modelVersion>4.0.0</modelVersion>

    <groupId>com.springboot</groupId>
    <artifactId>springboot-hello</artifactId>
    <version>1.0-SNAPSHOT</version>

    <name>springboot-hello</name>
    <!-- FIXME change it to the project's website -->
    <url>http://www.example.com</url>

    <properties>
        <project.build.sourceEncoding>UTF-8</project.build.sourceEncoding>
        <maven.compiler.source>1.8</maven.compiler.source>
        <maven.compiler.target>1.8</maven.compiler.target>
    </properties>

    <!-- 引入springboot父类依赖 -->
    <parent>
        <groupId>org.springframework.boot</groupId>
        <artifactId>spring-boot-starter-parent</artifactId>
        <version>2.1.6.RELEASE</version>
    </parent>

    <dependencies>
        <!-- springboot-web 组件 -->
        <dependency>
            <groupId>org.springframework.boot</groupId>
            <artifactId>spring-boot-starter-web</artifactId>
        </dependency>
    </dependencies>
</project>
整合Servlet
Servlet 是 Java Servlet 的简称,称为小服务程序或服务连接器,用 Java 编写的服务器端程序,具有独立于平台和协议的特性,主要功能在于交互式地浏览和生成数据,生成动态Web内容。
Java Servlet 是运行在 Web 服务器或应用服务器上的程序,它是作为来自 Web 浏览器或其他 HTTP 客户端的请求和 HTTP 服务器上的数据库或应用程序之间的中间层。使用 Servlet 可以收集来自网页表单的用户输入,呈现来自数据库或者其他源的记录,还可以动态创建网页。
方法一
通过注解扫描完成 Servlet 组件的注册
编写FirstServlet.java
package com.springboot.servlet;

import javax.servlet.ServletException;
import javax.servlet.annotation.WebServlet;
import javax.servlet.http.HttpServlet;
import javax.servlet.http.HttpServletRequest;
import javax.servlet.http.HttpServletResponse;
import java.io.IOException;

/*
    配置文件的写法:
    <servlet>
        <servlet-name>FirstServlet</servlet-name>
        <servlet-class>com.springboot.servlet.FirstServlet</servlet-class>
    </servlet>
    <servlet-mapping>
        <servlet-name>FirstServlet</servlet-name>
        <url-pattern>/first</url-pattern>
    </servlet-mapping>
 */
@WebServlet(name = "FirstServlet", urlPatterns = {"/first"})
public class FirstServlet extends HttpServlet {

    @Override
    protected void doGet(HttpServletRequest req, HttpServletResponse resp)
            throws ServletException, IOException {
        System.out.println("FirstServlet");
    }

}
启动类App.java
package com.springboot;

import org.springframework.boot.SpringApplication;
import org.springframework.boot.autoconfigure.SpringBootApplication;
import org.springframework.boot.web.servlet.ServletComponentScan;

@SpringBootApplication
// 在 SpringBoot 启动时会扫描 @WebServlet,并将该类实例化
@ServletComponentScan
public class App {

    // 项目中不需要有多个 main 方法只需要有一个入口就可以了
    public static void main(String[] args) {
        // 主函数运行 springboot 项目
        SpringApplication.run(App.class, args);
    }

}
方法二
通过方法完成 Servlet 组件的注册
编写SecondServlet.java
package com.springboot.servlet;

import javax.servlet.ServletException;
import javax.servlet.annotation.WebServlet;
import javax.servlet.http.HttpServlet;
import javax.servlet.http.HttpServletRequest;
import javax.servlet.http.HttpServletResponse;
import java.io.IOException;

@WebServlet(name = "SecondServlet", urlPatterns = {"/second"})
public class SecondServlet extends HttpServlet {

    @Override
    protected void doGet(HttpServletRequest req, HttpServletResponse resp)
            throws ServletException, IOException {
        System.out.println("FirstServlet");
    }

}
启动类App.java
package com.springboot;

import com.springboot.servlet.SecondServlet;
import org.springframework.boot.SpringApplication;
import org.springframework.boot.autoconfigure.SpringBootApplication;
import org.springframework.boot.web.servlet.ServletRegistrationBean;
import org.springframework.context.annotation.Bean;

@SpringBootApplication
public class App {

    // 项目中不需要有多个 main 方法只需要有一个入口就可以了
    public static void main(String[] args) {
        // 主函数运行 springboot 项目
        SpringApplication.run(App.class, args);
    }

    // 通过方法完成 Servlet 组件的注册
    @Bean
    public ServletRegistrationBean getServletRegistrationBean() {
        ServletRegistrationBean bean = new ServletRegistrationBean(new SecondServlet());
        bean.addUrlMappings("/second");
        return bean;
    }

}
整合Filter
过滤器:Filter 是 Servlet 技术中最实用的技术,Web开发人员通过 Filter 技术,对 web 服务器管理的所有 web 资源,例如:Jsp,Servlet,图片,HTML,CSS,JS等文件进行拦截,从而实现一些特殊的功能。例如实现 URL 级别的权限访问控制、过滤敏感词汇、压缩响应信息等一些高级功能。它主要用于对用户请求进行预处理,也可以对 HttpServletResponse 进行后处理。
使用 Filter 的完整流程:Filter 对用户请求进行预处理,接着将请求交给 Servlet 进行处理并生成响应,最后 Filter 再对服务器响应进行后处理。
方法一
通过注解扫描完成 Filter 组件的注册
编写FirstFilter.java
package com.springboot.filter;

import javax.servlet.*;
import javax.servlet.annotation.WebFilter;
import java.io.IOException;

/*
    配置文件写法:
    <filter>
        <filter-name>FirstFilter</filter-name>
        <filter-class>com.springboot.filter.FirstFilter</filter-class>
    </filter>
    <filter-mapping>
        <filter-name>FirstFilter</filter-name>
        <url-pattern>/first</url-pattern>
    </filter-mapping>
 */
@WebFilter(filterName = "FirstFilter", urlPatterns = {"/first"})
public class FirstFilter implements Filter {

    @Override
    public void init(FilterConfig filterConfig) throws ServletException {

    }

    @Override
    public void doFilter(ServletRequest req, ServletResponse resp, FilterChain filterChain)
            throws IOException, ServletException {
        System.out.println("FirstFilter Begin");
        filterChain.doFilter(req, resp);
        System.out.println("FirstFilter End");
    }

    @Override
    public void destroy() {

    }

}
启动类App.java
package com.springboot;

import org.springframework.boot.SpringApplication;
import org.springframework.boot.autoconfigure.SpringBootApplication;
import org.springframework.boot.web.servlet.ServletComponentScan;

@SpringBootApplication
@ServletComponentScan
public class App {

    // 项目中不需要有多个 main 方法只需要有一个入口就可以了
    public static void main(String[] args) {
        // 主函数运行 springboot 项目
        SpringApplication.run(App.class, args);
    }

}
方法二
通过方法完成 Filter 组件的注册
编写SecondFilter.java
package com.springboot.filter;

import javax.servlet.*;
import javax.servlet.annotation.WebFilter;
import java.io.IOException;

@WebFilter(filterName = "SecondFilter", urlPatterns = {"/second"})
public class SecondFilter implements Filter {

    @Override
    public void init(FilterConfig filterConfig) throws ServletException {

    }

    @Override
    public void doFilter(ServletRequest req, ServletResponse resp, FilterChain filterChain)
            throws IOException, ServletException {
        System.out.println("SecondFilter Begin");
        filterChain.doFilter(req, resp);
        System.out.println("SecondFilter End");
    }

    @Override
    public void destroy() {

    }

}
启动类App.java
package com.springboot;

import com.springboot.filter.SecondFilter;
import com.springboot.servlet.SecondServlet;
import org.springframework.boot.SpringApplication;
import org.springframework.boot.autoconfigure.SpringBootApplication;
import org.springframework.boot.web.servlet.FilterRegistrationBean;
import org.springframework.boot.web.servlet.ServletRegistrationBean;
import org.springframework.context.annotation.Bean;

@SpringBootApplication
public class App {

    // 项目中不需要有多个 main 方法只需要有一个入口就可以了
    public static void main(String[] args) {
        // 主函数运行 springboot 项目
        SpringApplication.run(App.class, args);
    }

    // 通过方法完成 Servlet 组件的注册
    @Bean
    public ServletRegistrationBean getServletRegistrationBean() {
        ServletRegistrationBean bean = new ServletRegistrationBean(new SecondServlet());
        bean.addUrlMappings("/second");
        return bean;
    }

    // 通过方法完成 Filter 组件的注册
    @Bean
    public FilterRegistrationBean getFilterRegistrationBean() {
        FilterRegistrationBean bean = new FilterRegistrationBean(new SecondFilter());
        bean.addUrlPatterns("/second");
        return bean;
    }

}
整合Listener
Servlet 的监听器 Listener 实现了 javax.servlet.ServletContextListener 接口的服务器端程序,它随 web应用的启动而启动,只初始化一次,随 web 应用的停止而销毁。主要作用是: 做一些初始化的内容添加工作、设置一些基本的内容、比如一些参数或者是一些固定的对象等等。
方法一
通过注解扫描完成 Listener 组件的注册
编写FirstListener.java
package com.springboot.listener;

import javax.servlet.ServletContextEvent;
import javax.servlet.ServletContextListener;
import javax.servlet.annotation.WebListener;

/*
    配置文件写法:
    <listener>
        <listener-class>com.springboot.listener.FirstListener</listener-class>
    </listener>
 */
@WebListener
public class FirstListener implements ServletContextListener {

    @Override
    public void contextInitialized(ServletContextEvent servletContextEvent) {
        System.out.println("FirstListener Init");
    }

    @Override
    public void contextDestroyed(ServletContextEvent servletContextEvent) {

    }

}
启动类App.java
package com.springboot;

import org.springframework.boot.SpringApplication;
import org.springframework.boot.autoconfigure.SpringBootApplication;
import org.springframework.boot.web.servlet.ServletComponentScan;

@SpringBootApplication
@ServletComponentScan
public class App {

    // 项目中不需要有多个 main 方法只需要有一个入口就可以了
    public static void main(String[] args) {
        // 主函数运行 springboot 项目
        SpringApplication.run(App.class, args);
    }

}
方法二
通过方法完成 Listener 组件注册
编写SecondListener.java
package com.springboot.listener;

import javax.servlet.ServletContextEvent;
import javax.servlet.ServletContextListener;
import javax.servlet.annotation.WebListener;

@WebListener
public class SecondListener implements ServletContextListener {

    @Override
    public void contextInitialized(ServletContextEvent servletContextEvent) {
        System.out.println("SecondListener Init");
    }

    @Override
    public void contextDestroyed(ServletContextEvent servletContextEvent) {

    }

}
启动类App.java
package com.springboot;

import com.springboot.listener.SecondListener;
import org.springframework.boot.SpringApplication;
import org.springframework.boot.autoconfigure.SpringBootApplication;
import org.springframework.boot.web.servlet.ServletListenerRegistrationBean;
import org.springframework.context.annotation.Bean;

@SpringBootApplication
public class App {

    // 项目中不需要有多个 main 方法只需要有一个入口就可以了
    public static void main(String[] args) {
        // 主函数运行 springboot 项目
        SpringApplication.run(App.class, args);
    }

    // 通过方法完成 Listener 组件注册
    @Bean
    public ServletListenerRegistrationBean<SecondListener> getServletListenerRegistrationBean() {
        return new ServletListenerRegistrationBean(new SecondListener());
    }

}
访问静态资源
static目录
在我们开发web应用的时候,需要引用大量的js、css、图片等静态资源。
Spring Boot 默认提供静态资源目录位置需要置于 classpath 下,目录名需符合如下规则:
/static
/public
/resources
/META-INF/resources
比如:
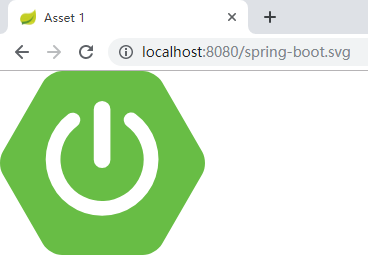
启动项目后,位于 static 下的资源直接访问,路径里无需添加 /static
如果 /static 下还有文件夹需要添加对应路径访问

访问: http://localhost:8080/spring-boot.svg
demo.html
<!DOCTYPE html>
<html lang="en">
<head>
    <meta charset="UTF-8">
    <title>资源访问</title>
</head>
<body>
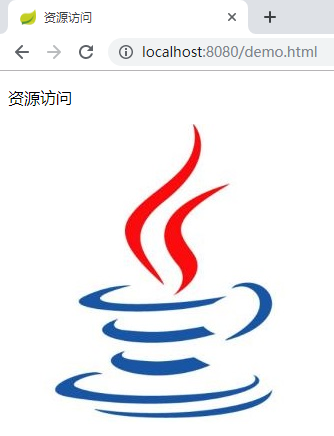
    <p>资源访问</p>
    <img src="images/java.jpg">
</body>
</html>
访问: http://localhost:8080/demo.html
ServletContext目录
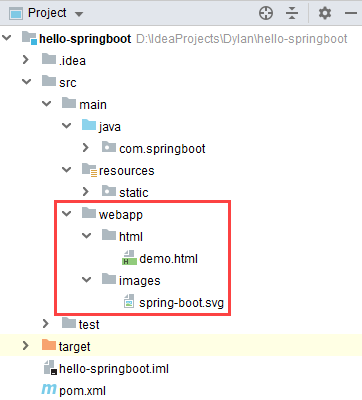
在 src/main/webapp 下,目录名称必须是 webapp
demo.html
<!DOCTYPE html>
<html lang="en">
<head>
    <meta charset="UTF-8">
    <title>资源访问</title>
</head>
<body>
    <p>资源访问</p>
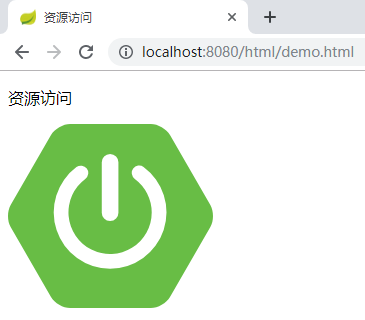
    <img src="../images/spring-boot.svg">
</body>
</html>
访问: http://localhost:8080/html/demo.html
文件上传
Spring MVC 通过 MultipartResolver (多部件解析器)对象实现对文件上传的支持。
MultipartResolver 是一个接口对象,需要通过它的实现类 CommonsMultipartResolver 来完成文件的上传工作。在 Spring Boot 中又是如何来完成的,我们一起学习一下。
FileController.java
package com.springboot.controller;

import org.springframework.web.bind.annotation.PostMapping;
import org.springframework.web.bind.annotation.RestController;
import org.springframework.web.multipart.MultipartFile;

import javax.servlet.http.HttpServletRequest;
import java.io.File;
import java.io.IOException;
import java.util.HashMap;
import java.util.Map;

@RestController
@RequestMapping("/file")
public class FileController {

    /**
     * 文件上传
     *
     * @param fileName
     * @param request
     * @return
     */
    @PostMapping("/upload")
    public Map<String, Object> fileUpload(MultipartFile fileName,
                                          HttpServletRequest request) {
        try {
            // 获取文件名
            System.out.println("文件名:" + fileName.getOriginalFilename());
            // 将文件保存至当前项目 src/main/upload 文件夹
            String baseDir = System.getProperty("user.dir") + "/src/main/upload/";
            fileName.transferTo(new File(baseDir + fileName.getOriginalFilename()));
        } catch (IOException e) {
            e.printStackTrace();
        }

        Map<String, Object> map = new HashMap<>();
        map.put("message", "success");
        return map;
    }

}
resources/static/fileUpload.html
<!DOCTYPE html>
<html lang="en">
<head>
    <meta charset="UTF-8">
    <title>文件上传</title>
</head>
<body>
    <form action="file/upload" method="post" enctype="multipart/form-data">
        文件上传:<input type="file" name="fileName"/>
        <input type="submit" value="上传"/>
    </form>
</body>
</html>
启动类App.java
package com.springboot;

import org.springframework.boot.SpringApplication;
import org.springframework.boot.autoconfigure.SpringBootApplication;

@SpringBootApplication
public class App {

    // 项目中不需要有多个 main 方法只需要有一个入口就可以了
    public static void main(String[] args) {
        // 主函数运行 springboot 项目
        SpringApplication.run(App.class, args);
    }

}
演示效果:
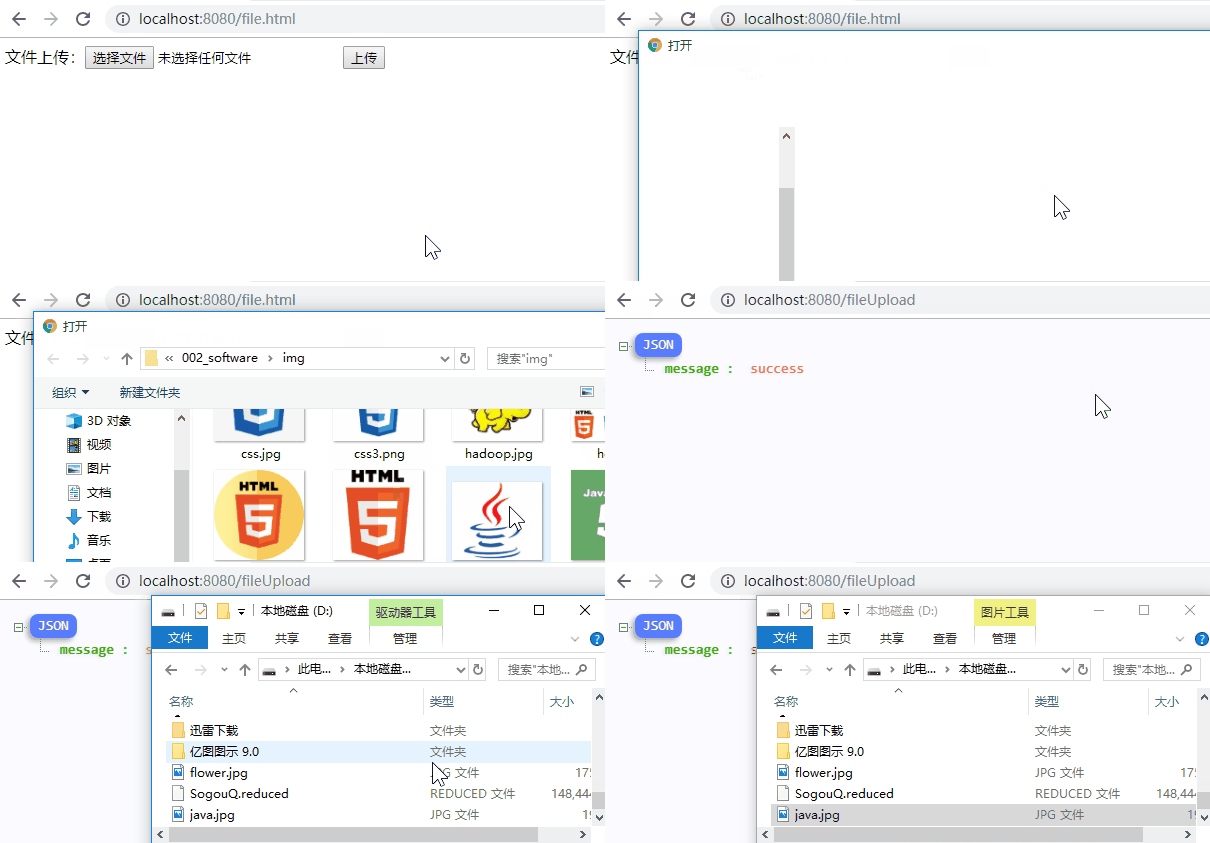
设置上传文件大小的默认值
Spring 限制了文件上传的大小值,默认是10MB,需要通过配置文件设置,
在 resources 根目录下添加一个 Spring Boot 的配置文件 application.properties。
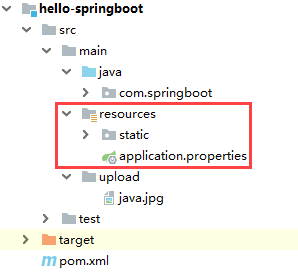
resources/application.properties
# 设置单个上传文件的大小
spring.http.multipart.max-file-size=200MB
# 设置一次请求上传文件的总容量
spring.http.multipart.max-request-size=200MB
文件下载
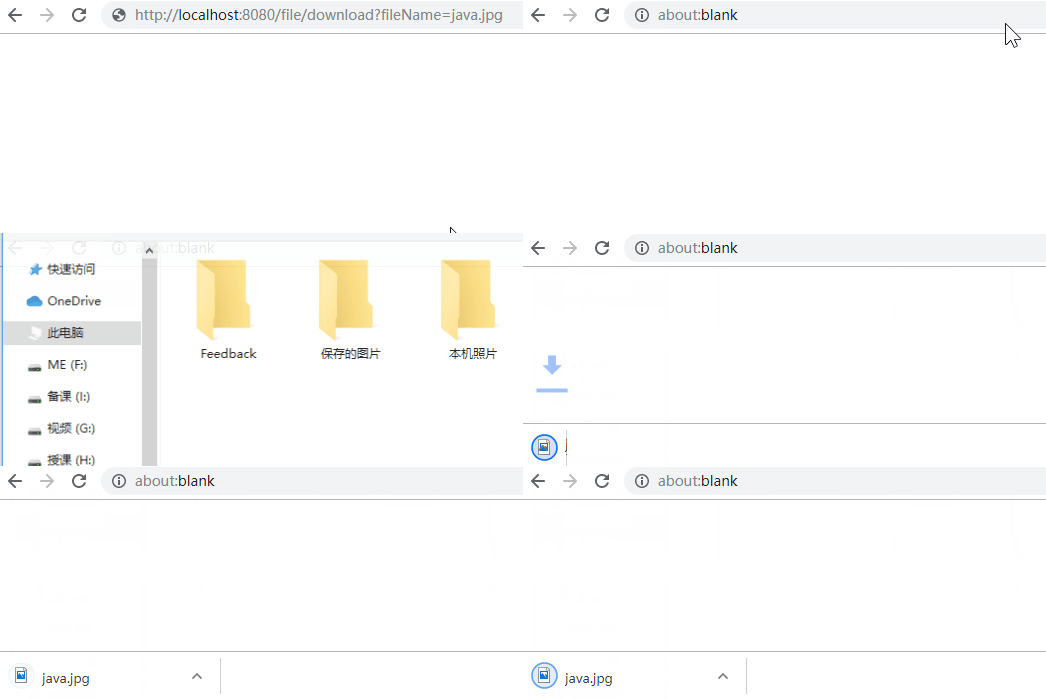
本文基于简单的功能实现,编写 Get 请求方法,将刚才上传的文件进行下载。
FileController.java
package com.springboot.controller;

import org.apache.tomcat.util.http.fileupload.IOUtils;
import org.springframework.web.bind.annotation.GetMapping;
import org.springframework.web.bind.annotation.PostMapping;
import org.springframework.web.bind.annotation.RequestMapping;
import org.springframework.web.bind.annotation.RestController;
import org.springframework.web.multipart.MultipartFile;

import javax.servlet.http.HttpServletRequest;
import javax.servlet.http.HttpServletResponse;
import java.io.*;
import java.util.HashMap;
import java.util.Map;

@RestController
@RequestMapping("/file")
public class FileController {

    /**
     * 文件上传
     *
     * @param fileName
     * @param request
     * @return
     */
    @PostMapping("/upload")
    public Map<String, Object> fileUpload(MultipartFile fileName,
                                          HttpServletRequest request) {
        ...
    }

    /**
     * 文件下载
     *
     * @param fileName
     * @param request
     * @param response
     */
    @GetMapping("/download")
    public void fileDownload(String fileName,
                             HttpServletRequest request,
                             HttpServletResponse response) {
        // 获取文件存储路径
        String baseDir = System.getProperty("user.dir") + "/src/main/upload/";
        // 读取文件,声明输出流
        try (InputStream is = new FileInputStream(new File(baseDir, fileName));
             OutputStream os = response.getOutputStream()) {
            // 设置响应数据类型
            response.setContentType("application/x-download");
            response.addHeader("Content-Disposition", "attchment;filename=" + fileName);
            // 复制写出文件
            IOUtils.copy(is, os);
        } catch (IOException e) {
            e.printStackTrace();
        }
    }

}
演示效果:
✍️本章节到这里就结束了,喜欢的话就点赞 加转发:revolving_hearts:吧,我们下章节再见:wave:。
- 本文标签: HashMap 时间 REST web 生命 ip 图片 UI 实例 schema 端口 message tar springboot 管理 文件上传 apache http tomcat ORM 配置 解析 开发 classpath 监听器 Spring Boot CSS list java src servlet bean map stream HTML dependencies 协议 下载 js id IDE value spring build pom Action cat session App 参数 服务器 ACE https IO 数据 XML 目录 example maven Property 数据库
- 版权声明: 本文为互联网转载文章,出处已在文章中说明(部分除外)。如果侵权,请联系本站长删除,谢谢。
- 本文海报: 生成海报一 生成海报二


![[HBLOG]公众号](https://www.liuhaihua.cn/img/qrcode_gzh.jpg)

