Spring Cloud Gateway (二)熔断、降级、限流
1.熔断降级:在分布式系统中,网关作为流量的入口,大量请求进入网关,向后端远程系统或服务发起调用,后端服务不可避免的会产生调用失败(超时或者异常),失败时不能让请求堆积在网关上,需要快速失败并返回回去,这就需要在网关上做熔断、降级操作。
2.限流:网关上有大量请求,对指定服务进行限流,可以很大程度上提高服务的可用性与稳定性,限流的目的是通过对并发访问/请求进行限速,或对一个时间窗口内的请求进行限速来保护系统。一旦达到限制速率则可以拒绝服务、排队或等待、降级。
3.Spring Cloud Gateway 集成熔断、限流
1.在前篇博客代码的基础上集成 Hystrix 熔断降级,引用hystrix依赖,在filters下加入熔断降级配置,设置降级后返回的路由,同时配置默认使用信号量隔离、3秒主动超时
<!-- 熔断、降级 -->
<dependency>
	<groupId>org.springframework.cloud</groupId>
	<artifactId>spring-cloud-starter-netflix-hystrix</artifactId>
</dependency>
12345复制代码
application.yml
filters:
# 熔断降级配置
- name: Hystrix
  args:
    name : default
    fallbackUri: 'forward:/defaultfallback'

# hystrix 信号量隔离,3秒后自动超时
hystrix:
  command:
    default:
      execution:
        isolation:
          strategy: SEMAPHORE
          thread:
            timeoutInMilliseconds: 3000
  shareSecurityContext: true
1234567891011121314151617复制代码
新建一个DefaultHystrixController 的RestController,内容如下:
/**
 * 默认降级处理
 */
@RestController
public class DefaultHystrixController {

    @RequestMapping("/defaultfallback")
    public Map<String,String> defaultfallback(){
        System.out.println("降级操作...");
        Map<String,String> map = new HashMap<>();
        map.put("resultCode","fail");
        map.put("resultMessage","服务异常");
        map.put("resultObj","null");
        return map;
    }
}
12345678910111213141516复制代码
同时在consumer-service的IndexController中添加一个timeout方法,让线程睡5秒,大于网关中设置超时的3秒,因此会触发熔断降级,代码如下:
@RestController
public class IndexController {

    @RequestMapping("/hello")
    public String hello(String name){
        return "hi " + name;
    }

    @RequestMapping("/timeout")
    public String timeout(){
        try{
            //睡5秒,网关Hystrix3秒超时,会触发熔断降级操作
            Thread.sleep(2000);
        }catch (Exception e){
            e.printStackTrace();
        }
        return "timeout";
    }
}
12345678910111213141516171819复制代码
启动项目,访问 http://localhost:9999/consumer/timeout ,结果如下,触发了降级

把网关的超时配置改为6000,也就是6秒,重启网关,再次访问 http://localhost:9999/consumer/timeout ,结果正常返回,网关上集成了 Hystrix 熔断降级,可以覆盖大部分后端服务不可用场景

-
2.集成限流,Spring Cloud Gateway默认集成了Redis限流,可以对不同服务做不同维度的限流,如:IP限流、用户限流 、接口限流
本文演示的是 IP限流 ,先添加redis依赖,添加KeyResolver,再添加配置,需启动redis
<!-- 限流 -->
<dependency>
	<groupId>org.springframework.boot</groupId>
	<artifactId>spring-boot-starter-data-redis-reactive</artifactId>
</dependency>
12345复制代码
通过KeyResolver来指定限流的Key,新建一个 RateLimiterConfig 类,IP限流代码如下:
/**
 * 路由限流配置
 * @author zhuyu
 * @date 2019/1/15
 */
@Configuration
public class RateLimiterConfig {

    @Bean(value = "remoteAddrKeyResolver")
    public KeyResolver remoteAddrKeyResolver() {
        return exchange -> Mono.just(exchange.getRequest().getRemoteAddress().getAddress().getHostAddress());
    }
}
12345678910111213复制代码
application.yml下添加限流配置:
spring:
  redis:
    host: localhost
filters:
# redis限流 , filter名称必须是RequestRateLimiter
- name: RequestRateLimiter
  args:
    # 使用SpEL名称引用Bean,与上面新建的RateLimiterConfig类中的bean的name相同
    key-resolver: '#{@remoteAddrKeyResolver}'
    # 每秒最大访问次数
    redis-rate-limiter.replenishRate: 20
    # 令牌桶最大容量
    redis-rate-limiter.burstCapacity: 20
12345678910111213复制代码
filter名称必须是RequestRateLimiter
redis-rate-limiter.replenishRate:允许用户每秒处理多少个请求
redis-rate-limiter.burstCapacity:令牌桶的容量,允许在一秒钟内完成的最大请求数
key-resolver:使用SpEL按名称引用bean
-
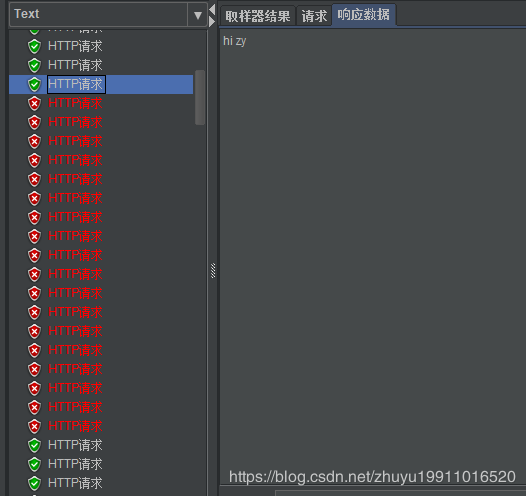
3.测试网关是否做到了限流,使用 jmeter 测试工具,测试配置如下,100个线程,2秒内,循环2次,总共200个请求,请求地址: http://localhost:9999/consumer/hello?name=zy

第一次设置限流数 2、10
redis-rate-limiter.replenishRate: 2
redis-rate-limiter.burstCapacity: 10
测试结果如下,只有14个请求响应回去,其他全被拒绝了

第二次设置限流数 20、20
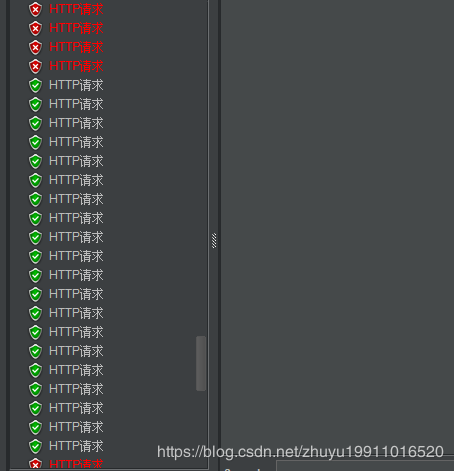
redis-rate-limiter.replenishRate: 20
redis-rate-limiter.burstCapacity: 20
测试结果如下,有大量请求进行了响应,部分拒绝

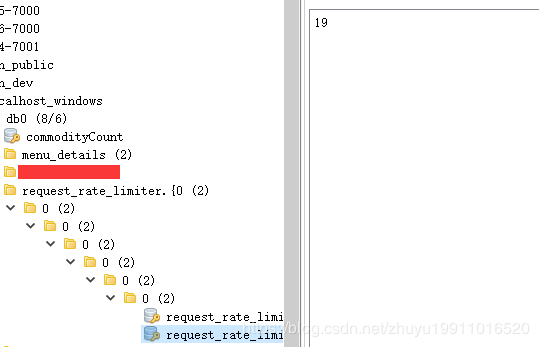
给出redis的限流时 key与value 变化

还可以使用用户限流、接口限流
用户限流,使用这种方式限流,请求路径中必须携带userId参数
@Bean
KeyResolver userKeyResolver() {
    return exchange -> Mono.just(exchange.getRequest().getQueryParams().getFirst("userId"));
}
1234复制代码
接口限流,获取请求地址的uri作为限流key
@Bean
KeyResolver apiKeyResolver() {
    return exchange -> Mono.just(exchange.getRequest().getPath().value());
}
1234复制代码
在真实场景中,限流数的调整需要依赖配置中心,当网站做活动时,动态调整限流数,新服务上线时,通过配置中心做动态路由等
代码已上传至码云, 源码 ,项目使用的版本信息如下:
- SpringBoot 2.0.6.RELEASE
- SpringCloud Finchley.SR2
12复制代码
- 本文标签: Security Hystrix Semaphore redis REST message 分布式系统 并发 https UI value springboot 限流 ip 配置 key ACE 分布式 HashMap remote map App 博客 id 配置中心 源码 网站 JMeter http IO Netflix 测试 cat 时间 src bean Spring cloud spring 线程 代码 consumer Service springcloud 2019 云 tar API 参数
- 版权声明: 本文为互联网转载文章,出处已在文章中说明(部分除外)。如果侵权,请联系本站长删除,谢谢。
- 本文海报: 生成海报一 生成海报二


![[HBLOG]公众号](https://www.liuhaihua.cn/img/qrcode_gzh.jpg)

