Spring Boot 2.x 启动全过程源码分析(上)入口类剖析
Spring Boot 的应用教程我们已经分享过很多了,今天来通过源码来分析下它的启动过程,探究下 Spring Boot 为什么这么简便的奥秘。
本篇基于 Spring Boot 2.0.3 版本进行分析,阅读本文需要有一些 Java 和 Spring 框架基础,如果还不知道 Spring Boot 是什么,建议先看下我们的 Spring Boot 教程。
Spring Boot 的入口类
@SpringBootApplication
public class SpringBootBestPracticeApplication {

	public static void main(String[] args) {
		SpringApplication.run(SpringBootBestPracticeApplication.class, args);
	}

}
复制代码
做过 Spring Boot 项目的都知道,上面是 Spring Boot 最简单通用的入口类。入口类的要求是最顶层包下面第一个含有 main 方法的类,使用注解 @SpringBootApplication 来启用 Spring Boot 特性,使用 SpringApplication.run 方法来启动 Spring Boot 项目。
来看一下这个类的 run 方法调用关系源码:
public static ConfigurableApplicationContext run(Class<?> primarySource,
String... args) {
return run(new Class<?>[] { primarySource }, args);
}
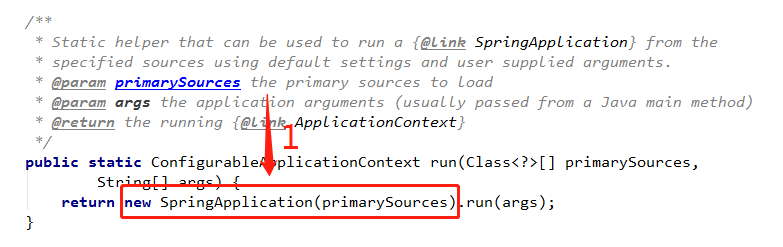
public static ConfigurableApplicationContext run(Class<?>[] primarySources,
String[] args) {
return new SpringApplication(primarySources).run(args);
}
复制代码
第一个参数 primarySource :加载的主要资源类
第二个参数 args :传递给应用的应用参数
先用主要资源类来实例化一个 SpringApplication 对象,再调用这个对象的 run 方法,所以我们分两步来分析这个启动源码。
SpringApplication 的实例化过程
接着上面的 SpringApplication 构造方法进入以下源码:
public SpringApplication(Class<?>... primarySources) {
	this(null, primarySources);
}

public SpringApplication(ResourceLoader resourceLoader, Class<?>... primarySources) {
    // 1、资源初始化资源加载器为 null
	this.resourceLoader = resourceLoader;

	// 2、断言主要加载资源类不能为 null,否则报错
	Assert.notNull(primarySources, "PrimarySources must not be null");

	// 3、初始化主要加载资源类集合并去重
	this.primarySources = new LinkedHashSet<>(Arrays.asList(primarySources));

	// 4、推断当前 WEB 应用类型
	this.webApplicationType = deduceWebApplicationType();

	// 5、设置应用上线文初始化器
	setInitializers((Collection) getSpringFactoriesInstances(
			ApplicationContextInitializer.class));

    // 6、设置监听器
	setListeners((Collection) getSpringFactoriesInstances(ApplicationListener.class));

	// 7、推断主入口应用类
	this.mainApplicationClass = deduceMainApplicationClass();
}
复制代码
可知这个构造器类的初始化包括以下 7 个过程。
1、资源初始化资源加载器为 null
this.resourceLoader = resourceLoader;
复制代码
2、断言主要加载资源类不能为 null,否则报错
Assert.notNull(primarySources, "PrimarySources must not be null");
复制代码
3、初始化主要加载资源类集合并去重
this.primarySources = new LinkedHashSet<>(Arrays.asList(primarySources));
复制代码
4、推断当前 WEB 应用类型
this.webApplicationType = deduceWebApplicationType();
复制代码
来看下 deduceWebApplicationType 方法和相关的源码:
private WebApplicationType deduceWebApplicationType() {
	if (ClassUtils.isPresent(REACTIVE_WEB_ENVIRONMENT_CLASS, null)
			&& !ClassUtils.isPresent(MVC_WEB_ENVIRONMENT_CLASS, null)) {
		return WebApplicationType.REACTIVE;
	}
	for (String className : WEB_ENVIRONMENT_CLASSES) {
		if (!ClassUtils.isPresent(className, null)) {
			return WebApplicationType.NONE;
		}
	}
	return WebApplicationType.SERVLET;
}

private static final String REACTIVE_WEB_ENVIRONMENT_CLASS = "org.springframework."
		+ "web.reactive.DispatcherHandler";

private static final String MVC_WEB_ENVIRONMENT_CLASS = "org.springframework."
		+ "web.servlet.DispatcherServlet";

private static final String[] WEB_ENVIRONMENT_CLASSES = { "javax.servlet.Servlet",
			"org.springframework.web.context.ConfigurableWebApplicationContext" };

public enum WebApplicationType {

	/**
	 * 非 WEB 项目
	 */
	NONE,

	/**
	 * SERVLET WEB 项目
	 */
	SERVLET,

	/**
	 * 响应式 WEB 项目
	 */
	REACTIVE

}
复制代码
这个就是根据类路径下是否有对应项目类型的类推断出不同的应用类型。
5、设置应用上线文初始化器
setInitializers((Collection) getSpringFactoriesInstances(
			ApplicationContextInitializer.class));
复制代码
ApplicationContextInitializer 的作用是什么?源码如下。
public interface ApplicationContextInitializer<C extends ConfigurableApplicationContext> {

    /**
	 * Initialize the given application context.
	 * @param applicationContext the application to configure
	 */
	void initialize(C applicationContext);

}
复制代码
用来初始化指定的 Spring 应用上下文,如注册属性资源、激活 Profiles 等。
来看下 setInitializers 方法源码,其实就是初始化一个 ApplicationContextInitializer 应用上下文初始化器实例的集合。
public void setInitializers(
		Collection<? extends ApplicationContextInitializer<?>> initializers) {
	this.initializers = new ArrayList<>();
	this.initializers.addAll(initializers);
}
复制代码
再来看下这个初始化 getSpringFactoriesInstances 方法和相关的源码:
private <T> Collection<T> getSpringFactoriesInstances(Class<T> type) {
	return getSpringFactoriesInstances(type, new Class<?>[] {});
}

private <T> Collection<T> getSpringFactoriesInstances(Class<T> type,
		Class<?>[] parameterTypes, Object... args) {
	ClassLoader classLoader = Thread.currentThread().getContextClassLoader();
	// Use names and ensure unique to protect against duplicates
	Set<String> names = new LinkedHashSet<>(
			SpringFactoriesLoader.loadFactoryNames(type, classLoader));
	List<T> instances = createSpringFactoriesInstances(type, parameterTypes,
			classLoader, args, names);
	AnnotationAwareOrderComparator.sort(instances);
	return instances;
}
复制代码
设置应用上下文初始化器可分为以下 5 个步骤。
5.1)获取当前线程上下文类加载器
ClassLoader classLoader = Thread.currentThread().getContextClassLoader();
复制代码
5.2)获取 ApplicationContextInitializer 的实例名称集合并去重
Set<String> names = new LinkedHashSet<>(
				SpringFactoriesLoader.loadFactoryNames(type, classLoader));
复制代码
loadFactoryNames 方法相关的源码如下:
public static List<String> loadFactoryNames(Class<?> factoryClass, @Nullable ClassLoader classLoader) {
	String factoryClassName = factoryClass.getName();
	return loadSpringFactories(classLoader).getOrDefault(factoryClassName, Collections.emptyList());
}

public static final String FACTORIES_RESOURCE_LOCATION = "META-INF/spring.factories";

private static Map<String, List<String>> loadSpringFactories(@Nullable ClassLoader classLoader) {
	MultiValueMap<String, String> result = cache.get(classLoader);
	if (result != null) {
		return result;
	}

	try {
		Enumeration<URL> urls = (classLoader != null ?
				classLoader.getResources(FACTORIES_RESOURCE_LOCATION) :
				ClassLoader.getSystemResources(FACTORIES_RESOURCE_LOCATION));
		result = new LinkedMultiValueMap<>();
		while (urls.hasMoreElements()) {
			URL url = urls.nextElement();
			UrlResource resource = new UrlResource(url);
			Properties properties = PropertiesLoaderUtils.loadProperties(resource);
			for (Map.Entry<?, ?> entry : properties.entrySet()) {
				List<String> factoryClassNames = Arrays.asList(
						StringUtils.commaDelimitedListToStringArray((String) entry.getValue()));
				result.addAll((String) entry.getKey(), factoryClassNames);
			}
		}
		cache.put(classLoader, result);
		return result;
	}
	catch (IOException ex) {
		throw new IllegalArgumentException("Unable to load factories from location [" +
				FACTORIES_RESOURCE_LOCATION + "]", ex);
	}
}
复制代码
根据类路径下的 META-INF/spring.factories 文件解析并获取 ApplicationContextInitializer 接口的所有配置的类路径名称。
spring-boot-autoconfigure-2.0.3.RELEASE.jar!/META-INF/spring.factories 的初始化器相关配置内容如下:
# Initializers
org.springframework.context.ApplicationContextInitializer=/
org.springframework.boot.autoconfigure.SharedMetadataReaderFactoryContextInitializer,/
org.springframework.boot.autoconfigure.logging.ConditionEvaluationReportLoggingListener
复制代码
5.3)根据以上类路径创建初始化器实例列表
List<T> instances = createSpringFactoriesInstances(type, parameterTypes,
				classLoader, args, names);

private <T> List<T> createSpringFactoriesInstances(Class<T> type,
		Class<?>[] parameterTypes, ClassLoader classLoader, Object[] args,
		Set<String> names) {
	List<T> instances = new ArrayList<>(names.size());
	for (String name : names) {
		try {
			Class<?> instanceClass = ClassUtils.forName(name, classLoader);
			Assert.isAssignable(type, instanceClass);
			Constructor<?> constructor = instanceClass
					.getDeclaredConstructor(parameterTypes);
			T instance = (T) BeanUtils.instantiateClass(constructor, args);
			instances.add(instance);
		}
		catch (Throwable ex) {
			throw new IllegalArgumentException(
					"Cannot instantiate " + type + " : " + name, ex);
		}
	}
	return instances;
}
复制代码
5.4)初始化器实例列表排序
AnnotationAwareOrderComparator.sort(instances);
复制代码
5.5)返回初始化器实例列表
return instances;
复制代码
6、设置监听器
setListeners((Collection) getSpringFactoriesInstances(ApplicationListener.class));
复制代码
ApplicationListener 的作用是什么?源码如下。
@FunctionalInterface
public interface ApplicationListener<E extends ApplicationEvent> extends EventListener {

	/**
	 * Handle an application event.
	 * @param event the event to respond to
	 */
	void onApplicationEvent(E event);

}
复制代码
看源码,这个接口继承了 JDK 的 java.util.EventListener 接口,实现了观察者模式,它一般用来定义感兴趣的事件类型,事件类型限定于 ApplicationEvent 的子类,这同样继承了 JDK 的 java.util.EventObject 接口。
设置监听器和设置初始化器调用的方法是一样的,只是传入的类型不一样,设置监听器的接口类型为: getSpringFactoriesInstances ,对应的 spring-boot-autoconfigure-2.0.3.RELEASE.jar!/META-INF/spring.factories 文件配置内容请见下方。
# Application Listeners
org.springframework.context.ApplicationListener=/
org.springframework.boot.autoconfigure.BackgroundPreinitializer
复制代码
可以看出目前只有一个 BackgroundPreinitializer 监听器。
7、推断主入口应用类
this.mainApplicationClass = deduceMainApplicationClass();

private Class<?> deduceMainApplicationClass() {
	try {
		StackTraceElement[] stackTrace = new RuntimeException().getStackTrace();
		for (StackTraceElement stackTraceElement : stackTrace) {
			if ("main".equals(stackTraceElement.getMethodName())) {
				return Class.forName(stackTraceElement.getClassName());
			}
		}
	}
	catch (ClassNotFoundException ex) {
		// Swallow and continue
	}
	return null;
}
复制代码
这个推断入口应用类的方式有点特别,通过构造一个运行时异常,再遍历异常栈中的方法名,获取方法名为 main 的栈帧,从来得到入口类的名字再返回该类。
总结
源码分析内容有点多,也很麻烦,本章暂时分析到 SpringApplication 构造方法的初始化流程,下章再继续分析其 run 方法,作者很快写完过两天就发布,扫码关注下面的公众号 "Java技术栈" 即可获取推送更新。
源码分析不易,点赞 + 转发支持一下吧!
好了,今天的分享就到这里,更多 Spring Boot 文章正在撰写中,关注Java技术栈微信公众号获取第一时间推送。
在公众号后台回复:boot,还能获取栈长整理的往期 Spring Boot 教程,都是实战干货,以下仅为部分预览。
- Spring Boot 读取配置的几种方式
- Spring Boot 如何做参数校验?
- Spring Boot 最核心的 25 个注解!
- Spring Boot 2.x 启动全过程源码分析
- Spring Boot 2.x 新特性总结及迁移指南
- ……

正文到此结束
- 本文标签: 实例 src java cache tar CTO 构造方法 list Listeners 源码 配置 Spring Boot URLs 总结 spring bean https 响应式 equals value 文章 启动过程 map id 遍历 tk final 微信公众号 struct 时间 ArrayList key ACE ssl cat Collection 解析 HashSet 参数 监听器 servlet 代码 Lua Collections http web IO 线程 App 类加载器 BeanUtils Logging UI springboot
- 版权声明: 本文为互联网转载文章,出处已在文章中说明(部分除外)。如果侵权,请联系本站长删除,谢谢。
- 本文海报: 生成海报一 生成海报二
热门推荐


相关文章

近期评论
-
ws0132613@gmail.comhttps://getmacos.com/gopanel/william smith
-
谢谢
-
https://www.newcmy.com/register?aff=HBVX建议您试试草莓云机场,可以流畅观看youtube和tiktok,上reddit/x也没有问题,还有各种ai优化节点。
-
-
-
想购买您这个站,我的联系方式QQ741756694微信同步 能卖联系
-
-
-
-
Loading...
![[HBLOG]公众号](https://www.liuhaihua.cn/img/qrcode_gzh.jpg)

