Java搭建简易服务器(一)
作为一个iOS/flutter 工程师,最近因为一个临时的需求,需要搭建一个建议的服务器,然而,之前的工作生涯中,从未接触过服务器以及数据的相关开发,所以。。。有点儿手足无措
但是作为一个合格的工程师,时刻做好了指哪儿打哪儿的准备,没有不能不会,所以,度娘帮忙搞起来~
实战
下面就记录一下,我搭建服务器,以及后面拿到数据存入本地数据库的一系列操作步骤,和遇到的坑以及解决方案。本文大概只适合和我一样的Java,数据库小白,但是又遇到这样的“挑战”的小伙伴看,如果你是个服务器大神,Java大神,看到本文,如果写的有误,请不吝赐教~
搭建建议服务器
准备工作
- Mac (就是说你得有台电脑,哈哈 其实是想强调一下我用的Mac,和Windows操作可能不一样,后面所有操作都以Mac为例)
- IntelliJ IDEA
- MySql
IntelliJ IDEA 这个去 官网 下载就可,但是要注意一下,我们要下载 Ultimate 版本的,而且这个版本是收费的(破解版本,或者破解方法,自行百度),但是我们要做服务器开发,必须用这个版本,免费版没有Spring这个功能的支持。

接下来就是安装MySQL了,推荐使用Homebrew进行安装,以为我电脑上之前都装过,所以这里就不细说了,不是重点,重点是,切记记住自己设置的密码
brew install mysql
复制代码
搭建服务器
首先要保证你已经有一个能正常打开可用的IntelliJ IDEA,下面通过截图记录每一个具体步骤
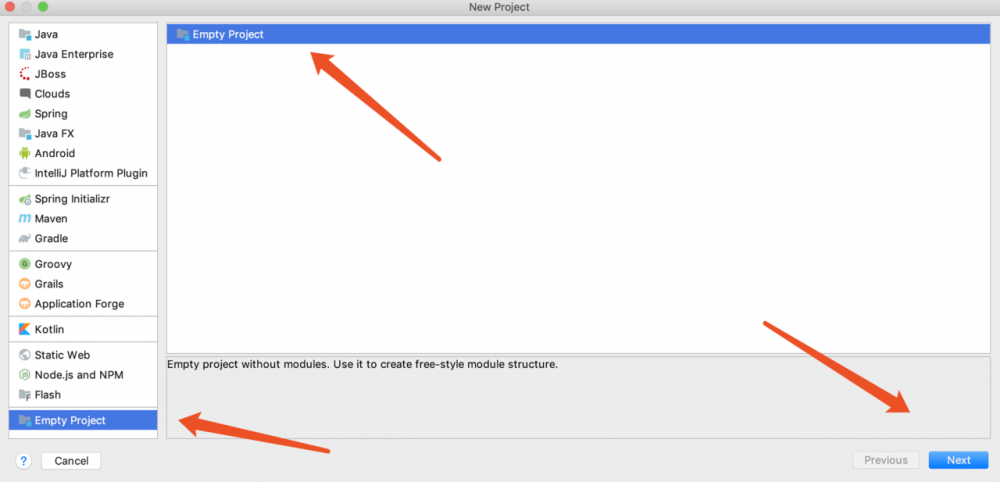
- 创建一个空项目
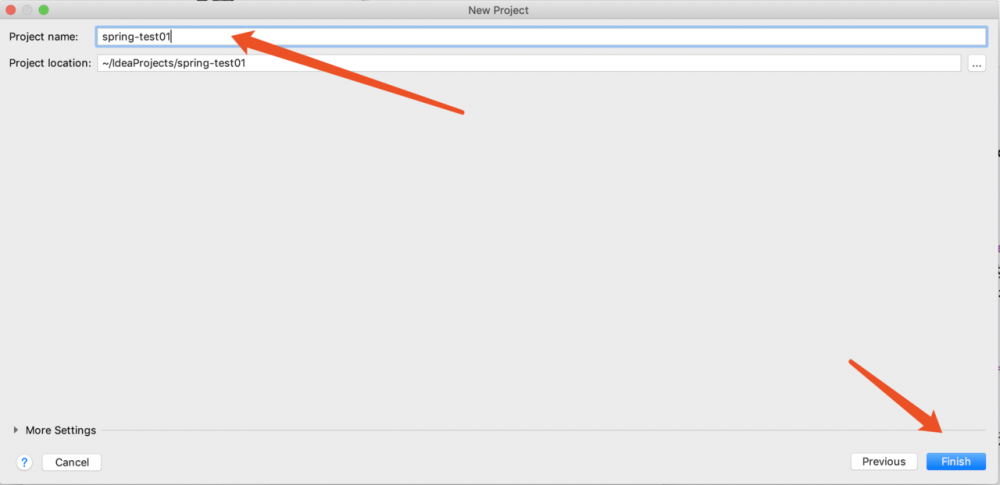
填写项目名称
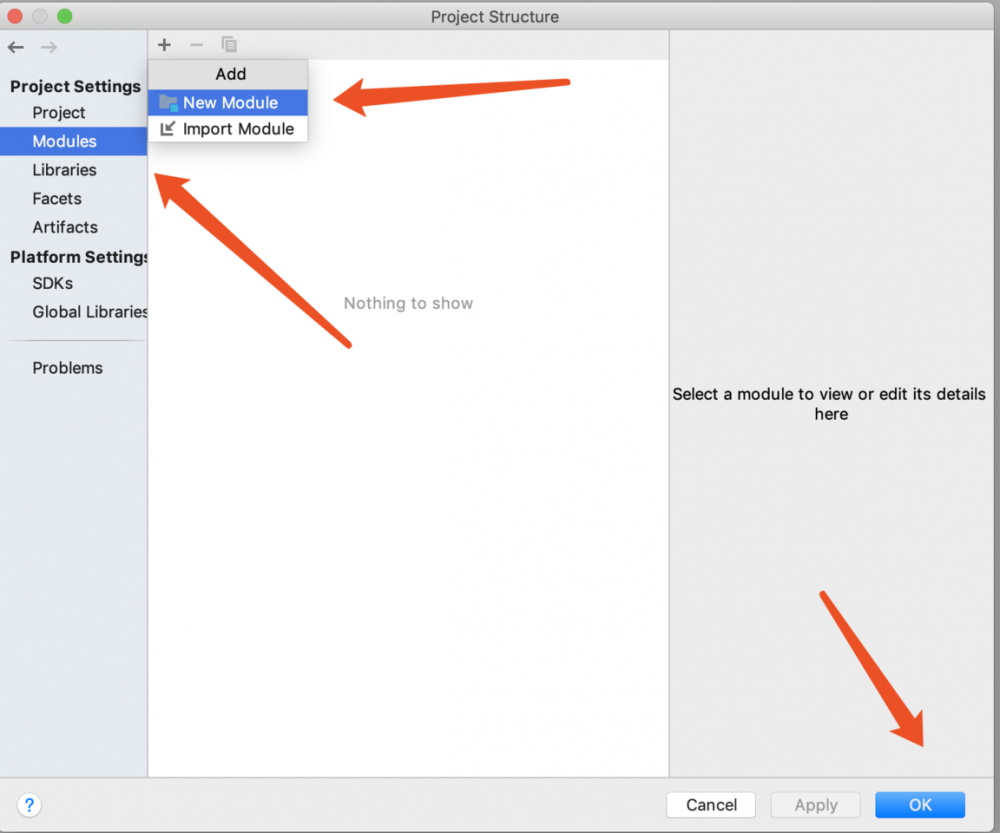
2. add Modules
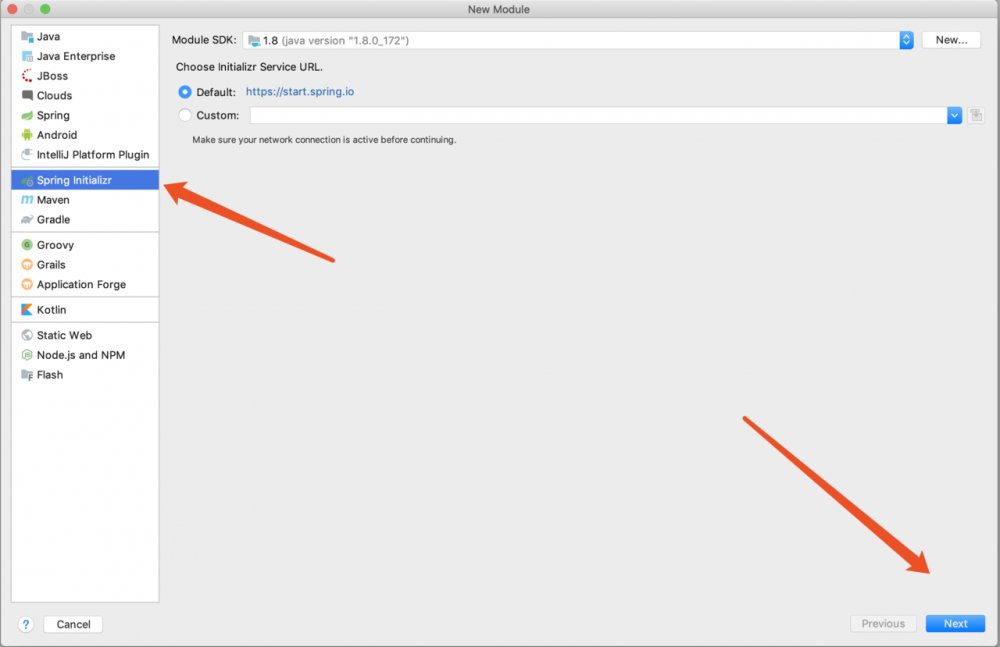
默认配置 next (这一步可能会超时报错,再来一次就可)
这里根据需要修改
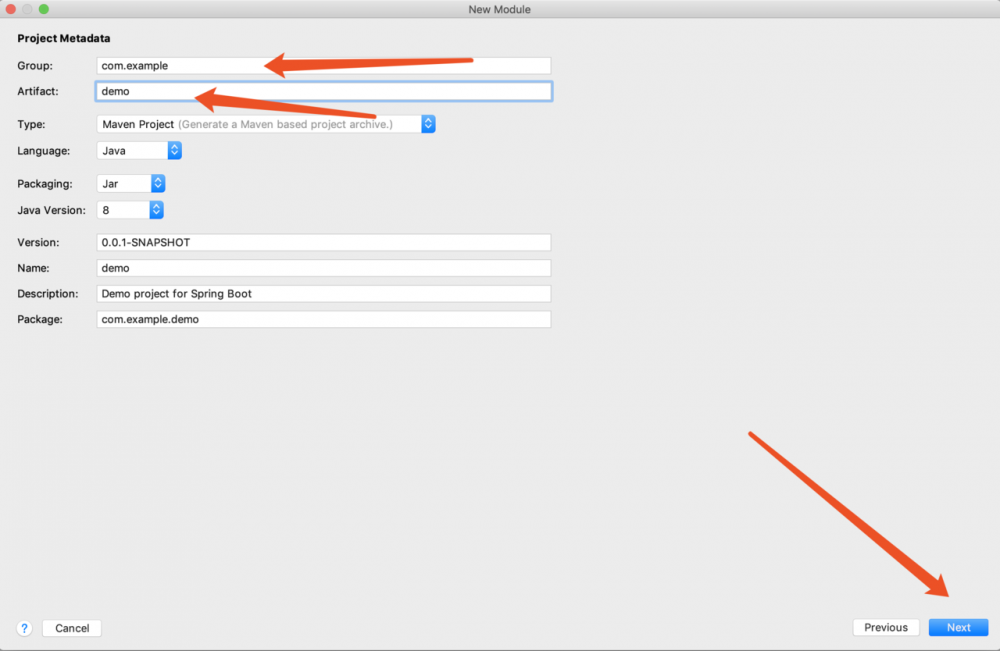
下面两步是必须的配置
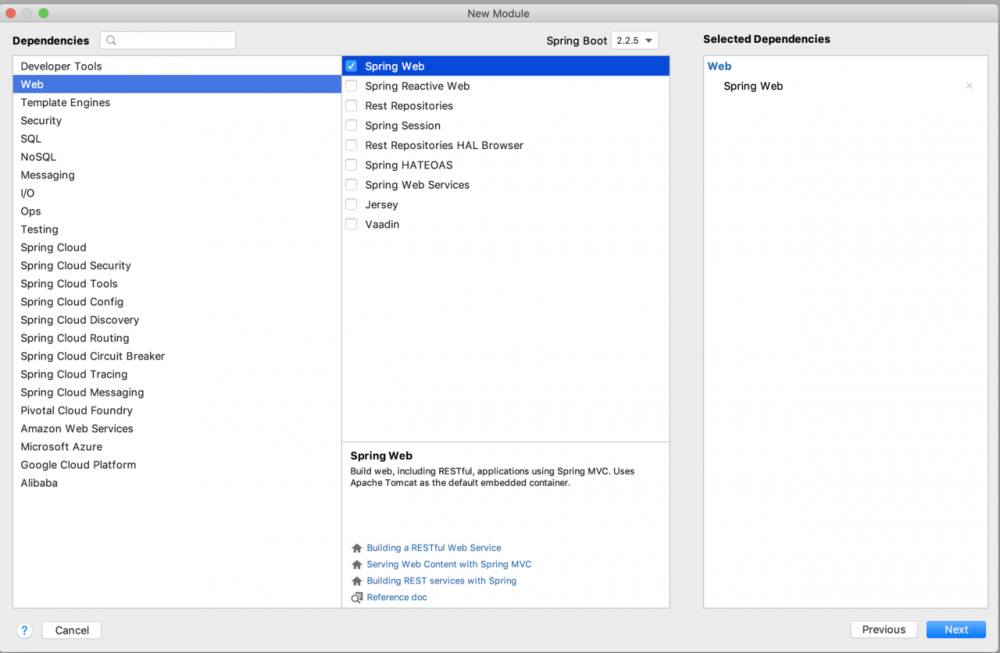
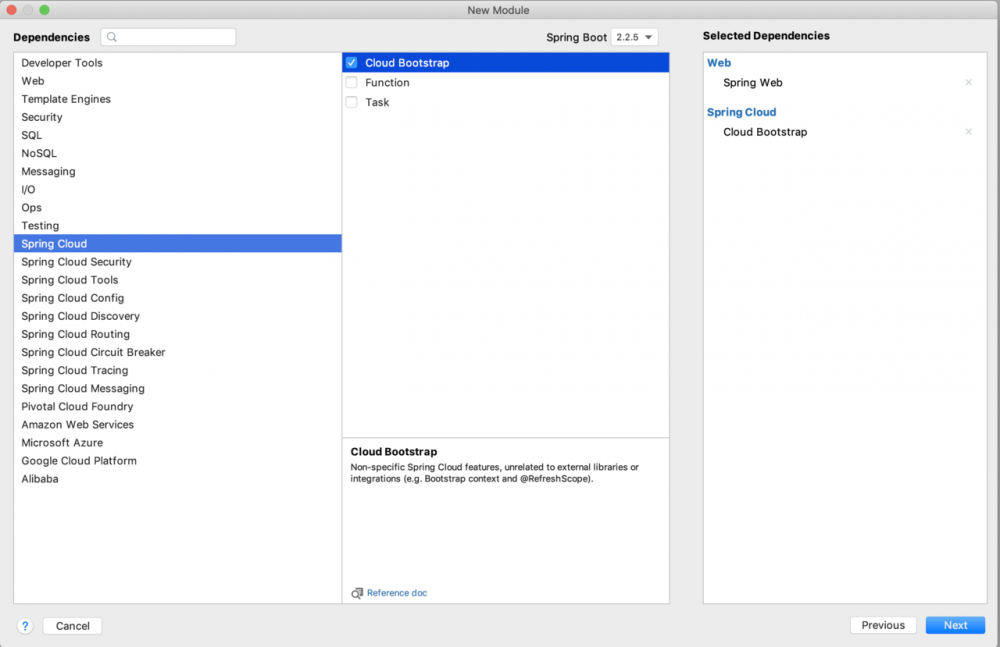
然后到这里就成功了一大半了
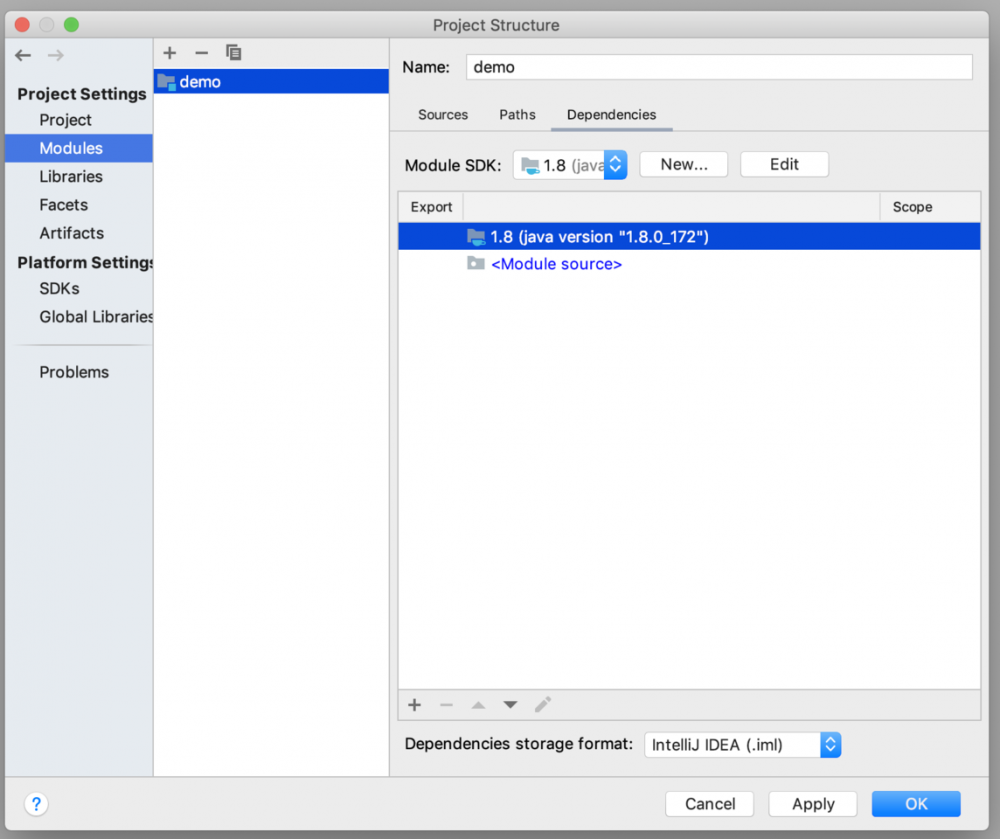
然后需要等待一会儿,应该是下载依赖包一类的东西吧,右下角会有一个进度条,等他下载完成了,再往下操作。
- 创建一个controller
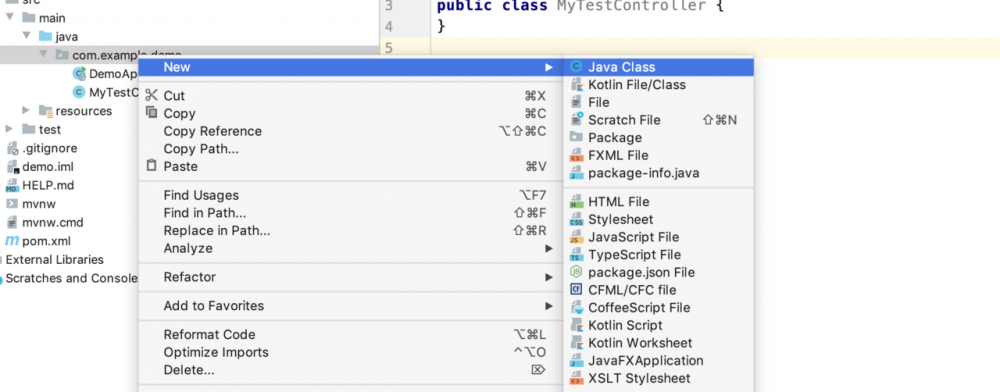
了解下下面三个注解,感兴趣可以深入学习一下,这里我们先学会用 @RestController 标志这是一个控制器
@ResponseBody 会包装返回结果
@RequestMapping 是匹配前台请求路径的
package com.example.demo.controller;

import org.springframework.web.bind.annotation.RequestMapping;
import org.springframework.web.bind.annotation.ResponseBody;
import org.springframework.web.bind.annotation.RestController;

@RestController
public class MyTestController {

    @ResponseBody
    @RequestMapping("/test")
    public String test(){
        return "test spring boot!!";
    }
}
复制代码
这里记录一个快捷键 Option+Enter 可以自动import 或者解决其他问题,可以自己试试~
- 启动服务器

测试结果
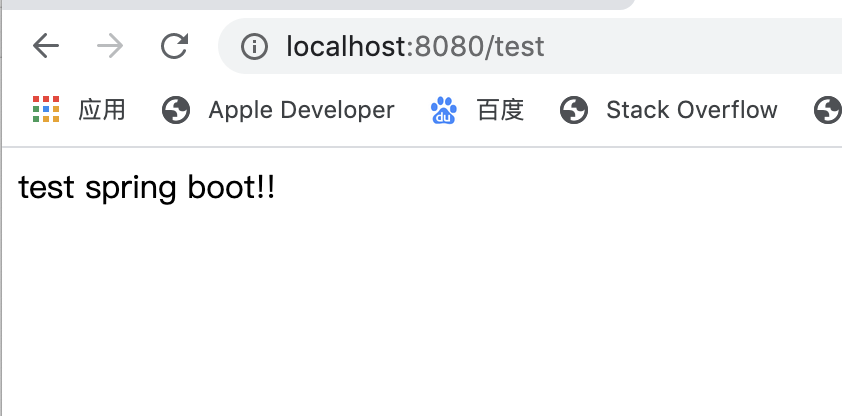
- 其他注解 @RequestMapping
package com.example.demo.controller;

import org.springframework.web.bind.annotation.RequestMapping;
import org.springframework.web.bind.annotation.ResponseBody;
import org.springframework.web.bind.annotation.RestController;

@RestController
@RequestMapping("/api")
public class MyTestController {

    @ResponseBody
    @RequestMapping("/test")
    public String test(){
        return "test spring boot!!";
    }
}
复制代码

6. service层
package com.example.demo.service;

import org.springframework.stereotype.Service;

@Service
public class MyTestService {
    public String sayHello(){
        return "Hello this is Service";
    }
}

复制代码
controller中的修改
package com.example.demo.controller;

import com.example.demo.service.MyTestService;
import org.springframework.beans.factory.annotation.Autowired;
import org.springframework.web.bind.annotation.RequestMapping;
import org.springframework.web.bind.annotation.ResponseBody;
import org.springframework.web.bind.annotation.RestController;

@RestController
@RequestMapping("/api")
public class MyTestController {

    @Autowired
    MyTestService myTestService;

    @ResponseBody
    @RequestMapping("/test")
    public String test(){
        return "test spring boot!!";
    }


    @ResponseBody
    @RequestMapping("/testService")
    public String testService(){
        return myTestService.sayHello();
    }
}
复制代码
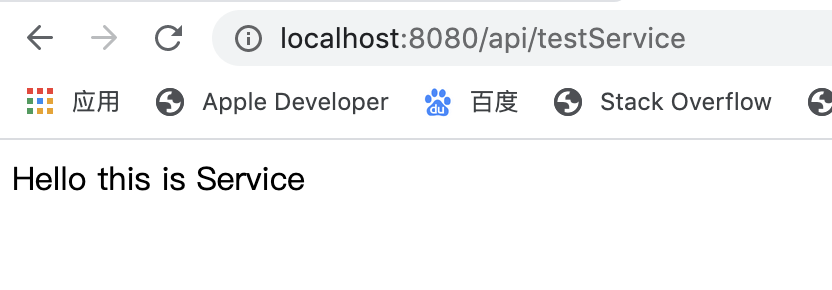
下面是目前为止工程的结构
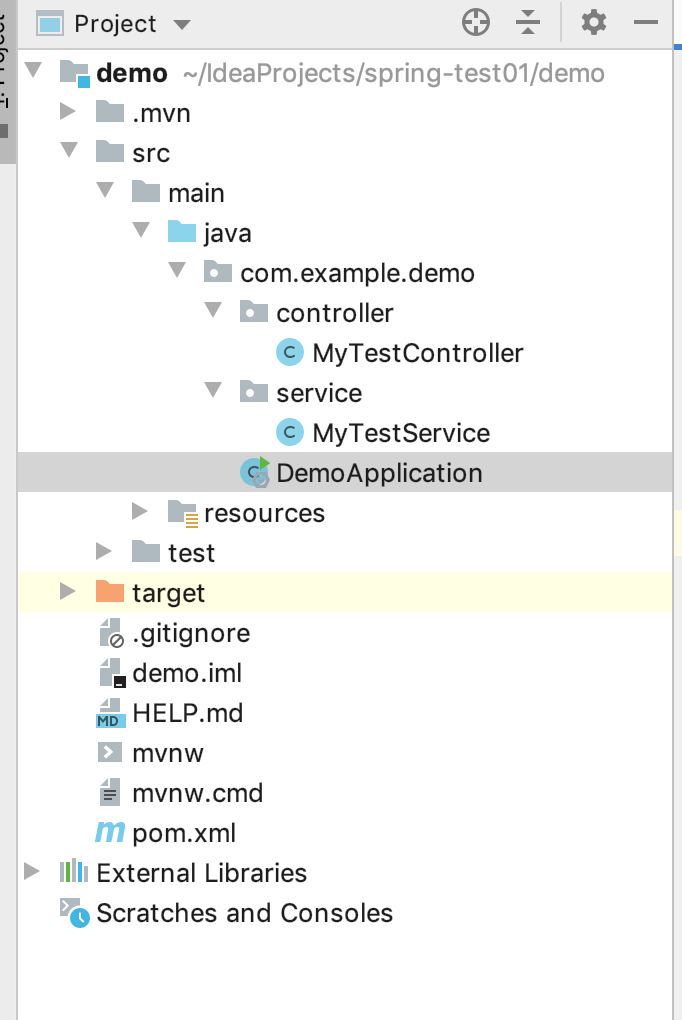
今天先写到这里,后面会在更新请求其他服务拿到数据,然后本地存储~


![[HBLOG]公众号](https://www.liuhaihua.cn/img/qrcode_gzh.jpg)

