我们为什么需要 SpringBoot?


作者 | 阿文, 责编 | 郭芮
头 图 | CSDN 下载自东方IC
出品 | CSDN(ID:CSDNnews)
任何先进技术的产生都不是凭空出现的,SpringBoot 也不例外,SpringBoot 是基于Spring 的基础上产生的。总所周知,Spring 是一个轻量级的容器,在Java EE 项目中得到广泛使用,但是Spring复杂、繁琐和臃肿的XML配置方式配置使得开发人员在实际使用过程中变得非常痛苦,尤其是与其他第三方工具进行整合时,比如Mybatis等就更会使得配置文件变得异常复杂和重复。
比如我们来看一段Spring的配置:
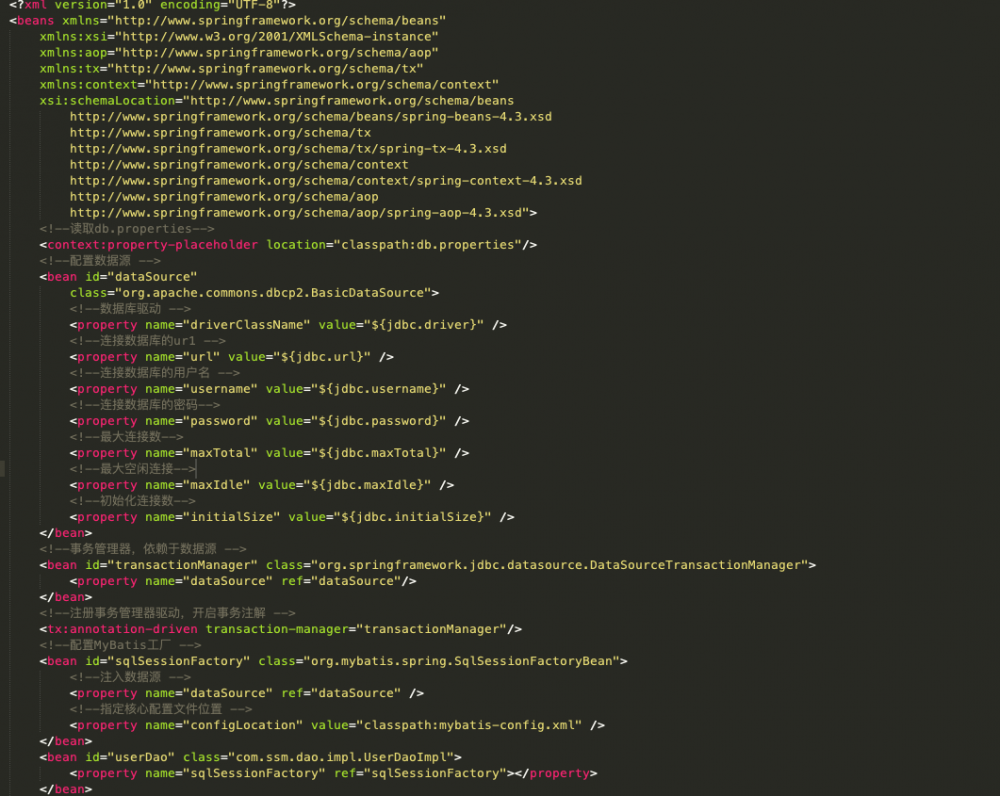
上图是一段配置数据库以及事务管理和Mybatis 的配置,我们发现仅仅是配置文件就非常的多,当然这还不是最复杂的。在这种基础上,SpringBoot 诞生了。
SpringBoot 的出现给开发者带来了新的自动化配置解决方案,使得开发者能够基于 SpringBoot 快速创建基于 Spring 生产级的独立应用程序, SpringBoot 中对一些常用的第三方库提供了默认的自动化配置方案,使得开发者只需要很少的 Spring 配置就能运行完整的 JavaEE 应用。由于其拥有了开箱即用的特性以及服务监控方案同时自带web服务器且与Spring的另一个主流的Spring Cloud 等服务治理框架以及kubernetes 等技术的融合使得开发人员可以快速的实现微服务以及服务的治理、熔断等,最重要的是你可以完全不需要配置XML,真的是太爽了。
那么,如何入门SpringBoot 呢?本文将带你了解。

小试牛刀
首先,我们创建一个SpringBoot工程,创建SpringBoot的方法有很多,这里以IDEA 企业版为例,我们选择 Spring initalizr 然后创建一个工程。
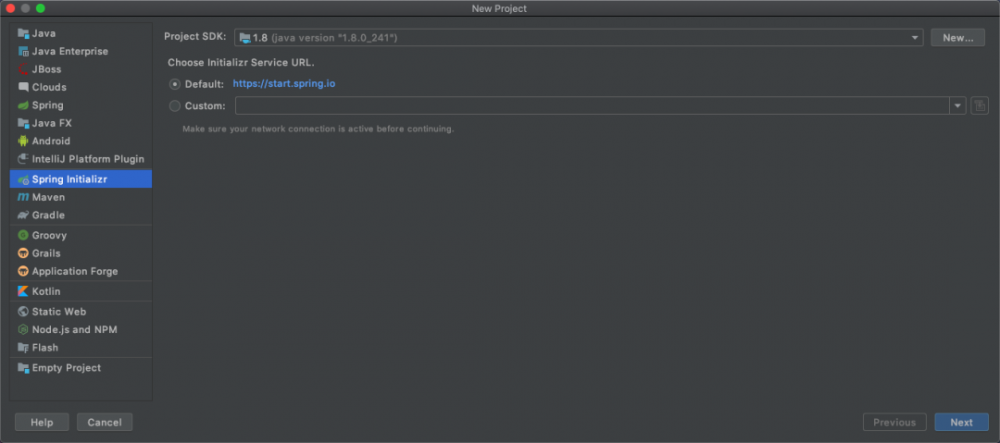
创建完工程之后,我们打开pom.xml,我们可以看到这段配置:
< parent >
< groupId > org.springframework.boot </ groupId >
< artifactId > spring-boot-starter-parent </ artifactId >
< version > 2.2.6.RELEASE </ version >
< relativePath /> <!-- lookup parent from repository -->
</ parent >
spring-boot-starter-parent 是一种特殊的 starter,它提供了一些 maven 默认配置,同时还提供了dependency-management ,可以便开发者在引入其他依赖时不必输入版本号,方便依赖管理。
SpringBoot 提供的starter 非常多,这些 Starter 要为第三方库提供自动配置,假如我们要配置一个web项目,则可以在maven 中加入:
< dependency >
< groupId > org.springframework.boot </ groupId >
< artifactId > spring-boot-starter-web </ artifactId >
</ dependency >
在项目的入口我们可以看到一个DemoApplication,这是整个SpringBoot的入口:
package com.example.demo;
import org.springframework.boot.SpringApplication;
import org.springframework.boot.autoconfigure.SpringBootApplication;
@SpringBootApplication
public class DemoApplication {
public static void main (String[] args) {
SpringApplication.run(DemoApplication.class);
}
}
其中@SpringBootApplication 注解等于如下注解,表示开启自动配置以及自动扫包:
@EnableAutoConfiguration
@ComponentScan
其中ComponentScan 会扫描@Service、@Repository、@Component、@Controller、@RestController以及带@Configuration 注解的类,但是我们为了更方便,通常都是直接在入口加上@SpringBootApplication。
在IDE中,我们运行DemoApplication 这个class 就可以运行SpringBoot 了,此时终端会出现如下信息,我们可以看到 (v2.2.6.RELEASE) 版本号以及Tomcat的端口:

但是此时我们去访问127.0.0.1:8080,会出现404的提醒:
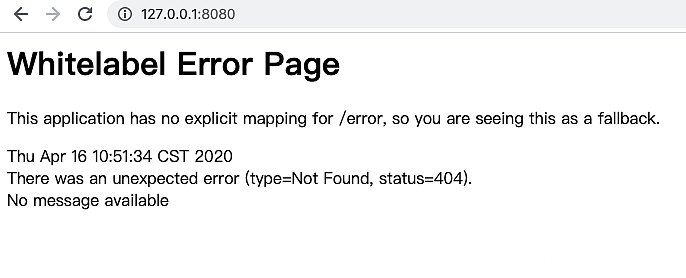
我们可以在项目下新建一个 HelloController:
@RestController
public class HelloController {
@GetMapping( "/hello" )
public String hello(){
return "Hello World!" ;
}
}
此时,我们去访问可以看到如下内容:
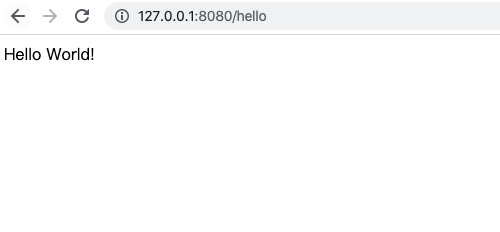
当然,更多的时候我们写完一个应用,是需要放到服务器上去运行的,这个时候我们需要把应用进行打包,要打包应用,我们需要在pom.xml中配置:
< build >
< plugins >
< plugin >
< groupId > org.springframework.boot </ groupId >
< artifactId > spring-boot-maven-plugin </ artifactId >
</ plugin >
</ plugins >
</ build >
当然,使用idea 创建的SpringBoot 这些都给我们安排的妥妥的,我们只需要在终端输入如下命令就可以将整个项目进行打包:
mvn package
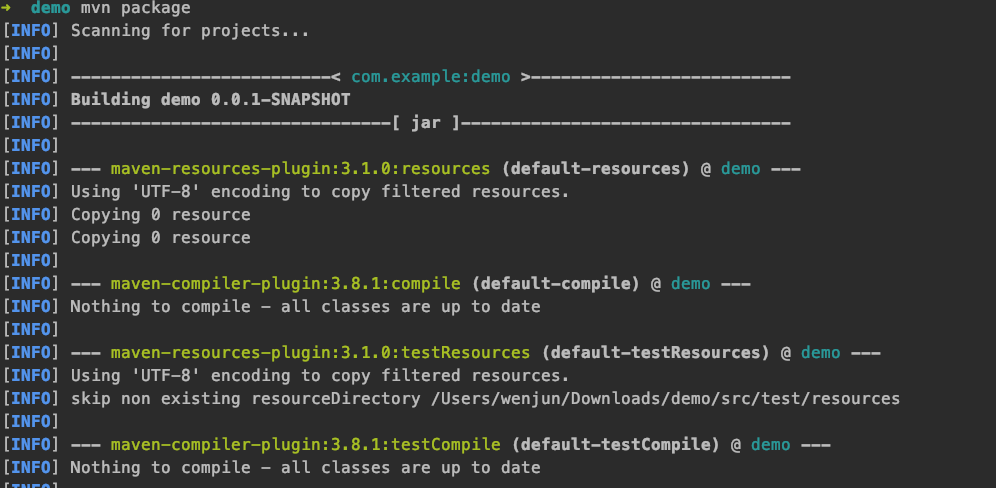
然后我们在终端执行:
java -jar target/demo- 0 . 0 . 1 -SNAPSHOT.jar
就可以运行打包好的项目,如下所示:


定制Banner
当SpringBoot 程序启动之后,我们会看到SpringBoot 的Logo:
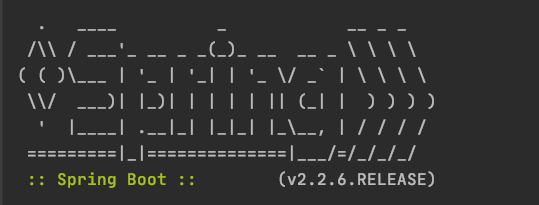
但是通常情况下,企业会将其替换成自己的公司Logo,那么如何定制属于自己的企业Logo 呢?
首先,我们要把文件转成TXT文本形式的字体,比如在 http://www.network-science.de/ascii/ 设置,比如我们设置一个SpringDemo的字体:
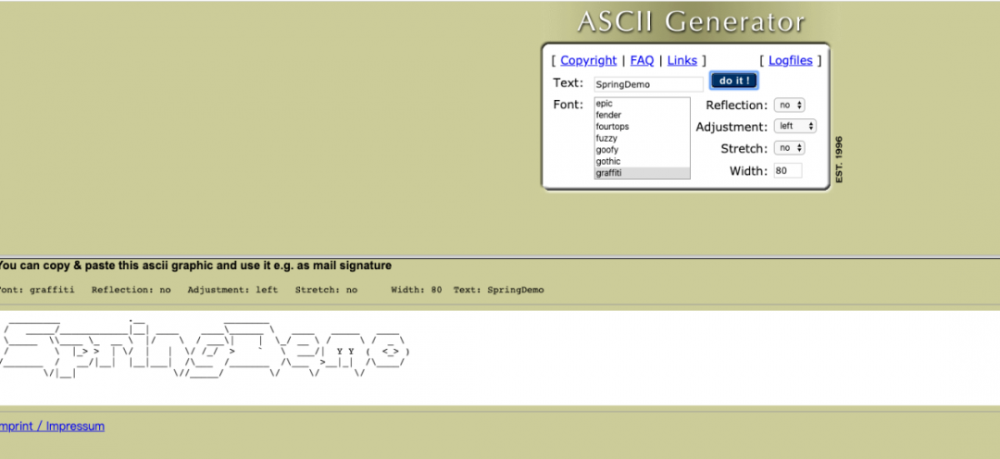
然后在项目的resource目录下新建一个banner.txt的文件,将生成的文字复制粘贴进去即可:

然后我们重新运行程序就会发现默认的Logo 被替换了:

如果要关闭也很简单,只需要在main函数中,设置:
SpringApplicationBuilder builder = new SpringApplicationBuilder(DemoApplication. class );
builder.bannerMode(Banner.Mode. OFF ).run(args);

Web 容器的配置
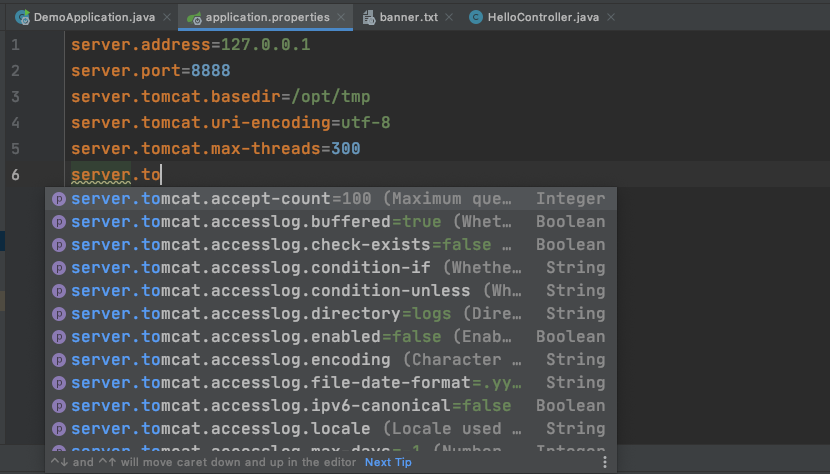
在SpringBoot 中,我们可以在application.properties 中对web 容器进行配置,如下所示:
server.address= 127.0 . 0 . 1 # 配置地址
server.port= 8888 # 配置端口
server.tomcat.basedir= /opt/tmp # 配置目录
server.tomcat.uri-encoding=utf- 8 #配置编码
server.tomcat.max-threads= 300 #配置最大线程数
在idea 中,会对配置项进行智能提示,非常方便:
我们还可以在该文件中配置证书:
server.ssl. key -store= #配置秘钥文件名称
server.ssl. key - alias = #配置秘钥别名
server.ssl. key -password= # 配置证书密码

application.properties 的文件加载顺序
SpringBoot 中的application.properties配置文件可以出现在如下4个位置:
-
项目根目录下的config 文件夹中
-
项目的根目录下
-
classpath 下的config文件夹下
-
classpath 下
开发者也可以自定义这个文件的名称,只需要在运行时加上spring.config.name=xxx即可:
jar -jar xxx.jar --spring.config.name=xxx
也可以知道配置文件所在路径:
jar -jar xxx.jar --spring.config.location=classpath:/
SpringBoot 的配置文件最终都会被加载到Environment中,我们可以通过@Value 注解以及EnvironmentAware 接口来讲数据注入到属性上,例如application.properties中的内容如下:
book.name=西游记
book.author=六承恩
book.price= 66
book. type = "古典文学" , "四大名著"
Book 类的内容如下:
@Component
@ConfigurationProperties(prefix = "book" )
public class Book {
private String name;
private String author;
private Float price;
private List<String> type;
//getter 省略
//seteer 省略
@Override
public String toString() {
return "Book{" +
"name='" + name + '/'' +
", author='" + author + '/'' +
", price=" + price +
", type=" + type +
'}' ;
}
}
其中ConfigurationProperties 注解中的prefix 属性描述了要加载配置文件的前缀对应的控制器类如下:
@RestController
public class BookController {
@Autowired
Book book;
@GetMapping( "/book" )
public String book(){
return book.toString();
}
}
我们执行后访问可以看到如下内容:

除此之外,还支持YAML 配置,我们将application.properties中的内容删除或注释,然后在resource中新建一个application.yml 文件,内容如下,重新运行程序得到的结果与上面的一样。
book:
name : 西游记
author: 六承恩
price: 66
type :
- 古典文学
- 四大名著
YAML格式的文件虽然方便,但是无法使用@PropertySource 注解加载YAML文件。

Profile
在实际的开发过程中,开发人员需要频繁的在生产和测试环境进行切换,其中一些配置就需要变动,比如数据库的配置。对此,SpringBoot 提供了@Profile注解,我们可以配置2个配置文件分别代表生产和测试环境的,在resource中新建application-dev.properties以及application-prod.properties。

然后在main 函数中配置:
SpringApplicationBuilder builder = new SpringApplicationBuilder(DemoApplication. class );
builder.application().setAdditionalProfiles( "prod" );
builder.run(args);
或者在项目启动时候加上 --spring.profiles.active=prod 。

【END】

更多精彩推荐
☞ 平台抗住日访问量 7 亿次,研发品控流程全公开
☞ 深度干货!如何将深度学习训练性能提升数倍?
☞“手把手撕LeetCode题目,扒各种算法套路的裤子”
☞ 北京四环堵车引发的智能交通大构想
☞从Web1.0到Web3.0:详析这些年互联网的发展及未来方向
你点的每个“在看”,我都认真当成了喜欢
- 本文标签: 开发者 Spring cloud XML spring example 自动化 plugin 互联网 SDN REST ssl 删除 https UI springboot Kubernetes 目录 企业 端口 Service 线程 管理 微服务 list 服务器 http tomcat 配置 id App logo Uber classpath Property 数据库 IDE 测试环境 value web src pom map IO 智能 开发 测试 下载 tar 数据 EnableAutoConfiguration key java build maven 深度学习 cat 注释 mybatis 定制 Word
- 版权声明: 本文为互联网转载文章,出处已在文章中说明(部分除外)。如果侵权,请联系本站长删除,谢谢。
- 本文海报: 生成海报一 生成海报二


![[HBLOG]公众号](https://www.liuhaihua.cn/img/qrcode_gzh.jpg)

