2020:0703--12--SpringBoot整合mybatis(二)
1.
复制代码
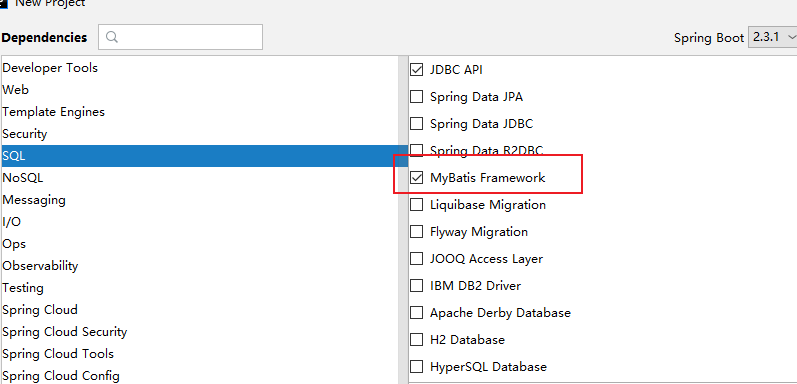
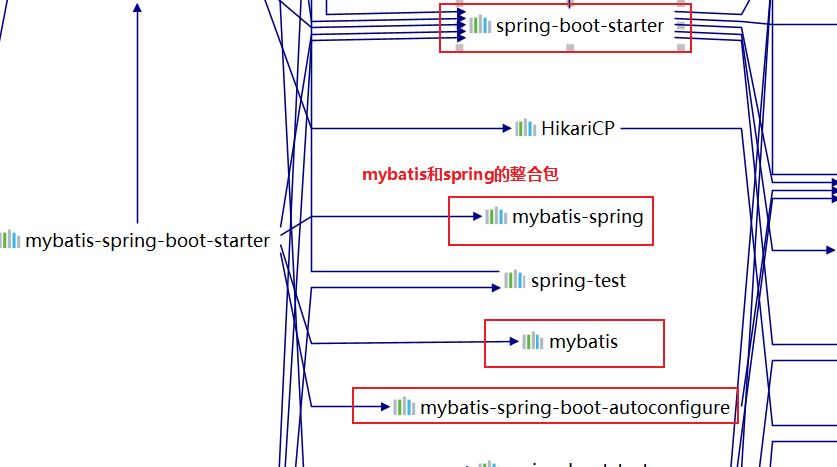
2.  看一下都导入了哪些mybatis的相关依赖。
复制代码
3.  引入druid依赖
复制代码
<!--引入druid-->
        <dependency>
            <groupId>com.alibaba</groupId>
            <artifactId>druid</artifactId>
            <version>1.1.10</version>
        </dependency>
复制代码
4.  application.yml配置
复制代码
spring:
      #数据源基本配置
      datasource:
        username: root
        password: root
        url: jdbc:mysql://192.168.92.130:3306/mybatis
        driver-class-name: com.mysql.cj.jdbc.Driver

        # 开启后就能执行sql语句文件
        initialization-mode: always
        # 自定义加载的schema.sql语句文件的位置和名字
        schema:
          - classpath:sql/department.sql
          - classpath:sql/employee.sql

        # 指明数据源类型
        type: com.alibaba.druid.pool.DruidDataSource

        #   数据源其他配置
        initialSize: 5
        minIdle: 5
        maxActive: 20
        maxWait: 60000
        timeBetweenEvictionRunsMillis: 60000
        minEvictableIdleTimeMillis: 300000
        validationQuery: SELECT 1 FROM DUAL
        testWhileIdle: true
        testOnBorrow: false
        testOnReturn: false
        poolPreparedStatements: true

        #   配置监控统计拦截的filters,去掉后监控界面sql无法统计,'wall'用于防火墙
        filters: stat,wall,slf4j
        maxPoolPreparedStatementPerConnectionSize: 20
        useGlobalDataSourceStat: true
        connectionProperties: druid.stat.mergeSql=true;druid.stat.slowSqlMillis=500
复制代码
1.2 建表
1.  建表

        将employee.sql和department.sql放到classpath:sql文件夹下

    2.  自定义加载的schema.sql语句文件的位置和名字

        启动创建表
复制代码
spring
                schema:
                  - classpath:sql/department.sql
                  - classpath:sql/employee.sql
复制代码
3.  创建JavaBean(实体类)
复制代码
public class Department {

            private Integer id;
            private String departmentName;

            get/set...
        }

        public class Employee {

        private Integer id;
        private String lastName;
        private Integer gender;
        private String email;
        private Integer dId;

        get/set...
        }
复制代码
4.  注释掉sql文件,防止重新建表
复制代码
#    schema:
        #      - classpath:sql/department.sql
        #      - classpath:sql/employee.sql
复制代码
2. 注解版mybatis整合
1.  配置类
复制代码
@Configuration
        public class DruidConfig {

            //将配置的spring.datasource属性和它进行绑定
            @ConfigurationProperties(prefix = "spring.datasource")
            @Bean
            public DataSource druid(){
                return new DruidDataSource();
            }


            //配置druid的监控
            @Bean
            public ServletRegistrationBean statViewServlet(){
                ServletRegistrationBean bean = new ServletRegistrationBean(new StatViewServlet(), "/druid/*");

                //初始化StatViewServlet的属性
                Map<String, String> initParams = new HashMap<String, String>();
                initParams.put("loginUsername","admin");
                initParams.put("loginPassword","123456");
                initParams.put("allow",""); //默认是允许所有访问
                initParams.put("deny","192.168.15.21");

                bean.setInitParameters(initParams);

                return bean;
            }

            @Bean
            public FilterRegistrationBean webStatFilter(){
                FilterRegistrationBean bean = new FilterRegistrationBean();

                bean.setFilter(new WebStatFilter());

                //初始化WebStatFilter的属性参数
                Map<String, String> initParams = new HashMap<String, String>();
                initParams.put("exclusion", "*.js, *.css, /druid/*");
                //设置FilterRegistrationBean的属性
                bean.setInitParameters(initParams);
                bean.setUrlPatterns(Arrays.asList("/*"));

                return bean;
            }

        }

复制代码
2.  mapper类

        @Mapper注解的的作用
        1:为了把mapper这个Mapper交給Spring管理
        2:为了不再写mapper映射文件
        3:为了给mapper接口 自动根据一个添加@Mapper注解的接口生成一个实现类
复制代码
//指定这是操作数据库的mapper
        @Mapper
        public interface DepartmentMapper {

            @Select("select * from department where id=#{id}")
            public Department getDeptById(Integer id);

            @Delete("delete from department where id=#{id}")
            public int deleteDeptByid(Integer id);

            @Insert("insert into department (departmentName) values(#{departmentName})")
            public int insertDept(Department department);

            @Update("update department set departmentName=#{departmentName} where id=#{id}")
            public int updateDept(Department department);
        }
复制代码
3.  controller
复制代码
@RestController
        public class DeptController {

            @Autowired
            DepartmentMapper departmentMapper;

            @GetMapping("/dept/{id}")
            public Department getDepartment(@PathVariable("id") Integer id){
                return departmentMapper.getDeptById(id);
            }

            @GetMapping("/dept")
            public Department insertDept(Department department){
                departmentMapper.insertDept(department);
                return department;
            }
        }
复制代码
4.  测试
复制代码
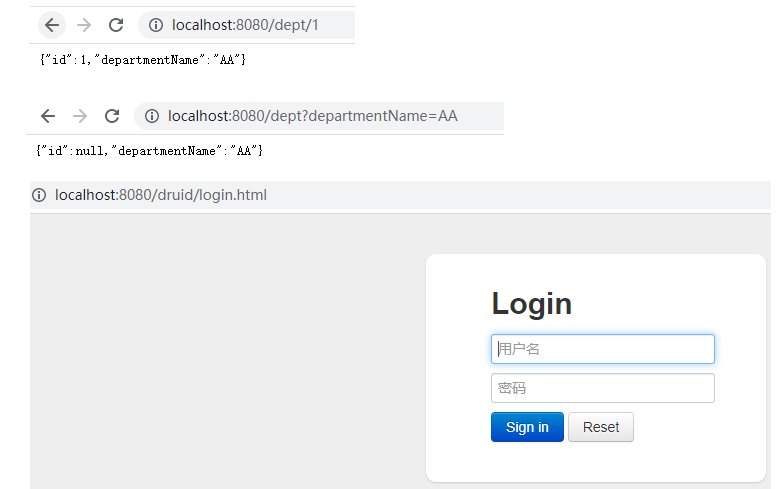
5.  发现使用注解版的mybatis非常的方便

        @Mapper即可,底层给我们做了很多配置

        @Mapper注解的的作用
        1:为了把mapper这个Mapper交給Spring管理
        2:为了不再写mapper映射文件
        3:为了给mapper接口 自动根据一个添加@Mapper注解的接口生成一个实现类
复制代码
2.1 改进insert操作:@Options(useGeneratedKeys = true, keyProperty = "id")
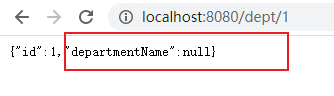
1.  原来的效果
复制代码
@GetMapping("/dept")
    public Department insertDept(Department department){
        departmentMapper.insertDept(department);

        /**
         * 注意:向页面返回的是department。而department是根据页面传过来的参数进行封装的得到的对象
         *
         * 如果我们只传一个departmentName,那么封装得到的department对象其id就为null。
         *
         * 经过插入操作后,再return到页面上就会显示id=null
         *
         * 解决:我们可以在mapper/dao 的方发处,
         * 用@Options(useGeneratedKeys = true, keyProperty = "id")将就将主键再封装进department
         */
        return department;
    }

    @Insert("insert into department (departmentName) values(#{departmentName})")
    public int insertDept(Department department);
复制代码

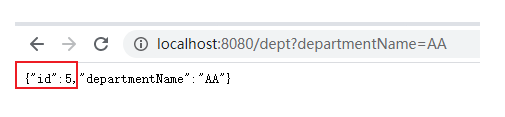
2.  改进
复制代码
@GetMapping("/dept")
    public Department insertDept(Department department){
        departmentMapper.insertDept(department);

        return department;
    }

    //是否使用自动生成的主键,并且指明department中的id属性是用来封装主键的
    //这样传过来的department一开始id为null,然后数据库插入完成后,就将主键封装进去。
    @Options(useGeneratedKeys = true, keyProperty = "id")
    @Insert("insert into department (departmentName) values(#{departmentName})")
    public int insertDept(Department department);
复制代码
3.  分析一下@Options(useGeneratedKeys = true, keyProperty = "id")

        否使用自动生成的主键:useGeneratedKeys = true
        指明department中的id属性是用来封装主键的:keyProperty = "id"
复制代码
3 列名和实体类的属性名不匹配
3.1 测试一下

测试一个查询操作:

        发现查询出来结果,但是实体类封装不进去
复制代码
3.2 分析一下原理
1.  MybatisAutoConfiguration 自动配置类给我们添加了SqlSessionFactory组件
复制代码
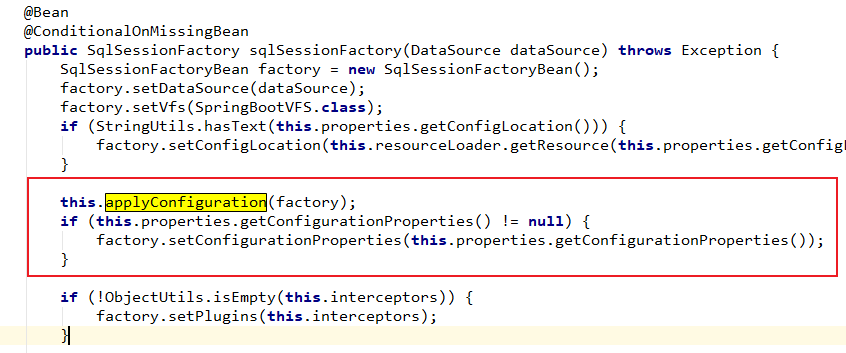
2.  this.applyConfiguration(factory)方法中有cunstomizer
复制代码
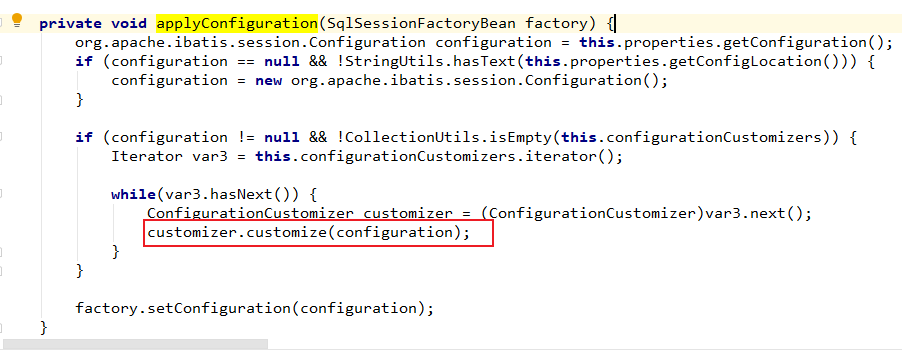
3.  我们可以在cunstomizer定义相关的mybatis规则
复制代码
3.3 在不写配置文件的情况下,我们重写一个ConfigurationCustomizer
1.  写一个ConfigurationCustomizer加到IOC中
复制代码
import org.apache.ibatis.session.Configuration;
    import org.mybatis.spring.boot.autoconfigure.ConfigurationCustomizer;
    import org.springframework.context.annotation.Bean;

    //因为mybatis导入了org.apache.ibatis.session.Configuration;
    //所以这里为了区分,@Configuration注解用了全类名
    @org.springframework.context.annotation.Configuration
    public class MyBatisConfig {

        @Bean
        public ConfigurationCustomizer configurationCustomizer(){
            return new ConfigurationCustomizer(){
                @Override
                public void customize(Configuration configuration) {
                    //开启驼峰命名法规则
                    configuration.setMapUnderscoreToCamelCase(true);
                }
            };
        }
    }
复制代码
2.  测试
复制代码
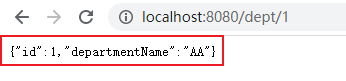
3.4 @MapperScan
代替多个@Mapper注解,批量扫描所有的Mapper接口

    加到主程序类上:
复制代码
@MapperScan(basePackages = {"com.atguigu.springboot.mapper"})
@MapperScan(basePackages = {"com.atguigu.springboot.mapper"})
    @SpringBootApplication
    public class Day0703Springboot07MybatisApplication {

        public static void main(String[] args) {
            SpringApplication.run(Day0703Springboot07MybatisApplication.class, args);
        }

    }
复制代码
4. 配置文件版mybatis整合
1.  EmployeeMapper
复制代码
public interface EmployeeMapper {

            public Employee getEmpById(Integer id);

            public void insertEmp(Employee employee);
        }
复制代码
2.  controller
复制代码
//@PathVariable("id")获取请求路径上的变量
        @GetMapping("/emp/{id}")
        public Employee getEmp(@PathVariable("id") Integer id){
            return employeeMapper.getEmpById(id);
        }
复制代码
3.  mybatis全局配置文件
复制代码
<?xml version="1.0" encoding="UTF-8" ?>
        <!DOCTYPE configuration
                PUBLIC "-//mybatis.org//DTD Config 3.0//EN"
                "http://mybatis.org/dtd/mybatis-3-config.dtd">
        <configuration>
            <!--全局配置文件:一般在这里配置一些mybatis的环境-->
        </configuration>
复制代码
4.  sql映射文件
复制代码
<?xml version="1.0" encoding="UTF-8" ?>
    <!DOCTYPE mapper
            PUBLIC "-//mybatis.org//DTD Mapper 3.0//EN"
            "http://mybatis.org/dtd/mybatis-3-mapper.dtd">
    <mapper namespace="com.atguigu.springboot.mapper.EmployeeMapper">

        <select id="getEmpById" resultType="com.atguigu.springboot.bean.Employee">
            select * from employee where id=#{id}
        </select>

        <insert id="insertEmp">
            insert into employee (lastName, email, gender, d_id) value (#{lastName}, #{email}, #{gender}, #{dId})
        </insert>
    </mapper>
复制代码

5.  将这两个配置文件加到主配置文件中
复制代码
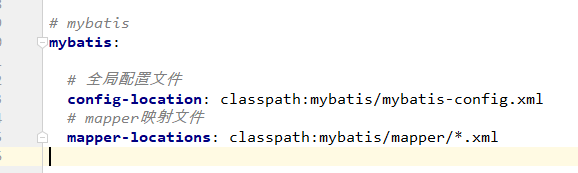
# mybatis
        mybatis:

          # 全局配置文件
          config-location: classpath:mybatis/mybatis-config.xml
          # mapper映射文件
          mapper-locations: classpath:mybatis/mapper/*.xml

复制代码
6.  测试一下
复制代码

7.  开启驼峰命名法

        注意:在将注解mybatis的时候,我们用一个customizer开起来了驼峰命名法。

        但是在配置文件版的mybatis时,没有起作用。

        我可以这样理解吗?
            配置文件版的mybatis,它的mapper都交给配置文件管理。
            所以必须在配置文件中开启驼峰命名法

        在mybatis主配置文件中配置:
复制代码
<?xml version="1.0" encoding="UTF-8" ?>
        <!DOCTYPE configuration
                PUBLIC "-//mybatis.org//DTD Config 3.0//EN"
                "http://mybatis.org/dtd/mybatis-3-config.dtd">
        <configuration>
            <!--全局配置文件:一般在这里配置一些mybatis的环境-->
            <settings>
                <setting name="mapUnderscoreToCamelCase" value="true"/>
            </settings>
        </configuration>
复制代码
8.  测试一下
复制代码

9.  发现dept请求也可以,即注解版的mybatis也可以使用。

        SpringBoot整合mybatis时,注解和xml可以同时使用。
复制代码
正文到此结束
- 本文标签: cat bean 代码 springboot update REST servlet 统计 UI sqlsession Select Statement 测试 Connection 数据库 Property 管理 id java list mail core 配置 mapper App JDBC root dataSource ACE CSS iBATIS spring value db src map SqlSessionFactory CTO session web 参数 js Word IDE IO mysql key tab lib sql ioc 注释 HashMap apache mybatis https http 数据 自动生成 XML druid classpath schema
- 版权声明: 本文为互联网转载文章,出处已在文章中说明(部分除外)。如果侵权,请联系本站长删除,谢谢。
- 本文海报: 生成海报一 生成海报二
热门推荐


相关文章

近期评论
-
ws0132613@gmail.comhttps://getmacos.com/gopanel/william smith
-
谢谢
-
https://www.newcmy.com/register?aff=HBVX建议您试试草莓云机场,可以流畅观看youtube和tiktok,上reddit/x也没有问题,还有各种ai优化节点。
-
-
-
想购买您这个站,我的联系方式QQ741756694微信同步 能卖联系
-
-
-
-
Loading...
![[HBLOG]公众号](https://www.liuhaihua.cn/img/qrcode_gzh.jpg)

