个人学习系列 - SpringCloud项目搭建
一直想写springcloud的搭建教程,今天就来整理一下吧。
搭建项目
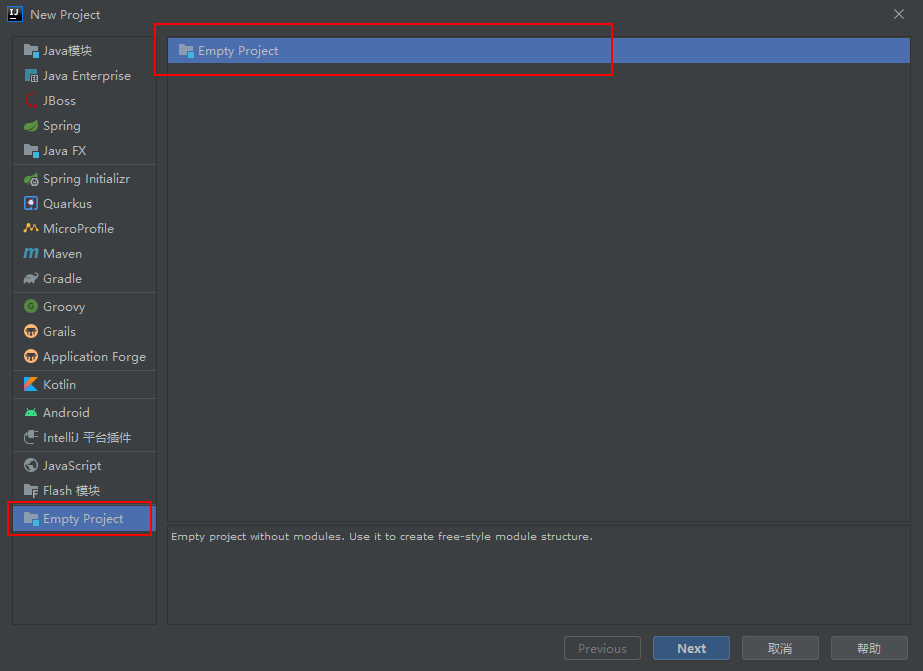
1. 创建一个空项目
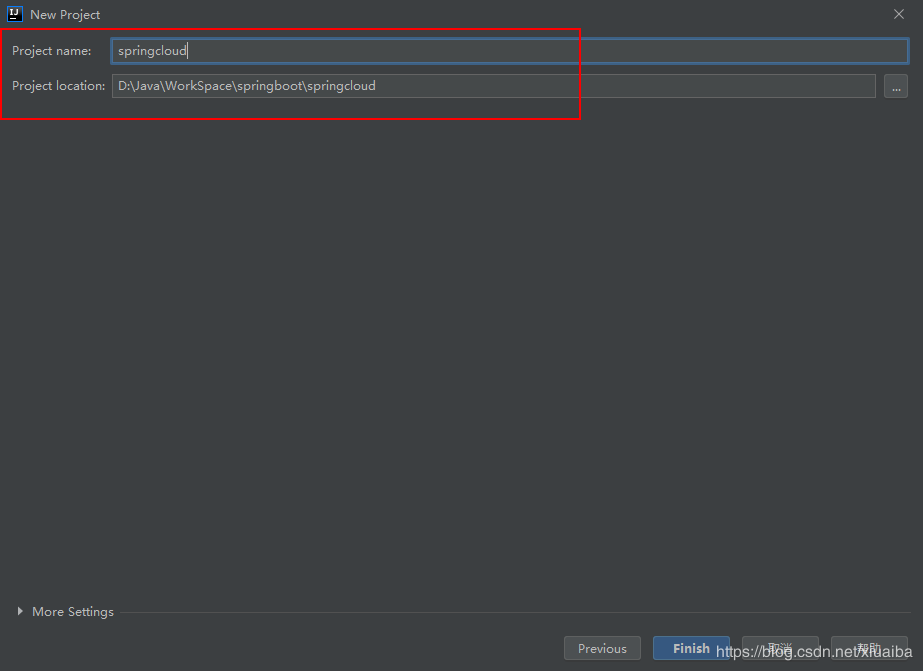
2. 填写相关的信息
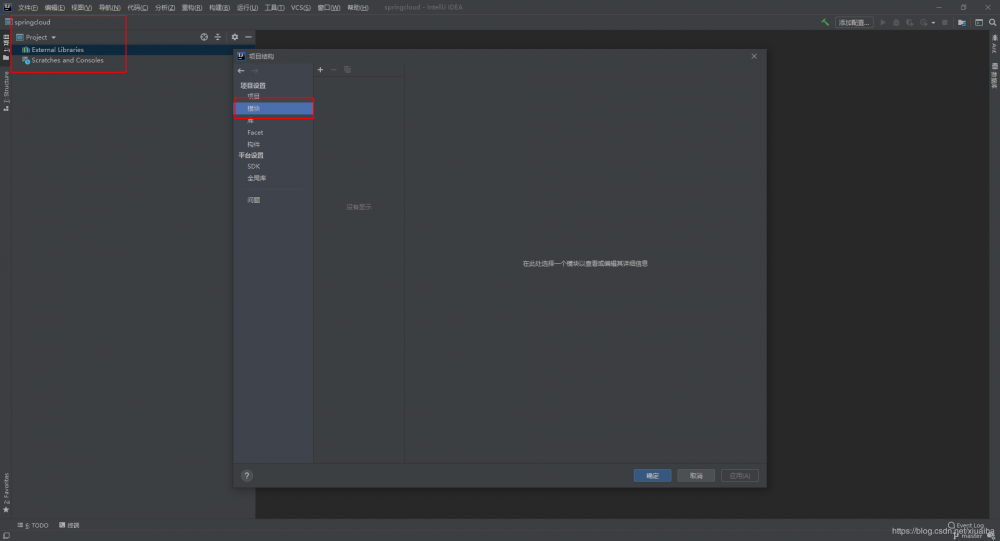
3. 新建项目后
4. 搭建服务中心
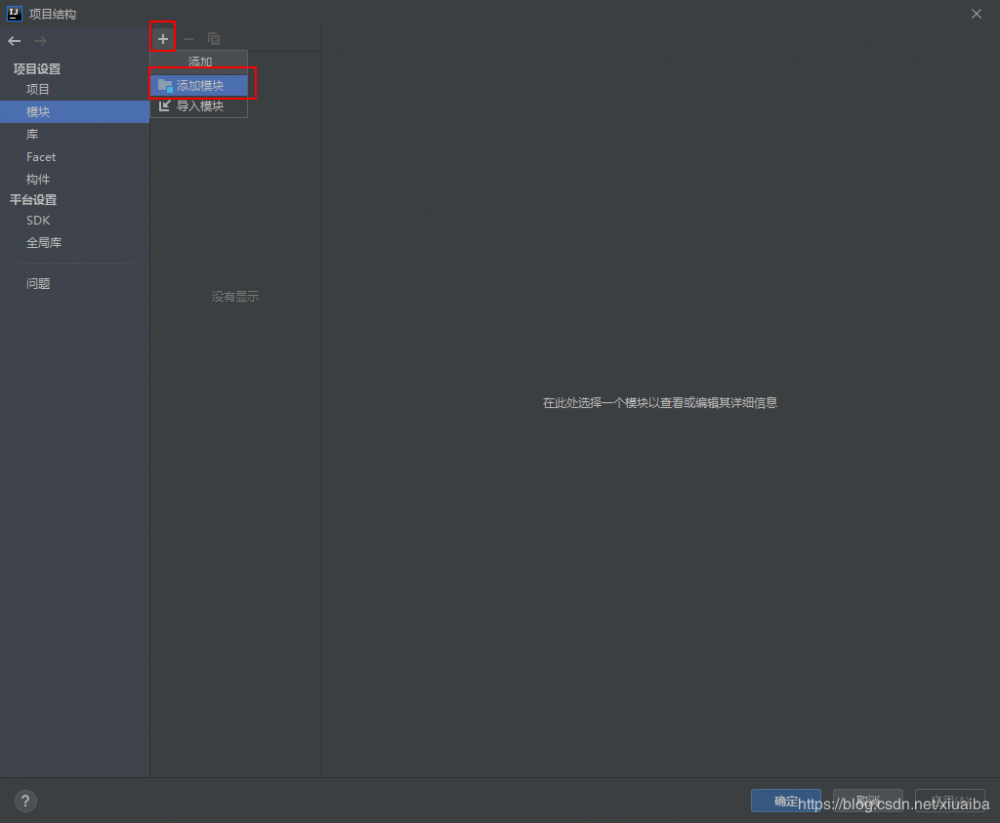
4.1 添加模块
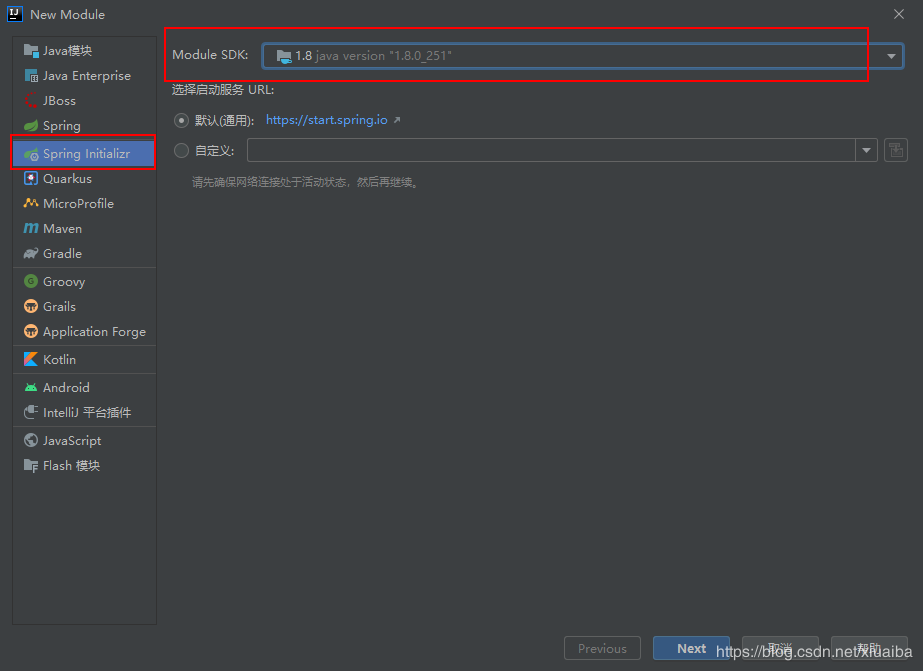
4.2 选择Spring Initializr方式创建
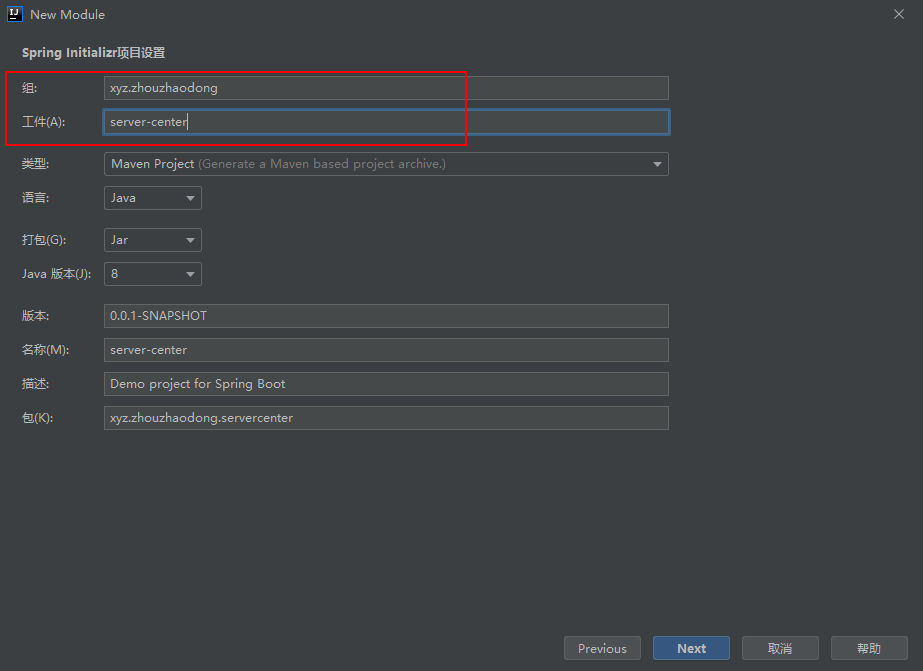
4.3 填写相关的组和工件
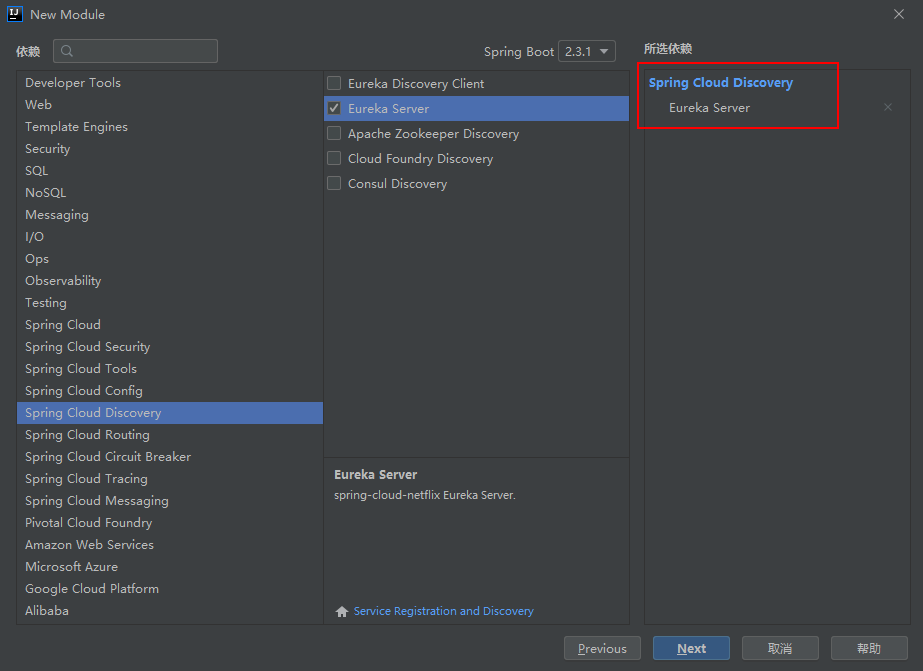
4.4 选择相关依赖
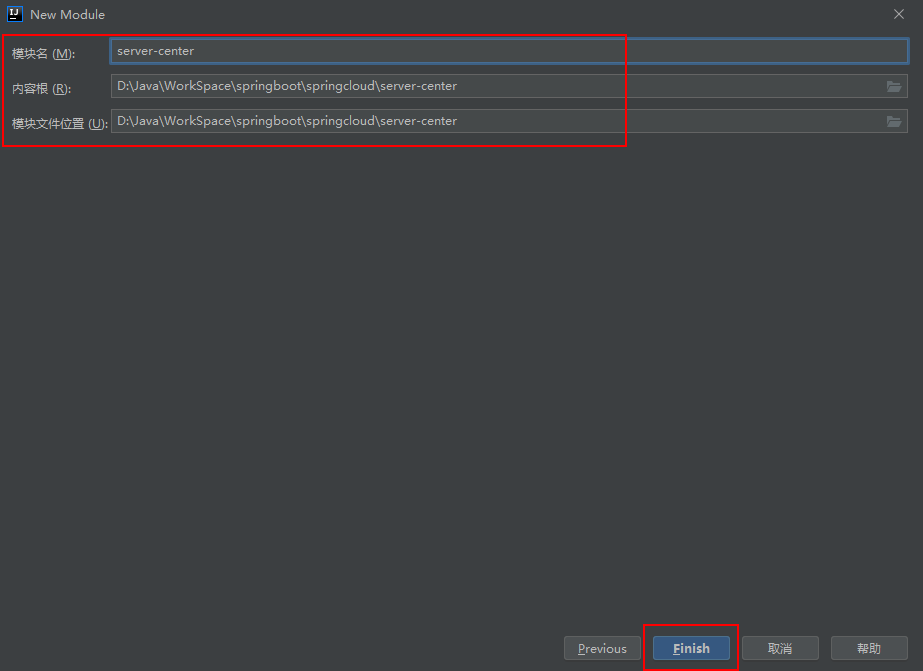
4.5 确认好相关内容点击完成
4.6 修改application.yml配置文件
#eureka注册中心
server:
  port: 8761 #端口号

eureka:
  instance:
    hostname: localhost
  client:
    #表示十分将自己注册到Eureka Server,默认为true。由于当前应用就是Eureka Server,故而设为false。
    register-with-eureka: false
    #表示是否从Eureka Server获取注册信息,默认为true。因为这是一个单点的Eureka Server,不需要同步其他 的Eureka Server节点的数据,故而设为false
    fetch-registry: false
    #置与Eureka Server交互的地址,查询服务和注册服务都需要依赖这个地址,默认是http://localhost:8761/eureka;多个地址可用,分隔
    service-url:
      default-zone: http://${eureka.instance.hostname}:${server.port}/eureka/
4.7 启动类添加注解
@EnableEurekaServer是声明这是一个Eureka注册中心
@EnableEurekaServer
@SpringBootApplication
public class ServerCenterApplication {

    public static void main(String[] args) {
        SpringApplication.run(ServerCenterApplication.class, args);
    }

}
4.8 访问127.0.0.1:8761
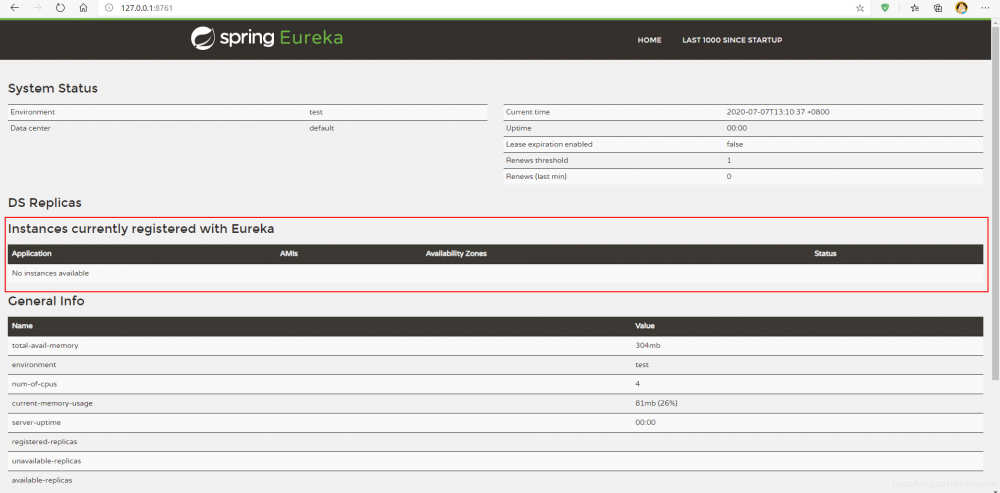
如上图所示,看到没有任何的服务提供者。
5. 搭建服务提供者
5.1 新建模块server-order
构建方式和上面一样,就不再赘述了。
5.2 修改配置文件application.yml
#eureka-client
#端口号
server:
  port: 8082

eureka:
  instance:
    hostname: localhost
  #置与Eureka Server交互的地址,查询服务和注册服务都需要依赖这个地址,默认是http://localhost:8761/eureka;多个地址可用,分隔
  client:
    service-url:
      default-zone: http://localhost:8761/eureka/

spring:
  application:
    name: service-order
5.3 启动类添加注解
@EnableEurekaClient
@SpringBootApplication
public class ServerOrderApplication {

    public static void main(String[] args) {
        SpringApplication.run(ServerOrderApplication.class, args);
    }

}
注册中心和服务提供者的主要区别就在于注解的不同。
5.4 新建Controller
/**
 * 服务提供者方法
 * @author zhouzhaodong
 */
@RestController
@RequestMapping("/order")
public class OrderController {

    /**
     * 测试方法
     * @return
     */
    @RequestMapping("/getMessage")
    public String getMessage(){
        return "order-one";
    }

}
5.5 启动服务提供者(注册中心也要启动)
这里我们发现注册中心上面多了一个服务。
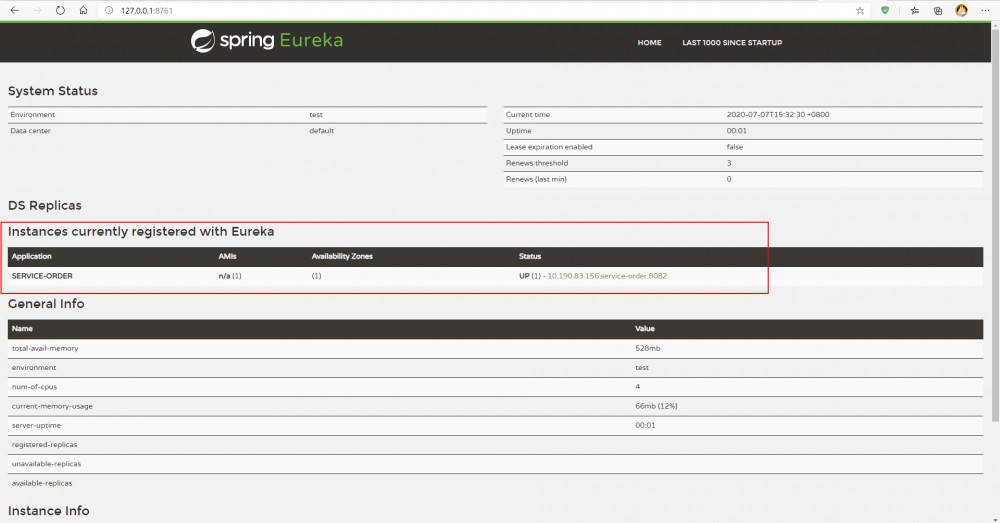
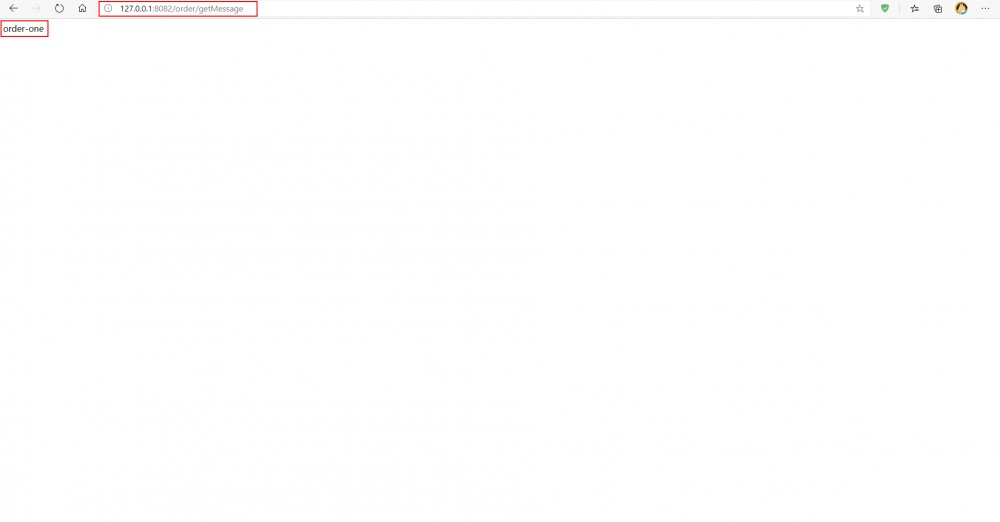
5.6 在浏览器中直接输入127.0.0.1:8082/order/getMessage
显示内容如下:
至此服务提供者创建完毕!
6. 搭建服务消费
6.1 新建模块server-user
构建方式和上面一样,就不再赘述了。
6.2 修改配置文件application.yml
#eureka-client
#端口号
server:
  port: 8083

eureka:
  instance:
    hostname: localhost
  #置与Eureka Server交互的地址,查询服务和注册服务都需要依赖这个地址,默认是http://localhost:8761/eureka;多个地址可用,分隔
  client:
    service-url:
      default-zone: http://localhost:8761/eureka/

spring:
  application:
    name: service-user
6.3 在启动类上添加注解
/**
 * 服务消费者
 * @author zhouzhaodong
 */
@EnableEurekaClient
@SpringBootApplication
public class ServerUserApplication {

    /**
     * @Bean 注解用来注入restTemplate
     * @LoadBalanced 注解用来在注册中心里进行查找微服务,Ribbon负载均衡
     * 生成一个RestTemplate实例对象
     * 使用user服务调用order服务就是通过这个restTemplate对象实现的
     * @return
     */
    @Bean
    @LoadBalanced
    public RestTemplate restTemplate(){
        return new RestTemplate();
    }

    public static void main(String[] args) {
        SpringApplication.run(ServerUserApplication.class, args);
    }

}
6.4 新建controller
/**
 * 消费者
 *
 * @author zhouzhaodong
 */
@RestController
public class UserController {

    @Resource
    private RestTemplate restTemplate;

    /**
     * 返回值类型需要和我们的业务返回值一致
     * @return
     */
    @RequestMapping("getUserOrder")
    public String getUserOrder() {
        String url = "http://service-order/order/getMessage";
        return restTemplate.getForObject(url, String.class);
    }

}
6.5 启动消费者
发现注册中心页面多了一个服务
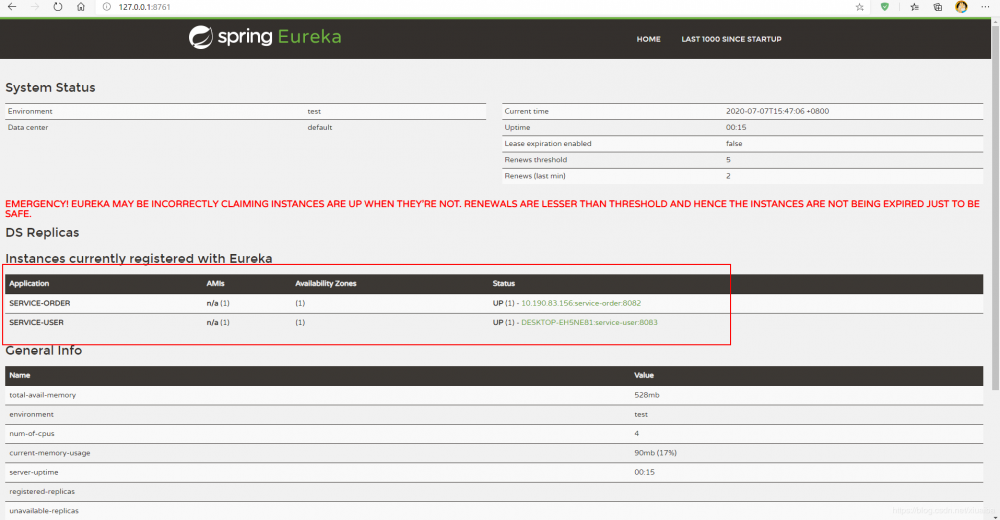
6.6 在浏览器中输入127.0.0.1:8083/getUserOrder
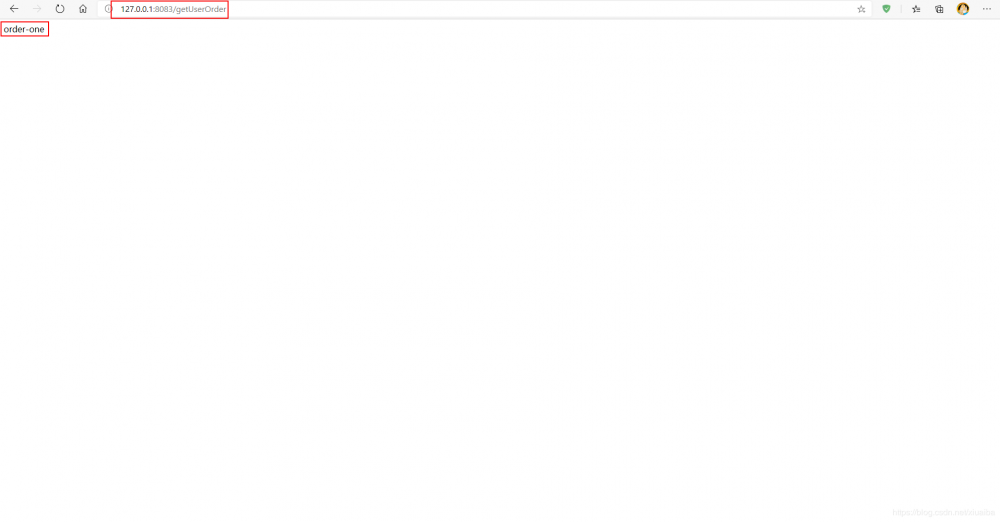
可以发现成功调用了order服务并返回了结果,实现了server-user服务调用server-order服务的操作。服务消费者本身又是服务提供者。
至此消费者搭建完毕!
源代码地址
https://github.com/zhouzhaodo...
个人博客
http://www.zhouzhaodong.xyz
正文到此结束
热门推荐
相关文章
Loading...


![[HBLOG]公众号](https://www.liuhaihua.cn/img/qrcode_gzh.jpg)

