在Spring Boot中的实现国际化(i18n)
1.什么是国际化(i18n)?
国际化(Internationalization,简称i18n)是指在软件应用中支持多种语言和文化的能力。通过国际化,应用可以根据用户的语言和地区设置,动态地显示不同的文本内容。本文将介绍如何在Spring Boot应用中实现国际化,并提供完整的代码示例。2.代码工程
在Spring Boot中实现国际化(i18n)可以通过以下步骤完成。我们将使用Spring的消息源(MessageSource)功能来支持多语言文本。
步骤 1: 创建项目
首先,创建一个新的Spring Boot项目。可以使用Spring Initializr(https://start.spring.io/)来生成项目,选择以下依赖:
- Spring Web
- Spring Boot DevTools(可选,用于热重载)
<?xml version="1.0" encoding="UTF-8"?>
<project xmlns="http://maven.apache.org/POM/4.0.0"
         xmlns:xsi="http://www.w3.org/2001/XMLSchema-instance"
         xsi:schemaLocation="http://maven.apache.org/POM/4.0.0 http://maven.apache.org/xsd/maven-4.0.0.xsd">
    <parent>
        <artifactId>springboot-demo</artifactId>
        <groupId>com.et</groupId>
        <version>1.0-SNAPSHOT</version>
    </parent>
    <modelVersion>4.0.0</modelVersion>

    <artifactId>i18n</artifactId>

    <properties>
        <maven.compiler.source>8</maven.compiler.source>
        <maven.compiler.target>8</maven.compiler.target>
    </properties>
    <dependencies>
        <dependency>
            <groupId>org.springframework.boot</groupId>
            <artifactId>spring-boot-starter-web</artifactId>
        </dependency>

        <dependency>
            <groupId>org.springframework.boot</groupId>
            <artifactId>spring-boot-autoconfigure</artifactId>
        </dependency>
        <dependency>
            <groupId>org.springframework.boot</groupId>
            <artifactId>spring-boot-starter-test</artifactId>
            <scope>test</scope>
        </dependency>
    </dependencies>
</project>
步骤 2: 创建国际化资源文件
在src/main/resources目录下,创建一个名为messages的文件夹,并在其中创建不同语言的资源文件。例如:
messages.properties(默认语言,通常是英语)messages_zh.properties(中文)messages_fr.properties(法语)
每个文件的内容如下:
messages.properties(默认语言)
greeting=Hello!
farewell=Goodbye!messages_zh.properties(中文)
greeting=你好!
farewell=再见!messages_fr.properties(法语)
greeting=Bonjour!
farewell=Au revoir!
步骤 3: 配置MessageSource
在Spring Boot中,默认会自动配置MessageSource,但你可以自定义配置。创建一个配置类,例如MessageConfig:
import org.springframework.context.annotation.Bean;
import org.springframework.context.annotation.Configuration;
import org.springframework.context.support.ReloadableResourceBundleMessageSource;

@Configuration
public class MessageConfig {

    @Bean
    public ReloadableResourceBundleMessageSource messageSource() {
        ReloadableResourceBundleMessageSource messageSource = new ReloadableResourceBundleMessageSource();
        messageSource.setBasename("classpath:messages/messages");
        messageSource.setDefaultEncoding("UTF-8");
        return messageSource;
    }
}
步骤 4: 创建Controller
创建一个控制器来处理请求并返回国际化的消息:
package com.et.controller;

import org.springframework.beans.factory.annotation.Autowired;
import org.springframework.context.MessageSource;
import org.springframework.web.bind.annotation.GetMapping;
import org.springframework.web.bind.annotation.RequestHeader;
import org.springframework.web.bind.annotation.RestController;
import org.springframework.web.servlet.LocaleResolver;

import javax.servlet.http.HttpServletRequest;
import java.util.Locale;

@RestController
public class GreetingController {

    @Autowired
    private MessageSource messageSource;

    @Autowired
    private LocaleResolver localeResolver;

    @GetMapping("/greeting")
    public String greeting(HttpServletRequest request, @RequestHeader(value = "Accept-Language", required = false) String acceptLanguage) {
        Locale locale = localeResolver.resolveLocale(request);

        // set language by Accept-Language
        if (acceptLanguage != null && !acceptLanguage.isEmpty()) {
            String[] languages = acceptLanguage.split(",");
            String language = languages[0].split(";")[0]; // get the first language
            language = language.trim();
            locale = Locale.forLanguageTag(language);
        }

        return messageSource.getMessage("greeting", null, locale);
    }
}
步骤 5: 前端实现
如果你有前端页面,可以通过AJAX请求获取国际化文本。例如,使用JavaScript:
<!DOCTYPE html>
<html lang="en">
<head>
    <meta charset="UTF-8">
    <meta name="viewport" content="width=device-width, initial-scale=1.0">
    <title>Internationalization Example</title>
    <style>
        body {
            font-family: Arial, sans-serif;
            background-color: #f0f0f0;
            color: #333;
            padding: 20px;
        }
        select {
            margin-bottom: 20px;
        }
    </style>
</head>
<body>
<h1 id="greeting"></h1>

<label for="language-select">Choose a language:</label>
<select id="language-select">
    <option value="en">English</option>
    <option value="zh">中文</option>
    <option value="fr">Français</option>
</select>

<script>
        function fetchGreeting(lang) {
            fetch('/greeting', {
                method: 'GET',
                headers: {
                    'Accept-Language': lang
                }
            })
            .then(response => response.text())
            .then(data => {
                document.getElementById('greeting').innerText = data;
            });


        }

        // Fetch greeting based on selected language
        document.getElementById('language-select').addEventListener('change', function() {
            const selectedLang = this.value;
            fetchGreeting(selectedLang);
        });

        // Initial fetch in English
        fetchGreeting('en');
    </script>
</body>
</html>代码仓库
3.测试
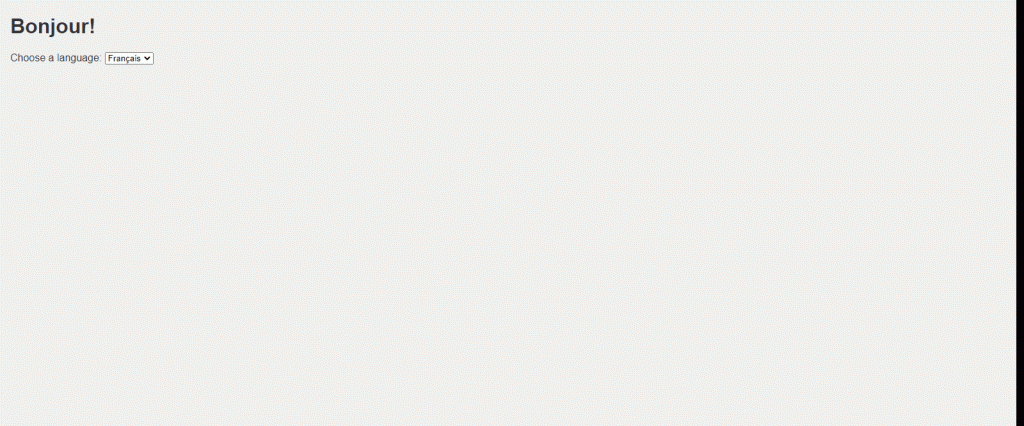
启动Spring Boot应用,访问http://127.0.0.1:8088/index.html。效果如下图
4.总结
通过以上步骤,你可以在Spring Boot应用中实现国际化。你可以根据用户的语言偏好动态地返回不同的文本内容。根据需要,你可以扩展更多语言和消息,并在前端实现语言切换功能。
正文到此结束
- 本文标签: i18n Spring Boot
- 版权声明: 本文由HARRIES原创发布,转载请遵循《署名-非商业性使用-相同方式共享 4.0 国际 (CC BY-NC-SA 4.0)》许可协议授权
- 本文海报: 生成海报一 生成海报二
热门推荐
相关文章
Loading...


![[HBLOG]公众号](https://www.liuhaihua.cn/img/qrcode_gzh.jpg)

